

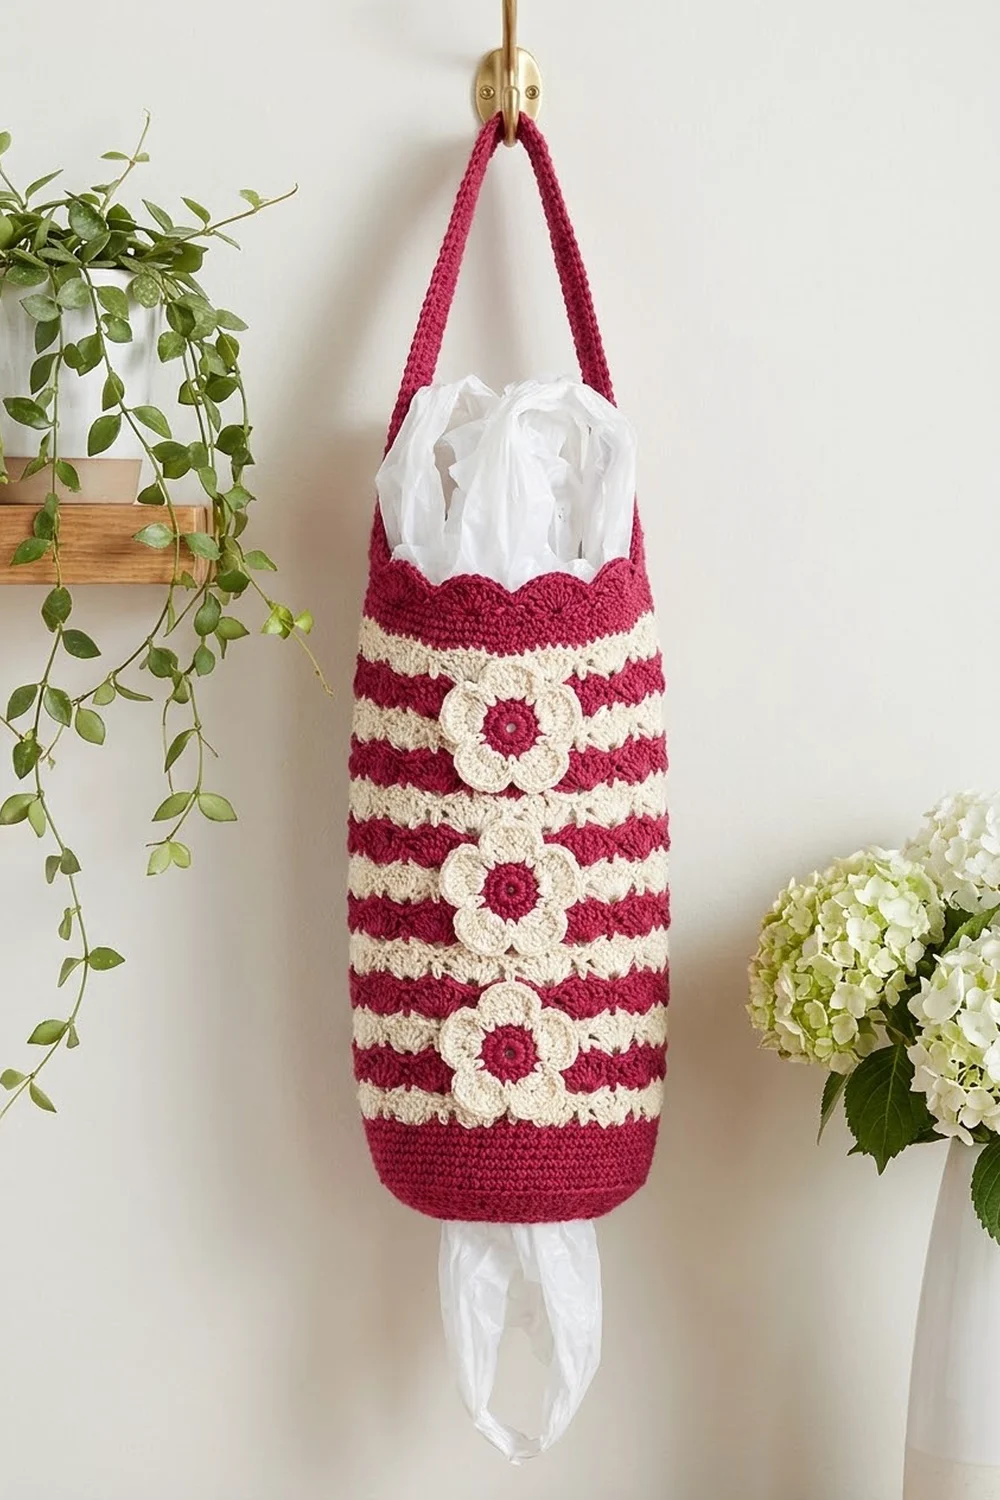
The Raspberry Blossom Bag Holder is a tall, slim tube that keeps plastic grocery bags tidy and in reach. You stuff bags in at the top and pull them out one at a time through the snug opening at the bottom.
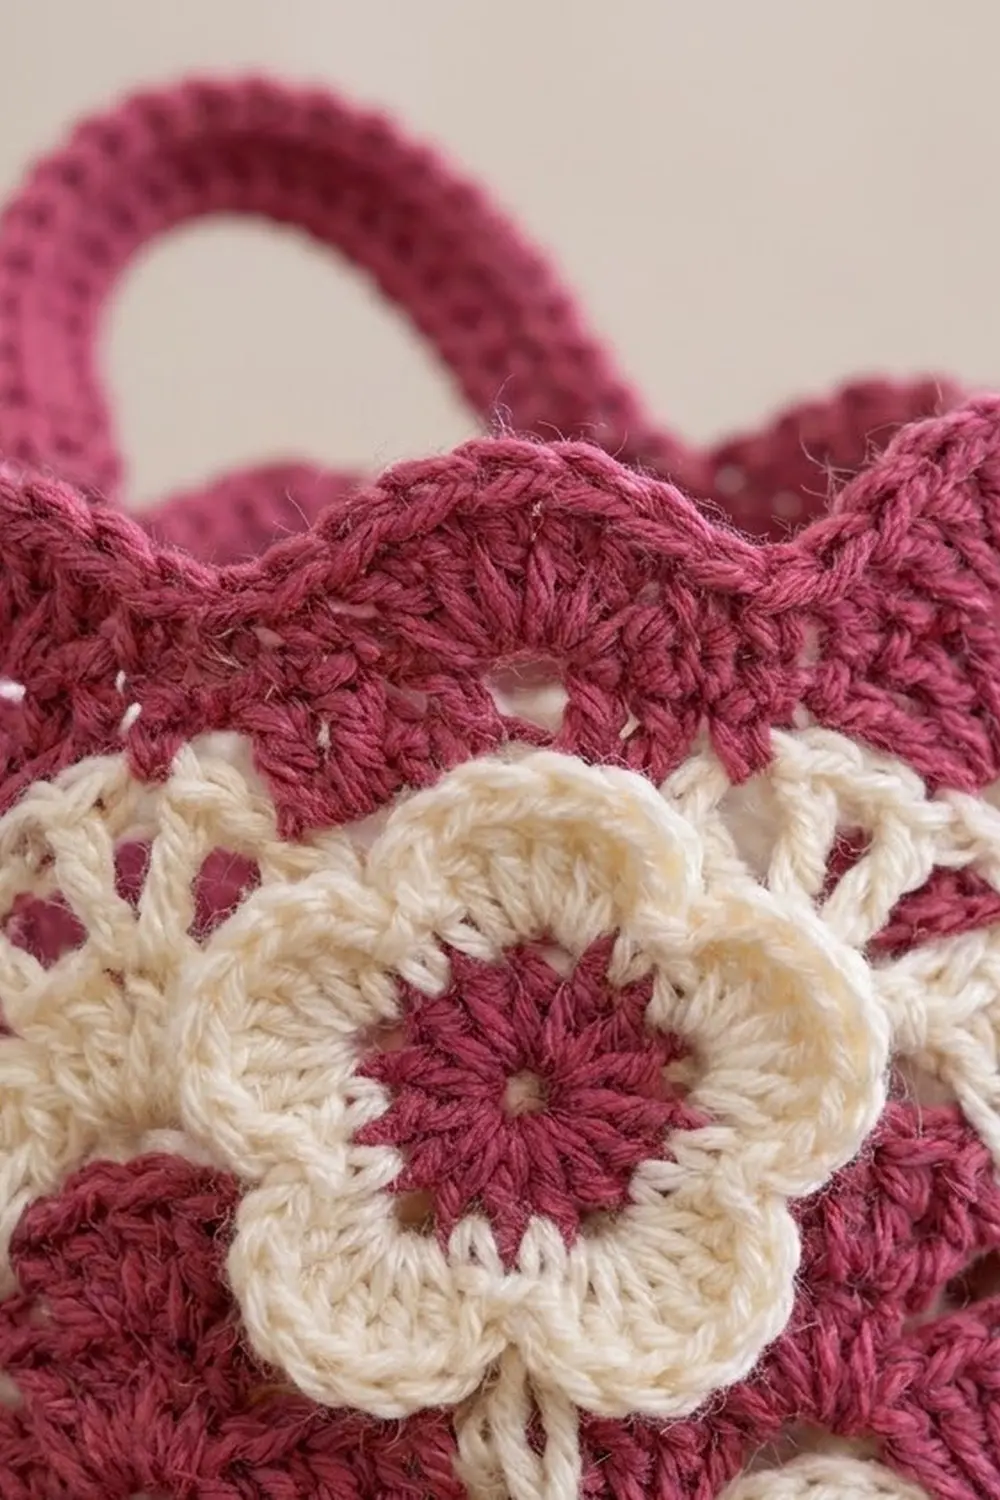
The design uses two colors: deep raspberry and soft cream. Solid raspberry shell stripes alternate with lacy cream open-shell stripes, and three six-petal cream flowers with raspberry centers run down the front. A scalloped raspberry edge finishes the top, and an arched strap hangs it from a hook.
This pattern uses US crochet terms. The finished holder is 14 in (35.6 cm) tall without the strap and 6 in (15.2 cm) wide when laid flat. The body circumference is 12 in (30.5 cm).
You crochet the holder from the bottom up in joined rounds. First comes a narrow single-crochet ring, then 24 rounds of shell pattern, then a scalloped top edge and a strap. You make the flowers separately and sew them on, then finish the bottom opening with one final round.
Finished Size and Construction
- Finished size: 14 in (35.6 cm) tall × 6 in (15.2 cm) wide when flat, not counting the strap
- Skill level: Easy / advanced beginner
- Terminology: US
- Yarn weight: Worsted (#4) cotton or cotton blend
- Hook: US H-8 (5.0 mm)
- Number of pieces: 1 tubular body with an attached strap, plus 3 flower appliqués
- Layout: One column of 3 flowers, centered on the front
- Body circumference: 48 stitches = 12 in (30.5 cm)
- Size before edging: 13 in (33.0 cm) tall (1 in / 2.5 cm bottom ring + 12 in / 30.5 cm shell body)
- Edging depth: top scallop edge 0.75 in (1.9 cm); bottom rim round 0.25 in (0.6 cm)
- Flower size: 2.5 in (6.4 cm) across
Materials
Choose a smooth worsted-weight cotton or cotton blend. Cotton holds its shape when the tube is full of bags and doesn’t stretch the way acrylic can. Mercerized cotton shows off the shell texture well.
- Color A, Raspberry: 70 g (about 120 m / 131 yd)
- Color B, Cream: 50 g (about 85 m / 93 yd)
These quantities include a margin of about 15 percent for your gauge swatch and weaving in ends.
Tools:
- US H-8 (5.0 mm) crochet hook
- Tapestry needle
- 4 stitch markers
- Scissors
- Measuring tape
- Rust-proof pins and a rolled towel for blocking
Abbreviations (US Terms)
- ch – chain
- sl st – slip stitch
- sc – single crochet
- hdc – half double crochet
- dc – double crochet
- st(s) – stitch(es)
- sp – space
- rep – repeat
Special stitches:
- Solid shell: 5 dc in the same stitch. It counts as 5 sts.
- Open shell: (dc, ch 1, dc, ch 1, dc) in the same stitch. It counts as 5 sts: 3 dc and 2 ch.
- Center dc: the 3rd stitch of a shell, which is the middle dc.
Raspberry stripes use solid shells and cream stripes use open shells. Both have the same stitch count, so the math is the same in both colors.
Gauge and Checkpoints
- Single crochet: 16 sc = 4 in (10.2 cm)
- Shell pattern: 1 repeat (6 sts) = 1.5 in (3.8 cm); 2 shell rounds = 1 in (2.5 cm)
Use the body itself as your test piece. Work the bottom ring and the first 4 shell rounds, then stop and measure.
Checkpoint 1 (after Rnd 4): The ring measures 4.5 in (11.4 cm) across when flat, or 9 in (22.9 cm) around.
Checkpoint 2 (after Rnd 9): The body measures 6 in (15.2 cm) across when flat, and the shell section is 2 in (5.1 cm) tall.
Checkpoint 3 (after Rnd 29): The piece is 13 in (33.0 cm) tall.
Checkpoint 4 (finished): The piece is 14 in (35.6 cm) tall.
If your work is too big, go down half a hook size. If it’s too small, go up half a size. The width matters more than the height. A body narrower than 5.5 in (14.0 cm) flat will be hard to fill, and one wider than 6.5 in (16.5 cm) will look baggy.
Bottom Ring
With Color A (Raspberry):
Foundation: Ch 36 and join with a sl st to the first ch to form a ring. Check that the chain is not twisted.
Rnd 1: Ch 1, sc in each ch around, then sl st to the first sc. (36 sc)
Rnds 2–4: Ch 1, sc in each st around, then sl st to the first sc. (36 sc)
Rnd 5 (growth round): Ch 1, sc in the next 2 sts, 2 sc in the next st, then rep from * 11 more times. Sl st to the first sc. (48 sc)
The ring is now about 1 in (2.5 cm) tall. Change to Color B on the final sl st of Rnd 5.
Shell Body
The body alternates two rounds, A and B. Each round has 8 shells and 8 sc, for 48 sts. Every round ends exactly where the next one begins, so the stitch count never drifts.
Pattern Round A: Ch 1, sc in the same st. [Skip 2 sts, shell in the next st, skip 2 sts, sc in the next st (the center dc of the shell below)] 7 times. Skip 2 sts, shell in the next st, skip 2 sts, then sl st to the first sc. (8 shells + 8 sc = 48 sts)
Pattern Round B, solid version: Ch 3 (counts as dc), 2 dc in the same st to make a half shell. [Skip 2 sts, sc in the center dc, skip 2 sts, 5 dc in the next sc] 7 times. Skip 2 sts, sc in the center dc of the last shell, skip 2 sts, 2 dc in the first st (the base of the ch-3), then sl st to the top of the ch-3. (7 full shells + 2 halves of 3 and 2 sts = 8 shells; with 8 sc, that makes 48 sts)
Pattern Round B, open version: Ch 4 (counts as dc and ch 1), dc in the same st. [Skip 2 sts, sc in the center dc, skip 2 sts, open shell in the next sc] 7 times. Skip 2 sts, sc in the center dc of the last shell, skip 2 sts, then (dc, ch 1) in the first st. Sl st to the 3rd ch of the ch-4. (48 sts)
At the end of every B round, the joining point is the center of the split shell. The next A round therefore starts with sc in that same st, which keeps the shells stacked in a neat zigzag.
Color sequence:
- Rnd 6: B, Round A (open)
- Rnd 7: B, Round B (open)
- Rnd 8: A, Round A (solid)
- Rnd 9: A, Round B (solid)
- Rnds 10–29: Repeat Rnds 6–9 five more times.
That makes 24 shell rounds: 6 cream stripes and 6 raspberry stripes, each 1 in (2.5 cm) deep. The body ends with a raspberry stripe at Rnd 29.
Change colors on the final sl st of each stripe. Carry the unused color loosely up the inside of the tube rather than cutting it. The floats stay hidden inside and are only 1 in (2.5 cm) long.
The shell section is now 12 in (30.5 cm) tall, and the whole piece is 13 in (33.0 cm) tall. Change to Color B on the final sl st.
Flower Appliqués (Make 3)
Rnd 1 (Color A): Make a magic ring. Ch 1 and work 12 sc in the ring. Pull the ring snug, leaving a tiny center hole, then sl st to the first sc. (12 sc) Fasten off.
Rnd 2 (Color B): Join in any st. Ch 1, sc in the same st, ch 2, skip 1 st. [Sc in the next st, ch 2, skip 1 st] 5 times, then sl st to the first sc. (6 sc + 6 ch-2 sps)
Rnd 3 (Color B): Sl st into the first ch-2 sp. In each ch-2 sp, work (sc, hdc, 3 dc, hdc, sc), then sl st to the first sc. (6 petals × 7 sts = 42 sts)
Fasten off, leaving a 12 in (30.5 cm) tail for sewing. Each flower measures 2.5 in (6.4 cm) across.
Edging
The edging finishes the top opening, adds the strap, and firms up the bottom opening. Use single-crochet gauge here: 4 sts per inch (per 2.5 cm).
When you flatten the tube, each side has half the stitches. The 48-st round is 24 sts per side, which at 4 sts per inch gives 6 in (15.2 cm). The body is a tube with no corners, so there are no corner stitches to add.
Rnd 30 (Color B, trim round): Ch 1, sc in each st around, then sl st to the first sc. This is 48 sts worked one per stitch, plus 0 extra, for 48 sc (24 per side). Change to Color A on the final sl st.
Rnd 31 (Color A, scallop round): Ch 1, sc in the first st. [Skip 1 st, 5 dc in the next st, skip 1 st, sc in the next st] 11 times. Skip 1 st, 5 dc in the next st, skip 1 st, then sl st to the first sc.
Each scallop uses 4 sts of Rnd 30, and 12 × 4 = 48, so the round closes exactly. The count is 24 base sts worked into (12 sc + 12 shell bases) plus 48 extra dc (4 per scallop), for 72 sts. That gives 12 scallops, 6 per side. Do not fasten off.
Strap: Mark the sc at the start of scallop 1 and the sc at the start of scallop 7, which sits directly opposite.
- Ch 36 and sl st in the scallop-7 sc.
- Turn, then sc in each ch back. Sl st in the scallop-1 sc. (36 sc)
- Ch 1, turn, and sc in each sc. Sl st in the scallop-7 sc. (36 sc)
Fasten off. The strap is 9 in (22.9 cm) long, and its ends sit at the sides of the tube. The color-change seam is hidden under the scallop-1 end.
Bottom rim (Color A): Join at the foundation chain. Ch 1 and sc in the free loop of each ch around, then sl st to the first sc. This is 36 sts worked one per stitch, plus 0 extra, for 36 sc (18 per side). The rim adds 0.25 in (0.6 cm) and stops the opening from stretching.
The final height is 1 in (2.5 cm) ring + 12 in (30.5 cm) body + 0.75 in (1.9 cm) top edge + 0.25 in (0.6 cm) rim = 14 in (35.6 cm).
Attaching the flowers: The front center lies halfway between the two strap ends, below scallop 4. Pin the middle flower 6 in (15.2 cm) above the top of the bottom ring, at the midpoint of the shell body. Pin the other two flowers so their centers are 3.25 in (8.3 cm) above and below it.
This spacing leaves a 0.75 in (1.9 cm) gap between flowers. It also leaves 1.5 in (3.8 cm) of shell body clear at the top and the bottom. Whipstitch around the petal edges with the cream tail, catching only the front layer of the tube.
Final Blocking
- Soak the holder in cool water for 10 minutes, then press out the water. Do not wring it.
- Roll a bath towel into a cylinder about 12 in (30.5 cm) around and slide the holder over it.
- Pat the shell stripes level and line up the zigzags vertically.
- Pin each top scallop into a round curve.
- Press the flowers flat with your fingers and open each petal.
- Lay the holder flat and check that it is 6 in (15.2 cm) wide and 14 in (35.6 cm) tall.
- Let it dry completely, then remove the towel.
Final Quality-Control Checklist
- Every body round has 48 sts, with 8 shells and 8 sc.
- There are 6 cream stripes and 6 raspberry stripes, and the last stripe is raspberry.
- The top edge has 12 even scallops.
- The strap ends sit exactly opposite each other and are secure.
- The 3 flowers are centered in a straight vertical column.
- The bottom opening is 4.5 in (11.4 cm) across when flat.
- All ends are woven in on the inside.
- The finished size is 14 in × 6 in (35.6 cm × 15.2 cm).
Troubleshooting
The shells lean or spiral. You probably started the round in the wrong stitch. Every A round begins in the join stitch, which is the center of the split shell.
The stitch count is off. Count sc only: you should have 8 per round. A missing sc usually means a skipped “skip 2.”
The bottom opening is too loose. Work the bottom rim with a hook one size smaller, or add a second sc round.
The bottom opening is too tight. Rip back and start with ch 40 instead of ch 36. Then in Rnd 5, work sc in the next 4 sts, 2 sc in the next st 8 times to reach 48 sts.
The flowers cup. Your magic ring is pulled too tight. Loosen Rnd 1 slightly or block the flowers before sewing.
The strap stretches. Add a third row of sc, or work the strap with a smaller hook.
Care
Hand wash in cool water and lay flat to dry. Reshape the tube while it is damp so the stripes stay level.
Final Notes
The measurements build on each other. The 36-st ring measures 9 in (22.9 cm) around, and the growth round takes it to 48 sts, or 12 in (30.5 cm) around. Twenty-four shell rounds add 12 in (30.5 cm) of height, for 13 in (33.0 cm) before edging. The edging and rim then bring the holder to its finished 14 in × 6 in (35.6 cm × 15.2 cm).
If you check your gauge at each checkpoint, the scallops, strap, and flowers will line up as planned. Happy crocheting!