

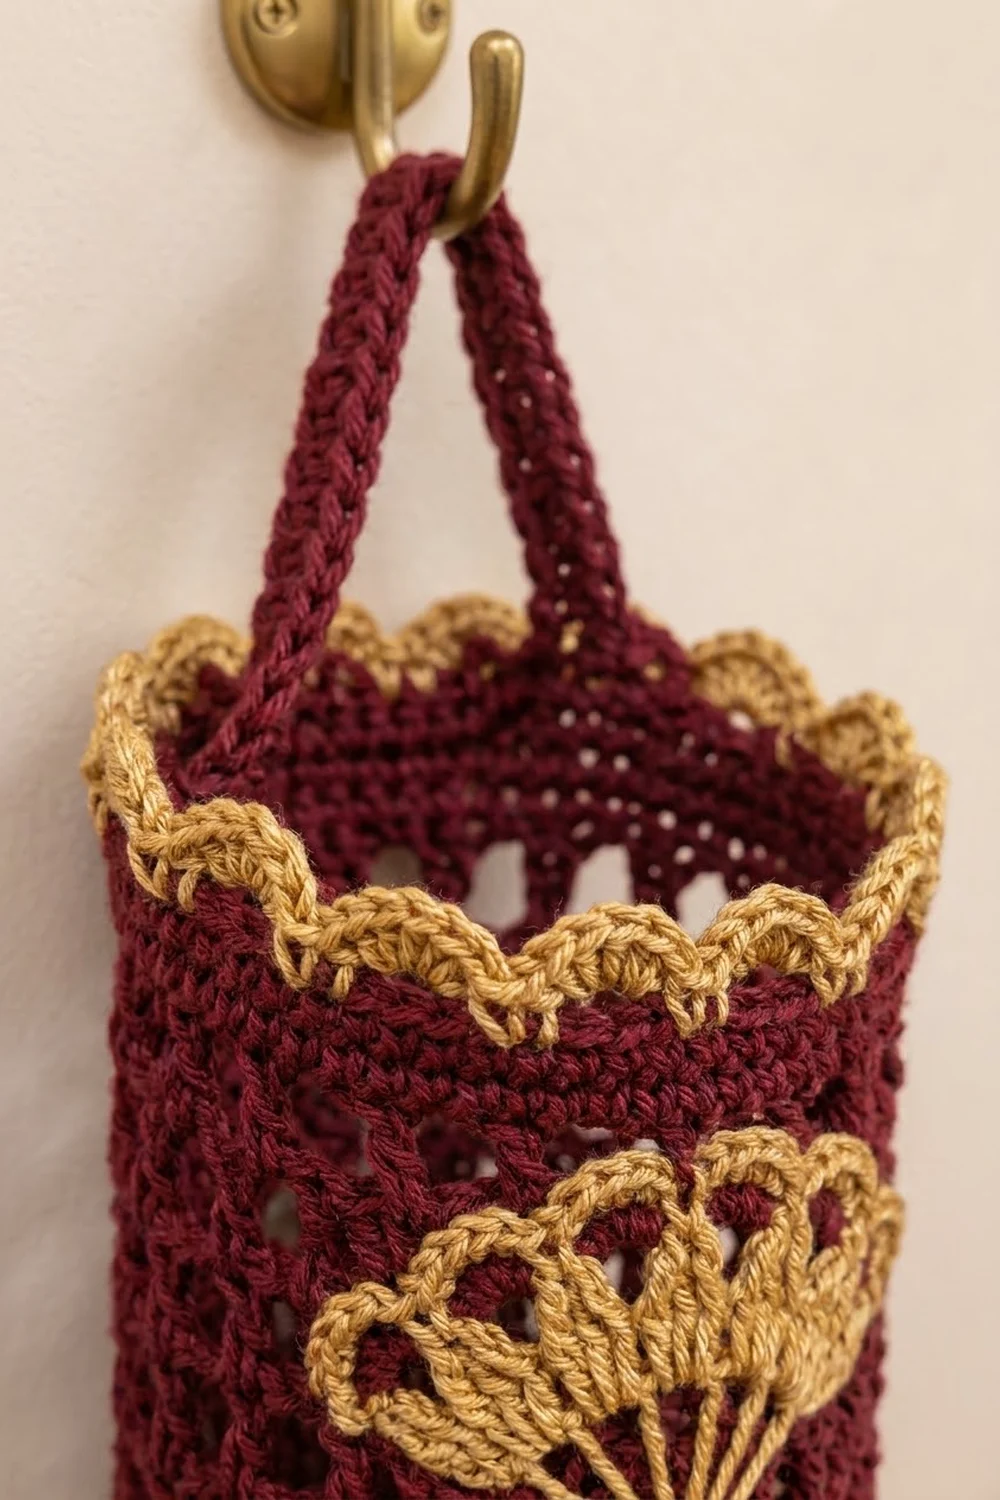
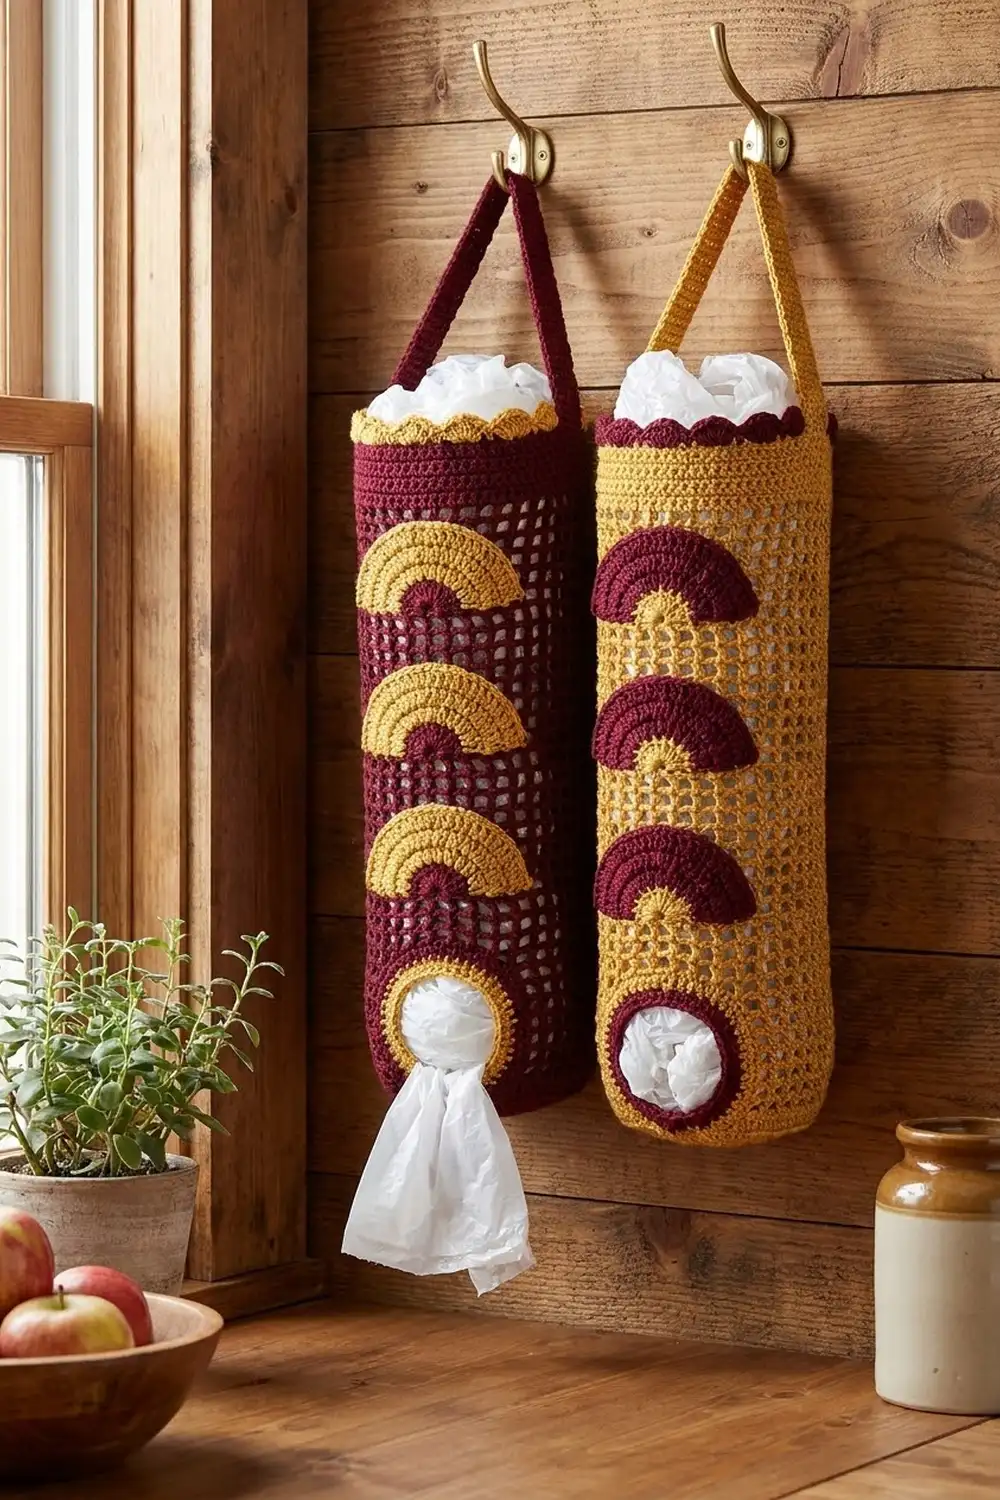
The Gilded Fan Plastic Bag Holder is a tall, slim crocheted tube for storing plastic grocery bags. Its open burgundy mesh body is decorated with three lacy gold fans down the front. Bags go in through the top and come out one at a time through a round opening at the bottom.
The colors are deep burgundy and warm antique gold. The burgundy gives a solid, cozy base, and the gold picks out the fan lace, the scalloped top rim and the ring around the bottom opening. The overall style is vintage and slightly Victorian, and it looks right in a kitchen, pantry or laundry room.
This pattern uses US crochet terms. The finished holder measures 6 in (15.2 cm) wide laid flat and 18 in (45.7 cm) tall, not counting the strap. The strap adds a hanging loop about 9.25 in (23.5 cm) long.
You start at the bottom opening and work upward in the round. A short gold ring becomes a rounded burgundy cup, the cup turns into a mesh tube, and the tube ends with a solid band and a gold shell edge. Then you make three fan appliqués and one strap separately and sew them on.
Finished Size and Construction
- Finished size: 6 in (15.2 cm) wide flat × 18 in (45.7 cm) tall
- Circumference: 12 in (30.5 cm)
- Bottom opening: about 2.4 in (6.1 cm) across
- Skill level: Intermediate (easy body, lacy appliqués)
- Terminology: US
- Yarn weight: Worsted (#4), cotton or cotton blend
- Hook: 5.0 mm (H-8)
- Number of pieces: 5 (1 body, 3 fans, 1 strap), sewn into one finished holder
- Layout: 3 fans stacked vertically, centered on the front
- Fan size: 4 in (10.2 cm) wide × 2 in (5.1 cm) tall
- Body height before top border: 17 in (43.2 cm)
- Top border depth: 1 in (2.5 cm), made of 2 burgundy sc rounds and 1 gold shell round
Materials
Yarn: Use a smooth worsted-weight cotton or cotton blend. Cotton holds its shape when the holder is full and does not stretch out as much as acrylic. A slightly shiny mercerized cotton makes the gold look richer.
- Color A, Burgundy: 100 g, about 180 m
- Color B, Antique Gold: 40 g, about 72 m
These amounts include a safety margin of roughly 15%, so you have room to swatch and to redo a round if needed.
Tools:
- 5.0 mm (H-8) crochet hook
- Tapestry needle
- 4 locking stitch markers
- Rustproof pins
- Scissors
- Tape measure
- Spray bottle and a towel for blocking
Abbreviations (US Terms)
- ch – chain
- sl st – slip stitch
- sc – single crochet
- dc – double crochet
- tr – treble crochet
- sk – skip
- sp(s) – space(s)
- st(s) – stitch(es)
- rnd – round
- RS – right side
Special stitches:
- Mesh unit: (dc, ch 1). Each mesh unit counts as 2 sts: the dc and its ch-1 sp.
- Shell (fan): 3 dc worked into the same space.
- Shell (rim): 5 dc worked into the same stitch.
Gauge and Checkpoints
Gauge:
- 16 sc × 16 rows = 4 in (10.2 cm)
- 16 dc × 8 rows = 4 in (10.2 cm)
- Mesh: 8 mesh units (16 sts) × 8 rnds = 4 in (10.2 cm)
That works out to 4 sts per inch, 0.25 in (0.6 cm) per sc round and 0.5 in (1.3 cm) per dc or mesh round.
Test one piece first: Make one fan before you start the body. A finished, lightly steamed fan should measure 4 in (10.2 cm) across its straight bottom edge and 2 in (5.1 cm) from base to arch. If it does, your tension is close enough for the body too.
Checkpoints:
- After Rnd 2: the gold ring has an inner opening about 2.4 in (6.1 cm) across.
- After Rnd 5: the edge measures 12 in (30.5 cm) around, or 6 in (15.2 cm) when the piece is flattened.
- After Rnd 15: the piece measures 7 in (17.8 cm) from the bottom edge.
- After Rnd 35: the piece measures 17 in (43.2 cm).
- After Rnd 38: the piece measures 18 in (45.7 cm).
If your piece is too big: go down one hook size, to 4.5 mm.
If your piece is too small: go up one hook size, to 5.5 mm.
If only the length is off, add or remove mesh rounds in pairs. Each pair changes the height by 1 in (2.5 cm).
Body
Work in joined rounds with the RS facing you. Do not turn. A beginning ch-3 counts as a dc and a beginning ch-4 counts as a dc + ch 1, unless the pattern says otherwise.
Bottom Opening Ring (Color B, Gold)
Rnd 1: Ch 30 and join with a sl st to the first ch to form a ring, taking care not to twist the chain. Ch 1, then sc in each ch around. Join with a sl st to the first sc. (30 sc)
Rnd 2: Ch 1, then sc in each st around. Join. (30 sc) Fasten off Color B.
Checkpoint: the opening should be about 2.4 in (6.1 cm) across.
Rounded Base (Color A, Burgundy)
These three rounds add only 6 sts each, which is fewer than a flat circle needs. That shortage is what makes the base curl up into a shallow, rounded cup.
Rnd 3: Join Color A in any st. Ch 3, dc in each of the next 3 sts, then 2 dc in the next st. Dc in each of the next 4 sts, 2 dc in the next st; repeat from * 5 more times. Join to the top of the ch-3. (36 dc)
Rnd 4: Ch 3, dc in each of the next 4 sts, then 2 dc in the next st. Dc in each of the next 5 sts, 2 dc in the next st; repeat from * 4 more times. Join. (42 dc)
Rnd 5: Ch 3, dc in each of the next 5 sts, then 2 dc in the next st. Dc in each of the next 6 sts, 2 dc in the next st; repeat from * 4 more times. Join. (48 dc)
Checkpoint: the edge measures 12 in (30.5 cm) around. The base is 2 in (5.1 cm) deep, measured along the fabric.
Mesh Tube (Color A)
Rnd 6 (mesh setup): Ch 4, then sk the next st. Dc in the next st, ch 1, sk the next st; repeat from * 22 more times. Join to the 3rd ch of the ch-4. (24 dc + 24 ch-1 sps = 48 sts)
Rnds 7–35: Sl st into the first ch-1 sp. Ch 4, then dc in the next ch-1 sp, ch 1; repeat from * 22 more times. Join to the 3rd ch of the ch-4. (24 dc + 24 ch-1 sps = 48 sts every round)
Mark the join at Rnd 10 and again at Rnd 30. The joins should line up in one straight column, which becomes the center back.
Checkpoints: 7 in (17.8 cm) after Rnd 15, and 17 in (43.2 cm) after Rnd 35. That gives 30 mesh rounds, or 15 in (38.1 cm) of mesh.
The top band and shell edge are covered in the Border section below.
Fan Appliqué (Make 3)
You work each fan flat in turned rows, starting from a magic ring at the base.
Row 1 (Color A): Make a magic ring. Ch 3, then work 6 dc into the ring. (7 dc) Pull the ring tight to form a half circle. Fasten off Color A.
Row 2 (Color B): With the RS facing you, join Color B in the top of the ch-3. Ch 6 (this counts as a tr + ch 2). Tr in the next dc, ch 2; repeat from * 4 more times, then tr in the last dc. (7 tr spokes, 6 ch-2 sps) Turn.
Row 3: Ch 1, then sc in the first tr. Work 3 dc in the next ch-2 sp, sc in the next tr; repeat from * 5 more times. (6 shells: 18 dc + 7 sc = 25 sts) Turn.
Row 4: Ch 1, then sc in the first sc. Ch 3, sc in the center dc of the next shell, ch 3, sc in the next sc; repeat from * 5 more times. (12 ch-3 loops, 13 sc)
Fasten off, leaving a 16 in (40.6 cm) tail of Color B for sewing.
Checkpoint: the fan measures 4 in (10.2 cm) wide × 2 in (5.1 cm) tall. The shells ripple slightly, which gives the scalloped look. Steam them flat; don’t pull them tight.
Strap (Make 1)
Row 1 (Color A): Ch 46. Sc in the 2nd ch from the hook and in each ch across. (45 sc) Turn.
Rows 2–3: Ch 1, then sc in each st across. (45 sc) Turn at the end of Row 2 only.
Fasten off, leaving a 12 in (30.5 cm) tail. The strap measures 11.25 in (28.6 cm) × 0.75 in (1.9 cm).
Border (Top Rim)
Border gauge: 4 sc per inch, 0.25 in (0.6 cm) per sc round and 0.5 in (1.3 cm) for the shell round.
Rnd 36 (Color A, conversion round): Ch 1. Sc in each dc and in each ch-1 sp around. Join. (24 sc in dc + 24 sc in sps = 48 sc) With the tube flattened, that is 24 sc per side.
Rnd 37: Ch 1, then sc in each st around. Join. (48 sc, 24 per side) Fasten off Color A.
Rnd 38 (Color B, shell edge): Join Color B in the st directly above the back-seam column. Ch 1, then sc in the same st. Sk 1 st, 5 dc in the next st, sk 1 st, sc in the next st; repeat from * 10 more times. Sk 1 st, 5 dc in the next st, sk 1 st, then join to the first sc. (12 shells + 12 sc = 72 sts; 6 shells per flattened side)
Why the math works: Each shell repeat uses exactly 4 sts: sc, sk, shell, sk. 48 ÷ 4 = 12 repeats with no leftover sts, and 24 per side ÷ 4 = 6 shells on each side. The conversion round keeps the count at 48 because every mesh unit is 2 sts, and you place 1 sc on each. No sts are added or lost, so the rim stays the same 12 in (30.5 cm) around as the tube.
Border depth: 1 in (2.5 cm). Total height: 17 in + 1 in = 18 in (45.7 cm).
Assembly
Fans: Flatten the tube so the back-seam column runs down the center back. Measure from the bottom edge of the base cup, then pin each fan centered on the front with its straight edge down and its arch up:
- Fan 1: base at 5 in (12.7 cm), top at 7 in (17.8 cm)
- Fan 2: base at 8.5 in (21.6 cm), top at 10.5 in (26.7 cm)
- Fan 3: base at 12 in (30.5 cm), top at 14 in (35.6 cm)
That leaves 1.5 in (3.8 cm) between fans. It also leaves 3 in (7.6 cm) of plain mesh below Fan 1 (from 2 in to 5 in) and 3 in (7.6 cm) above Fan 3 (from 14 in to 17 in).
Slip a piece of cardboard inside the tube so you only stitch through the front layer. Whipstitch each fan to the mesh through every sc of Row 4 and around the Row 1 half circle, catching a dc post or a chain each time.
Strap: Pin 1 in (2.5 cm) of each strap end to the inside of Rnds 36–37, one end at each side fold. The ends sit 6 in (15.2 cm) apart, and 9.25 in (23.5 cm) of strap is left free as the loop. Sew each end with a box stitch through both strap layers and the band.
Final Blocking
- Weave in all ends first, staying within same-color stitches.
- Mist the whole holder with water until it is damp, not soaked.
- Roll a towel into a tube about 12 in (30.5 cm) around and slide it inside the body.
- Shape the base into an even, rounded cup with the opening centered.
- Pin each fan’s shells and chain loops into an even arch, 4 in (10.2 cm) wide.
- Fold the top shells outward slightly so the scallops sit evenly.
- Let it dry completely, at least 12 hours, before you remove the towel.
Final Quality-Control Checklist
- The flat width is 6 in (15.2 cm) at the top, the middle and above the base.
- The total height is 18 in (45.7 cm), not counting the strap.
- The bottom opening is about 2.4 in (6.1 cm) and fully ringed in gold.
- The rim has 12 even shells, 6 per side.
- The three fans are centered and lined up vertically, with 1.5 in (3.8 cm) gaps.
- The strap is sewn securely, with a 9.25 in (23.5 cm) loop.
- No ends show on the RS.
Troubleshooting
The base is flat instead of cupped: you worked too many increases. Recheck that you have 36, 42 and 48 sts in Rnds 3–5.
The tube twists: your join is drifting. Always sl st into the first ch-1 sp before you ch 4, and keep the joins in one column.
The fans ruffle too much: go down a hook size for Row 3 only, or work 2 dc shells.
The rim shells don’t come out even: recount Rnd 37. It must be exactly 48.
Bags slide out too easily: add one more gold sc round to the opening, working sc2tog 6 times evenly around (24 sts).
Care
Hand wash in cool water with mild soap, press out the water in a towel, and dry flat over a rolled towel. Don’t tumble dry, because the fans will lose their shape.
Final Notes
The measurement chain is simple. The 30-st gold ring gives an opening about 2.4 in (6.1 cm) across. Three increase rounds bring the base to 48 sts, or 12 in (30.5 cm) around. Thirty mesh rounds add 15 in (38.1 cm), for a height of 17 in (43.2 cm), and the 1 in (2.5 cm) border brings the holder to 18 in (45.7 cm).
Three fans, each 4 in × 2 in (10.2 cm × 5.1 cm), sit evenly spaced down the front, and the strap gives you a sturdy loop for hanging. Check your gauge on the first fan, measure at each checkpoint, and the rest will come out right.
Happy crocheting!