

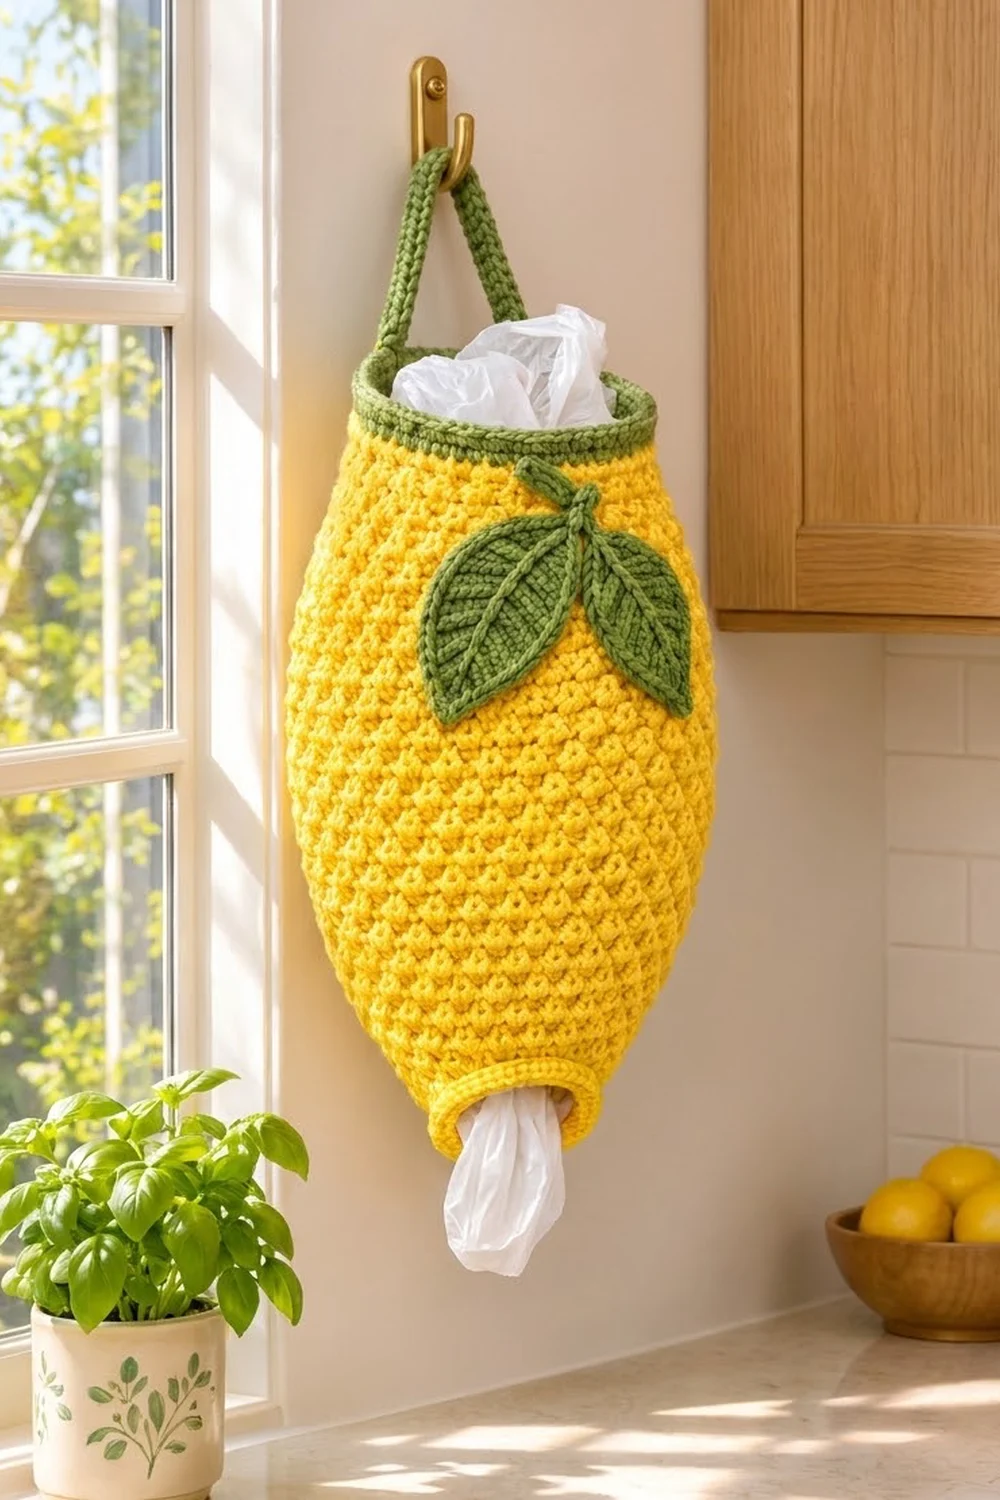
This lemon bag holder makes a useful kitchen object a bit more cheerful. You stuff loose plastic bags in through the wide top, and they come out one at a time through the small opening at the bottom. It hangs from a single hook by a green strap.
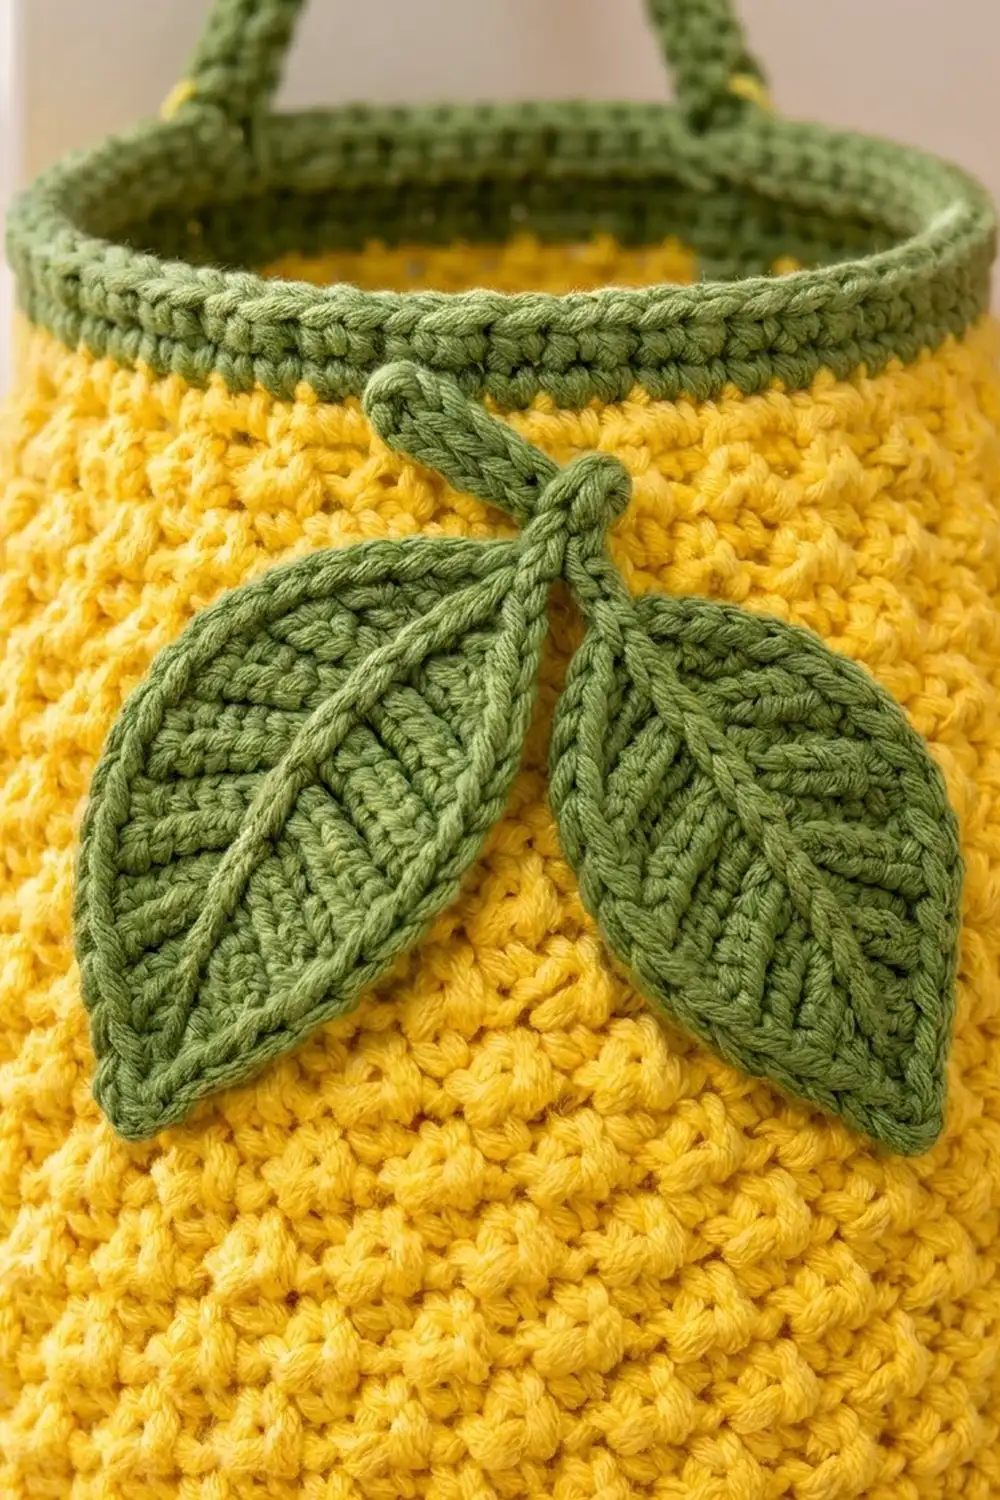
The body is bright lemon yellow worked in lemon peel stitch, which is simply alternating single and double crochet. This gives it a pebbled surface that looks like real citrus skin. Olive green is used for the rolled top rim, the hanging strap and two leaves with surface-stitched veins.
The pattern uses US crochet terms. The finished holder measures 15.25 in (38.7 cm) tall without the strap and 9.6 in (24.4 cm) wide at its widest point when hanging flat.
You’ll work the body bottom-up in joined rounds. It starts at the small dispensing opening, increases to the full width, works even, and then decreases toward the top. After that you add a green rim at the top and a yellow band at the bottom. Last, you make the strap and the leaves and sew them on.
Finished Size and Construction
- Finished size: 15.25 in (38.7 cm) tall × 9.6 in (24.4 cm) wide when hanging flat, strap not included
- Skill level: Easy–Intermediate
- Terminology: US
- Yarn weight: Worsted (#4)
- Hook: 5.0 mm (H-8)
- Number of pieces: One body, plus one strap and two leaves sewn on
- Layout: Single tube, opening at the top and bottom
- Body size before borders: 14 in (35.6 cm) tall
- Top border depth: 0.75 in (1.9 cm), green
- Bottom border depth: 0.5 in (1.3 cm), yellow
- Bottom opening: 4 in (10.2 cm) across when flat, about 2.5 in (6.4 cm) in diameter
- Top opening: 6.75 in (17.1 cm) across when flat
Materials
Use a smooth worsted-weight cotton or cotton blend. Cotton keeps the texture crisp and holds its shape when the holder is full of bags. Acrylic also works, but it stretches a little more.
- Lemon yellow: 200 g, about 380 m (416 yd)
- Olive green: 35 g, about 66 m (72 yd)
These amounts assume about 190 m (208 yd) per 100 g and include a safety margin of roughly 15%.
Tools:
– 5.0 mm (H-8) crochet hook
– Tapestry needle
– 4 stitch markers
– Scissors
– Measuring tape
– Pins and a spray bottle for blocking
Abbreviations (US Terms)
- ch – chain
- sl st – slip stitch
- sc – single crochet
- hdc – half double crochet
- dc – double crochet
- st(s) – stitch(es)
- rnd – round
- rev sc – reverse single crochet (crab stitch)
- sc3tog / dc3tog – work 3 stitches together into a single sc or dc
Lemon peel pattern: Alternate sc and dc all the way around. On every round after the first, work a sc into each dc and a dc into each sc. Odd rounds begin with sc and even rounds begin with dc. Begin a round that starts with sc with ch 1, and a round that starts with dc with ch 2. The beginning chain never counts as a stitch. Join each round with a sl st to the first stitch.
Pattern inc (adds 2 sts): Work 3 stitches into the same stitch, continuing the alternation (sc, dc, sc or dc, sc, dc).
Pattern dec (removes 2 sts): Work the stitch that is due next as a 3-together over the next 3 stitches (sc3tog if a sc is due, dc3tog if a dc is due).
An odd number of added or removed stitches would break the sc-over-dc stacking. Changing by exactly 2 keeps the alternation correct all the way around.
Gauge and Checkpoints
- Lemon peel: 15 sts and 12 rnds = 4 in (10.2 cm)
- Single crochet: 16 sts and 16 rows = 4 in (10.2 cm)
Make Rnds 1–12 of the body first and treat them as your test piece. Check these measurements:
- Rnd 1: circumference 8 in (20.3 cm)
- After Rnd 12: height 4 in (10.2 cm)
- After Rnd 24: height 8 in (20.3 cm)
- After Rnd 36: height 12 in (30.5 cm)
- After Rnd 42: height 14 in (35.6 cm), top circumference 14.4 in (36.6 cm)
If your piece is too big, go down to a 4.5 mm hook. If it’s too small, go up to a 5.5 mm hook. Change hooks early, because you can’t fix height later by skipping rounds without distorting the lemon shape.
Body (Yellow)
With yellow, ch 30 and join with a sl st to the first ch to form a ring. Check that the chain isn’t twisted.
Rnd 1: Ch 1, sc in next ch, dc in next ch; rep from * around, join. (30 sts: 15 sc, 15 dc)*
Rnd 2 (inc): Ch 2, [work pattern in next 9 sts, pattern inc in next st] 3 times, join. (36 sts)
Rnd 3: Work pattern even. (36 sts)
Rnd 4 (inc): [Pattern in next 11 sts, pattern inc] 3 times. (42 sts)
Rnd 5: Work even. (42 sts)
Rnd 6 (inc): [Pattern in next 13 sts, pattern inc] 3 times. (48 sts)
Rnd 7: Work even. (48 sts)
Rnd 8 (inc): [Pattern in next 15 sts, pattern inc] 3 times. (54 sts)
Rnd 9: Work even. (54 sts)
Rnd 10 (inc): [Pattern in next 17 sts, pattern inc] 3 times. (60 sts)
Rnd 11: Work even. (60 sts)
Rnd 12 (inc): [Pattern in next 19 sts, pattern inc] 3 times. (66 sts)
Checkpoint: the piece should be 4 in (10.2 cm) tall.
Rnd 13: Work even. (66 sts)
Rnd 14 (inc): [Pattern in next 21 sts, pattern inc] 3 times. (72 sts)
Here is how each increase round works out: Rnd 2 uses 10 sts per repeat (9 + 1) and makes 12 (9 + 3), so 3 repeats take 30 sts and make 36. The same logic applies to every later increase round. Place a marker in the middle stitch of each pattern inc on Rnd 14. This lets you check that the three increase lines are evenly spaced.
Rnds 15–34: Work even. (72 sts each round)
Checkpoint after Rnd 24: 8 in (20.3 cm) tall. The circumference is 19.2 in (48.8 cm), which is 9.6 in (24.4 cm) wide when flat.
Rnd 35 (dec): [Pattern in next 21 sts, pattern dec] 3 times. Each repeat takes 24 sts and makes 22. (66 sts)
Rnd 36: Work even. (66 sts)
Checkpoint: 12 in (30.5 cm) tall.
Rnd 37 (dec): [Pattern in next 19 sts, pattern dec] 3 times. (60 sts)
Rnd 38: Work even. (60 sts)
Rnd 39 (dec): [Pattern in next 17 sts, pattern dec] 3 times. (54 sts)
Rnds 40–42: Work even. (54 sts each round)
Fasten off yellow. Checkpoint: the body is 14 in (35.6 cm) tall, with a top circumference of 14.4 in (36.6 cm).
Hanging Strap (Green)
Ch 41.
Row 1: Sc in 2nd ch from hook and in each ch across, turn. (40 sc)
Rows 2–3: Ch 1, sc in each st across, turn. (40 sc)
Fasten off and leave a 12 in (30.5 cm) tail. The strap is 10 in (25.4 cm) long and 0.75 in (1.9 cm) wide.
Leaves (Green, Make 2)
Ch 11.
Rnd 1: Sc in 2nd ch from hook, hdc in next ch, dc in next 5 ch, hdc in next ch, sc in next ch, 3 sc in last ch. Rotate the work and continue along the other side of the chain: sc in next ch, hdc in next ch, dc in next 5 ch, hdc in next ch, sc in last ch. Join with a sl st to the first sc. (9 + 3 + 9 = 21 sts)
Rnd 2 (outline): Ch 1, sc in each st around, working 3 sc in the center sc of the tip group. Join. (21 sts worked 1 per stitch + 2 added = 23 sc)
Fasten off and leave a 10 in (25.4 cm) tail. Each leaf measures about 3 in (7.6 cm) long and 1.75 in (4.4 cm) wide. Both ends come to a point because the joining seam forms the base point.
Veins: Hold green yarn behind the leaf. Surface sl st along the chain line from base to tip. Then work three short angled surface sl st lines on each side, slanting up toward the tip.
Stem: Join green at the base of one leaf. Ch 8, then sl st in the 2nd ch from the hook and in each remaining ch, which gives 7 sl sts. Fasten off. The stem is about 1.5 in (3.8 cm) long and curls naturally.
Borders
Top Border (Green)
Border gauge: 16 sc = 4 in (10.2 cm), and 4 rnds = 1 in (2.5 cm).
Join green in any stitch of Rnd 42.
Rnd 1: Ch 1, sc in each st around, join. (54 sc)
Rnd 2: Ch 1, sc in each st around, join. (54 sc)
Rnd 3: Ch 1, rev sc in each st around, join. (54 rev sc)
Fasten off. The border is 0.75 in (1.9 cm) deep.
Why the math works: You work exactly one sc into each of the 54 body stitches. At the sc gauge, 54 sc make 13.5 in (34.3 cm), while the lemon peel edge underneath is 14.4 in (36.6 cm). That 0.9 in (2.3 cm) difference pulls the rim in slightly, which gives the top the gently cupped lemon shape.
Bottom Border (Yellow)
Turn the body upside down. Join yellow in a free loop of the foundation chain.
Rnd 1: Ch 1, sc in each free loop around, join. (30 sc)
Rnd 2: Ch 1, sc in each st around, join. (30 sc)
Fasten off. The band is 0.5 in (1.3 cm) deep.
Why the math works: One sc goes into each of the 30 chains. The 30 sc make 7.5 in (19.1 cm), slightly snugger than the 8 in (20.3 cm) foundation. This firm, smaller opening holds the bags back so they come out one at a time.
Attaching the Pieces
Flatten the body so that the end of the top-border round sits at one side. Mark border stitch 1 and stitch 28. These are exactly opposite each other, with 27 sts between them on each side.
Overlap 1 in (2.5 cm) of each strap end on the inside of the rim at the marked stitches, and whipstitch it through Rnds 1–2 of the border. The loop then rises 8 in (20.3 cm) above the rim.
Pin the leaves in a V on the front, centered between the strap points, with the stem 0.5 in (1.3 cm) below the rim. Whipstitch around each Rnd 2 outline and weave in all the tails.
Final Blocking
- Fill the holder loosely with crumpled towels until it reaches 9.6 in (24.4 cm) wide when flat.
- Mist it evenly until it is damp, but not soaked.
- Shape it into a smooth oval, rounding off the three increase lines.
- Pin the leaves flat, with their tips pointing out and down.
- Check that the height is 15.25 in (38.7 cm) and that the top opening is 6.75 in (17.1 cm) wide.
- Let it dry completely before you remove the towels.
Final Quality-Control Checklist
- [ ] The stitch counts were 30, 72 and 54 at the start, the widest point and the top
- [ ] The body is 14 in (35.6 cm) tall before the borders
- [ ] The lemon peel texture is staggered evenly, with no stacked columns
- [ ] The top border has 54 sc on each round, and the rev sc edge lies flat
- [ ] The bottom border has 30 sc and the opening is about 2.5 in (6.4 cm) across
- [ ] The strap ends are directly opposite each other and sewn securely
- [ ] The leaves are symmetrical, with veins visible
- [ ] All tails are woven in
Troubleshooting
- The texture looks like ribs instead of pebbles. You worked a stitch onto the same type of stitch. Check that every sc sits on a dc and every dc sits on a sc.
- A vertical line or jog appears at the seam. Start each round with the correct beginning chain (ch 1 or ch 2) and always join to the first real stitch.
- The shape is pointy at the increases. Block it firmly. Next time, shift where the repeats start by 3 sts on each increase round.
- The bottom opening is too loose. Redo bottom border Rnd 2 as sc2tog every 10 sts, for 27 sc.
- The rim flares. Work top border Rnd 1 with a hook one size smaller.
- The leaves curl. Steam them lightly from the back and pin them while they dry.
Care
Hand wash in cool water and lay flat to dry, reshaped with a towel inside. Don’t wring it, because that stretches the bottom opening.
Final Notes
The measurement chain runs like this:
- The 30-st foundation is 8 in (20.3 cm) around.
- Seven increase rounds take the body to 72 sts, which is 9.6 in (24.4 cm) wide when flat.
- Three decrease rounds bring it to 54 sts at the top.
- The 42-round body is 14 in (35.6 cm) tall.
- The 0.75 in (1.9 cm) top border and 0.5 in (1.3 cm) bottom border bring it to 15.25 in (38.7 cm).
If you check each of these numbers as you go, your lemon will come out the right size and shape.
Happy crocheting!