

This cheerful reindeer turns a plain grocery bag holder into holiday kitchen decor. The body is an open diamond mesh tube in warm caramel, with dark chocolate bands at the base and rim. A round opening edged in dark brown sits low on the front, so you can pull bags out one at a time.
The face is all appliqué: cream eyes with black pupils, a big red spiral nose, caramel ears with oatmeal centers, and oatmeal antlers rising above the rim. A thin dark brown strap hangs it from a hook.
The pattern uses US terms. The finished holder is 5.75 in (14.6 cm) across, 18 in (45.7 cm) around, and 17.5 in (44.5 cm) tall. Including the strap, it’s about 21.5 in (54.6 cm) tall.
You work the body in one piece from the bottom up:
– a flat dc base
– a sc band
– 21 mesh rounds and rows, with the dispenser opening built in
– a solid sc rim
Then you edge the opening, make the face pieces, block, and sew.
Finished Size and Construction
- Finished size: 5.75 in (14.6 cm) diameter x 17.5 in (44.5 cm) tall; 18 in (45.7 cm) circumference
- Skill level: Intermediate
- Terminology: US
- Yarn weight: Worsted (#4)
- Hook: 5.0 mm (H-8)
- Number of pieces: 1 body plus 8 small sewn-on pieces (strap, 2 antlers, 2 ears, 2 eyes, 1 nose)
- Layout: Single vertical tube, face centered above the dispenser opening
- Body size before rim: 16.5 in (41.9 cm) tall
- Rim (border) depth: 1 in (2.5 cm)
- Dispenser opening: about 2.5 in (6.4 cm) across after edging
Materials
Use a smooth worsted cotton or cotton blend. Cotton holds the mesh open and stretches less under the weight of bags. Acrylic works but sags more.
- Caramel (main): 60 g, about 108 m
- Dark Brown: 40 g, about 72 m
- Oatmeal: 10 g, about 18 m
- Red: 10 g, about 18 m
- Cream: 5 g, about 9 m
- Black: 2 g, about 4 m
Quantities include a margin of about 20%.
Tools:
- 5.0 mm (H-8) crochet hook
- Tapestry needle
- 4 stitch markers
- Scissors
- Measuring tape
- A cylinder about 5.75 in (14.6 cm) wide for blocking, such as an oatmeal canister or rolled towel
- Pins and a spray bottle
Abbreviations (US Terms)
- ch – chain
- sl st – slip stitch
- sc – single crochet
- hdc – half double crochet
- dc – double crochet
- sc2tog – single crochet 2 together
- BLO – back loop only
- MR – magic ring
- sp – space
- st(s) – stitch(es)
- rnd(s) – round(s)
- rep – repeat
- RS / WS – right side / wrong side
Special stitch – mesh loop: “Ch 5, sc in next ch-5 sp.” Each loop sits over the center of a loop below, which creates the diamond grid.
Gauge and Checkpoints
- Solid sc: 16 sc and 16 rnds = 4 in (10.2 cm)
- Mesh: 4 mesh loops = 4 in (10.2 cm) wide; 4 mesh rnds = 3 in (7.6 cm) tall, so each mesh rnd is 0.75 in (1.9 cm)
Use the base as your test piece, since it sets the width of everything above it. Checkpoints:
- After Rnd 6 (base): 5.75 in (14.6 cm) across, lying flat.
- After Rnd 9: band is 0.75 in (1.9 cm) tall.
- After Rnd 15: 5.25 in (13.3 cm) from base edge to top of mesh.
- After Rnd 30: 16.5 in (41.9 cm) tall.
- After Rnd 34: 17.5 in (44.5 cm) tall.
If the base is too big, go down a hook size. If it’s too small, go up one. If the base is right but the mesh comes out too tall, use ch 4 for every mesh loop. If the mesh comes out short, add 1 more repeat of Rnd 11 for each 0.75 in (1.9 cm) missing.
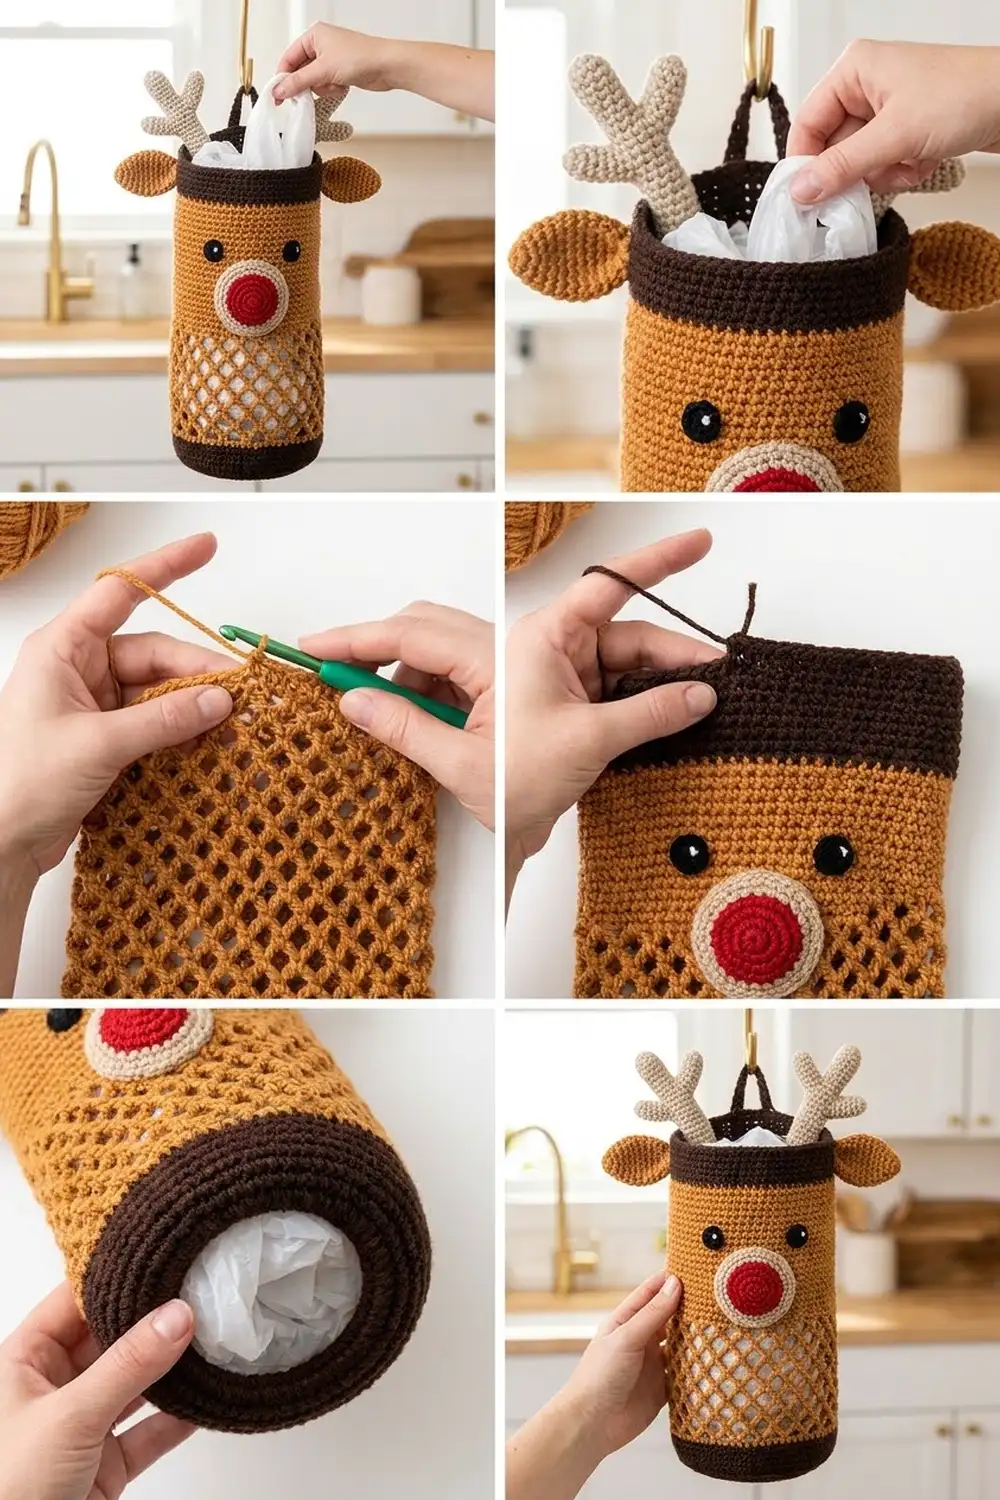
Body
Base (Dark Brown)
Rnd 1: MR, ch 3 (counts as dc), 11 dc in ring, sl st in top of ch-3. (12 dc)
Rnd 2: Ch 3, dc in same st, 2 dc in each st around, sl st in top of ch-3. (24 dc)
Rnd 3: Ch 3, 2 dc in next st, *dc in next st, 2 dc in next st; rep from * around, sl st to join. (36 dc)
Rnd 4: Ch 3, dc in next st, 2 dc in next st, *dc in next 2 sts, 2 dc in next st; rep from * around, sl st to join. (48 dc)
Rnd 5: Ch 3, dc in next 2 sts, 2 dc in next st, *dc in next 3 sts, 2 dc in next st; rep from * around, sl st to join. (60 dc)
Rnd 6: Ch 3, dc in next 3 sts, 2 dc in next st, *dc in next 4 sts, 2 dc in next st; rep from * around, sl st to join. (72 dc)
Checkpoint: 5.75 in (14.6 cm) across.
Bottom Band (Dark Brown)
Rnd 7: Ch 1, sc in BLO of each st around, sl st in first sc. (72 sc) Working in the BLO turns the edge up to start the tube wall.
Rnds 8–9: Ch 1, sc in each st around, sl st in first sc. (72 sc)
Fasten off. Checkpoint: band is 0.75 in (1.9 cm) tall.
Mesh (Caramel)
Rnd 10: Join Caramel with sc in any st. *Ch 5, sk 3 sts, sc in next st; rep from * 16 more times, ch 5, sk last 3 sts, sl st in first sc. (18 sc, 18 ch-5 loops)
Rnd 11: Sl st in next 2 ch, sc in same ch-5 sp, (ch 5, sc in next ch-5 sp) 17 times, ch 5, sl st in first sc. (18 sc, 18 ch-5 loops)
Label the loops of Rnd 11 as L1 to L18, starting with the loop right after the joining sc. Loops L16–L18 form the bottom edge of the opening, and the middle of L17 is the front center.
Dispenser Opening (Caramel)
Row 12 (RS): Sl st in next 2 ch, sc in L1, (ch 5, sc in next ch-5 sp) 14 times, ending in L15. Leave L16–L18 unworked. (15 sc, 14 ch-5 loops)
Row 13 (WS): Ch 4 (counts as dc + ch 2), turn, sc in first ch-5 sp, (ch 5, sc in next ch-5 sp) 13 times, ch 2, dc in last sc. (14 sc, 13 ch-5 loops, 2 edge dc)
Row 14 (RS): Ch 1, turn, sc in first dc, (ch 5, sc in next ch-5 sp) 13 times, ch 5, sc in 2nd ch of turning ch-4. (15 sc, 14 ch-5 loops)
These three rows leave a gap 3 loops wide: about 3 in (7.6 cm) wide and 2.25 in (5.7 cm) tall.
Rnd 15 (closing round): Ch 15 for the bridge, then sc in first sc of Row 14 on the far side of the gap. (Ch 5, sc in next ch-5 sp of Row 14) 14 times. Now work across the bridge: ch 5, sk first 3 bridge ch, sc in next ch, (ch 5, sk next 3 ch, sc in next ch) 2 times, ch 5, sk last 3 ch, sl st in first sc. (18 sc, 18 ch-5 loops)
How the bridge adds up: its 15 ch are 4 groups of 3 skipped ch plus 3 sc. That places 4 loops across the gap and brings the round back to 18 loops. Checkpoint: 5.25 in (13.3 cm) tall.
Rnds 16–30: Rep Rnd 11. (18 sc, 18 ch-5 loops each rnd)
Checkpoint: 16.5 in (41.9 cm) tall. Fasten off, or carry on straight into the rim (see Border).
Opening Edging (Dark Brown)
Rnd 1: With RS facing, join Dark Brown at the bottom-right corner of the opening and work around it:
– 4 sc in each of L16, L17 and L18 (12 sc)
– 3 sc in each of the 3 row ends up the side (9 sc)
– sc in each of the 15 free loops of the bridge chain (15 sc)
– 3 sc in each of the 3 row ends down the other side (9 sc)
Sl st in first sc. (45 sc) Place a marker in the first sc of each of the 4 groups to mark the corners.
Rnd 2: Ch 1, sc in each st around, working sc2tog over each marked st and the next st, sl st in first sc. (45 – 4 = 41 sc)
Decreasing at the 4 corners rounds the square gap into a circle. Fasten off.
Face Pieces and Strap
Nose (Red, make 1)
Rnd 1: MR, 6 sc in ring, sl st in first sc. (6 sc)
Rnd 2: Ch 1, 2 sc in each st, sl st to join. (12 sc)
Rnd 3: Ch 1, (sc, 2 sc in next) 6 times, sl st to join. (18 sc)
Rnd 4: Ch 1, (sc in next 2, 2 sc in next) 6 times, sl st to join. (24 sc)
Rnd 5: Ch 1, (sc in next 3, 2 sc in next) 6 times, sl st to join. (30 sc)
Fasten off with a long tail. Joining each round creates the visible concentric rings. Size: about 2.4 in (6.1 cm).
Eyes (make 2)
Rnd 1: With Black, MR, 6 sc in ring, sl st in first sc, changing to Cream. (6 sc)
Rnd 2: With Cream, ch 1, 2 sc in each st, sl st to join. (12 sc)
Rnd 3: Ch 1, (sc, 2 sc in next) 6 times, sl st to join. (18 sc)
Fasten off with a long tail. Size: about 1.4 in (3.6 cm).
Ears (make 2)
Rnd 1: With Oatmeal, ch 6. Sc in 2nd ch from hook, hdc in next ch, dc in next 2 ch, 5 dc in last ch. Working along the other side of the chain: dc in next 2 ch, hdc in next ch, sc in next ch. Sl st in first sc. (13 sts) The sc end is the pointed tip and the 5-dc fan is the rounded base.
Rnd 2: Join Caramel in first sc. Ch 1, sc in same st, sc in next 3 sts, 2 sc in each of next 5 sts, sc in next 4 sts, ch 2 for the tip, sl st in first sc. (13 sts + 5 increases = 18 sc, plus ch-2 tip)
Fasten off with a long tail. Size: about 1.75 in (4.4 cm) long and 1.25 in (3.2 cm) wide.
Antlers (Oatmeal, make 2)
Ch 13. Work into this main chain from the hook end toward the slip knot.
- Top tine: Sl st in 2nd ch from hook, sc in next 3 ch. (4 sts)
- Side tine 1: Ch 5, sl st in 2nd ch from hook, sc in next 3 ch (4 tine sts), sl st in next main ch.
- Stem: Hdc in next 2 main ch.
- Side tine 2: Ch 4, sl st in 2nd ch from hook, sc in next 2 ch (3 tine sts), sl st in next main ch.
- Base: Hdc in last 4 main ch.
Main chain check: 1 skipped + 4 + 1 + 2 + 1 + 4 = 13. Fasten off with a long tail. Size: about 3 in (7.6 cm) tall. Flip the second antler over so the two mirror each other.
Strap (Dark Brown, make 1)
Ch 41, sc in 2nd ch from hook and in each ch across. (40 sc) Length: 10 in (25.4 cm). Leave long tails at both ends.
Border: Top Rim
The border gauge is the same as the body: 16 sc = 4 in (10.2 cm). To make counting easier, think of the 72 sts as 4 quarters of 18 sts: front, left side, back and right side.
Rnd 31 (conversion round): Join Dark Brown in any sc of Rnd 30. Ch 1, *sc in sc, 3 sc in next ch-5 sp; rep from * around, sl st in first sc. (18 sc worked 1 per existing sc + 54 sc worked into the 18 loops = 72 sc; 18 per quarter)
Rnds 32–34: Ch 1, sc in each st around, sl st in first sc. (72 sc; 18 per quarter)
Fasten off. Rim depth: 1 in (2.5 cm).
Why the math works: each mesh loop started over 4 sts in Rnd 10 (18 x 4 = 72). The conversion round puts back 4 sts per loop (1 + 3), so the rim has the same 72 sts as the base. It measures 18 in (45.7 cm) around and won’t flare or pull in.
Final Blocking
- Weave in all ends on the body.
- Slide the body over your 5.75 in (14.6 cm) cylinder, base on top.
- Spray until damp.
- Straighten the diamond columns from base to rim. Ease the mesh until the body measures 16.5 in (41.9 cm) from the base to the bottom of the rim.
- Pin the opening edging into a circle.
- Pin the nose, eyes and ears flat on a towel and spray them.
- Let everything dry completely.
- Assemble: Sew through the mesh strands with matching yarn.
- Mark the front center (middle of L17). Then mark the 3 o’clock and 9 o’clock points on the rim, 18 sts either side of front center.
- Sew one strap end inside the rim at each side mark. The strap peak stands about 4 in (10.2 cm) high.
- Sew each antler inside the rim, 1.25 in (3.2 cm) in front of a strap end.
- Sew an ear on the outside of the rim just below each antler, tip angled out.
- Sew the eyes side by side, with their top edges 2 in (5.1 cm) below the rim.
- Sew the nose below the eyes so it overlaps their lower edges.
Final Quality-Control Checklist
- Base is flat and 5.75 in (14.6 cm) across
- Every mesh round has 18 loops, and the columns run straight
- Opening is centered under the face and edged with 41 sc
- Rim has 72 sts and matches the base width
- Body is 17.5 in (44.5 cm) tall
- Strap ends sit opposite each other, so the holder hangs level
- Antlers mirror each other, eyes are level, nose is centered
- All ends are secured
Troubleshooting
- Mesh leans to one side: this is normal when each round starts with sl sts. Pin the columns straight while blocking.
- Opening too tall: use ch 4 in Rows 12–14 only.
- Bridge sags: redo it with a tighter chain, keeping all 15 ch.
- Base cups: go up a hook size for Rnds 1–6.
- Base ruffles: go down a hook size.
- Bags slip out: add a third edging round with no decreases.
Care
Hand wash in cool water and dry over a cylinder so the mesh keeps its shape. Don’t tumble dry.
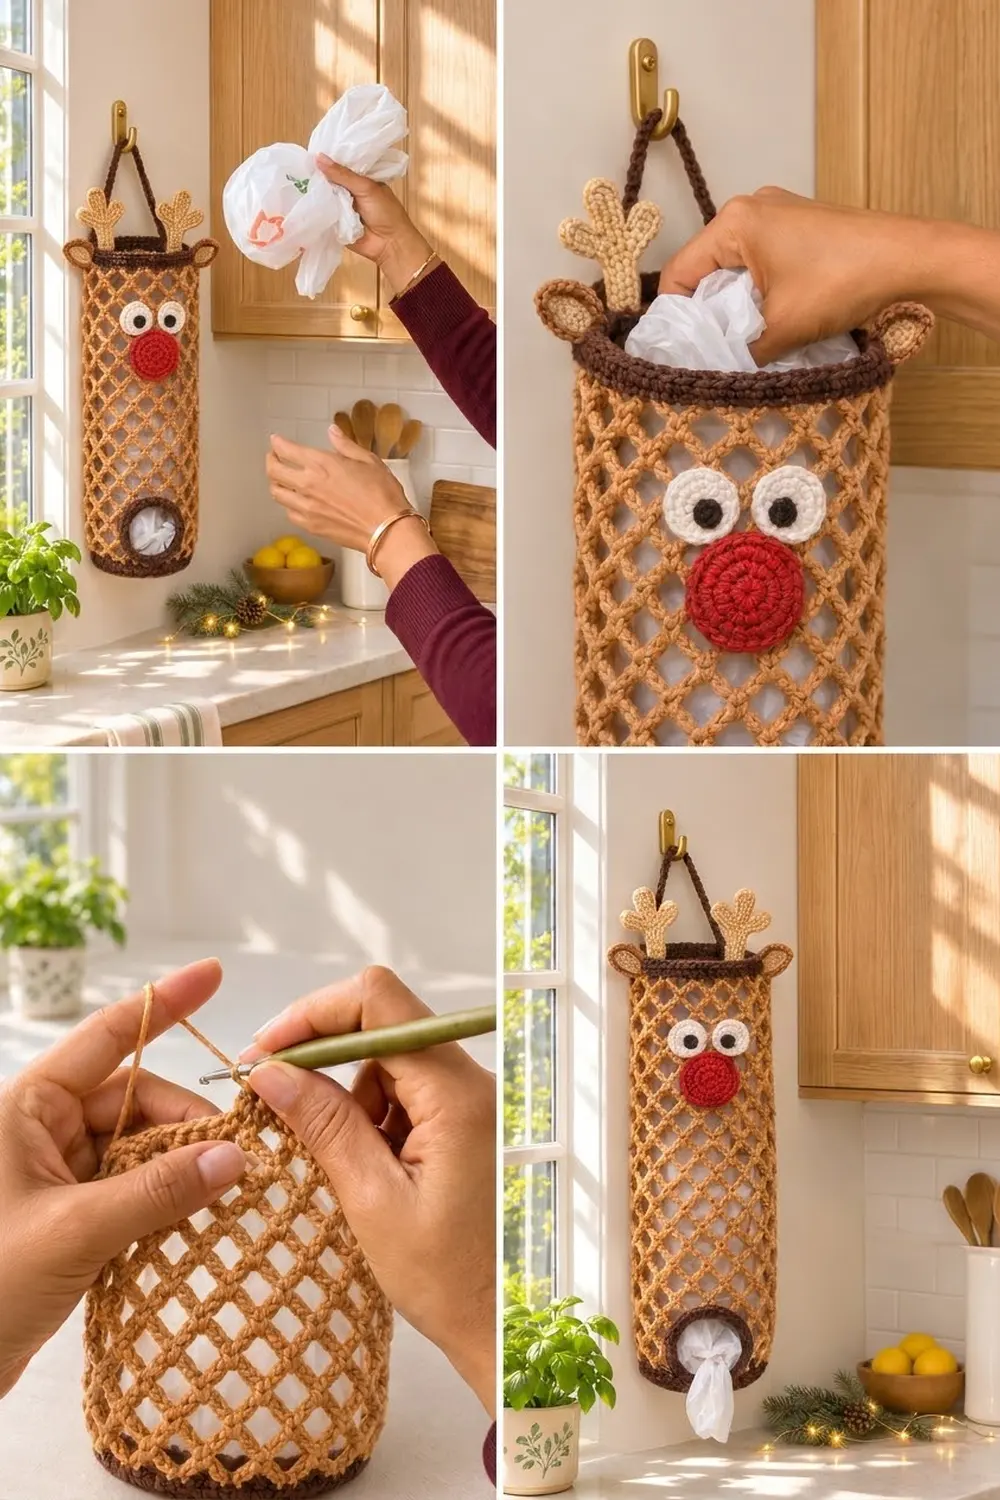
Final Notes
Here’s how the measurements connect. The 72-st base is 5.75 in (14.6 cm) across, which sets an 18 in (45.7 cm) circumference. The 18 mesh loops of 4 sts each keep that width for 16.5 in (41.9 cm). The 72-st rim then finishes the tube at 17.5 in (44.5 cm). Check the base, the opening and the last mesh round, and your reindeer will hang straight all season.
Happy crocheting!