

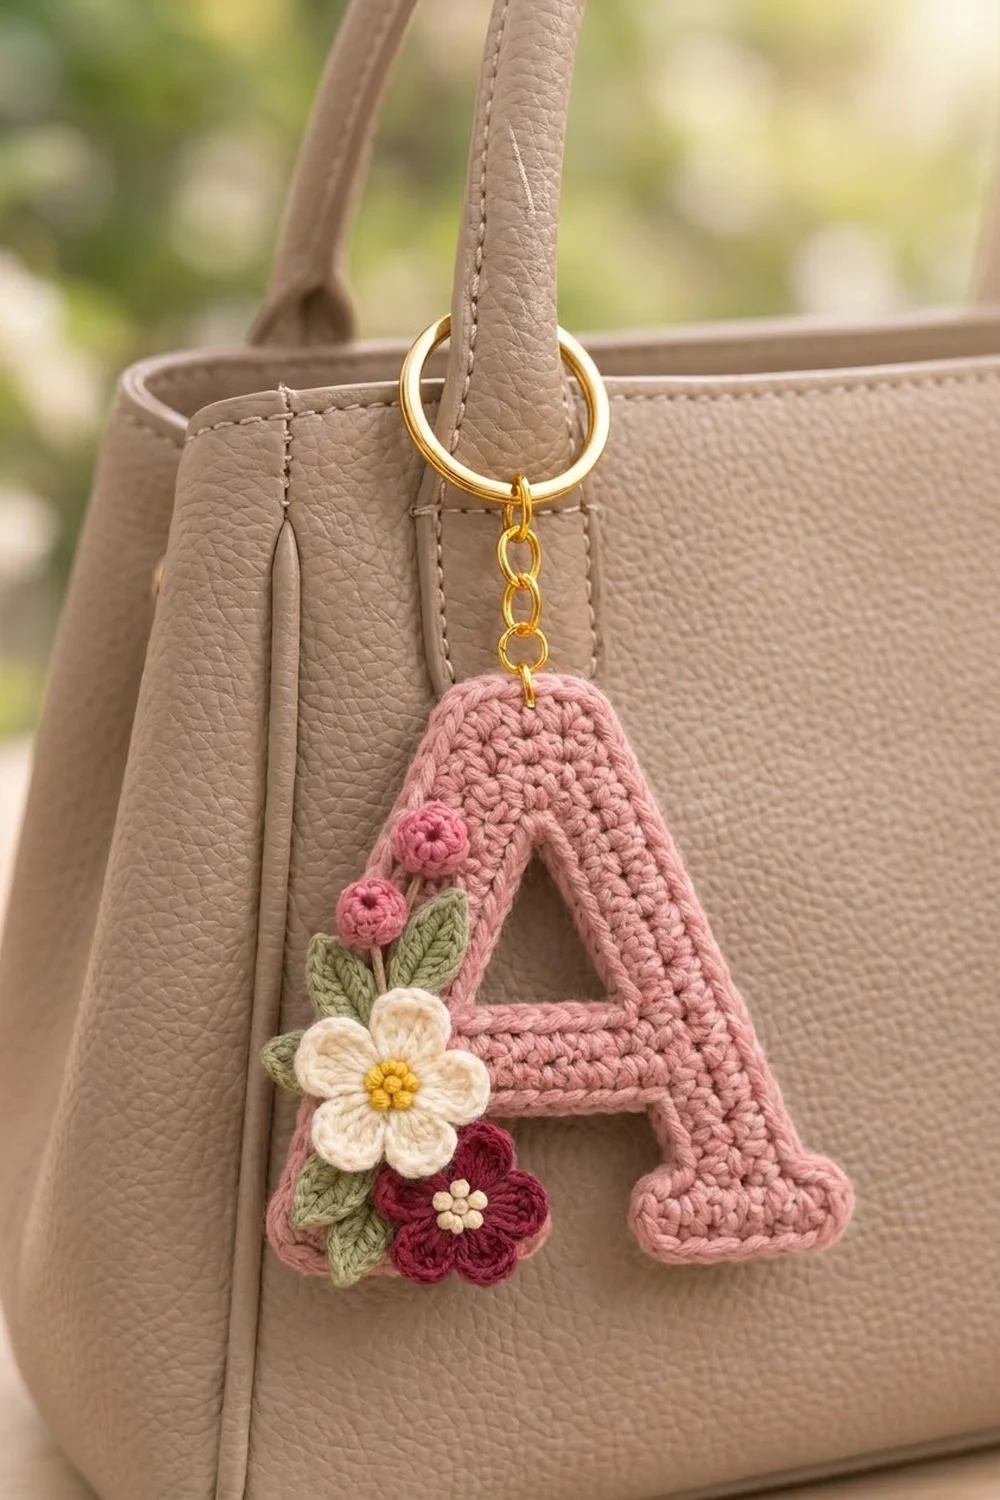
This little keychain is a bold, chunky capital “A” in dusty rose pink with a small bouquet sewn onto its left leg. The letter is solid single crochet with a neat outline border. It has a flat top, slightly flared feet, a solid crossbar, and a small triangular opening above the crossbar.
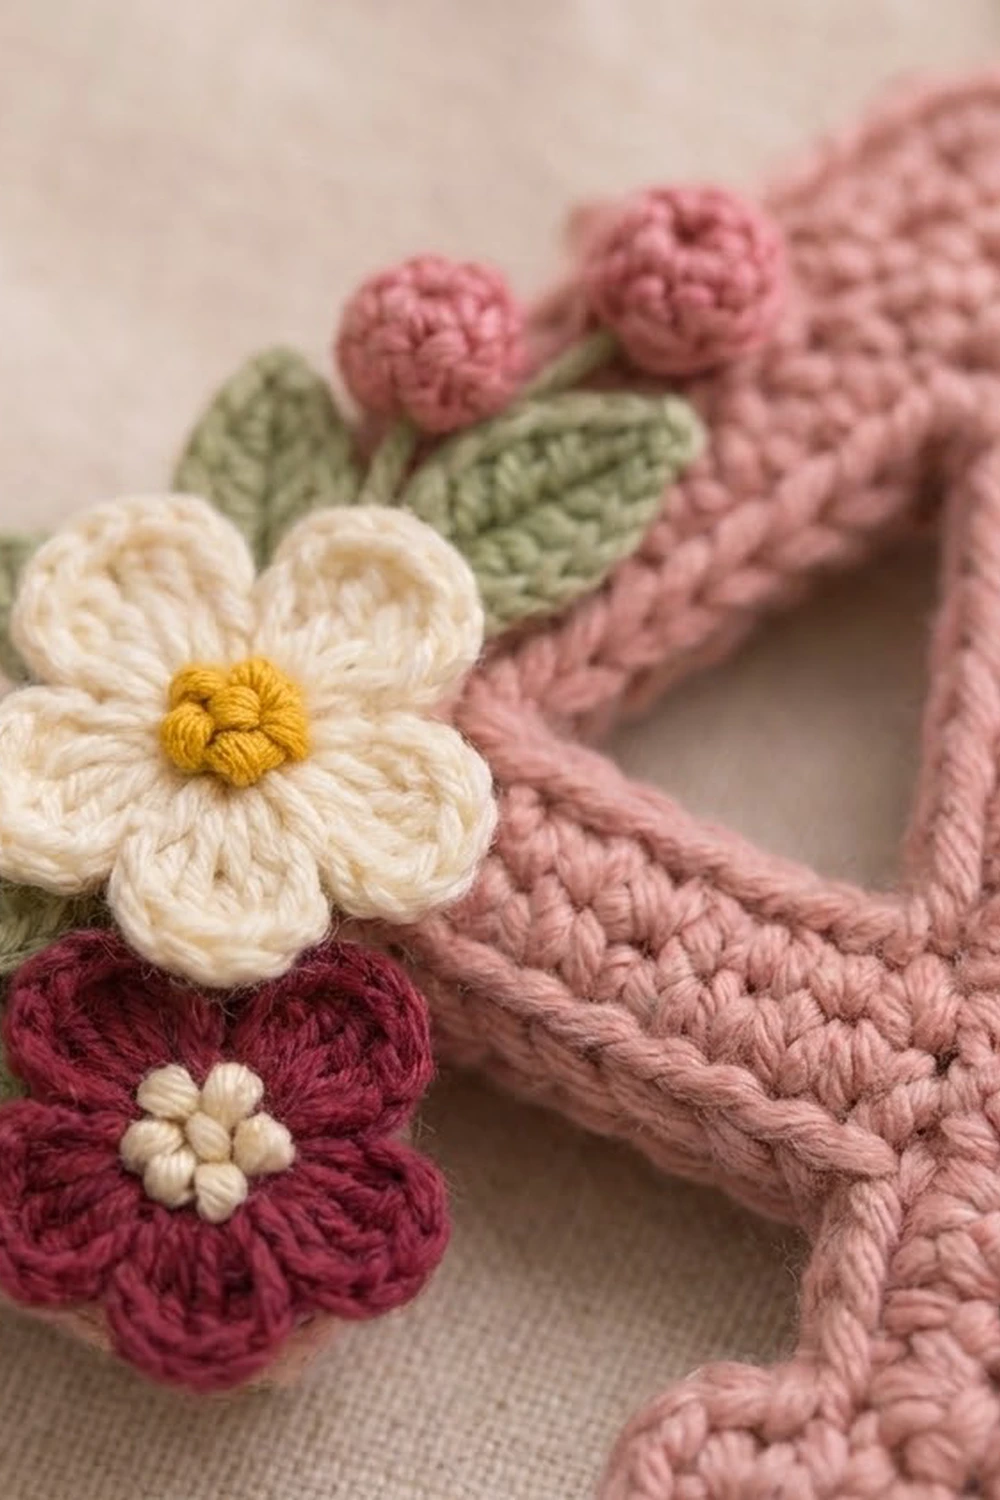
The bouquet uses five accent colors: a cream five-petal flower with a mustard yellow center, a smaller deep burgundy flower with cream French-knot centers, three sage green leaves, and two rose pink buds. A gold jump ring, a short gold chain, and a gold split key ring let it hang from a bag handle or a set of keys.
The pattern uses US crochet terms. The finished letter measures 4.0 in wide x 4.4 in tall (10.2 x 11.2 cm), not counting the hardware.
You work the letter flat in rows of single crochet. The two lower legs are made separately, then joined by a chain that becomes the crossbar. The top splits again around the triangular opening and rejoins at the apex. One border round goes around the outside and a short round goes around the opening. The appliqués are made separately and sewn on in layers.
Finished Size and Construction
- Finished size: 4.0 in wide x 4.4 in tall (10.2 x 11.2 cm)
- Skill level: Easy-intermediate
- Terminology: US
- Yarn weight: DK / light worsted (#3) cotton
- Hook: 3.5 mm (E-4)
- Number of pieces: 1 finished keychain (one letter base plus 7 small appliqués sewn on)
- Layout: Single motif, no joining
- Letter size before border: 3.6 in wide x 4.0 in tall (9.1 x 10.2 cm), 18 sts x 20 rows
- Border depth: 0.2 in (0.5 cm) on every edge, 1 round of sc
Materials
Choose a smooth mercerized or combed DK cotton. It gives crisp stitch definition and holds its shape on a keychain that gets handled every day. Fuzzy or very stretchy yarns blur the letter outline.
- Dusty rose pink (letter): 8 g, about 18 m
- Cream (large flower petals, French knots): 2 g, about 4 m
- Mustard yellow (large flower center): 1 g, about 2 m
- Deep burgundy (small flower): 2 g, about 4 m
- Rose pink (buds): 1 g, about 2 m
- Sage green (leaves): 2 g, about 4 m
All quantities include a small margin for gauge differences and sewing tails.
Tools
- 3.5 mm (E-4) crochet hook
- Tapestry needle
- 2 locking stitch markers
- 1 gold jump ring, 0.3 in (0.8 cm)
- 1 gold chain, about 0.75 in (1.9 cm), 4 to 5 links
- 1 gold split key ring, 1 in (2.5 cm)
- 2 pairs of flat-nose pliers
- Blocking mat, rust-proof pins, spray bottle
Abbreviations (US Terms)
- ch – chain
- sl st – slip stitch
- sc – single crochet
- hdc – half double crochet
- dc – double crochet
- sc2tog – single crochet 2 together (decrease)
- st(s) – stitch(es)
- MR – magic ring
Shift row (special technique): This moves a 4-st leg sideways by 1 st without changing its count. You decrease at the outer edge and increase at the inner edge. If the row starts at the outer edge, work sc2tog, sc 1, 2 sc in last st. If it starts at the inner edge, work 2 sc in first st, sc 1, sc2tog. Either way, 4 sts in and 4 sts out.
Gauge and Checkpoints
Gauge: 10 sc x 10 rows = 2 in (5.1 cm) in sc with a 3.5 mm hook.
Make a swatch of 12 sc over 12 rows and measure the middle 10 x 10. Because the letter is small, you can also treat Leg 1 as your test piece.
Checkpoints:
- After Row 2 (foot): 6 sts = 1.2 in (3.0 cm) wide, 0.4 in (1.0 cm) tall
- After Row 7 (leg): 4 sts = 0.8 in (2.0 cm) wide, 1.4 in (3.6 cm) tall
- After Row 8: full width 2.8 in (7.1 cm); the crossbar chain spans 1.2 in (3.0 cm)
- After Row 10: 12 sts = 2.4 in (6.1 cm), height 2.0 in (5.1 cm)
- After Row 15: 8 sts = 1.6 in (4.1 cm)
- After Row 20: top 6 sts = 1.2 in (3.0 cm), base 3.6 in (9.1 cm), height 4.0 in (10.2 cm)
Too big? Go down to a 3.0 mm hook. Too small? Go up to a 4.0 mm hook. Don’t change stitch counts, because the letter shape depends on them.
Letter Pattern
The ch 1 at the start of each row does not count as a stitch. Leave 6 in (15.2 cm) tails.
Leg 1 (fasten off)
Make a slipknot. Its tail marks the inner edge of Leg 1.
Foundation: Ch 7.
Row 1: Sc in 2nd ch from hook and in each ch across, turn. (6 sts)
Row 2: Ch 1, sc in each st across, turn. (6 sts)
Row 3: Ch 1, sc2tog, sc 2, sc2tog, turn. (4 sts) The extra stitch on each side of Rows 1–2 forms the flared foot.
Row 4: Ch 1, sc in each st across, turn. (4 sts)
Row 5 (shift row, starts at outer edge): Ch 1, sc2tog, sc 1, 2 sc in last st, turn. (4 sts)
Rows 6–7: Ch 1, sc in each st across, turn. (4 sts)
Fasten off. Row 7 ends at the inner edge.
Leg 2 (do not fasten off)
Make a slipknot. Its tail marks the outer edge of Leg 2.
Foundation and Rows 1–4: Work as for Leg 1.
Row 5 (shift row, starts at inner edge): Ch 1, 2 sc in first st, sc 1, sc2tog, turn. (4 sts)
Rows 6–7: Ch 1, sc in each st across, turn. (4 sts) Row 7 ends at the outer edge.
Lay the legs side by side, same face up, inner edges facing each other, feet aligned.
Crossbar
Row 8: Ch 1, sc in each of the 4 sts of Leg 2, ch 6, then sc in each of the 4 sts of Leg 1 starting at its inner edge, turn. (8 sc + 6 ch = 14 sts)
Row 9: Ch 1, sc2tog, sc in next 2 sc, sc in each of the 6 ch, sc in next 2 sc, sc2tog, turn. (12 sts)
Row 10: Ch 1, sc in each st across, turn. (12 sts)
Upper Leg A
Row 11: Ch 1, sc in first 4 sts only, turn. (4 sts) Leave the remaining 8 sts unworked.
Row 12: Ch 1, sc in each st, turn. (4 sts)
Row 13 (shift row, starts at outer edge): Ch 1, sc2tog, sc 1, 2 sc in last st, turn. (4 sts)
Row 14: Ch 1, sc in each st. (4 sts) Don’t turn. Place the live loop on a marker. Row 14 ends at the outer edge.
Upper Leg B
Row 11: Skip the next 4 unworked sts of Row 10 (the base of the opening). Join yarn in the next st, sc in it and the next 3 sts, turn. (4 sts)
Row 12: Ch 1, sc in each st, turn. (4 sts)
Row 13 (shift row, starts at inner edge): Ch 1, 2 sc in first st, sc 1, sc2tog, turn. (4 sts)
Row 14: Ch 1, sc in each st. (4 sts) Fasten off at the inner edge.
The opening is now 4 sts (0.8 in / 2.0 cm) wide at its base and 2 sts wide at Rows 13–14.
Apex
Return the Leg A loop to your hook and turn.
Row 15: Ch 1. On Leg A: sc2tog, sc 1, 2 sc in last st. Continue straight into Leg B: 2 sc in first st, sc 1, sc2tog, turn. (4 + 4 = 8 sts) The two inner increases lean toward each other and close the point of the triangle.
Row 16: Ch 1, sc in each st across, turn. (8 sts)
Row 17: Ch 1, sc2tog, sc 4, sc2tog, turn. (6 sts)
Rows 18–20: Ch 1, sc in each st across, turn. (6 sts)
Don’t fasten off. Check: 3.6 in (9.1 cm) across the feet and 4.0 in (10.2 cm) tall.
Flowers, Leaves, and Buds
Leave an 8 in (20.3 cm) sewing tail on each piece.
Large Cream Flower (make 1)
Rnd 1 (yellow): MR, ch 1, 5 sc in ring, pull tight, sl st to first sc. (5 sts) Fasten off.
Rnd 2 (cream): Join in any st, ch 1, 2 sc in each st, sl st to first sc. (10 sts)
Rnd 3 (petals): *(sc, hdc, 2 dc) in next st, (2 dc, hdc, sc) in next st; repeat from * 4 more times, sl st to first sc. (5 petals of 8 sts = 40 sts)
The flower is about 1.3 in (3.3 cm) across.
Small Burgundy Flower (make 1)
Rnd 1: MR, ch 1, 10 sc in ring, pull tight, sl st to first sc. (10 sts)
Rnd 2 (petals): *(hdc, dc, hdc) in next st, sl st in next st; repeat from * 4 more times. (5 petals, 20 sts)
The flower is about 1 in (2.5 cm) across. Embroider a cluster of 5 small cream French knots in the center.
Leaf (make 3, sage green)
Ch 6. Sc in 2nd ch from hook, hdc in next ch, dc in next ch, hdc in next ch, (sc, ch 2, sc) in last ch for the tip. Working along the other side of the chain: hdc in next ch, dc in next ch, hdc in next ch, sc in last ch, sl st to first sc. (10 sts + ch-2 tip)
Each leaf is about 1 in (2.5 cm) long. The foundation chain forms the center vein.
Bud (make 2, rose pink)
Rnd 1: MR, 6 sc in ring, pull tight. (6 sts)
Rnd 2: Sc in each st. (6 sts)
Rnd 3: Sc2tog 3 times. (3 sts)
Tuck the starting tail inside and close the top. Each bud is a firm ball about 0.4 in (1.0 cm) across.
Border
Border gauge: The border keeps the body’s 5 sc per inch. Work 1 sc per stitch along top and bottom edges and 1 sc per row-end along the sides. Because stitch gauge and row gauge match (5 and 5), the edges lie flat.
Outer Border (Rnd 1)
Continue from Row 20. Ch 1, turn.
- Top: 3 sc in first st, sc in next 4 sts, 3 sc in last st. (10 sts, including both corner groups)
- First outer side: 1 sc in the end of each row from Row 19 down to Row 2. (18 sts)
- Foot bottom: 3 sc in first free loop of the foundation chain, sc in next 4 loops, 3 sc in last loop. (10 sts)
- Inner channel: 1 sc in the end of each of Rows 2–6. Sc2tog over the end of Row 7 and the first free loop of the crossbar chain. Sc in the next 4 loops. Sc2tog over the 6th loop and the end of Row 7 on the other leg. 1 sc in the end of each of Rows 6–2. (5 + 1 + 4 + 1 + 5 = 16 sts)
- Second foot bottom: 3 sc in first free loop, sc in next 4, 3 sc in last loop. (10 sts)
- Second outer side: 1 sc in the end of each of Rows 2–19. (18 sts)
Sl st to first sc. (10 + 18 + 10 + 16 + 10 + 18 = 82 sts) Fasten off.
Why the math works: Each 6-st edge (top and both feet) gets 1 sc in each of its 4 middle stitches plus 3 sc in each end stitch. That makes 10, and the extra stitches turn the convex corners. Each side has 20 rows. The ends of Rows 1 and 20 sit under the corner groups, so 18 remain. The two sc2tog under the crossbar stop those concave corners from ruffling. The border adds 1 stitch (0.2 in / 0.5 cm) to each edge. Width becomes 18 + 2 = 20 sts = 4.0 in (10.2 cm). Height becomes 20 + 2 = 22 rows = 4.4 in (11.2 cm).
Opening Border (Rnd 2)
Join pink in the first of the 4 skipped sts of Row 10. Sc in each of the 4 skipped sts. Sc in the end of each of Rows 11–14 up one side, then in the end of each of Rows 14–11 down the other side. Sl st to first sc. (4 + 4 + 4 = 12 sts) Fasten off.
The opening measures about 2.4 in (6.1 cm) around, which 12 sc at 5 per inch fits exactly.
Assembly
Weave in all ends on the letter. Lay out the bouquet on the left leg, with the front facing you, centered at about crossbar height:
- Sew one leaf pointing up-left and one pointing up-right just above the crossbar. Sew the third leaf pointing down-left near the outer edge.
- Sew the cream flower over the base of all three leaves, centered on the leg. It overlaps the outer edge by about 0.25 in (0.6 cm).
- Tuck the burgundy flower below and right of the cream flower. Slide its upper edge slightly under one cream petal and sew it in place.
- Sew the two buds above the upper leaves, one higher than the other.
Use small stitches through the backs of the appliqués so nothing shows from the front. To add the hardware, open the jump ring with pliers. Slip it through the top border between the 5th and 6th top sts and through the end link of the chain, then close it tightly. Thread the split key ring onto the other end of the chain.
Final Blocking
- Lightly mist the letter only, not the flowers.
- Pin it face up. Pin the two top corners, the four foot corners, and the two corners under the crossbar.
- Check the measurements: 4.0 in (10.2 cm) across the feet and 4.4 in (11.2 cm) tall.
- Straighten the outer sides into clean diagonals and open the triangle evenly.
- Let it dry completely before you unpin.
Final Quality-Control Checklist
- Outer border has 82 sts; opening border has 12
- Both feet flare evenly, 1 st on each side
- Crossbar is level; lower gap measures 1.2 in (3.0 cm)
- Triangle is centered and comes to a clean point
- Top is flat and 1.6 in (4.1 cm) across including border
- Appliqués are secure, with no stitching visible from the front
- Jump ring is fully closed
Troubleshooting
- Letter leans: A shift row was worked the wrong way. The sc2tog must always land at the outer edge.
- Border ruffles: Work Rnd 1 with a hook one size smaller.
- Border pulls in: Check that you didn’t skip any row-ends.
- Crossbar sags: The chains are too loose. Redo Row 8 with tighter chains.
- Petals curl: Steam the flower lightly and pat it flat.
- Triangle won’t close: Check that the Row 15 increases sit at the inner edges.
Care
Spot clean or hand wash cool and lay flat to dry. Remove the metal hardware first if you can, so it doesn’t tarnish.
Final Notes
The measurement chain is short. Your gauge of 5 sc and 5 rows per inch gives 18 sts x 20 rows, which makes a 3.6 x 4.0 in (9.1 x 10.2 cm) letter. One border round adds 0.2 in (0.5 cm) per edge, for a finished 4.0 x 4.4 in (10.2 x 11.2 cm) keychain. Check each checkpoint as you go, and your A will come out crisp and ready for its bouquet.
Happy crocheting!