

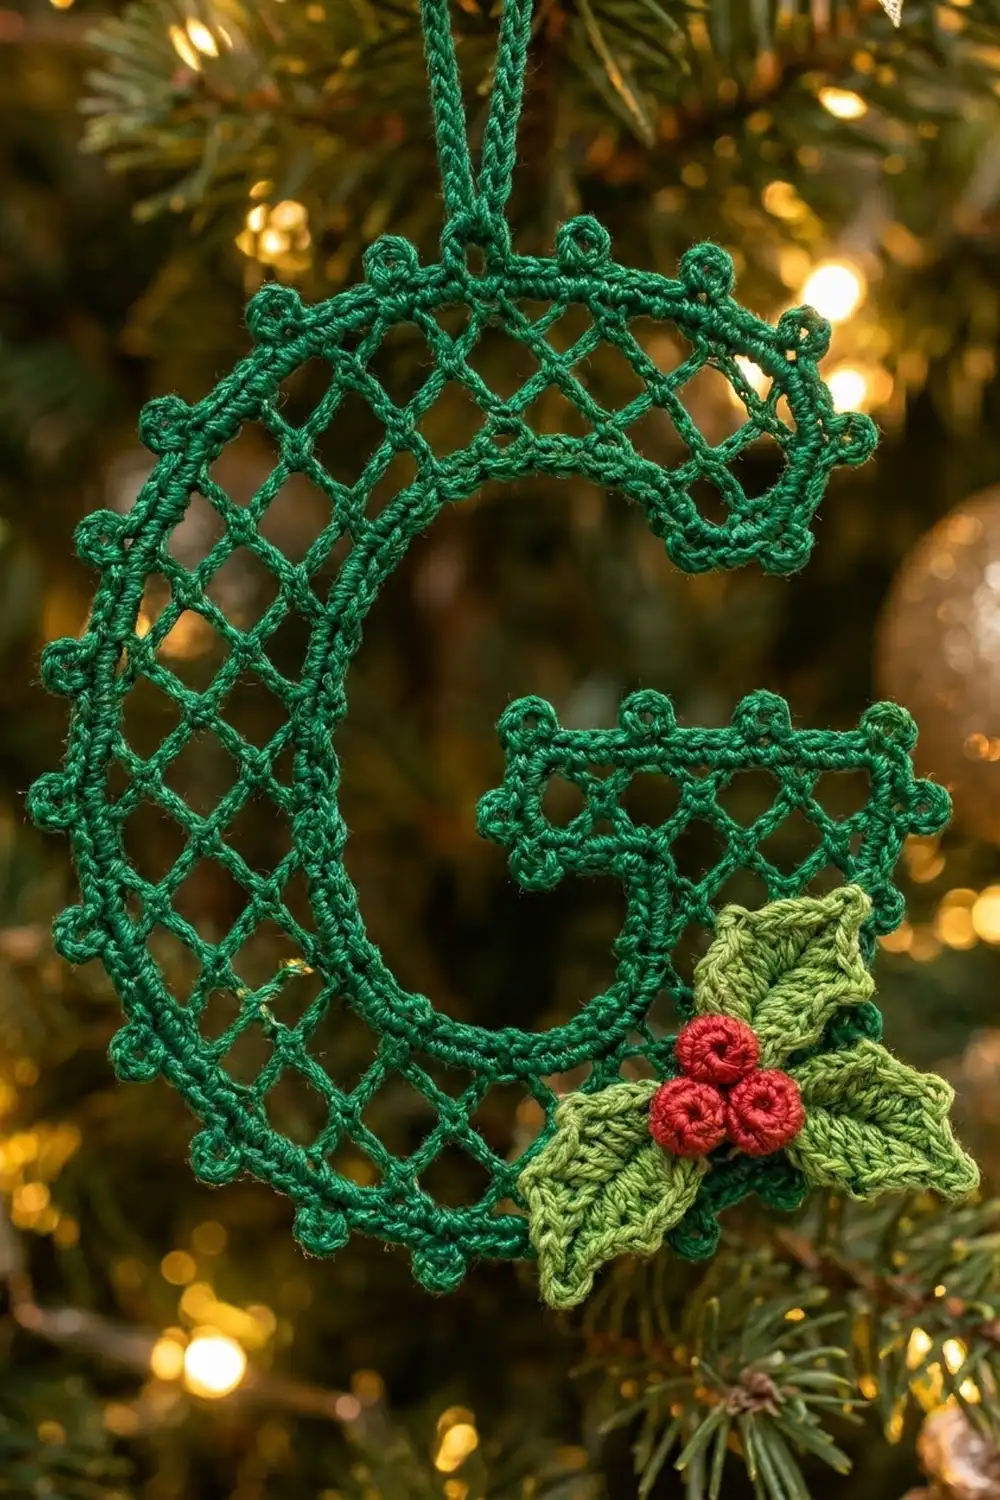
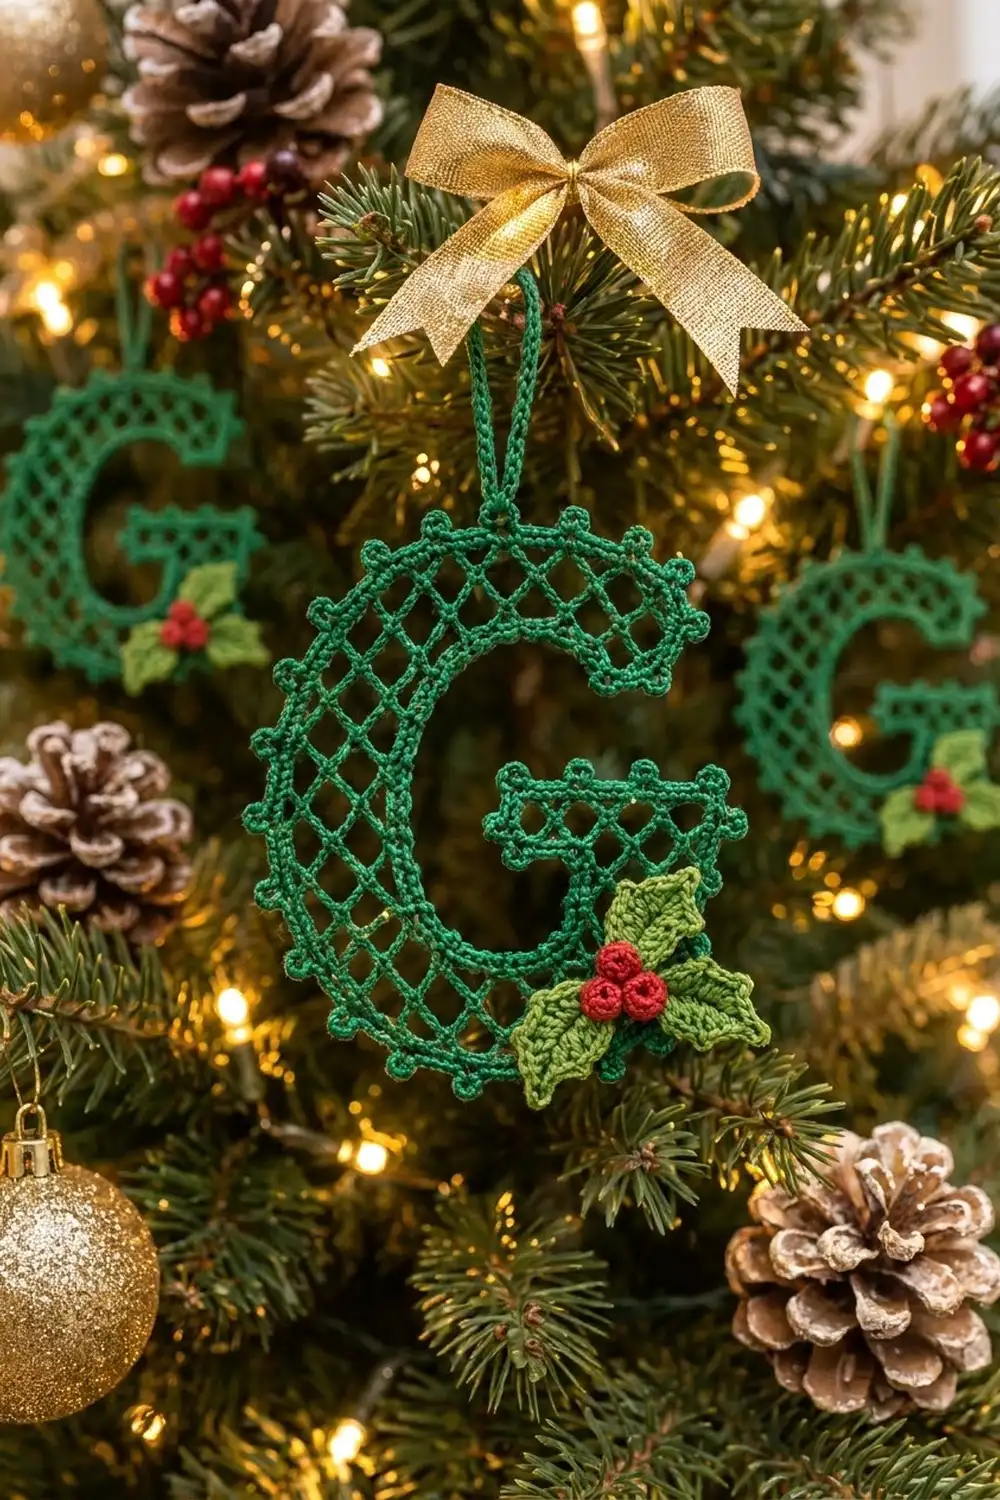
This lacy letter G ornament is worked in dark green cotton thread. The body is an open diamond lattice, and a neat picot edge runs around the whole outline. Three light green holly leaves and three bright red berries sit at the lower right, where the arc of the G meets its crossbar.
The finished ornament measures about 5 in (12.7 cm) tall and 4.3 in (10.9 cm) wide. The hanging loop adds about 1 in (2.5 cm), so it is about 6 in (15.2 cm) tall overall. It’s a quick, satisfying make for a monogram gift, a tree ornament, or a gift-tag topper.
This pattern uses US crochet terms throughout.
Construction is simple once you see it. You work the G as one mesh strip, row by row, starting at the upper tip. Short “wedge” rows on the outer edge curve the strip into an arc. The strip then continues straight up as the stem, and a chain extension adds the crossbar. A single border round adds the sc-and-picot edge. Finally, you add a hanging loop and sew on the leaves and berries.
Finished Size and Construction
- Finished size: 5 in (12.7 cm) tall × 4.3 in (10.9 cm) wide, without the loop
- Skill level: Intermediate
- Terminology: US
- Yarn weight: Size 10 cotton crochet thread (Lace, weight 0)
- Hook: 1.5 mm (US steel 8)
- Number of pieces: 1 lace body, plus 3 leaves and 3 berries as appliqué
- Layout: Single motif, no joining
- Band width: 3 mesh loops = 1.2 in (3.0 cm)
- Size before border: 4.7 in (11.9 cm) tall × 4 in (10.2 cm) wide
- Border depth: about 0.15 in (0.4 cm), including picots
Materials
Use a mercerized size 10 cotton thread. It gives crisp picots and blocks well. Avoid fuzzy or very soft threads, because they blur the lattice.
- Color A – dark green: 8 g / 42 m (lace body, border, loop)
- Color B – light green: 2 g / 10 m (holly leaves)
- Color C – red: 1 g / 5 m (berries)
These quantities include a generous margin. The ornament uses roughly 70% of each amount.
Tools:
– 1.5 mm (US steel 8) crochet hook
– Fine tapestry needle
– Sharp scissors
– Rustproof pins and a foam blocking mat
– Spray starch or a diluted fabric stiffener
– Stitch marker
Abbreviations (US Terms)
- ch – chain
- sl st – slip stitch
- sc – single crochet
- hdc – half double crochet
- dc – double crochet
- sc2tog – single crochet 2 together
- sp – space
- tch – turning chain
- st(s) – stitch(es)
Special stitch:
– Picot: ch 3, sl st in 3rd ch from hook.
Mesh terms:
– Loop: a ch-5 arch.
– Half space: the ch-2 at the edge of an even row.
– Sc-end / dc-end: the edge of a row that begins or ends with that stitch. You’ll work into these in the border.
Gauge and Checkpoints
Gauge: Each loop is 0.4 in (1.0 cm) wide, and 2 rows are 0.4 in (1.0 cm) tall. That makes 1 diamond 0.4 in (1.0 cm) square.
Swatch: Ch 22. Work Row 1 as written below, but across 5 loops, then work 9 more rows following the even/odd pattern. The swatch should measure 2 in (5.1 cm) square after a light press.
Because this is a single motif, your swatch is your test piece. Check it carefully before you start.
- Too big: go down to a 1.4 mm or 1.25 mm hook.
- Too small: go up to a 1.65 mm or 1.75 mm hook.
Row height matters most. It controls how far the arc travels.
Lace Body (Color A)
Odd rows always run from the inner edge to the outer edge. Even rows run from the outer edge back to the inner edge. Place a marker on the outer edge and keep it there.
Starting Tip
Foundation: Ch 14.
Row 1 (odd): Sc in 2nd ch from hook, [ch 5, skip 3 ch, sc in next ch] 3 times. Turn.
(4 sc, 3 loops)
Checkpoint: The strip is 1.2 in (3.0 cm) wide.
Arc Repeat
Work these 4 rows as one repeat.
Row W1 (wedge, outer half only): Ch 5 (counts as dc + ch-2), sc in first loop, ch 5, sc in next loop. Turn, leaving the last (inner) loop unworked.
(2 sc, 1 loop, 1 half space)
Row W2 (wedge): Ch 5, sc in next loop, ch 5, sc in 3rd ch of tch. Turn.
(2 sc, 2 loops)
Even Row: Ch 5 (counts as dc + ch-2), sc in first loop, ch 5, sc in next loop, ch 5, sc in the unworked inner loop from before the wedge, ch 2, dc in edge sc. Turn.
(3 sc, 2 loops, 2 half spaces)
Odd Row: Ch 1, sc in dc, [ch 5, sc in next loop] 2 times, ch 5, sc in 3rd ch of tch. Turn.
(4 sc, 3 loops)
Work the 4-row repeat 14 times in total.
Each repeat adds 4 rows (0.8 in / 2.0 cm) along the outer edge. It adds only 2 rows (0.4 in / 1.0 cm) along the inner edge, and that difference is what curves the strip.
Checkpoint after 4 repeats:
– Inner edge: 9 rows, 1.8 in (4.6 cm)
– Outer edge: 17 rows, 3.4 in (8.6 cm)
Checkpoint after 14 repeats:
– Inner edge: 29 rows, 5.8 in (14.7 cm)
– Outer edge: 57 rows, 11.4 in (29.0 cm)
The strip now curls into roughly three-quarters of a circle.
Stem
Work 3 straight rows: Even Row, Odd Row, Even Row. Do not add any wedges. You finish at the inner edge, on a dc.
(Last row: 3 sc, 2 loops, 2 half spaces)
Crossbar
Extension: Do not turn. Ch 9.
Bar Row:
1. Sc in 2nd ch from hook, ch 5, skip 3 ch, sc in next ch, ch 5, skip 3 ch, sc in the dc.
2. [Ch 5, sc in next loop] 2 times, ch 5, sc in 3rd ch of tch. Turn.
(6 sc, 5 loops)
Bar Even Row: Ch 5, sc in first loop, [ch 5, sc in next loop] 4 times, ch 2, dc in last sc. Turn.
(5 sc, 4 loops, 2 half spaces)
Bar Odd Row: Ch 1, sc in dc, [ch 5, sc in next loop] 4 times, ch 5, sc in 3rd ch of tch.
(6 sc, 5 loops)
Fasten off.
Checkpoint:
– The block (stem plus bar) is 1.2 in (3.0 cm) tall and 2 in (5.1 cm) wide.
– The bar sticks out 0.8 in (2.0 cm) past the stem.
– The outer edge totals 63 rows.
Border (Color A)
Border gauge: 3 sc per 0.4 in (1.0 cm). That matches one loop width, or one sc-end plus one dc-end.
Edge rules:
– 3 sc in each loop or skipped-chain space
– 1 sc in each sc-end
– 2 sc in each dc-end
– A corner picot at each outside corner
– No picot and no extra stitches at the inside corner under the crossbar
Round 1: Join A in the first skipped ch-3 space of the foundation, at the inner corner of the tip. Work the edges in this order:
- Tip end (foundation): [3 sc in ch-3 sp, picot] 3 times. (9 sc; the last picot is the corner)
- Outer edge (63 row-ends, from the tip to the top of the bar): Sc in the Row 1 sc-end, then [2 sc in next dc-end, sc in next sc-end, picot] 31 times. (94 sc; the last picot is the corner)
- Top of bar: [3 sc in next loop, picot] 5 times. (15 sc; the last picot is the corner)
- Left end of bar: Sc in sc-end, 2 sc in dc-end, sc in sc-end, picot. (4 sc; the picot is the corner)
- Underside of bar (ch-9): 3 sc in first skipped ch-3 sp, picot, 3 sc in next skipped ch-3 sp. (6 sc)
- Inner edge (32 row-ends, from the inside corner back to the tip): [2 sc in next dc-end, sc in next sc-end, picot] 16 times. (48 sc; the last picot is the tip’s inner corner)
Sl st in first sc. Fasten off.
Round total: 9 + 94 + 15 + 4 + 6 + 48 = 176 sc and 3 + 31 + 5 + 1 + 1 + 16 = 57 picots.
Why the math works: The outer edge alternates sc-ends and dc-ends, starting and ending with an sc-end (32 sc-ends, 31 dc-ends). That gives 1 + 31 × 3 = 94 sc. The inner edge has 16 dc-ends and 16 sc-ends, which gives 16 × 3 = 48 sc. Every 3 sc covers 0.4 in (1.0 cm), so the border lies flat on both curves.
Checkpoint: 5 in (12.7 cm) tall × 4.3 in (10.9 cm) wide.
Hanging Loop (Color A)
- Find the picot at the highest point of the outer curve. It’s about 1.75 in (4.4 cm) along the edge from the tip.
- Join A in the sc just before it, ch 25, and sl st in the same sc.
- Turn and work 30 sc over the ch-25 loop. Sl st in the first sc. Fasten off.
The loop stands about 1 in (2.5 cm) tall.
Holly Leaves (Make 3, Color B)
Foundation: Ch 11.
Side 1: Sl st in 2nd ch from hook, sc in next ch, hdc in next ch, picot, dc in each of next 2 ch, picot, dc in next ch, hdc in next ch, picot, sc in each of next 2 ch.
Tip: (Sc, picot, sc) in last ch.
Side 2: Work along the other side of the foundation chain. Sc in each of next 2 ch, picot, hdc in next ch, dc in next ch, picot, dc in each of next 2 ch, picot, hdc in next ch, sc in next ch, sl st in last ch.
Fasten off, leaving a 6 in (15.2 cm) tail.
(20 sts and 7 picots per leaf; each leaf is about 1.1 in / 2.8 cm long and 0.5 in / 1.3 cm wide)
Berries (Make 3, Color C)
- Rnd 1: 6 sc in a magic ring. (6)
- Rnd 2: 2 sc in each st. (12)
- Rnd 3: Sc in each st. (12)
- Rnd 4: Sc2tog 6 times. (6)
Tuck the starting tail inside as stuffing. Close the opening and leave a tail for sewing.
Each berry is about 0.3 in (0.8 cm) across.
Assembly
- Arrange the leaves at the lower right of the G, where the arc meets the stem:
- one pointing up along the stem
- one pointing down and to the left along the bottom curve
- one pointing outward to the right
- Overlap the leaf bases slightly and sew them down, catching only the mesh bars so the stitches stay hidden.
- Sew the three berries in a tight cluster over the leaf bases.
Final Blocking
- Lightly mist the ornament, or dip it in diluted stiffener and blot it in a towel.
- Pin it face up on foam. Shape the arc into a smooth three-quarter circle 5 in (12.7 cm) tall.
- Pin the stem straight up and the crossbar level.
- Pin the 4.3 in (10.9 cm) width.
- Pin out every picot and open each diamond evenly.
- Spray starch over the surface. Let it dry completely, at least 12 hours.
- Unpin and lift the leaf points slightly for dimension.
Final Quality-Control Checklist
- The tip is 1.2 in (3.0 cm) wide and square.
- The arc has 14 wedge repeats, 63 outer rows, and 29 inner arc rows.
- The bar row has 6 sc and 5 loops. The bar is 0.8 in (2.0 cm) long.
- The border has 176 sc and 57 picots.
- The ornament measures 5 in (12.7 cm) × 4.3 in (10.9 cm).
- The loop sits at the top centre and stands 1 in (2.5 cm) tall.
- There are 3 leaves and 3 berries, firmly sewn on.
- All ends are woven into solid stitches.
Troubleshooting
- Arc too open (looks like a C with a big gap): You probably skipped a wedge repeat. Count the outer edge: it should have 63 row-ends.
- Arc overlaps itself: Your rows are too tall. Go down a hook size, or work only 13 repeats and check against the 5.8 in (14.7 cm) inner-edge checkpoint.
- Border ruffles on the outer edge: You’re working 2 sc into sc-ends. Recheck the edge rules.
- Inner edge cups: Your tension is tight there. Loosen up and keep exactly 3 sc per row pair.
- Diamonds are uneven: Keep every ch-5 the same length and block firmly.
- Leaves curl: Steam-block them flat before sewing.
Care
Hand wash in cool water, press out the moisture, and re-block. Store flat, or hang it away from direct sunlight.
Final Notes
The measurement chain runs like this:
- 0.4 in (1.0 cm) diamonds
- 1.2 in (3.0 cm) band
- an arc with 5.8 in (14.7 cm) inner and 11.4 in (29.0 cm) outer edges
- a 1.2 in (3.0 cm) stem-and-bar block
- a 4.7 in × 4 in (11.9 cm × 10.2 cm) body
- a 5 in × 4.3 in (12.7 cm × 10.9 cm) finished ornament
If you check each link, the G will come out right.
Happy crocheting!