

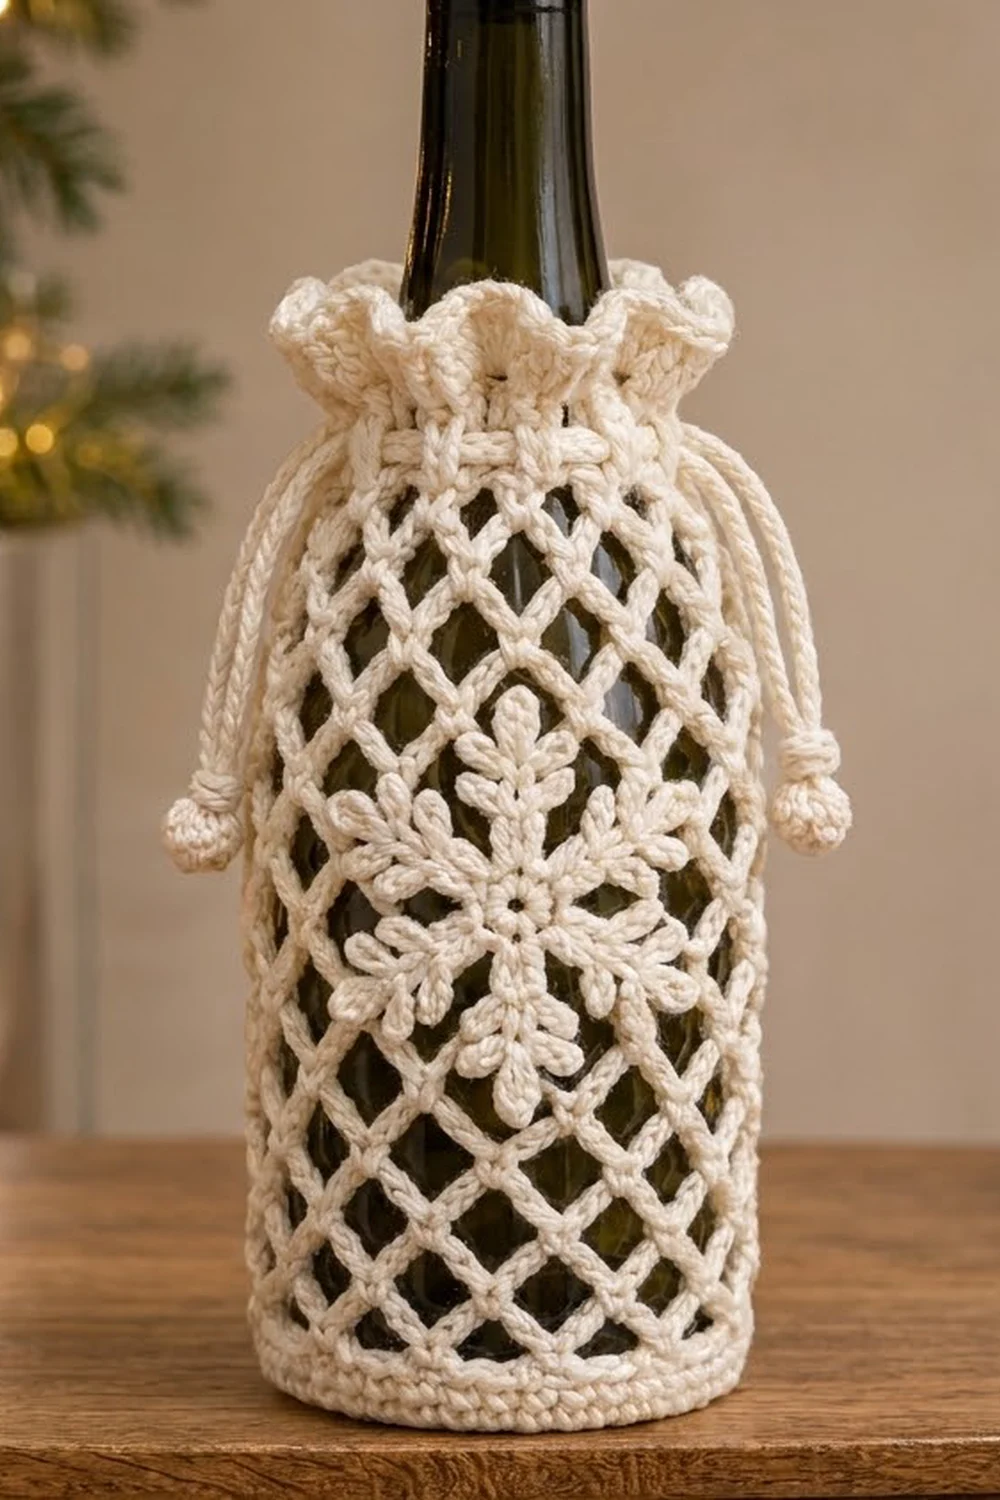
The Frosted Lattice Wine Bottle Cover is a holiday gift wrap you can use again and again. An open diamond lattice lets the glass show through, a six-armed snowflake appliqué sits on the front, and a ruffled top gathers neatly around the bottle neck.
The whole design is worked in one cream or ivory yarn. Because there is only one color, the stitch texture does the decorating: a ridged solid base, crisp mesh diamonds, a ridged collar and soft shell ruffles. It looks right next to gold ornaments, kraft paper or plain white gift boxes.
The pattern uses US crochet terms. The finished cover measures 3.25 in (8.3 cm) across the base, 10 in (25.4 cm) around and about 9 in (22.9 cm) tall from the base to the ruffle tips. It fits a standard 750 ml wine or champagne bottle.
Construction is simple. You work the base flat in the round, turn the sides up with a back-loop round, build the lattice in chain loops, then add a solid collar with eyelets and finish with the ruffle. You make the snowflake, two cords and two small balls separately, then sew the snowflake on and thread the cords through.
Finished Size and Construction
- Finished size: 3.25 in (8.3 cm) base diameter; 10 in (25.4 cm) circumference; 9 in (22.9 cm) tall
- Skill level: Intermediate
- Terminology: US
- Yarn weight: Worsted (#4), cotton
- Hook: 4.0 mm (G-6)
- Number of pieces: 1 body, 1 snowflake appliqué, 2 drawstring cords, 2 cord-end balls
- Layout: Single tubular body with the appliqué centered on the front
- Snowflake size: 3.5 in (8.9 cm) point to point
- Body height before border: 8 in (20.3 cm)
- Border (ruffle) depth: 1 in (2.5 cm)
Materials
Yarn: Use a smooth, mercerized or combed worsted-weight cotton. Cotton holds the diamonds open and the ruffle crisp. Acrylic will work, but the mesh will be softer and stretchier.
- Cream/Ivory: 100 g (approx. 190 m). That covers the body at about 60 g (115 m), the snowflake at about 6 g (12 m), and the cords and balls at about 12 g (23 m).
Quantities include a margin of roughly 20% for your gauge swatch and any small differences in tension.
Tools:
– 4.0 mm (G-6) crochet hook
– Tapestry needle
– 1 locking stitch marker
– Rust-proof blocking pins and a foam mat
– Large safety pin, for threading the cords
– A 750 ml bottle, for test fitting
– A small amount of scrap cream yarn, for stuffing the balls
Abbreviations (US Terms)
- ch: chain
- sl st: slip stitch
- sc: single crochet
- hdc: half double crochet
- dc: double crochet
- BLO: back loop only
- sc2tog: single crochet 2 together
- sk: skip
- sp: space
- st(s): stitch(es)
Special stitch – Leaf: Ch 3, then work (dc, ch 2, sl st) all in the 3rd ch from the hook. This makes one small pointed petal.
Gauge and Checkpoints
Gauge: 16 sc and 18 rounds = 4 in (10.2 cm).
Treat the base as your test piece. Work Rounds 1–5 and measure before you go any further.
- After Round 5: the base measures 3.25 in (8.3 cm) across and lies flat.
- After Round 9: the solid band stands 0.9 in (2.3 cm) tall.
- Mesh: each ch-5 loop spans about 1 in (2.5 cm) wide, and each mesh round adds about 0.5 in (1.3 cm) of height.
- After Round 21: the body is about 7 in (17.8 cm) tall.
- After Round 24: the body is about 8 in (20.3 cm) tall.
If the base is too big (over 3.5 in / 8.9 cm), change to a 3.75 mm hook. If it is too small (under 3 in / 7.6 cm), change to a 4.5 mm hook. If the base cups, your tension is too tight. If it ruffles, your tension is too loose.
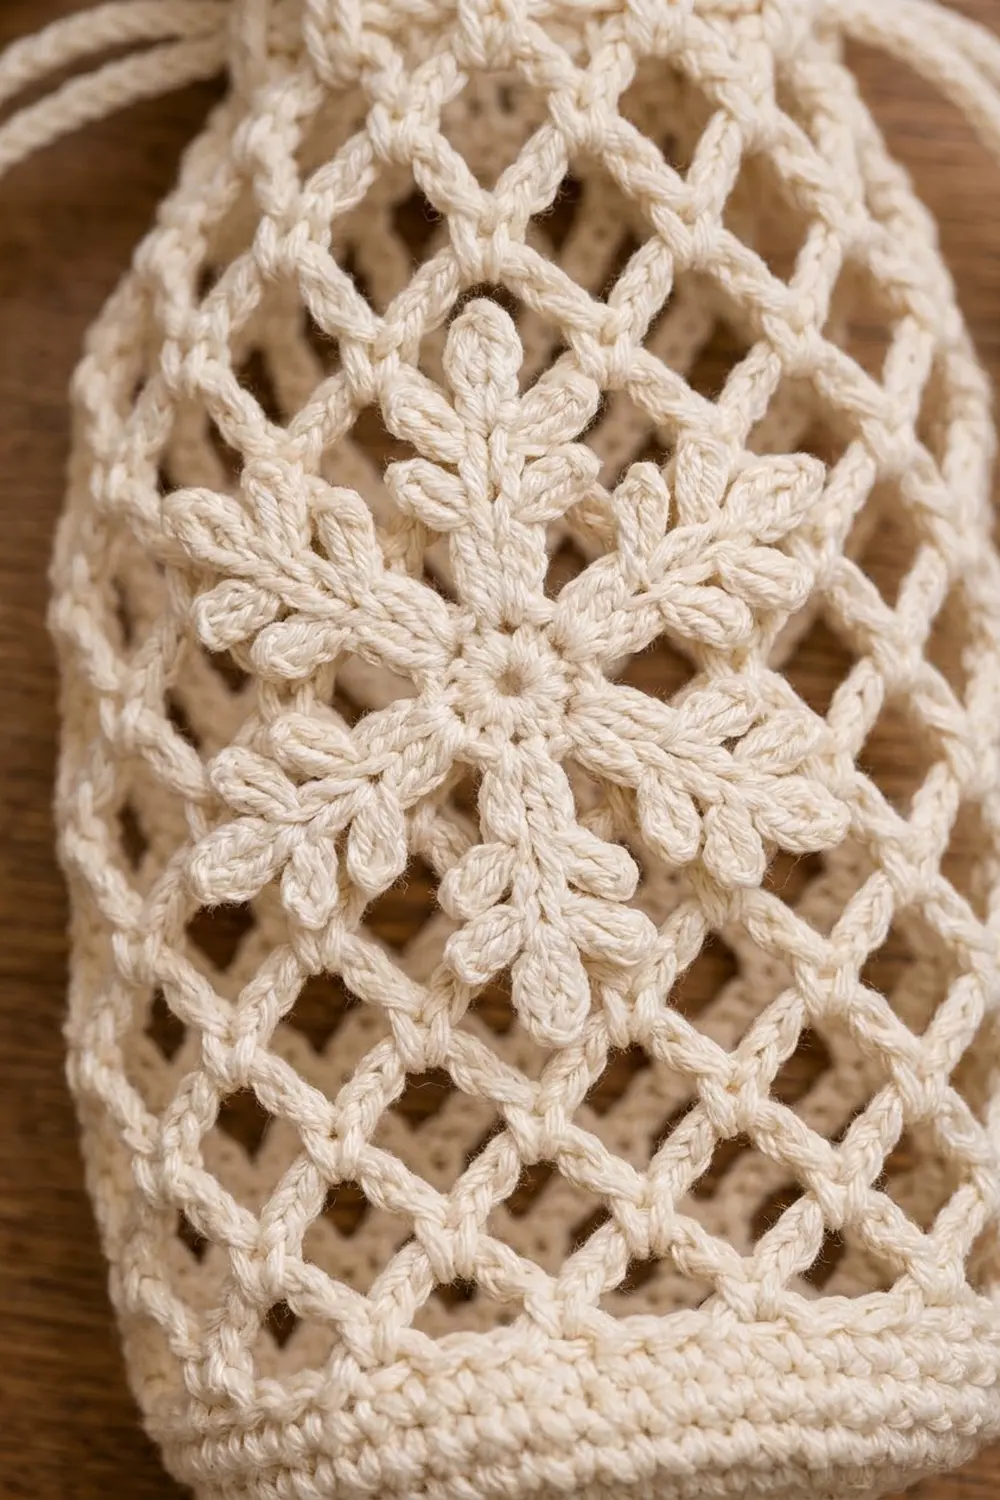
Pattern: Body
The body is worked in joined rounds. Do not turn. The beginning ch does not count as a stitch unless the pattern says it does.
Base
Round 1: Make a magic ring, ch 2, then work 8 hdc in the ring. Sl st to the first hdc. (8 sts)
Round 2: Ch 2, work 2 hdc in each st around, sl st to the first hdc. (16 sts)
Round 3: Ch 2, hdc in next st, 2 hdc in next st; repeat from * around, then sl st to the first hdc. (24 sts)
Round 4: Ch 2, hdc in next 2 sts, 2 hdc in next st; repeat from * around, then sl st to the first hdc. (32 sts)
Round 5: Ch 2, hdc in next 3 sts, 2 hdc in next st; repeat from * around, then sl st to the first hdc. (40 sts)
Checkpoint: the base is 3.25 in (8.3 cm) across.
Solid Band
Round 6: Ch 1, sc in the BLO of each st around, sl st to the first sc. (40 sts) This round turns the sides upward and leaves a ridge at the base edge.
Rounds 7–9: Ch 1, sc in each st around, sl st to the first sc. (40 sts)
Checkpoint: the band is 0.9 in (2.3 cm) tall.
Diamond Lattice
Round 10 (mesh setup): Ch 1, sc in the first st, ch 5, sk 3 sts, sc in next st. Repeat from * 8 more times. To finish, ch 5, sk the last 3 sts, and sl st to the first sc. (10 sc, 10 ch-5 loops)
Each repeat uses 4 sts, and 40 ÷ 4 = 10 loops.
Round 11: Sl st in the first 3 ch of the first loop, which places you at the loop’s center. Ch 1, sc in the same loop, ch 5, sc in next ch-5 loop. Repeat from * 8 more times. To finish, ch 2 and dc in the first sc. The ch-2 + dc counts as the 10th loop and leaves your hook at its center. (10 loops)
Rounds 12–20: Ch 1, sc around the post of the closing dc, ch 5, sc in next ch-5 loop. Repeat from * 8 more times. Finish with ch 2 and dc in the first sc. (10 loops)
Round 21: Ch 1, sc around the post of the closing dc, ch 5, sc in next ch-5 loop. Repeat from * 8 more times. Finish with ch 5 and sl st in the first sc. This gives a true chain loop to work into on the next round. (10 sc, 10 ch-5 loops)
Each round staggers its sc into the center of the loops below, and that offset is what forms the diamonds. You now have 12 mesh rounds (Rounds 10–21).
Checkpoint: the body is about 7 in (17.8 cm) tall, measured lightly stretched on the bottle.
Collar
Round 22 (conversion): Ch 1, sc in the sc, 3 sc in next ch-5 loop; repeat from * around, then sl st to the first sc. (10 sc worked 1-per-existing-sc + 30 sc worked in loops = 40 sts)
Round 23 (eyelets): Ch 4 (counts as dc + ch 1), sk next st, dc in next st, ch 1, sk next st. Repeat from * 18 more times, then sl st to the 3rd ch of the beginning ch-4. (20 dc + 20 ch-1 sps = 40 sts)
Round 24: Ch 1, sc in each dc and each ch-1 sp around, sl st to the first sc. (20 + 20 = 40 sts)
Checkpoint: the body is 8 in (20.3 cm) tall and still 10 in (25.4 cm) around.
Leave the yarn attached and go on to the border.
Pattern: Snowflake Appliqué
Round 1: Make a magic ring, ch 1, work 12 sc in the ring, and sl st to the first sc. (12 sts)
Round 2 (arms): Sl st in the first sc. Then work the following arm 6 times:
- Ch 7 for the stem.
- Work a Leaf. This is the tip petal.
- Working back down the stem, sk the last stem ch (the tip Leaf sits on it). Sl st in the next 2 ch.
- Work a Leaf, Leaf. This is the first side pair.
- Sl st in the next 2 ch.
- Work a Leaf, Leaf. This is the second side pair.
- Sl st in the last 2 ch.
- Sl st in the next 2 sc of the center.
(6 arms; 5 Leaves per arm = 30 Leaves)
Each stem uses 1 skipped ch + 6 sl sts = 7 ch. The 6 arms use 2 center sc each, which is all 12 sts. Fasten off and leave a 12 in (30.5 cm) tail for sewing.
Pattern: Cords and Balls
Cord (make 2): Ch 75. Sl st in the back bump of the 2nd ch from the hook and of each ch across. (74 sl sts) Each cord is about 15 in (38.1 cm) long. Fasten off.
Ball (make 2):
– Round 1: Make a magic ring and work 6 sc in it. (6)
– Round 2: Work 2 sc in each st. (12)
– Round 3: Sc in each st. (12)
– Round 4: Work sc2tog 6 times. (6)
Stuff the ball firmly with scrap yarn. Leave a tail, run it through the front loops of the last round, and pull to close. Each ball is about 0.75 in (1.9 cm) across.
Border: Ruffle
Border gauge: the 2 border rounds together measure 1 in (2.5 cm) deep.
Border Round 1 (Round 25): Ch 3 (counts as dc), dc in the same st, then work 2 dc in each remaining st around. Sl st to the top of the ch-3. (40 sts worked 1-per-existing-st + 40 extra = 80 dc) That is 40 dc for each half of the bag.
Border Round 2 (Round 26): Ch 1, sc in the first st, sk 1 st, 5 dc in next st, sk 1 st, sc in next st. Repeat from * around. On the last repeat, replace the final sc with a sl st into the first sc. (20 shells + 20 sc = 100 dc + 20 sc = 120 sts) That is 10 shells for each half.
Why the math works: Each shell repeat uses 4 sts. Because 80 ÷ 4 = 20 exactly, the shells close without a partial repeat. Doubling the stitch count in Round 25 makes the edge ruffle instead of lying flat. Twenty is an even number of shells, so the front and back halves match when the drawstring gathers the top.
Fasten off and weave in the ends.
Assembly
- Snowflake: Center the snowflake on the front of the body over Rounds 13–19, opposite the round joins. Use the tail to whipstitch the center ring to the mesh. Then tack each arm tip and each pair of leaves onto the nearest lattice strand.
- Cords: Use the safety pin to thread Cord 1 in and out of the Round 23 eyelets all the way around, starting and ending at the left side. Thread Cord 2 the same way, starting and ending directly opposite, at the right side.
- Balls: Knot the two ends of each cord together. Slide a ball over each knot and sew it in place.
Final Blocking
- Wet the cover in cool water and gently press out the excess. Do not wring it.
- Roll it in a towel to remove the remaining water.
- Slide it over a clean, dry 750 ml bottle so the diamonds open evenly.
- Pin the snowflake arms straight on the mat before you sew, or pat them into shape on the bottle.
- Pinch each ruffle shell into a soft wave.
- Let it dry completely, upright, for at least 24 hours.
- Check the measurements: 3.25 in (8.3 cm) base, 10 in (25.4 cm) around, 9 in (22.9 cm) tall.
Final Quality-Control Checklist
- The base lies flat with 40 sts and has a clear ridge at Round 6.
- All 12 mesh rounds have exactly 10 loops.
- The diamonds line up vertically, with no twisting spiral.
- Round 22 and Round 24 each have 40 sts; Round 23 has 20 eyelets.
- The ruffle has 20 even shells.
- The snowflake has 6 arms with 5 Leaves each, and it is centered and flat.
- Both cords glide freely through the eyelets, and the balls are secure.
- All ends are woven in and invisible from the outside.
Troubleshooting
- The base cups: loosen your hdc, or go up 0.5 mm for the base only.
- The base waves: tighten your tension, or go down 0.5 mm.
- The mesh spirals: you missed a loop or skipped the closing dc. Count 10 loops on every round.
- The mesh is too tight on the bottle: change the loops to ch 6 for every mesh round. Keep the stitch counts the same.
- The ruffle flips outward: block it over the bottle neck and gently steam it.
- The snowflake curls: wet-block it pinned flat before sewing.
- The cord won’t gather: add 5 ch to each cord for extra length.
Care
Hand wash in cool water with a mild soap and dry flat or on a bottle. Do not tumble dry, because the ruffle and snowflake may lose their shape.
Final Notes
Each measurement depends on the one before it. Gauge of 16 sc = 4 in (10.2 cm) gives a 40-stitch base that is 3.25 in (8.3 cm) across and 10 in (25.4 cm) around. Those 40 stitches divide into 10 lattice loops, which convert back to 40 collar stitches and then double to 80 for exactly 20 ruffle shells. Check each stage as you go and the cover will finish at 9 in (22.9 cm) tall and fit a 750 ml bottle.
Happy crocheting!