

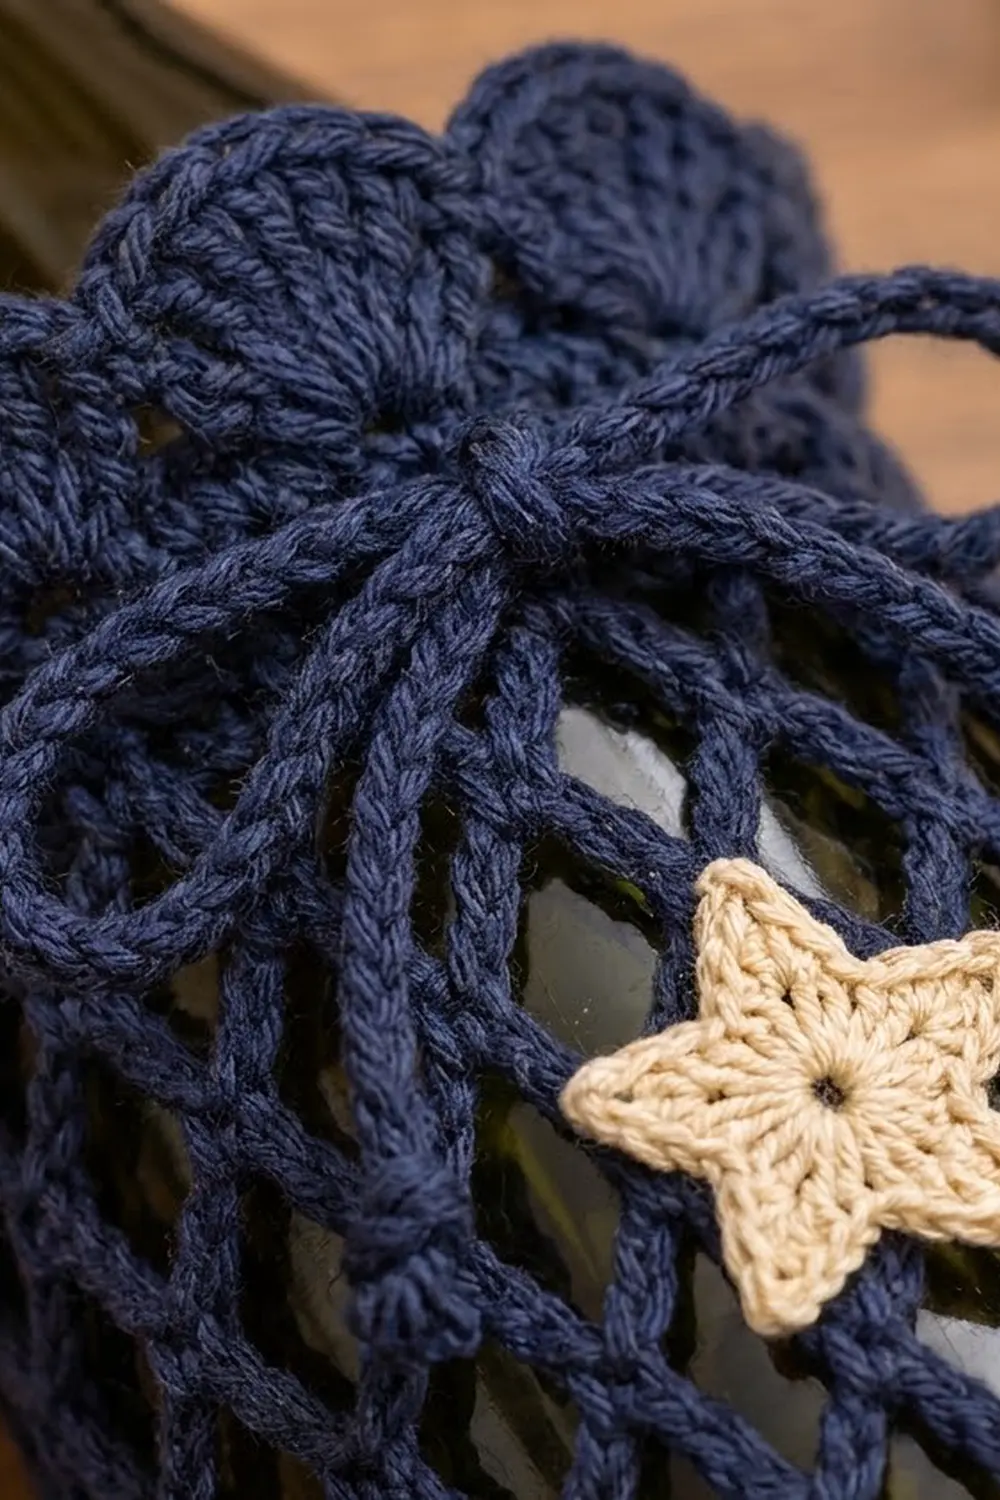
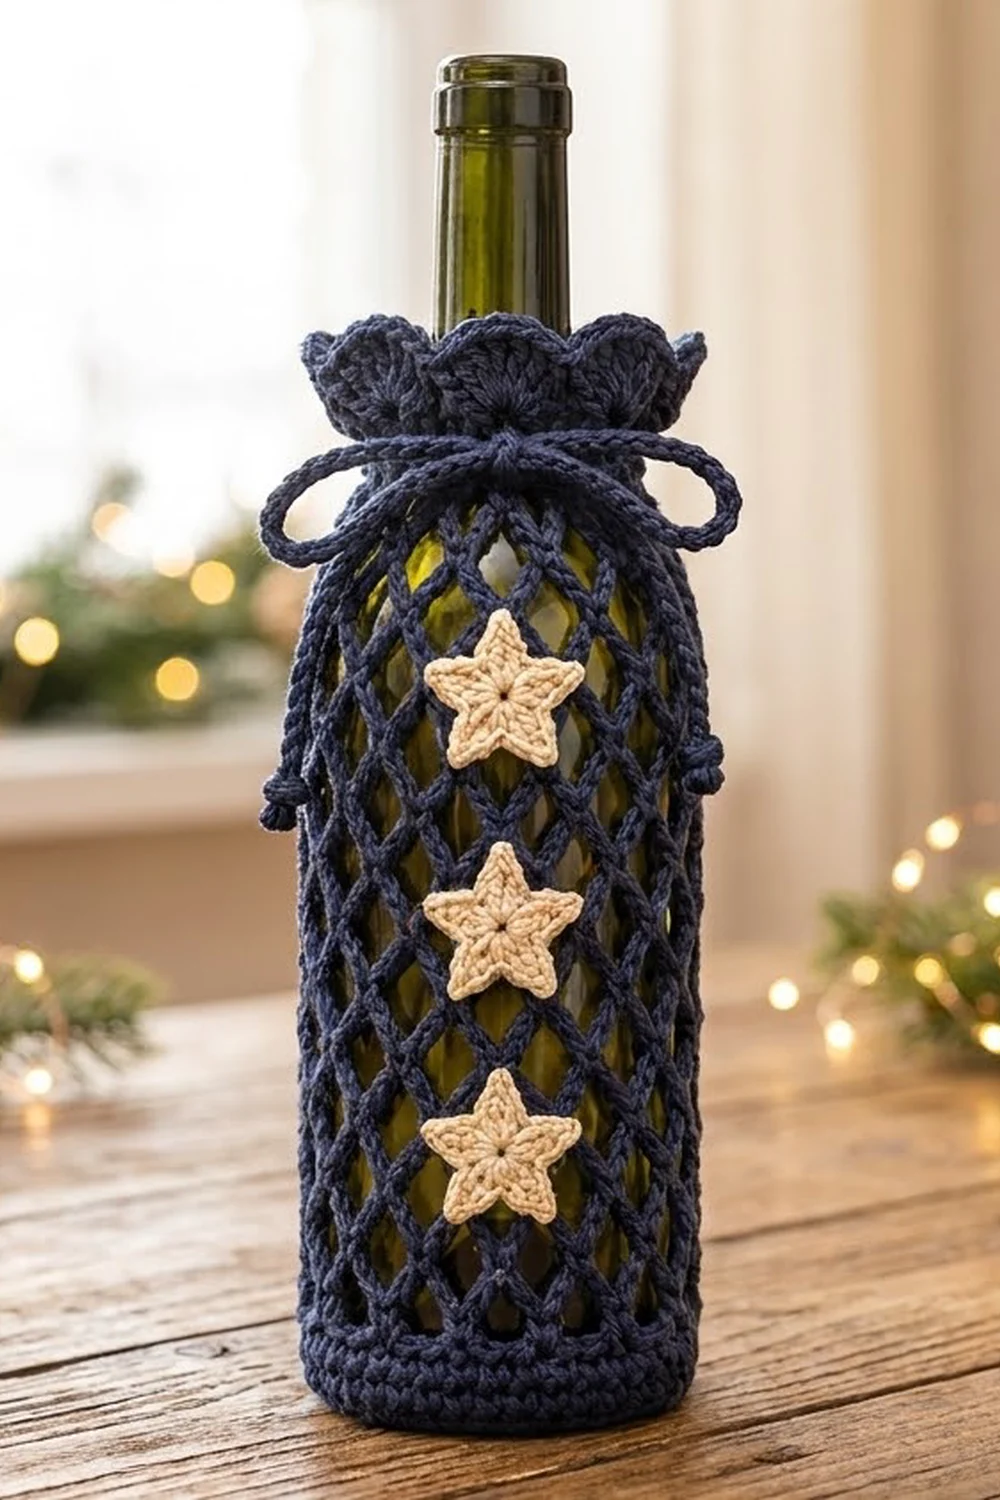
The Starlit Lattice Wine Bottle Cover is a quick holiday make that dresses up a standard 750 ml bottle. A solid navy base holds the bottle securely, an open diamond mesh lets the glass shine through, and a row of rounded shells frames the neck like a little collar.
The colors are simple: deep navy for the cover and drawstring, and soft cream for three small five-point stars sewn in a vertical line down the front. The look is elegant but cozy, and it suits hostess gifts, winter dinners and holiday tables.
This pattern uses US crochet terms. The finished cover is about 9.75 in (24.8 cm) tall and 10.7 in (27.2 cm) around, or 5.3 in (13.5 cm) wide laid flat. The base is 3.4 in (8.6 cm) across.
The cover is one continuous piece worked in joined rounds from the bottom up. You make a flat single crochet circle, a short solid wall, twelve rounds of chain mesh, a solid top band with an eyelet round, and a shell edging. The stars are made separately and sewn on, and a slip-stitch cord is woven through the eyelets.
Finished Size and Construction
- Finished size: 9.75 in (24.8 cm) tall x 10.7 in (27.2 cm) around
- Skill level: Easy to intermediate
- Terminology: US crochet terms
- Yarn weight: Worsted weight (#4) cotton
- Hook: 4.0 mm (G-6)
- Number of pieces: 1 cover body, plus 3 star appliqués and 1 drawstring cord
- Layout: Seamless tube with a closed base; stars stacked vertically on the front
- Piece size: Base 3.4 in (8.6 cm) across; flat width 5.3 in (13.5 cm)
- Size before border: 9 in (22.9 cm) tall
- Border depth: 0.75 in (1.9 cm) shell edging
Materials
Choose a smooth, firm worsted weight cotton or cotton blend. Cotton holds the mesh shape well and doesn’t stretch out under the weight of the bottle. Avoid fuzzy yarns, which hide the lattice.
- Navy (Color A): 60 g, about 115 m (126 yd), for the cover and drawstring
- Cream (Color B): 5 g, about 10 m (11 yd), for the three stars
Tools:
- 4.0 mm (G-6) crochet hook
- Tapestry needle
- 1 stitch marker
- Scissors
- Measuring tape
- A 750 ml wine bottle for fitting
- Rust-proof pins for blocking
The quantities include a margin of about 20 percent, so you have enough for a gauge check and some ripping back.
Abbreviations (US Terms)
- ch – chain
- sl st – slip stitch
- sc – single crochet
- hdc – half double crochet
- dc – double crochet
- BLO – back loop only
- sk – skip
- sp – space
- st(s) – stitch(es)
- rep – repeat
Special stitch – Shell: 7 dc worked into the same stitch.
Join every round with a sl st and don’t turn. The ch 1 at the start of a round doesn’t count as a stitch. A beginning ch 3 or ch 4 does count, as stated in that round.
Gauge and Checkpoints
Gauge: 18 sc and 20 rounds = 4 in (10.2 cm) in sc.
Check your size on the first section before going further. The base circle works as your swatch: after Round 8 it should measure 3.4 in (8.6 cm) across.
Fit note: Standard 750 ml bottles are about 3 in (7.6 cm) across. The 3.4 in (8.6 cm) base gives a little extra room so the bottle slides in easily, and the drawstring takes up any slack at the neck.
Measure these checkpoints with the cover on the bottle and the mesh relaxed, not pulled:
- After Round 8: base is 3.4 in (8.6 cm) across.
- After Round 13: solid wall is 1 in (2.5 cm) tall.
- After Round 25: total height is 8.2 in (20.8 cm). Each mesh round adds about 0.6 in (1.5 cm), and each loop is about 0.9 in (2.3 cm) wide.
- After Round 28: total height is 9 in (22.9 cm).
- After Round 29: total height is 9.75 in (24.8 cm).
If the base is too big, use a hook 0.5 mm smaller. If it’s too small to cover the bottom of the bottle, use a hook 0.5 mm larger. If only the height is off, change the mesh instead: remove or add one mesh round for every 0.6 in (1.5 cm). For a taller bottle, add mesh rounds rather than changing the stitch count.
Cover Body
With Color A.
Base
Round 1: Make a magic ring, ch 1, 6 sc in ring, sl st to first sc. (6 sts)
Round 2: Ch 1, 2 sc in each st around, sl st to first sc. (12 sts)
Round 3: Ch 1, sc in next st, 2 sc in next st; rep from * 6 times total, sl st to first sc. (18 sts)
Round 4: Ch 1, sc in next 2 sts, 2 sc in next st; rep 6 times, sl st to first sc. (24 sts)
Round 5: Ch 1, sc in next 3 sts, 2 sc in next st; rep 6 times, sl st to first sc. (30 sts)
Round 6: Ch 1, sc in next 4 sts, 2 sc in next st; rep 6 times, sl st to first sc. (36 sts)
Round 7: Ch 1, sc in next 5 sts, 2 sc in next st; rep 6 times, sl st to first sc. (42 sts)
Round 8: Ch 1, sc in next 6 sts, 2 sc in next st; rep 6 times, sl st to first sc. (48 sts)
Checkpoint: the base is 3.4 in (8.6 cm) across and lies flat.
Solid Wall
Round 9: Ch 1, sc BLO in each st around, sl st to first sc. (48 sts) The unused front loops form a neat ridge that turns the work upward.
Rounds 10–13: Ch 1, sc in each st around, sl st to first sc. (48 sts)
Checkpoint: the wall is 1 in (2.5 cm) tall and cups the bottom of the bottle.
Diamond Mesh
Round 14: Ch 1, sc in same st as join, ch 5, sk 3 sts, sc in next st; rep from * 10 more times, ch 2, sk 3 sts, dc in first sc. (12 loops)
The ch 2 and the dc together make up one ch-5 loop. They also leave your hook at the center of that loop, ready for the next round.
Rounds 15–24: Ch 1, sc around the post of the joining dc, ch 5, sc in next ch-5 loop; rep from * 10 more times, ch 2, dc in first sc. (12 loops)
Each sc sits in the center of a loop below it, so the loops stagger and open into diamonds.
Tip: Keep all your chains the same size. Loose chains make the lattice droop and the cover grow taller than the checkpoints. Tight chains pull the diamonds narrow and make the cover hard to slide on.
Round 25: Ch 1, sc around the post of the joining dc, ch 5, sc in next ch-5 loop; rep from * 10 more times, ch 5, sl st to first sc. (12 loops)
This last mesh round closes with a full ch 5 so the top band starts cleanly.
Checkpoint: 12 mesh rounds; total height is 8.2 in (20.8 cm).
Top Band
Round 26 (conversion): Sl st in next 2 ch to move into the first loop, ch 1, 4 sc in same loop, 4 sc in each of the remaining 11 loops, sl st to first sc. (12 loops x 4 sc = 48 sts)
This round brings you back to 48 stitches, so the top band matches the base wall exactly.
Round 27 (eyelets): Ch 4 (counts as dc + ch 1), sk next st, dc in next st, ch 1, sk next st; rep from * 22 more times, sl st to 3rd ch of beg ch-4. (24 dc + 24 ch-1 sps = 48 sts; 24 eyelets)
Round 28: Ch 1, sc in each dc and in each ch-1 sp around, sl st to first sc. (24 + 24 = 48 sts)
Checkpoint: total height is 9 in (22.9 cm).
Border: Shell Edging
Border gauge: One shell repeat uses 6 sts, is about 1.3 in (3.3 cm) wide and stands 0.75 in (1.9 cm) tall.
Round 29: Ch 1, sc in first st, sk 2 sts, shell in next st, sk 2 sts, sc in next st; rep from * 6 more times, sk 2 sts, shell in next st, sk 2 sts, sl st to first sc. (8 shells; 8 sc + 56 dc = 64 sts)
The cover is a tube, so it has no corners. Laid flat, each side shows 4 shells.
Why the math works: Each repeat uses exactly 6 sts of Round 28: 1 sc, 2 skipped, 1 shell st and 2 skipped. 48 ÷ 6 = 8 repeats with nothing left over, so the shells meet evenly at the join. The 7 dc in each shell fan out above the 5 sts they cover, which makes the gently ruffled, scalloped collar.
Fasten off and weave in the ends.
Stars (Make 3)
With Color B.
Round 1: Make a magic ring, ch 3 (counts as dc), 9 dc in ring, sl st to top of beg ch-3. (10 dc) Pull the ring closed, leaving a small hole in the center.
Round 2: Ch 4, sl st in 2nd ch from hook, sc in next ch, hdc in next ch, sk next dc, sl st in next dc; rep from * 4 more times, working the last sl st into the joining sl st. (5 points)
Each point uses 2 dc of Round 1, and 10 dc ÷ 2 = 5 even points. Each star is about 1.75 in (4.4 cm) from point to point.
Fasten off, leaving a 12 in (30.5 cm) tail for sewing. Weave in the starting tail.
Drawstring
With Color A, ch 140, about 28 in (71.1 cm). Sl st in the back bump of the 2nd ch from the hook and in each ch across. (139 sl sts) Fasten off.
Tie a double overhand knot about 0.5 in (1.3 cm) from each end and trim, leaving a small knob at each tip.
Assembly
Weaving the cord: Start from the outside at the eyelet just beside the Round 27 join. Weave in through that eyelet and out through the next one, alternating all the way around. With 24 eyelets, the cord comes out through the last eyelet, so both tails end up outside, side by side. Even out the tails.
Placing the stars: The drawstring tails mark one side of the cover. Count 6 eyelets (a quarter turn) away to find the line down the front center.
- Top star: centered 1.5 in (3.8 cm) below Round 26.
- Middle star: 2.25 in (5.7 cm) below the top star, center to center.
- Bottom star: 2.25 in (5.7 cm) below the middle star.
The center of the bottom star sits about 1.2 in (3.0 cm) above the solid wall. Pin the stars on while the cover is on the bottle, so the mesh is stretched to its working size. Sew each star to the mesh strands with small stitches through the back of the star, catching the center and each point tip. Don’t sew through both the front and back of the cover.
Final Blocking
- Lightly spray the cover and stars with water until damp, not soaked.
- Slide the cover onto the bottle.
- Ease the mesh so the diamonds are even and the rounds sit level.
- Open each shell into a smooth fan with your fingers.
- Gently flatten each star point and pin it to the mesh if needed.
- Let the cover dry fully on the bottle, about 12 hours.
- Remove the pins and tie the drawstring in a bow.
Final Quality-Control Checklist
- The base is flat, 3.4 in (8.6 cm) across, with no cupping.
- The Round 9 ridge is visible and even all around.
- Every mesh round has 12 loops, and there are 12 mesh rounds in total.
- The top band has 48 sts and 24 open eyelets.
- The border has 8 evenly spaced shells.
- The total height is 9.75 in (24.8 cm).
- The three stars sit in a straight vertical line down the front center.
- The drawstring tails come out side by side, with knotted ends.
- All ends are woven in securely.
Troubleshooting
Base ruffles: Your tension is loose or you added too many stitches. Recount each round, and use a smaller hook if needed.
Base cups before Round 9: Your tension is tight. Use a hook 0.5 mm larger, or check your increases.
Mesh loops lean in a spiral: Make sure each sc goes into the center of the loop, not into one of the chain stitches.
Loop count drifts: Place a marker in the first sc of every mesh round and count 12 loops before joining.
Cover is too short for your bottle: Add mesh rounds, at 0.6 in (1.5 cm) each.
Shells crowd together: Check that Round 28 has exactly 48 sts.
Stars curl: Steam them flat and pin them while they dry.
Care
Hand wash in cool water with mild soap, then lay flat or dry over a bottle. Don’t wring the mesh.
Final Notes
Here is the measurement chain from start to finish:
- A 3.4 in (8.6 cm) base of 48 sts.
- A 1 in (2.5 cm) solid wall.
- Twelve mesh rounds of 12 loops, reaching 8.2 in (20.8 cm).
- A 48-stitch top band, reaching 9 in (22.9 cm).
- An 8-shell border, finishing at 9.75 in (24.8 cm).
Keep 48 stitches in both the base and the top band, and check the height at each checkpoint, and the cover will fit the bottle neatly.
Happy crocheting!