

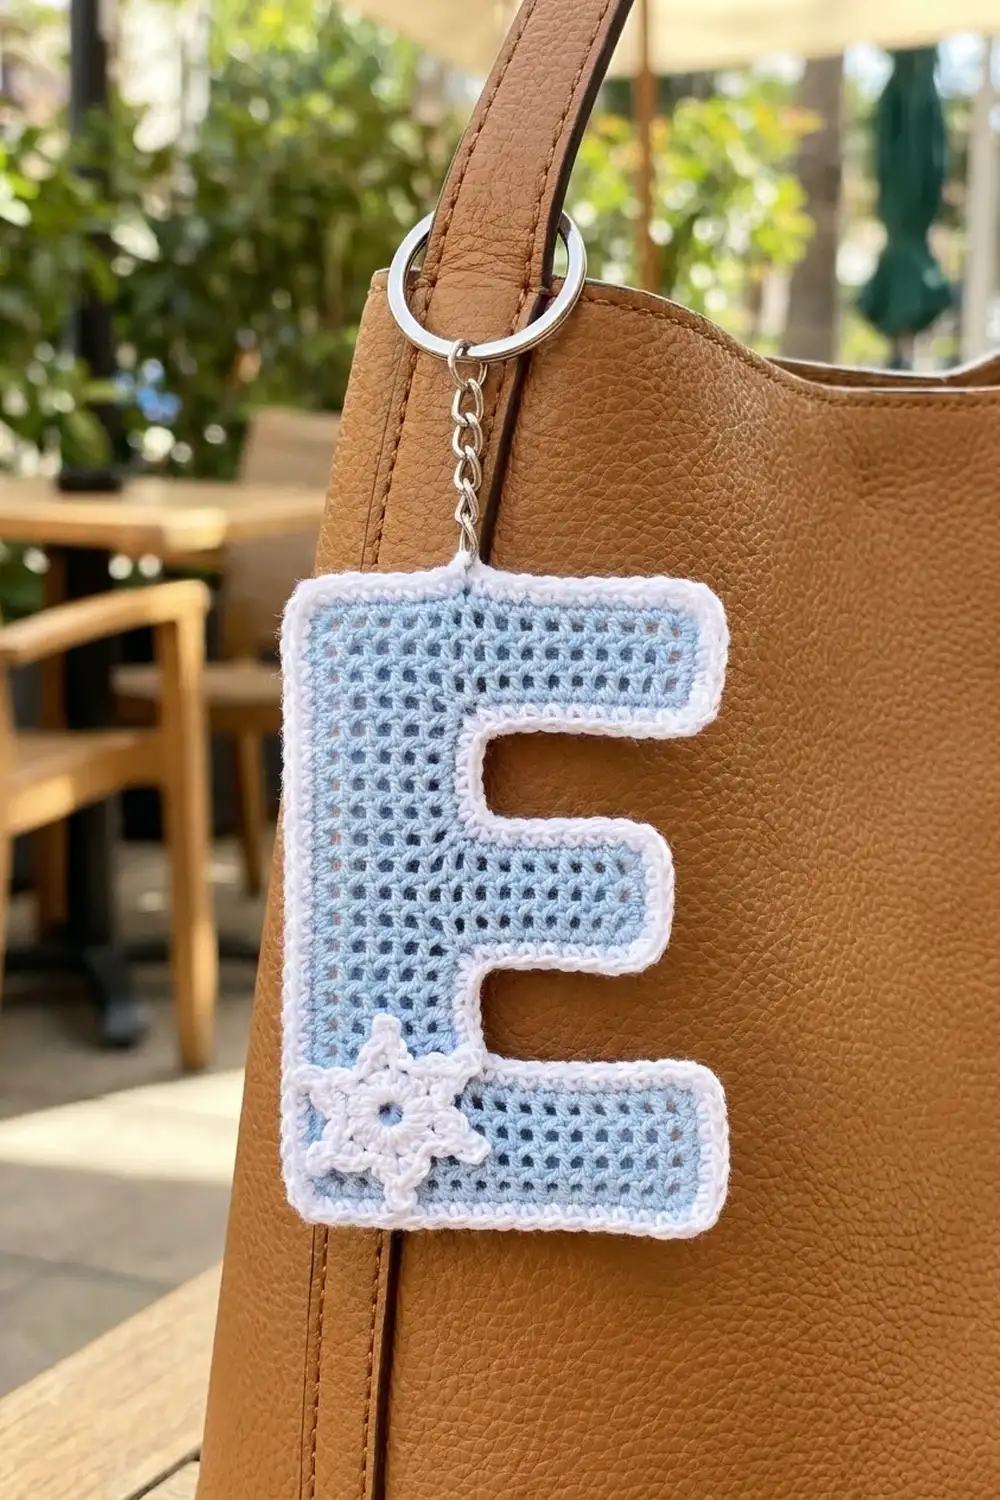
This little keychain is a capital letter E worked in light blue filet mesh. A white border goes all the way around it, and a small white snowflake sits on the lower left corner. The open grid keeps it light and gives it a stained-glass look. It’s a quick gift, a bag charm, or a stocking stuffer for anyone whose name starts with E.
The colors are kept simple: powder blue for the mesh and bright white for the border and snowflake. Together they read as frosty and wintry. A silver split ring on a short chain clips to the top left corner.
The pattern uses US crochet terms. The finished keychain, not counting hardware, measures 2 in (5.1 cm) wide by 3.5 in (8.9 cm) tall.
You work the letter sideways. First comes the 3-row spine, then three short arms worked straight off the last spine row. Two rounds of white single crochet trim the whole outline. Last, you make a 6-point snowflake, sew it on, and add the ring.
Finished Size and Construction
- Finished size: 2 in (5.1 cm) wide x 3.5 in (8.9 cm) tall, hardware not included
- Skill level: Easy-intermediate (basic filet mesh, rejoining yarn, corner shaping)
- Terminology: US crochet terms
- Yarn weight: Fingering / 4-ply (Super Fine, #1) cotton
- Hook: 2.5 mm (US B/1 or C/2)
- Number of pieces: 1 letter piece plus 1 small snowflake appliqué
- Layout: Single letter E. The spine is 12 meshes tall, the top and bottom arms are 6 meshes wide, and the middle arm is 5 meshes wide.
- Piece size before border: 1.5 in (3.8 cm) wide x 3 in (7.6 cm) tall
- Border depth: 0.25 in (0.6 cm) on every edge (2 rounds)
- Snowflake: 0.9 in (2.3 cm) across
Materials
Yarn. Choose a smooth, mercerized fingering-weight cotton, about 170 m per 50 g. Cotton keeps the mesh square and crisp and stands up to daily handling on a key ring. Don’t use fuzzy or very stretchy yarn, because it fills in the holes.
- Light blue (mesh): 5 g, about 17 m
- White (border and snowflake): 3 g, about 10 m
These amounts include a small margin for a gauge test and tails.
Tools:
– 2.5 mm crochet hook
– Tapestry needle
– Sharp sewing needle and white sewing thread (optional, for the appliqué)
– 1 in (2.5 cm) silver split ring with a 0.75 in (1.9 cm) chain
– 1 jump ring, 6 mm, plus 2 pairs of flat-nose pliers
– Rustproof pins, blocking mat, spray bottle
– Ruler or tape measure
Abbreviations (US Terms)
- ch – chain
- sl st – slip stitch
- sc – single crochet
- dc – double crochet
- sc2tog – single crochet 2 together
- sp – space
- sk – skip
- st(s) – stitch(es)
- rep – repeat
Special stitch – Mesh: ch 1, sk the next st or ch-1 sp, dc in the next dc. Each mesh is a single open square. A row with N meshes has N + 1 dc and N ch-1 sps, which makes 2N + 1 sts.
Turning chain: ch 4 at the start of a row counts as 1 dc plus 1 ch-1 sp.
Gauge and Checkpoints
Gauge: 4 meshes and 4 rows = 1 in (2.5 cm) square in filet mesh with a 2.5 mm hook. The border gauge is 8 sc = 1 in (2.5 cm).
Use the spine as your gauge swatch. Once you finish Rows 1–3, measure:
- Checkpoint 1 (spine): 3 in (7.6 cm) long x 0.75 in (1.9 cm) wide
- Checkpoint 2 (all arms done): 3 in (7.6 cm) tall x 1.5 in (3.8 cm) wide at the top and bottom arms, 1.25 in (3.2 cm) wide at the middle arm
- Checkpoint 3 (after border): 3.5 in (8.9 cm) tall x 2 in (5.1 cm) wide
If your spine is too long, go up 0.25 mm in hook size. If it is too short, go down 0.25 mm. If the length is right but the rows are too tall, your meshes are coming out as rectangles. Pull up less yarn on each dc, or try the next hook down for the dc rows only. Fix this at the spine. It only takes 3 rows to redo.
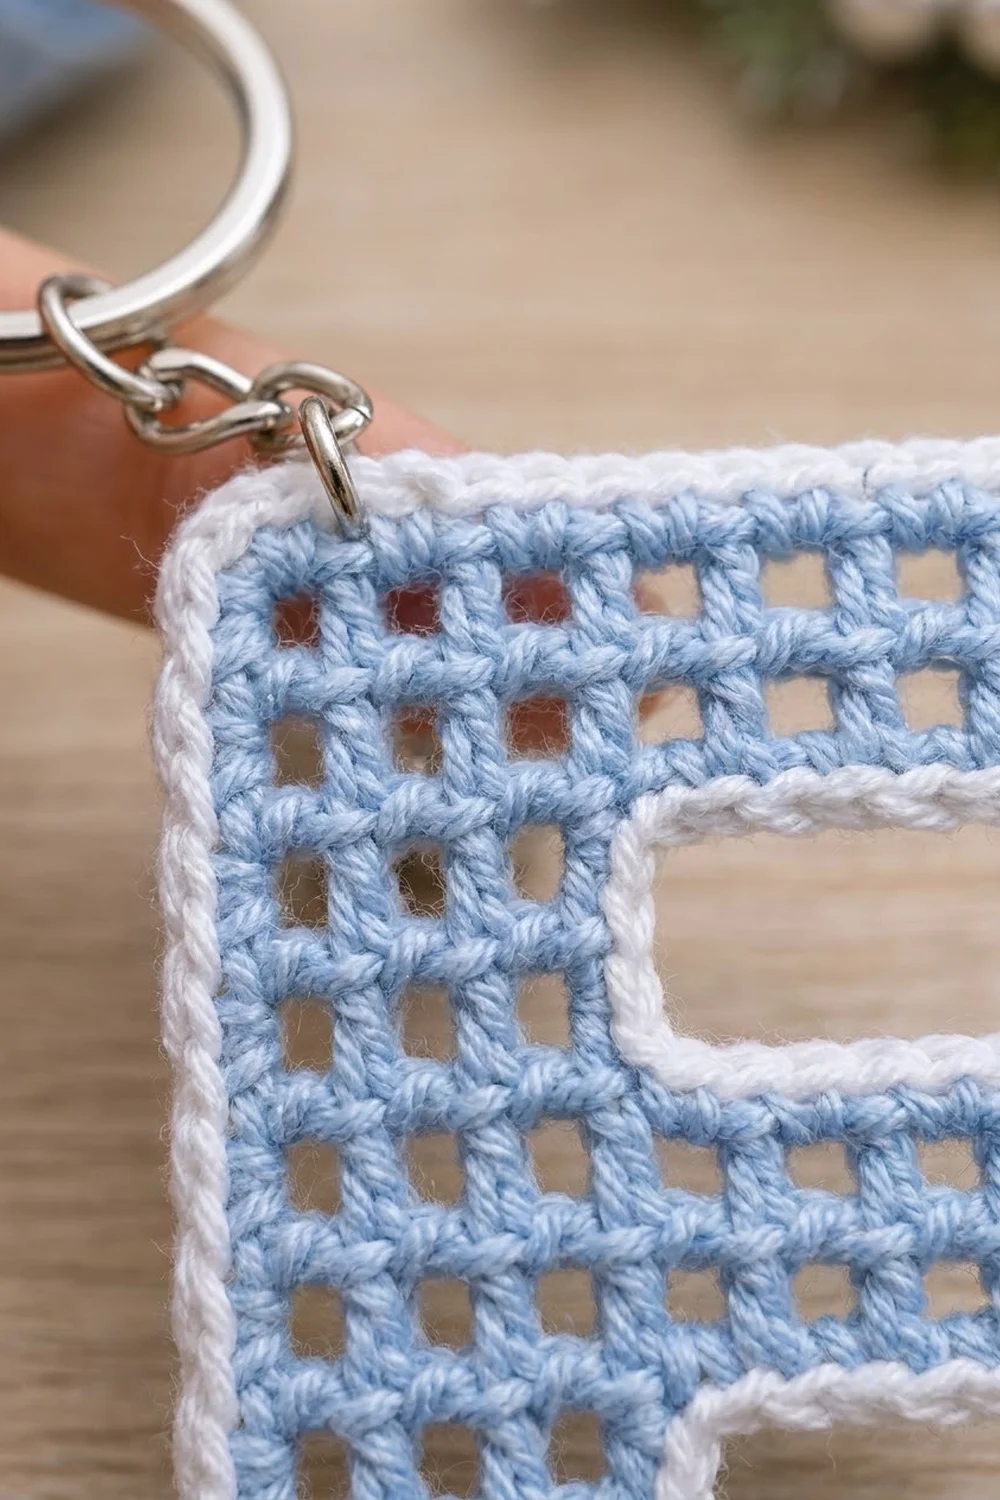
Letter Pattern
Spine
With light blue, ch 27.
Row 1: Dc in 5th ch from hook (skipped 4 ch count as dc + ch-1 sp), ch 1, sk next ch, dc in next ch; rep from * across, turn. (12 meshes: 13 dc, 12 ch-1 sps, 25 sts)*
Row 2: Ch 4 (counts as dc + ch-1 sp here and throughout), sk first ch-1 sp, dc in next dc; ch 1, sk next ch-1 sp, dc in next dc; rep from * across, working the last dc in the 3rd ch of the beginning ch. Turn. (12 meshes, 25 sts)*
Row 3: Repeat Row 2. Don’t fasten off and don’t turn yet. (12 meshes, 25 sts)
Check against Checkpoint 1.
Count the meshes of Row 3 as 1 to 12, starting from the end where your hook is now. The arms go on meshes 1–3 (top arm), 6–7 (middle arm), and 10–12 (bottom arm). Meshes 4–5 and 8–9 are left unworked, and they form the two openings of the E.
Top Arm
Row 4: Ch 4, turn, sk the ch-1 sp of mesh 1, dc in next dc; [ch 1, sk next ch-1 sp, dc in next dc] 2 times. Turn and leave the rest of Row 3 unworked. (3 meshes: 4 dc, 3 ch-1 sps, 7 sts)
Rows 5–6: Ch 4, sk first ch-1 sp, dc in next dc, [ch 1, sk next ch-1 sp, dc in next dc] once, ch 1, sk next ch-1 sp, dc in 3rd ch of beginning ch. Turn. (3 meshes, 7 sts per row)
Fasten off.
Middle Arm
Keep the same side facing you that faced you while you worked Row 4. Join light blue with a sl st in the dc between meshes 5 and 6 of Row 3.
Row M1: Ch 4, sk the ch-1 sp of mesh 6, dc in next dc, ch 1, sk ch-1 sp of mesh 7, dc in next dc (the dc between meshes 7 and 8). Turn. (2 meshes: 3 dc, 2 ch-1 sps, 5 sts)
Row M2: Ch 4, sk first ch-1 sp, dc in next dc, ch 1, sk next ch-1 sp, dc in 3rd ch of beginning ch. (2 meshes, 5 sts)
Fasten off.
Bottom Arm
Keep the same side facing. Join light blue with a sl st in the dc between meshes 9 and 10 of Row 3.
Row B1: Ch 4, sk the ch-1 sp of mesh 10, dc in next dc, ch 1, sk next ch-1 sp, dc in next dc, ch 1, sk next ch-1 sp, dc in the 3rd ch of Row 3’s beginning ch. Turn. (3 meshes, 7 sts)
Rows B2–B3: Work as for Rows 5–6. (3 meshes, 7 sts per row)
Fasten off and weave in all the blue tails along the solid dc posts.
Lay the piece with the foundation-chain edge on the left and the arms pointing right. The top arm should be at the slip-knot end of the foundation chain. Whatever side is facing up now is the front. Check against Checkpoint 2.
Snowflake Appliqué
With white, make a magic ring.
Rnd 1: Ch 1, 12 sc in ring, sl st to first sc. Pull the ring closed, leaving a small center hole. (12 sc)
Rnd 2: Sc in next sc, ch 5, sl st in 3rd ch from hook (tip picot), [ch 3, sl st in the same ch as the tip picot] 2 times (side picots), sl st in each of the next 2 ch down the stem, sl st in next sc; rep from * 5 more times. Join with a sl st to the first sc. (6 points, each with 3 picots; all 12 sc used)*
Fasten off. Leave a 10 in (25.4 cm) tail for sewing.
Border
You work the border in white straight around the letter. Every edge works out to the same 8 sc per inch:
- Stitch edges (the foundation chain and the last row of each arm) get 1 sc per st. Each mesh is 2 sts, and there are 4 meshes per inch, so that’s 8 sc per inch.
- Row-end edges get 2 sc per row. There are 4 rows per inch, so that’s also 8 sc per inch.
Because both edge types come out the same, the border lies flat. There are 8 outer (convex) corners, and each one gets 3 sc in its corner st. There are 4 inner (concave) corners where the arms meet the spine. Those get no extra sts in Rnd 1 and an sc2tog in Rnd 2.
In the counts below, each 3-sc corner group belongs to the stitch-edge segment it’s worked into. No corner is counted twice.
Rnd 1: With the front facing, join white with a sl st in the first foundation ch at the top left corner (slip-knot end). Ch 1.
– Left edge: 3 sc in the first ch, sc in each of the next 23 ch, 3 sc in the next ch at the base of the beginning ch. (29 sc)
– Bottom edge: 2 sc in each row-end across Rows 1–3 and B1–B3. (12 sc)
– Bottom arm end: 3 sc in the first st of Row B3, sc in the next 5 sts, 3 sc in the last st. (11 sc)
– Top of bottom arm: 2 sc in each of the 3 row-ends. (6 sc)
– Lower opening: Sc in the ch-1 sp, the dc, and the ch-1 sp of Row 3 meshes 9–8. (3 sc)
– Underside of middle arm: 2 sc in each of the 2 row-ends. (4 sc)
– Middle arm end: 3 sc in the first st of Row M2, sc in the next 3 sts, 3 sc in the last st. (9 sc)
– Top of middle arm: 2 sc in each of the 2 row-ends. (4 sc)
– Upper opening: Sc in each of the 3 exposed sts of meshes 5–4. (3 sc)
– Underside of top arm: 2 sc in each of the 3 row-ends. (6 sc)
– Top arm end: 3 sc in the first st of Row 6, sc in the next 5 sts, 3 sc in the last st. (11 sc)
– Top edge: 2 sc in each row-end across Rows 6–1. (12 sc)
Sl st to the first sc. (110 sc: 29 + 12 + 11 + 6 + 3 + 4 + 9 + 4 + 3 + 6 + 11 + 12)
Rnd 2: Ch 1. Sc in each sc around, with these changes: work 3 sc in the center sc of each of the 8 corner groups, and work an sc2tog over the last sc of one segment and the first sc of the next at each of the 4 inner corners. Counts by segment:
– Left edge 33, bottom edge 12, bottom arm end 15
– Top of bottom arm 5, sc2tog, lower opening 1, sc2tog, underside of middle arm 3
– Middle arm end 13
– Top of middle arm 3, sc2tog, upper opening 1, sc2tog, underside of top arm 5
– Top arm end 15, top edge 12
Sl st to the first sc. (122 sts: 110 + 16 corner increases − 4 sc2tog)
Fasten off and weave in the ends.
Why the math works: Each sc round adds about 0.125 in (0.3 cm) all the way around. Two rounds add 0.25 in (0.6 cm) on every side. That turns 1.5 x 3 in (3.8 x 7.6 cm) into 2 x 3.5 in (5.1 x 8.9 cm). The 8 corner increases keep the outer corners square. The sc2togs keep the inner corners from puckering.
Final Blocking
- Pin the letter face up to the blocking mat with the spine on the left.
- Pin the four outer corners to a 2 x 3.5 in (5.1 x 8.9 cm) rectangle.
- Pin out the right-hand corners of each arm. The top and bottom arms reach the full 2 in (5.1 cm) width. The middle arm stops 0.25 in (0.6 cm) short of that.
- Push the two openings into straight-sided rectangles with your fingertip, and pin the inner corners.
- Run a ruler along each mesh row to check that the squares line up.
- Mist with water until damp, then leave to dry completely.
- Block the snowflake on its own to 0.9 in (2.3 cm), with one pin in each point tip.
Finishing
Place the snowflake on the lower left of the letter, with its center about 0.6 in (1.5 cm) in from both the left and bottom outer edges. It should sit over the spine and the bottom arm, with two points lapping onto the white border. Use the tail to tack down the center ring and each point tip. Hide the stitches behind the dc posts.
Open the jump ring and put it through the Rnd 2 corner sc and the Rnd 1 sc just under it, at the top left corner. Then hook on the end link of the split-ring chain and close the jump ring.
For a stiffer charm that holds its shape on a busy bag, brush a thin coat of diluted fabric stiffener onto the back after blocking. Let it dry flat before you attach the hardware. Keep the stiffener off the front so the white border stays soft and bright.
Final Quality-Control Checklist
- The spine has 12 meshes. The arms have 3, 2, and 3 rows.
- Every mesh is open and square, and none are filled in.
- Rnd 1 = 110 sc and Rnd 2 = 122 sts.
- The piece measures 2 x 3.5 in (5.1 x 8.9 cm).
- Both openings are 2 meshes tall.
- The snowflake is tacked down at the center and all 6 points.
- The jump ring is completely closed and goes through two border rounds.
- All ends are woven in and trimmed.
Troubleshooting
- The meshes are rectangles, not squares. Your dc is too tall for the ch-1. Shorten the dc by pulling up a smaller loop, or use a smaller hook for the mesh only.
- The border ripples. You’ve added too many sc on the row-end edges. Stick to exactly 2 per row.
- The border cups. Make sure every outer corner got its 3 sc in both rounds.
- The inner corners gape. Pull the Rnd 2 sc2tog snug, or sew one small stitch across the corner from the back.
- An arm sits crooked. You probably joined into the wrong dc. Recount the Row 3 meshes from the top end.
- The snowflake points curl. Re-block them flat, and pin every picot.
Care
Hand wash in cool water with mild soap, press out the water in a towel, and dry it flat. Take it off the split ring before washing so the metal doesn’t mark the cotton.
Final Notes
Each stage has its own measurement, and each one depends on the last. The 12-mesh spine is 3 in (7.6 cm) long. With the arms, the letter is 1.5 x 3 in (3.8 x 7.6 cm). Two border rounds at 0.25 in (0.6 cm) per side bring it to 2 x 3.5 in (5.1 x 8.9 cm). If the spine is right, everything after it will be too. Once you’ve made the E, you can chart other initials on the same 4-meshes-per-inch grid.
Happy crocheting!