

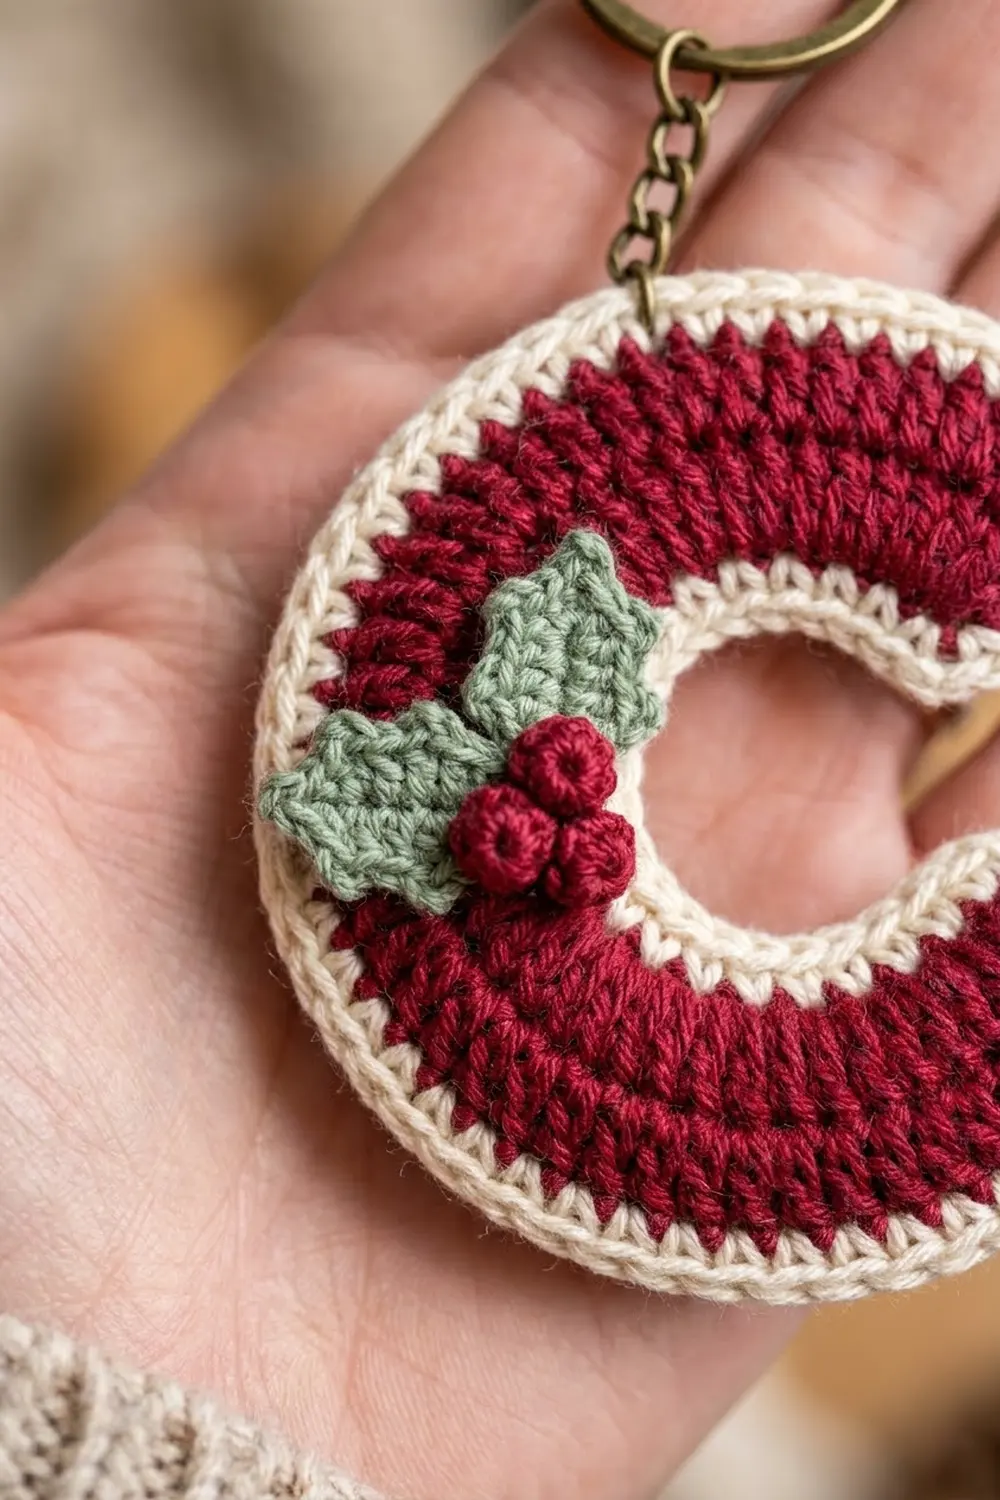
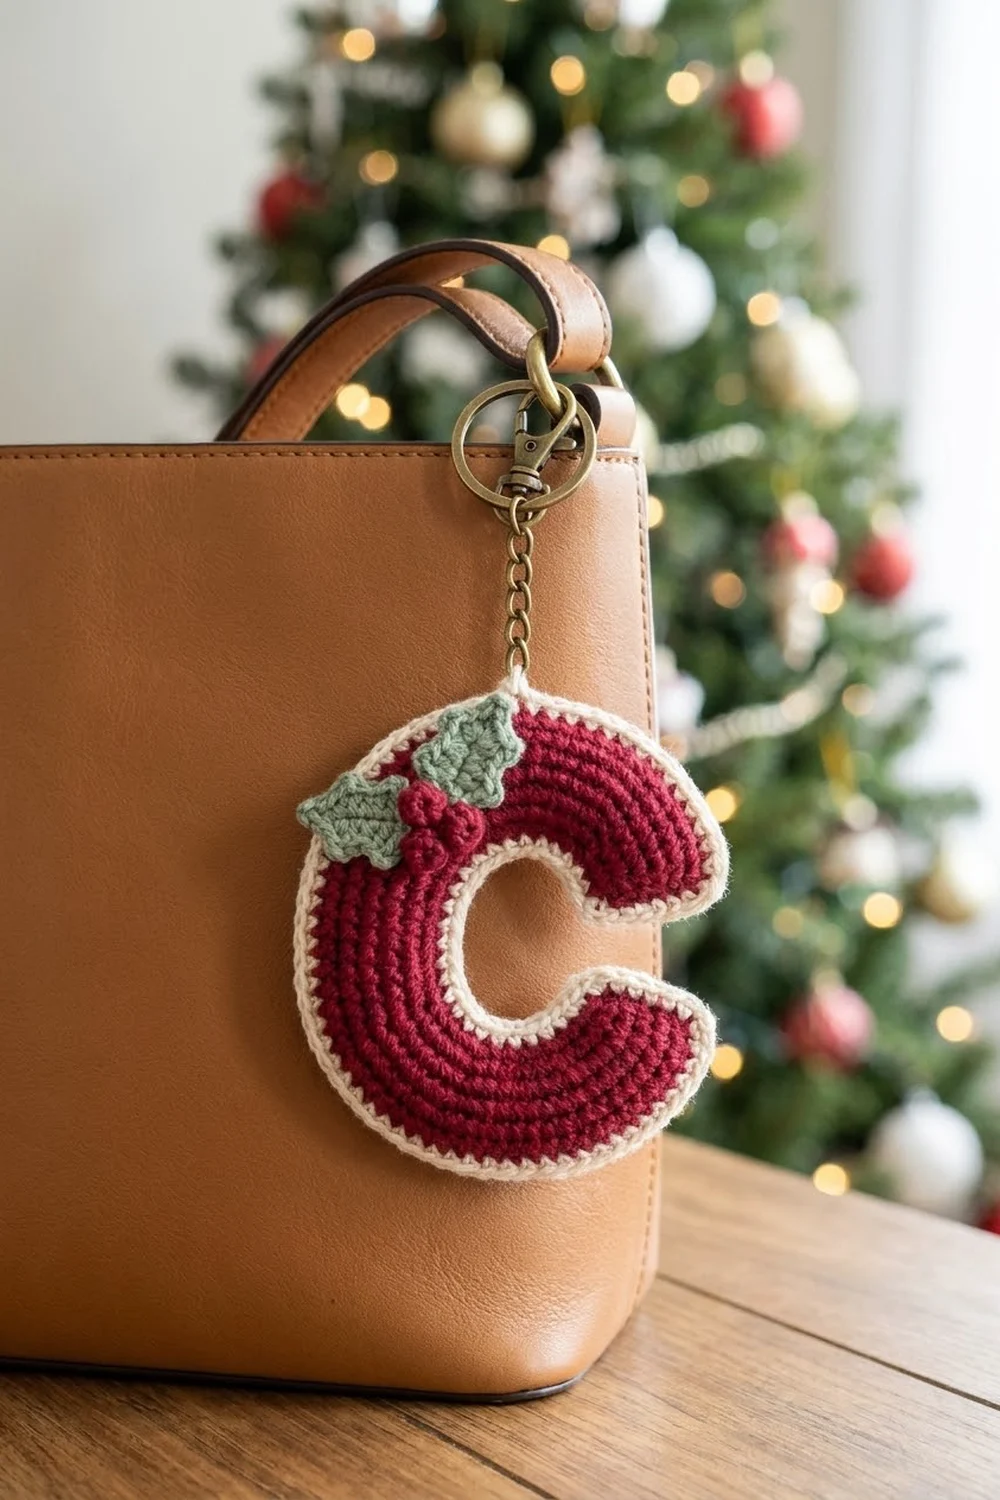
The Holly Letter C Keychain is a small, festive initial charm. It’s a deep cranberry red letter C with a soft cream outline, finished with two sage green holly leaves and three round red berries. It hangs from an antique brass split ring on a short chain, so you can use it as a bag charm, a key fob, or a personalized gift tag.
The letter is worked in double crochet, so the stitch posts fan out around the curve and give the C its ribbed, radial texture. One round of red single crochet neatens and rounds the shape, and one round of cream single crochet frames it. The holly cluster is made separately and sewn onto the lower curve.
The pattern uses US crochet terms. The finished charm measures about 3.5 in (8.9 cm) tall and 3 in (7.6 cm) wide, not counting the hardware.
Construction is simple. You chain the inner curve of the C, then work two rows of double crochet with increases so the strip curves on its own. Next you edge it in red, border it in cream, and add the leaves, berries, and keyring.
Finished Size and Construction
- Finished size: 3.5 in (8.9 cm) tall x 3 in (7.6 cm) wide
- Skill level: Easy / advanced beginner
- Terminology: US crochet terms
- Yarn weight: Sport (#2), cotton or cotton blend
- Hook: 3.25 mm (US D-3) for the letter; 2.75 mm (US C-2) for the leaves and berries
- Number of pieces: 1 letter, plus 2 leaves and 3 berries sewn on
- Layout: a single letter C with the opening facing right and the holly cluster on the lower curve
- Letter size before border: 3.1 in (7.9 cm) tall x 2.6 in (6.6 cm) wide
- Band width before border: 1 in (2.5 cm)
- Border depth: 0.2 in (0.5 cm) on every edge
Materials
Choose a smooth, tightly plied cotton in sport weight. Cotton holds the letter flat, shows the stitches clearly, and stands up to handling on a keyring. Avoid fuzzy yarns, which blur the ribbed texture.
- Cranberry red: 9 g, about 27 m (letter and berries)
- Cream: 3 g, about 9 m (border)
- Sage green: 2 g, about 6 m (leaves)
These quantities include a margin of about 25 percent for a test piece and sewing tails.
Tools:
- 3.25 mm (US D-3) crochet hook
- 2.75 mm (US C-2) crochet hook
- Tapestry needle
- Antique brass split ring, 1 in (2.5 cm)
- Short brass chain, about 0.75 in (1.9 cm), with an 8 mm jump ring
- Two pairs of flat-nose pliers
- Rust-proof pins and a blocking board
- Scissors and a stitch marker
Abbreviations (US Terms)
- ch: chain
- sl st: slip stitch
- sc: single crochet
- sc2tog: single crochet 2 together
- hdc: half double crochet
- dc: double crochet
- st(s): stitch(es)
- RS: right side
- WS: wrong side
Picot: ch 3, sl st in the 3rd ch from the hook. Each picot forms one point of a holly leaf.
Gauge and Checkpoints
Gauge: 12 dc and 6 dc rows = 2 in (5.1 cm) with the 3.25 mm hook. That works out to 6 sts and 3 rows per 1 in (2.5 cm).
The letter is a single small piece, so your first letter is your test piece. Make Rows 1 and 2, then compare your work with these checkpoints before you start the edging. Measure on a flat surface without stretching.
- After Row 1: the inner (chain) edge measures about 3.3 in (8.4 cm) laid straight, and the row is about 1/3 in (0.8 cm) tall. The strip already starts to curl.
- After Row 2: the band is about 2/3 in (1.7 cm) wide and the outer edge measures about 6.5 in (16.5 cm). The strip curls into a C on its own.
- After Round 3 (red edging): the letter measures 3.1 in (7.9 cm) tall x 2.6 in (6.6 cm) wide.
- After Round 4 (cream border): the letter measures 3.5 in (8.9 cm) tall x 3 in (7.6 cm) wide.
If your letter is too big, go down one hook size (3.0 mm). If it is too small, go up to 3.5 mm (US E-4). Don’t change the stitch counts, because the curve depends on them.
Letter C
Use the 3.25 mm hook and cranberry red.
Foundation: Ch 22.
Row 1 (RS): Work 2 dc in the 4th ch from the hook (the 3 skipped ch count as the first dc). *Work 2 dc in the next ch, then dc in the next ch; repeat from * 9 times in total. Turn. (30 sts)
Check: the 3 skipped ch, the first worked ch, and the 18 ch in the repeat use all 22 chains. Stitches: 1 (turning ch) + 2 + (9 x 3) = 30.
Row 2 (WS): Ch 3 (counts as the first dc). Dc in the next st, then 2 dc in the next st. *Dc in each of the next 2 sts, then 2 dc in the next st; repeat from * 9 times in total. The last 2 dc go into the top of the turning ch. Turn. (40 sts)
Check: 1 + 1 + 1 + (9 x 3) = 30 sts used. Stitches made: 1 + 1 + 2 + (9 x 4) = 40.
The dc posts now fan out around the curve and create the ribbed look. Don’t fasten off.
Round 3 (red edging that rounds the ends): Ch 1 with the RS facing. Work around the whole letter in 4 sections. Place a marker in the first sc.
- Outer curve: sc in each of the first 9 sts, then 2 sc in the next st. *Sc in each of the next 9 sts, then 2 sc in the next st; repeat from * 2 more times. That’s 40 sts worked 1 per stitch + 4 extra = 44 sc.
- First end: working across the row ends, work 4 sc around the Row 2 turning-ch post and 3 sc around the post of the last dc of Row 1. (7 sc)
- Inner curve: work into the free loops of the foundation chain, using the 19 worked chains plus the base of the Row 1 turning ch, for 20 loops in total. *Sc in each of the next 3 loops, then sc2tog over the next 2 loops; repeat from * 3 more times. That’s 20 loops used and 20 – 4 = 16 sc.
- Second end: work 3 sc around the Row 1 turning-ch post and 4 sc around the post of the last dc of Row 2. (7 sc)
Sl st to the first sc and fasten off. (74 sts: 44 + 7 + 16 + 7)
The extra stitches on the outer edge keep it flat, and the decreases on the inner edge stop it from ruffling. The 7 stitches across each short end turn the square row ends into soft, rounded tips.
Border
Use the 3.25 mm hook and cream.
Border gauge: one round of sc adds 0.2 in (0.5 cm) to every edge, so the letter grows by 0.4 in (1.0 cm) in each direction.
Round 4: With the RS facing, join cream with a standing sc in the marked first sc of the outer curve.
- Outer curve: sc in each of the next 10 sts (the standing sc counts as the first), then 2 sc in the next st. *Sc in each of the next 10 sts, then 2 sc in the next st; repeat from * 2 more times. That’s 44 sts worked 1 per stitch + 4 extra = 48 sc.
- First end: *2 sc in the next st, then sc in the next st; repeat from * 2 more times, then 2 sc in the next st. That’s 7 sts worked 1 per stitch + 4 extra = 11 sc.
- Inner curve: *Sc in each of the next 2 sts, then sc2tog; repeat from * 3 more times. That’s 16 sts used and 16 – 4 = 12 sc.
- Second end: *2 sc in the next st, then sc in the next st; repeat from * 2 more times, then 2 sc in the next st. That’s 7 + 4 = 11 sc.
Close with an invisible join to the first sc and fasten off. (82 sts: 48 + 11 + 12 + 11)
Why the math works: the outer curve sits on a larger circle than the inner curve. Each round that moves outward needs more stitches on the outside and fewer on the inside. The outer edge grows from 40 to 44 to 48 stitches, about 4 sts per 0.2 in (0.5 cm) round, while the inner edge shrinks from 20 to 16 to 12. The ends grow from 7 to 11 because each rounded tip is a half circle that also gets bigger. Spacing every increase and decrease evenly keeps the C smooth instead of faceted.
Holly Leaves (make 2)
Use the 2.75 mm hook and sage green.
Ch 8.
Side 1: Working in the back bumps, sl st in the 2nd ch from the hook, sc in the next ch, hdc in the next ch, picot, dc in the next ch, picot, hdc in the next ch, sc in the next ch, then (sc, ch 2, sc) in the last ch. The (sc, ch 2, sc) group forms the stem-end tip.
Side 2: Rotate the leaf and work in the free loops of the chain: sc in the next ch, hdc in the next ch, picot, dc in the next ch, picot, hdc in the next ch, sc in the next ch, ch 2, then sl st in the first sl st.
Fasten off, leaving a 6 in (15.2 cm) tail for sewing.
Each leaf has 6 points: 2 picots on each side plus the 2 tips. It measures about 0.9 in (2.3 cm) long and 0.5 in (1.3 cm) wide. Pull the picots outward with your fingertips to sharpen them.
Holly Berries (make 3)
Use the 2.75 mm hook and cranberry red.
Round 1: 6 sc in a magic ring. Don’t join; work in a spiral. (6 sts)
Round 2: Sc in each st around. (6 sts)
Round 3: Sc2tog 3 times. (3 sts)
Tuck the starting tail inside as stuffing. Fasten off with a 6 in (15.2 cm) tail, weave it through the 3 remaining stitches, and pull it closed. Each berry is about 0.3 in (0.8 cm) across.
Assembly
- Lay the letter RS up with the opening facing right.
- Place the two leaves on the lower curve, slightly left of center. Angle one leaf up and to the left and the other up and to the right, with their stem ends touching in the middle. Let the outer tips overlap the cream border by about 1/8 in (0.3 cm).
- Sew each leaf down along its center line with small running stitches. Tack each picot point so it stays flat.
- Sew the 3 berries in a tight triangle over the spot where the leaves meet, with two side by side below and one on top.
- Weave in all ends on the WS.
- Open the jump ring with two pairs of pliers. Pass it under 2 cream border stitches at the top of the outer curve, directly above the upper arm of the C. Add the end link of the chain and close the ring.
- Thread the other end of the chain onto the split ring.
Final Blocking
- Weave in all ends before blocking. If you already attached the hardware, take it off.
- Lightly mist the letter with water until it’s just damp. Keep the berries dry.
- Pin the letter RS up on a blocking board with the opening facing right.
- Ease it to 3.5 in (8.9 cm) tall x 3 in (7.6 cm) wide. Pin the outer curve at 6 or 7 points and each rounded end at its tip.
- Check that the inner curve lies flat. If it pulls in, ease it outward gently instead of stretching the outer edge.
- Let it dry completely, for at least 4 hours.
- Unpin it, then attach the leaves, berries, and hardware if you haven’t already.
Final Quality-Control Checklist
- Row 1 has 30 sts and Row 2 has 40 sts.
- Round 3 has 74 sts (44 + 7 + 16 + 7).
- Round 4 has 82 sts (48 + 11 + 12 + 11).
- The letter measures 3.5 in (8.9 cm) x 3 in (7.6 cm) after blocking.
- The cream border is an even 0.2 in (0.5 cm) on every edge.
- Both ends are rounded, with no sharp corners.
- Each leaf has 6 clear points.
- The berries are round, closed, and firmly sewn on.
- The jump ring is fully closed with no gap.
- No yarn ends show on the RS.
Troubleshooting
The strip won’t curl into a C. Recount the increases in Rows 1 and 2. Missed increases leave the strip straight.
The outer edge ruffles. Your dc are looser than gauge. Remake the letter one hook size smaller and keep every count as written.
The inner curve puckers. You may have missed some sc2tog stitches. Count 16 sts on the inner curve after Round 3.
The ends look square. Work all 7 sc across each end, and keep all 4 increases on each end in Round 4.
The berries are loose. Pull the closing tail firmly, then add one more stitch through the center.
The leaf points curl. Steam them lightly and pin each picot while it dries.
Care
Remove the metal hardware first so it can’t leave tarnish marks. Hand wash in cool water with mild soap, press out the water in a towel, and dry flat.
Final Notes
The measurement chain is short and easy to check: 30 sts in Row 1, 40 sts in Row 2, 74 sts in the red edging, and 82 sts in the cream border. Those counts take the letter from a 1/3 in (0.8 cm) strip to a 2/3 in (1.7 cm) band, then to 3.1 in (7.9 cm) x 2.6 in (6.6 cm) before the border, and finally to 3.5 in (8.9 cm) x 3 in (7.6 cm) finished. If you check each stage, the holly cluster and keyring will sit just right.
Happy crocheting!