

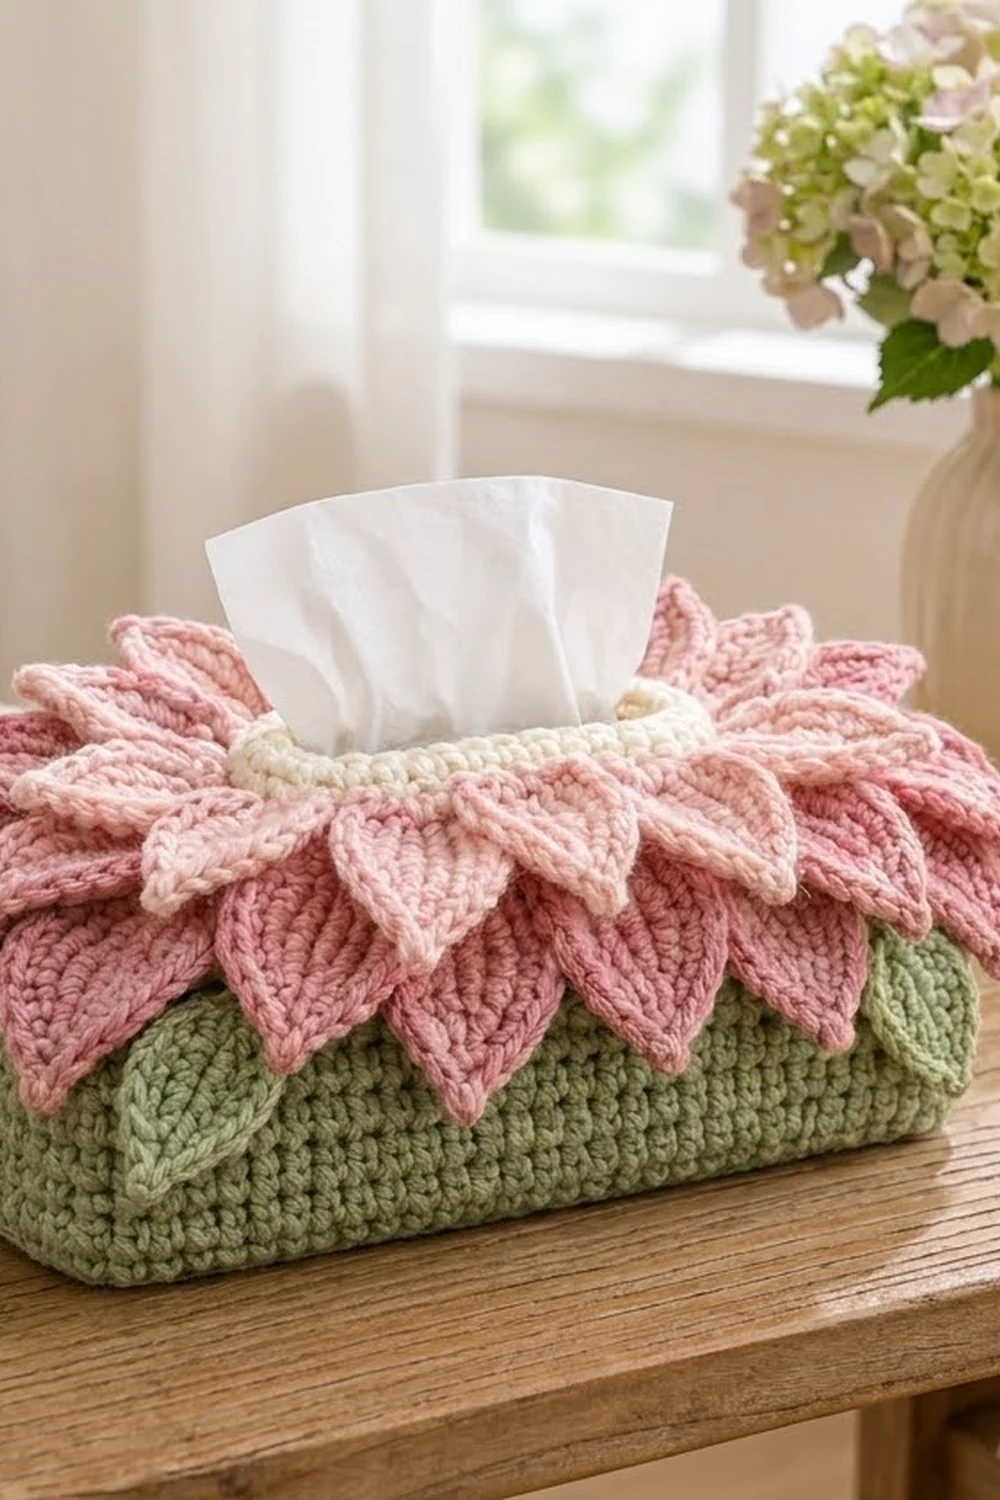
This cover turns a plain tissue box into a soft, blooming flower. A sage green body fits snugly over the box. A rolled cream collar frames the opening, and three layers of pointed petals open out around it.
The colors go from pale pink near the center to dusty rose at the outer tips, with four green leaves tucked under the petals at the corners. The look is cottage-style and gentle, and it suits a nightstand, bathroom shelf, or reading corner.
The pattern uses US crochet terms. The finished cover measures 9.5 x 4.9 in (24.1 x 12.4 cm) across the top and 3 in (7.6 cm) tall. It fits flat tissue boxes about 9.25–9.5 in (23.5–24.1 cm) long, 4.5–4.75 in (11.4–12.1 cm) wide, and 2.75–3 in (7.0–7.6 cm) tall.
The body is worked in one piece. First you make a flat top panel with a slot left open. Then you work single crochet rounds down from its edge to form the side walls. A cream collar is worked into the slot. The 48 petals and 4 leaves are made separately and sewn on in layers.
Finished Size and Construction
- Finished size: top 9.5 x 4.9 in (24.1 x 12.4 cm); height 3 in (7.6 cm); circumference 29 in (73.7 cm)
- Skill level: Intermediate
- Terminology: US
- Yarn weight: Worsted (#4)
- Hook: 4.5 mm (US 7)
- Number of pieces: 1 body, 48 petals, 4 leaves
- Layout: 3 petal rings (12 small, 16 medium, 20 large), plus 1 leaf at each corner
- Piece sizes: small petal 2 x 1 in (5.1 x 2.5 cm); medium petal and leaf 2.5 x 1.25 in (6.4 x 3.2 cm); large petal 3 x 1.5 in (7.6 x 3.8 cm)
- Height before border: 2.7 in (6.9 cm)
- Border depth: 0.3 in (0.8 cm)
Materials
Use a smooth worsted cotton or cotton blend. Cotton keeps petal points crisp and holds the box shape. Soft acrylic also works, but the petals will curl a little more.
- Sage green (A): 70 g / 125 m
- Pale pink (B): 55 g / 100 m
- Dusty rose (C): 55 g / 100 m
- Cream (D): 10 g / 18 m
These quantities include a margin of about 20% for gauge differences and long sewing tails.
Tools:
– 4.5 mm (US 7) crochet hook
– Tapestry needle
– 8–10 locking stitch markers
– Straight pins
– Tape measure
– A tissue box to test the fit
Abbreviations (US Terms)
- ch – chain
- sl st – slip stitch
- sc – single crochet
- hdc – half double crochet
- dc – double crochet
- sc2tog – single crochet 2 together
- BLO – back loop only
- sp – space
- st(s) – stitch(es)
- RS – right side
Special stitch – reverse sc (crab stitch): Work single crochet from left to right (right to left if you crochet left-handed). Insert the hook into the next stitch to the right, yarn over, pull up a loop, yarn over, and pull through both loops. This makes a rolled, beaded edge.
Gauge and Checkpoints
Gauge: 16 sc x 18 rows = 4 in (10.2 cm), worked in A.
Make one small petal first as a test piece. It should measure about 2 x 1 in (5.1 x 2.5 cm). If it’s much bigger, the full layers will crowd the top.
Checkpoints:
– Top panel, Row 1: 38 sts = 9.5 in (24.1 cm)
– After Row 7: about 1.5 in (3.8 cm) tall
– After Row 15: about 3.3 in (8.4 cm) tall
– After Row 22: 4.9 in (12.4 cm) tall
– Side walls after Round 13: 2.7 in (6.9 cm) from the fold
If your piece is too big, go down 0.5 mm in hook size. If it’s too small, go up 0.5 mm. Don’t change the stitch counts, because every border and collar count depends on them.
Top Panel
Use A.
Row 1 (RS): Ch 39. Sc in the 2nd ch from the hook and in each ch across, turn. (38 sts)
Rows 2–7: Ch 1, sc in each st across, turn. (38 sts)
Left Half of the Slot
Rows 8–15: Ch 1, sc in the first 9 sts only, turn. Leave the remaining 29 sts unworked. (9 sts per row, 8 rows)
Row 8 ends at the slot edge and Row 15 ends at the outer edge. Don’t fasten off. Set the loop aside on a marker.
Right Half of the Slot
Join A in the 30th st of Row 7, counting from the end where Row 8 began.
Rows 8–15: Ch 1, sc in the same st and in the next 8 sts, turn. (9 sts per row, 8 rows)
Fasten off. The center 20 sts of Row 7 stay unworked and become the bottom edge of the slot.
Closing the Slot
Pick up the held loop on the left half.
Row 16: Ch 1, turn. Sc in the 9 sts of the left half, ch 20, then sc in the 9 sts of the right half’s Row 15, turn. (18 sc + 20 ch)
Row 17: Ch 1, sc in each of the 9 sc, sc in each of the 20 ch, sc in each of the 9 sc, turn. (38 sts)
Rows 18–22: Ch 1, sc in each st across, turn. (38 sts)
Don’t fasten off. The panel measures 9.5 x 4.9 in (24.1 x 12.4 cm), and the slot is 5 x 1.75 in (12.7 x 4.4 cm).
Side Walls
Keep working with A, in joined rounds and without turning.
Round 1 (edging): Ch 1. Sc in each st of Row 22 (38 sc). Work 20 sc evenly along the 22 row ends of the short side (skip 2 row ends spread evenly). Sc in each free loop of the foundation ch (38 sc). Work 20 sc along the other short side. Sl st to the first sc. (116 sts: 38 + 20 + 38 + 20)
Round 2 (fold): Ch 1, sc BLO in each st around, sl st to the first sc. (116 sts)
The unused front loops leave a ridge that folds the work down, so the sides drop at a sharp angle.
Rounds 3–13: Ch 1, sc in each st around, sl st to the first sc. (116 sts)
Checkpoint: Measured from the fold ridge, the side is 2.7 in (6.9 cm) tall. Slip the cover onto your box now. It should fit smoothly, with about 0.2 in (0.5 cm) of ease around the box. Don’t fasten off yet. The border comes later.
Petals and Leaves
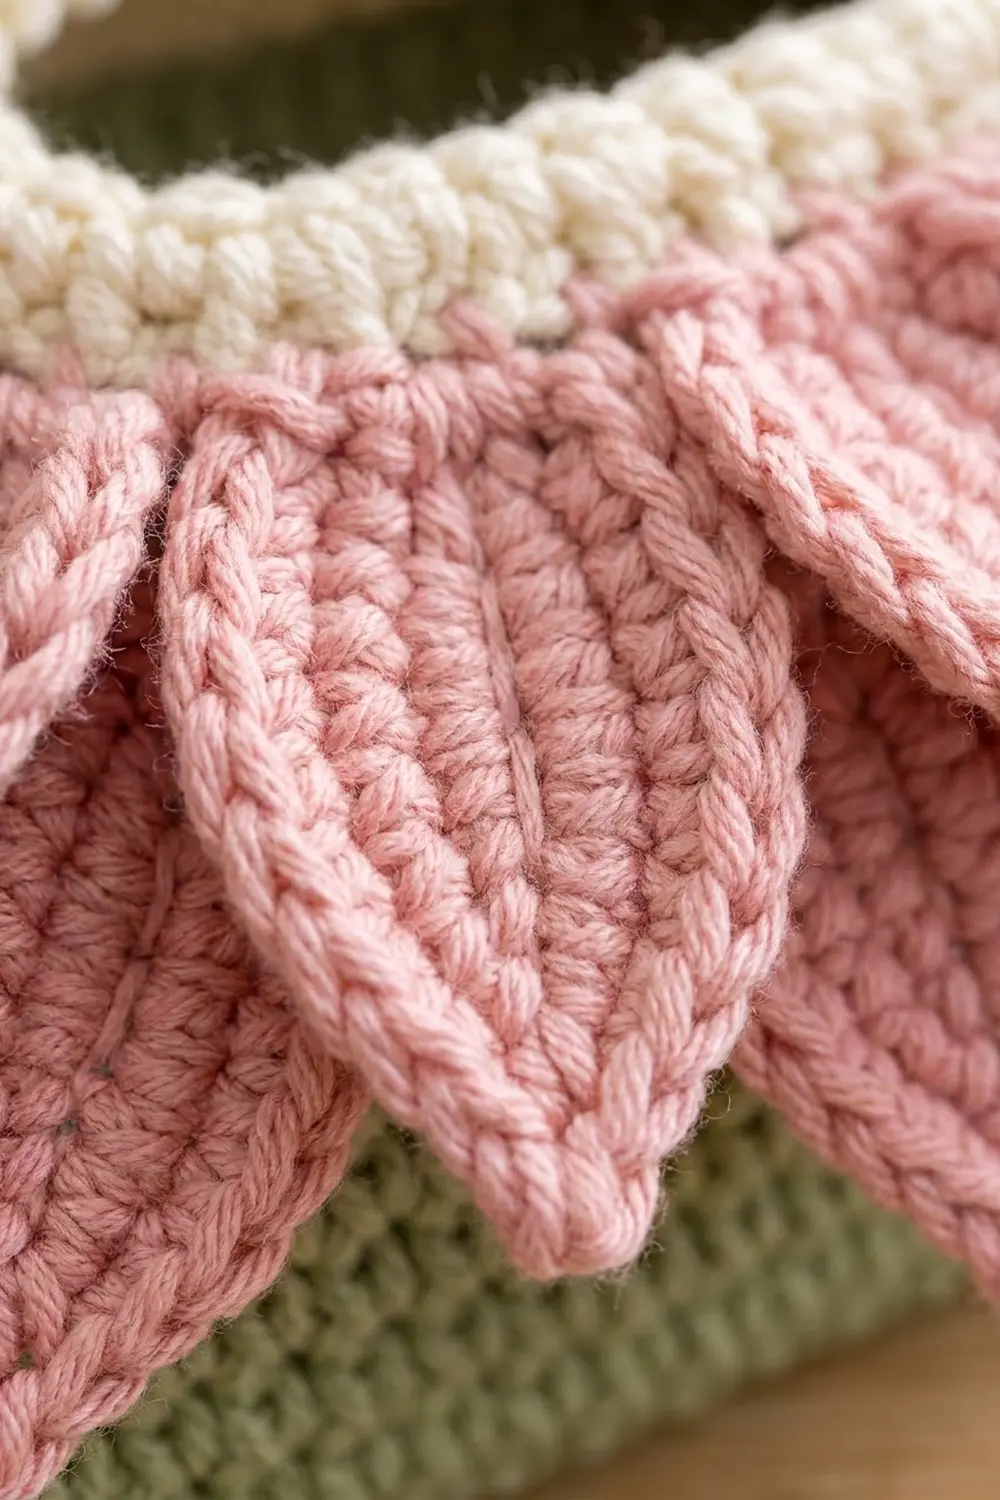
All petals are worked around both sides of a foundation chain. The line where the two halves meet forms the center line. Round 2 adds the raised outline and the sharp tip.
Small Petal (make 12 in B)
Ch 7.
Round 1: Sc in the 2nd ch from the hook, hdc in the next ch, dc in each of the next 2 ch, hdc in the next ch. In the last ch work (sc, ch 2, sc) for the tip. Rotate and work along the other side of the chain: hdc in the next ch, dc in each of the next 2 ch, hdc in the next ch, sc in the last ch. Sl st to the first sc. (12 sts + ch-2 sp)
Round 2: Ch 1. Sc in each of the next 6 sts, (sc, ch 2, sc) in the ch-2 sp, sc in each of the next 6 sts. Sl st to the first sc. (14 sc + ch-2 sp)
Fasten off and leave a 10 in (25.4 cm) tail. The petal measures 2 x 1 in (5.1 x 2.5 cm).
Medium Petal (make 16 in B)
Ch 9.
Round 1: Sc in the 2nd ch from the hook, hdc in the next ch, dc in each of the next 4 ch, hdc in the next ch. In the last ch work (sc, ch 2, sc). Along the other side: hdc, dc in each of the next 4 ch, hdc, sc in the last ch. Sl st to the first sc. (16 sts + ch-2 sp)
Round 2: Ch 1. Sc in each of the next 8 sts, (sc, ch 2, sc) in the ch-2 sp, sc in each of the next 8 sts. Sl st to the first sc. (18 sc + ch-2 sp)
The petal measures 2.5 x 1.25 in (6.4 x 3.2 cm).
Large Petal (make 20 in C)
Ch 11.
Round 1: Sc in the 2nd ch from the hook, hdc in the next ch, dc in each of the next 6 ch, hdc in the next ch. In the last ch work (sc, ch 2, sc). Along the other side: hdc, dc in each of the next 6 ch, hdc, sc in the last ch. Sl st to the first sc. (20 sts + ch-2 sp)
Round 2: Ch 1. Sc in each of the next 10 sts, (sc, ch 2, sc) in the ch-2 sp, sc in each of the next 10 sts. Sl st to the first sc. (22 sc + ch-2 sp)
The petal measures 3 x 1.5 in (7.6 x 3.8 cm).
Leaf (make 4 in A)
Work exactly like the medium petal. The leaf measures 2.5 x 1.25 in (6.4 x 3.2 cm).
Make All Pieces
| Piece | Color | Quantity |
|---|---|---|
| Body | A | 1 |
| Small petals | B | 12 |
| Medium petals | B | 16 |
| Large petals | C | 20 |
| Leaves | A | 4 |
Petal layout (top view, counts per side):
              Long side (back)
   Layer 3:   L L L L L L L      (7)
   Layer 2:    M M M M M         (5)
   Layer 1:     S S S S          (4)
 L  M  S   [ cream opening ]   S  M  L
 L  M  S                       S  M  L
 L  M                             M  L
   Layer 1:     S S S S          (4)
   Layer 2:    M M M M M         (5)
   Layer 3:   L L L L L L L      (7)
              Long side (front)
- Layer 1 (small): 4 + 2 + 4 + 2 = 12
- Layer 2 (medium): 5 + 3 + 5 + 3 = 16
- Layer 3 (large): 7 + 3 + 7 + 3 = 20
Joining
The petals are sewn on, not crocheted into the body. Put the cover on the tissue box before you sew so the top stays flat and taut.
- Layer 3 first. Pin the bases of the large petals about 1 in (2.5 cm) out from the slot edge, tips pointing outward. Space them using the per-side counts above.
- Sew each base with the tail. Go through the bottom 0.5 in (1.3 cm) of the petal and catch a whole sc on the panel each time. Stitch through the same panel stitch twice at the base point so the petal lifts slightly.
- Layer 2. Place the medium bases 0.5 in (1.3 cm) out from the slot edge, staggered between the Layer 3 petals.
- Layer 1. Place the small bases right against the slot edge, staggered again. Each new layer hides the stitched bases of the layer under it.
- Leaves. Sew one leaf at each corner of the side walls, angled, with the base tucked under the nearest large petal.
Tension advice: Sew firmly enough that the petals don’t flop, but don’t pull the panel stitches tight enough to pucker. If the top starts to cup, loosen your sewing.
Size checkpoint: After sewing, the top should still measure 9.5 x 4.9 in (24.1 x 12.4 cm) under the petals. The outer tips hang about 1–1.5 in (2.5–3.8 cm) over the sides.
Border
Border gauge: same as the body, 4 sc per inch (4 sc per 2.5 cm).
Opening Collar
Use D and work with the RS facing.
Round 1: Join D at a corner of the slot. Work 20 sc in the free loops of the ch-20, 6 sc along the 8 row ends of the short edge, 20 sc in the unworked sts of Row 7, and 6 sc along the other short edge. Sl st to the first sc. (52 sts: 20 + 6 + 20 + 6)
Round 2: Ch 1. *Sc in each of the next 20 sts, [sc2tog, sc in each of the next 2 sts, sc2tog]; repeat from * once more. Sl st to the first sc. (48 sts: 20 + 4 + 20 + 4)
Round 3: Ch 1, sc in each st around, sl st to the first sc. (48 sts)
Round 4: Ch 1, reverse sc in each st around, sl st to join. (48 sts)
Fasten off. The collar stands 0.9 in (2.3 cm) tall, and the opening measures about 4.75 x 1.5 in (12.1 x 3.8 cm).
Bottom Edge
Pick up the A loop from Round 13.
Round 14: Ch 1, sc in each st around (38 + 20 + 38 + 20), sl st to join. (116 sts)
Round 15: Ch 1, sl st loosely in each st around. (116 sts)
Fasten off.
Why the math works: The long sides keep the 38 sts of the top panel, and the short sides keep the 20 sts from Round 1. That gives 2 × 38 + 2 × 20 = 116 sts. At 4 sc per inch, 116 sts make 29 in (73.7 cm). The panel’s own perimeter is 2 × (9.5 + 4.9) = 28.8 in (73.2 cm), so the walls stay straight with only 0.2 in (0.5 cm) of ease. On the collar, the decreases are only on the short ends. That rounds those ends into an oval and leaves the 20-st long sides matching the slot.
Final Blocking
- Weave in all the ends, except any you might need for small adjustments.
- Put the cover on a tissue box.
- Mist the petals lightly with water until they’re damp, not soaked.
- Shape each petal with your fingers. Pinch the tips to a point and curve Layer 3 gently outward and down.
- Press the collar into a smooth oval and roll its beaded edge slightly outward.
- Let it dry fully on the box, which takes about 6–8 hours.
- Weave in any remaining ends.
Final Quality-Control Checklist
- The top measures 9.5 x 4.9 in (24.1 x 12.4 cm).
- The sides are 3 in (7.6 cm) tall and hang straight.
- The petal counts are 12, 16, and 20, spaced according to the layout.
- No petal base shows from above.
- The cream collar is even, with 48 sts.
- Four leaves sit at the four corners.
- The cover slides on and off without stretching.
Troubleshooting
- Sides flare out: Your gauge is loose. Redo Rounds 3–13 with a smaller hook.
- Cover is too tight: Add 1 sc on each short side in Round 1 (120 sts), and carry the new counts into the border.
- Petals curl: Block them damp and pin them flat to dry. Cotton yarn helps.
- Gaps between petals: Nudge the bases closer together or add one petal to that layer.
- Collar ripples: Work an extra sc2tog on each short end in Round 3.
- Top puckers: Your sewing stitches are too tight. Remove a few and redo them more loosely.
Care
Hand wash in cool water, press out the water in a towel, and reshape the petals while damp. Dry flat or on the box, away from direct heat.
Final Notes
The measurements build on each other. A gauge of 16 sc = 4 in (10.2 cm) gives a 38-st top that is 9.5 in (24.1 cm) wide. The 116-st round gives a circumference of 29 in (73.7 cm). The walls measure 2.7 in (6.9 cm) before the border and 3 in (7.6 cm) after it. The petals overlap to make a full bloom 48 petals deep. If you check each stage against these numbers, the cover will fit.
Happy crocheting!