

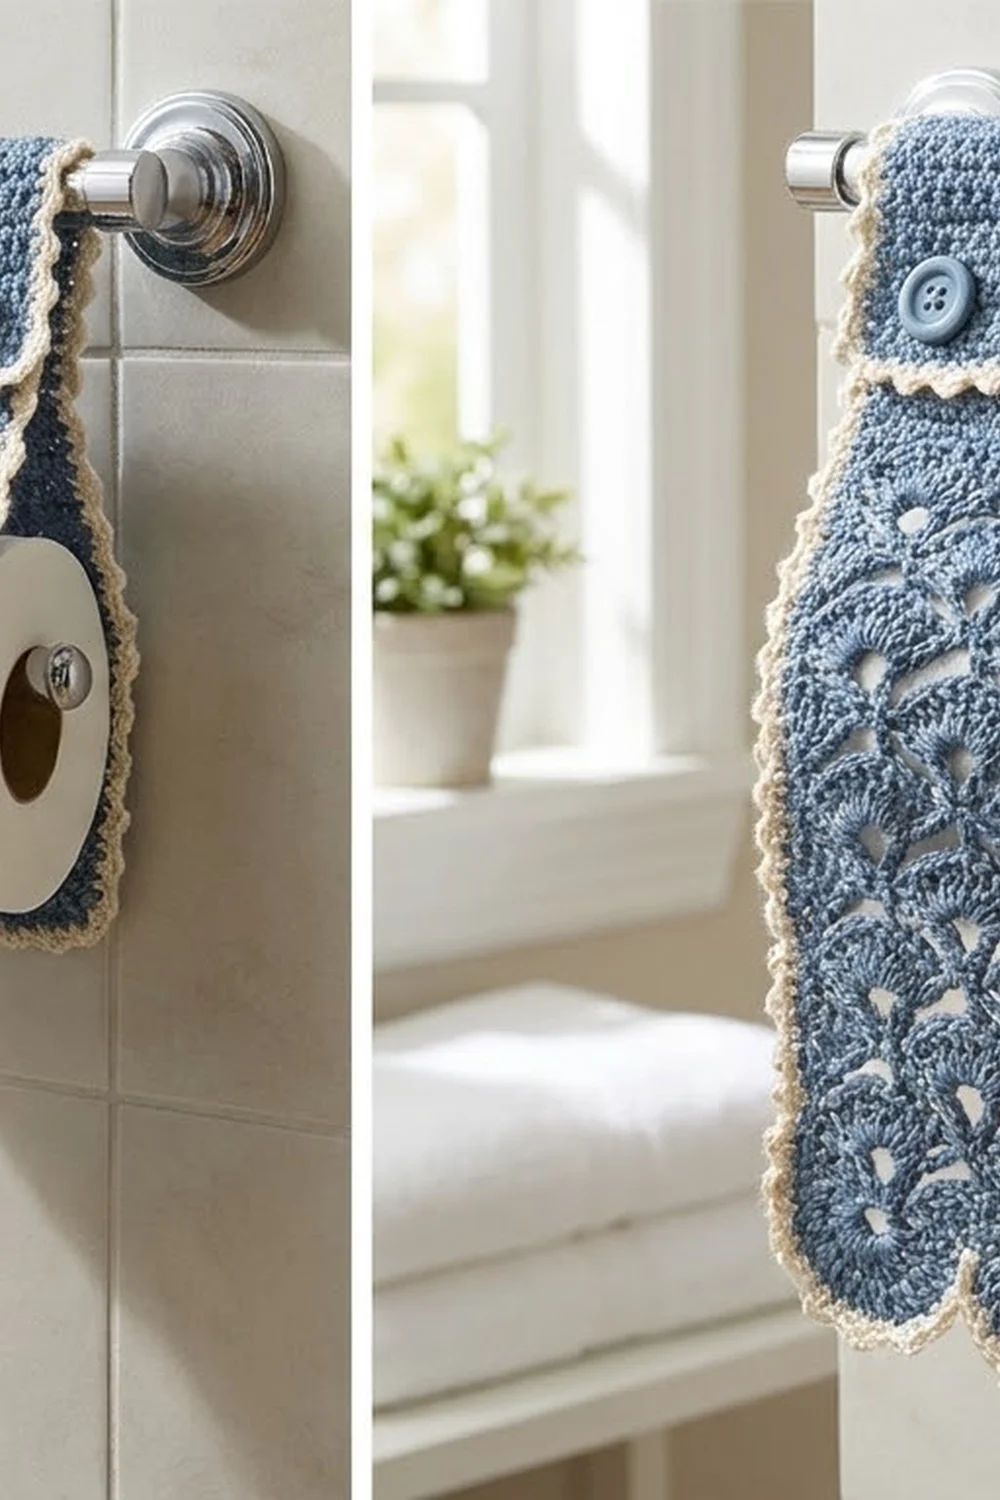
The Bluebell Fan Lace cover is a light, pretty way to dress up a plain toilet roll holder. A soft dusty-blue lace panel drapes over the front of the roll. A solid band at the top wraps around the holder bar and closes with two buttons, so you don’t need to take the holder off the wall.
The lace is a classic fan pattern. Rows of 7-double-crochet fans swap places with rows of open chain arches, so each tier of fans sits between the fans of the tier below. The last fan row makes three rounded scallops at the bottom. A cream border with tiny picots outlines the whole piece and makes the scallops stand out.
This pattern uses US crochet terms. The finished cover measures 6.4 in (16.3 cm) wide by 12.1 in (30.7 cm) long after blocking.
The cover is worked flat in one piece, in rows, starting at the buttonhole end of the tab. You work 24 rows of single crochet for the tab and band, then 13 rows of fan lace. Last, you work two rounds of cream border around the whole piece and sew on the buttons.
Finished Size and Construction
- Finished size: 6.4 in × 12.1 in (16.3 cm × 30.7 cm)
- Skill level: Easy-intermediate
- Terminology: US crochet terms
- Yarn weight: DK / light worsted (#3), cotton
- Hook: 4.0 mm (G-6)
- Number of pieces: 1
- Layout: One vertical strip: tab and band (solid) on top, fan lace below
- Piece size before border: 5.6 in × 11.3 in (14.2 cm × 28.7 cm)
- Solid tab and band: 5.6 in × 4.8 in (14.2 cm × 12.2 cm)
- Lace panel: 5.6 in × 6.5 in (14.2 cm × 16.5 cm)
- Border depth: 0.4 in (1.0 cm) on every side
- Fits: holder bars up to about 1.2 in (3.0 cm) across
Materials
Choose a smooth mercerized or combed cotton DK. Cotton shows lace stitches clearly, holds up in a humid bathroom, and blocks crisply. Avoid fuzzy or very stretchy yarns, because the fans will lose their shape.
- Color A, dusty blue: 30 g, about 72 m (79 yd)
- Color B, cream: 10 g, about 24 m (26 yd)
These amounts assume a DK cotton of about 120 m per 50 g. They include a margin of roughly 25% for your gauge swatch and small differences in tension.
Tools and notions:
– 4.0 mm (G-6) crochet hook
– Two buttons, 5/8 in (1.6 cm) across, in blue
– Tapestry needle
– Sewing needle and matching thread (or Color A yarn split to 2 plies)
– Scissors
– Rustproof pins and a blocking mat or folded towel
– Spray bottle
Abbreviations (US Terms)
- ch – chain
- sl st – slip stitch
- sc – single crochet
- dc – double crochet
- sk – skip
- st(s) – stitch(es)
- sp – space
- RS / WS – right side / wrong side
- rep – repeat
Special stitches:
– Fan: 7 dc in the stitch indicated.
– Half fan: 4 dc in the stitch indicated. At the start of a row, ch 3 counts as the first of those 4 dc.
– Picot: ch 3, sl st in the 3rd ch from the hook.
Gauge and Checkpoints
Single crochet gauge: 18 sc and 20 rows = 4 in (10.2 cm).
Lace gauge: 25 sts = 5.6 in (14.2 cm) wide; 4 lace rows = 2 in (5.1 cm) tall.
The cover is a single piece, so your first rows act as your test swatch. Measure at each of these points:
- After Row 4: width is 5.6 in (14.2 cm) and height is 0.8 in (2.0 cm).
- After Row 24: the solid section is 4.8 in (12.2 cm) long.
- After Row 29 (5 lace rows): the lace is 2.5 in (6.4 cm) tall.
- After Row 37: the lace is 6.5 in (16.5 cm) tall and the whole piece is 11.3 in (28.7 cm) long.
- After the border: the cover is 6.4 in × 12.1 in (16.3 cm × 30.7 cm).
If your piece is too big (more than 1/4 in or 0.6 cm off at checkpoint 1), go down to a 3.75 mm hook. If it is too small, go up to a 4.5 mm hook. Change the hook, not the stitch count, because the lace only works on a multiple of 8 + 1 stitches.
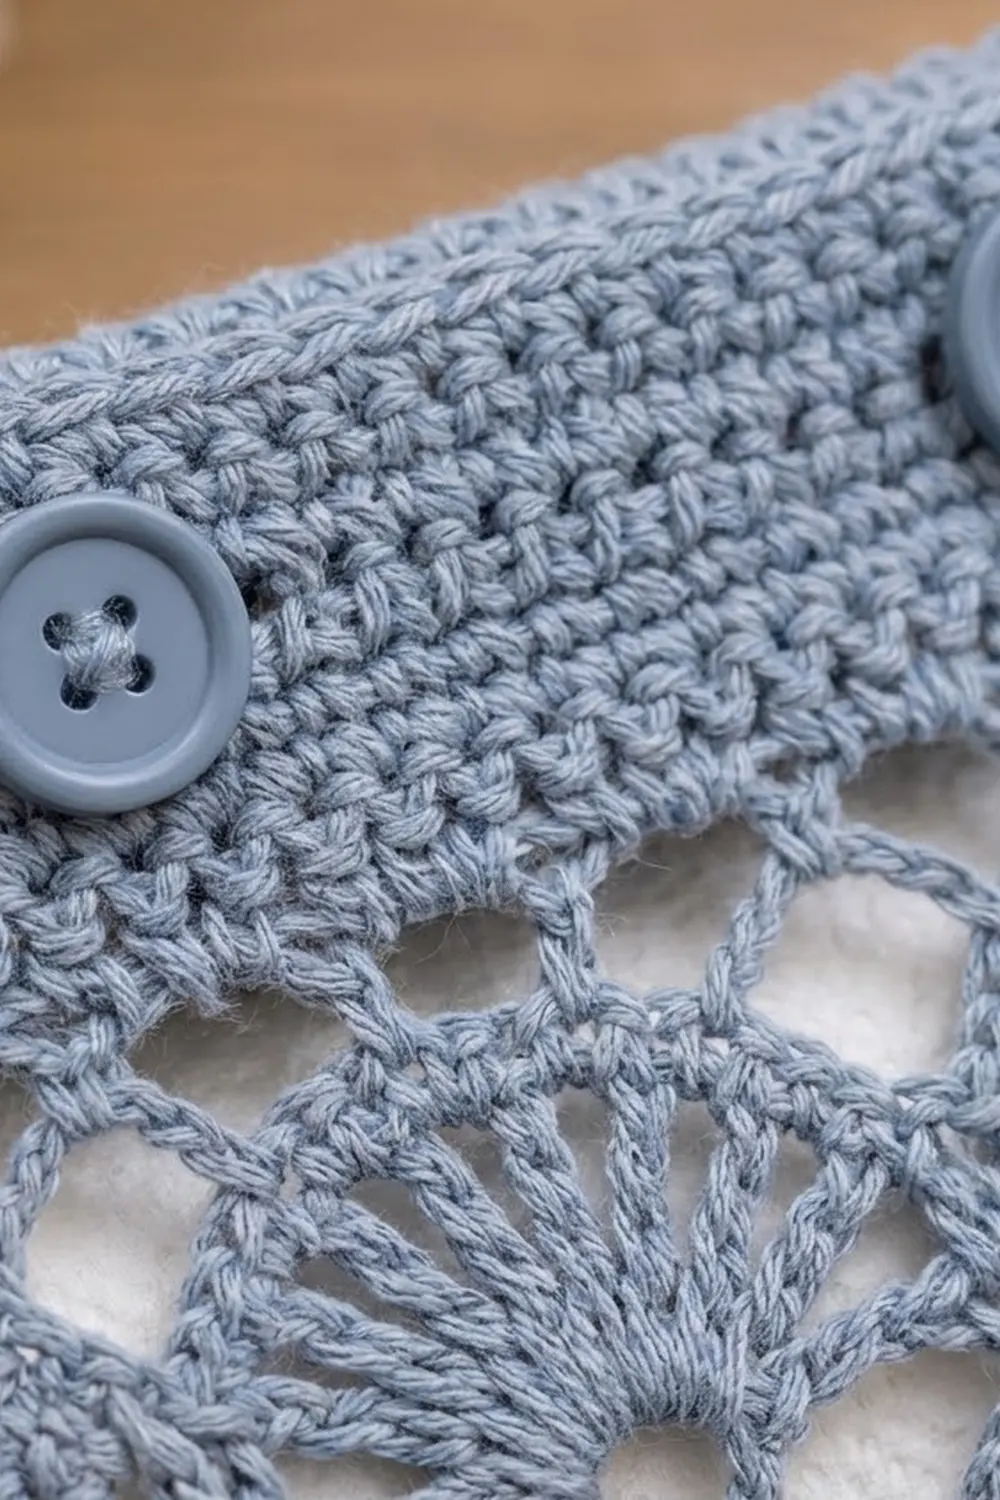
Tab and Band (Solid Section)
Use Color A. Odd-numbered rows are RS rows. Every row turns.
Foundation: Ch 26.
Row 1 (RS): Sc in the 2nd ch from the hook and in each ch across. Turn. (25 sc)
Row 2: Ch 1, sc in each st across. Turn. (25 sc)
Row 3 (buttonhole row): Ch 1, sc in the first 5 sts, ch 3, sk 3 sts, sc in the next 9 sts, ch 3, sk 3 sts, sc in the last 5 sts. Turn. (19 sc + 2 ch-3 sps; 5 + 3 + 9 + 3 + 5 = 25 sts of width)
The two buttonholes sit over stitches 6–8 and 18–20. Their centers are stitches 7 and 19, which are 6 stitches either side of the center stitch (13). That keeps them symmetrical.
Row 4: Ch 1, sc in each sc and 3 sc in each ch-3 sp across. Turn. (19 + 6 = 25 sc)
Checkpoint 1: 5.6 in (14.2 cm) wide.
Rows 5–24: Ch 1, sc in each st across. Turn. (25 sc in each row)
At the end of Row 24 the next row will be a RS row. Don’t fasten off.
Checkpoint 2: the solid section is 4.8 in (12.2 cm) from the foundation edge.
Rows 1–21 form the tab that wraps around the bar. Rows 22–24 form the front band, where the buttons will go.
Fan Lace Panel
Keep using Color A. The lace repeats over 8 stitches + 1. With 25 stitches you get 3 full fans across.
Row 25 (RS, full fan row): Ch 1, sc in the first st, sk 3 sts, fan in the next st, sk 3 sts, sc in the next st; rep from * 2 more times. Turn. (3 fans + 4 sc = 25 sts)*
Row 26 (WS, arch row A): Ch 6 (counts as dc + ch 3). Sc in the center (4th) dc of the first fan, ch 3, dc in the next sc. Ch 3, sc in the center dc of the next fan, ch 3, dc in the next sc; rep from * once more. Turn. (4 dc + 3 sc = 7 sts, 6 ch-3 sps)*
Row 27 (RS, offset fan row): Ch 3, 3 dc in the first dc (half fan). Sc in the next sc, fan in the next dc; rep from * once more. Sc in the next sc, then work 4 dc in the 3rd ch of the turning ch-6 (half fan). Turn. (4 + 1 + 7 + 1 + 7 + 1 + 4 = 25 sts: 2 fans, 2 half fans, 3 sc)*
Row 28 (WS, arch row B): Ch 1, sc in the first dc, ch 3, dc in the next sc. Ch 3, sc in the center dc of the next fan, ch 3, dc in the next sc; rep from * once more. Ch 3, sc in the top of the turning ch-3. Turn. (3 dc + 4 sc = 7 sts, 6 ch-3 sps)*
Row 29 (RS, full fan row): Ch 1, sc in the first sc. Fan in the next dc, sc in the next sc; rep from * 2 more times. Turn. (3 fans + 4 sc = 25 sts)*
Checkpoint 3: the lace measures 2.5 in (6.4 cm).
Rows 30–33: Rep Rows 26–29.
Rows 34–36: Rep Rows 26–28.
Row 37 (RS): Rep Row 29. (3 fans + 4 sc = 25 sts)
Fasten off Color A. Row 37’s three full fans are the bottom scallops. Starting the lace with Row 25 and ending with Row 37 gives seven tiers of fans, alternating 3 full fans with 2 full fans plus 2 half fans.
Checkpoint 4: the lace measures 6.5 in (16.5 cm) and the piece measures 11.3 in (28.7 cm) in total.
Border
Border gauge: about 4.5 sc per in (2.5 cm) along every edge, which matches the sc gauge of the body.
Each corner group (3 sc in one stitch) is counted on its own. The side counts below are the stitches between the corner groups.
Round 1 (Color B, RS): With the RS facing, join Color B in the last sc of Row 37 (a bottom corner). Ch 1, then work 3 sc in that same st (corner).
- Side 1: Work up the row ends of Rows 36–25. Put 3 sc in the end of each arch row (6 rows = 18 sc) and 2 sc in the end of each fan row (6 rows = 12 sc). Then work 1 sc in the end of each of Rows 24–1 (24 sc). (18 + 12 + 24 = 54 sc)
- Corner: 3 sc in the free loop of the first foundation ch.
- Tab end: 1 sc in each of the next 23 free loops. (23 sc)
- Corner: 3 sc in the last foundation ch.
- Side 2: Work down the row ends of Rows 1–24 (24 sc), then Rows 25–36 at the same rates as Side 1. (54 sc)
- Corner: 3 sc in the first sc of Row 37.
- Bottom: Sc in the next 3 dc, 3 sc in the center dc, sc in the next 3 dc (9 sc per fan), sc in the next sc; rep from * once more. Then work sc in the next 3 dc, 3 sc in the center dc, sc in the next 3 dc. (9 + 1 + 9 + 1 + 9 = 29 sc)*
Sl st to the first sc to join.
Round 1 total: 4 corners × 3 + 54 + 23 + 54 + 29 = 172 sc.
Round 2 (Color B, picot round): Ch 1. Sc in each sc around, working 3 sc in the center sc of each corner group, and work a picot after every 2nd sc. Sl st to the first sc to join. Fasten off.
Round 2 total: 172 + 8 corner increases = 180 sc, and 180 ÷ 2 = 90 picots.
Per side in Round 2: Side 1 = 54, tab end = 23, Side 2 = 54, bottom = 29, and 4 corners × 5 = 20. That gives 54 + 23 + 54 + 29 + 20 = 180.
Why the math works: the solid rows are 5 rows per in. One sc per row end (24 sc over 4.8 in, or 12.2 cm) matches the 4.5–5 sc per in border gauge closely. The lace rows are 0.5 in (1.3 cm) each. Alternating 3 and 2 sc gives 30 sc over 6 in (15.2 cm), which is 5 per in, and that eases slightly across the shorter top edge of the fan rows. Three sc at each fan’s center dc rounds the scallop instead of pulling it flat. The extra 2 sc at each corner in Round 2 keep the corners square. Each round adds about 0.2 in (0.5 cm), so the two rounds add 0.4 in (1.0 cm) per side. That makes the width 5.6 + 0.8 = 6.4 in (16.3 cm) and the length 11.3 + 0.8 = 12.1 in (30.7 cm).
Buttons
Lay the cover RS up. Mark sts 7 and 19 on Row 22. Sew a button centered on each marked stitch, using sewing thread or split yarn. Leave a short thread shank of about 1/8 in (0.3 cm) so the tab can close over the buttons without puckering.
The distance from the buttonholes (Row 3) to the buttons (Row 22) is 19 rows, or 3.8 in (9.7 cm). That is enough to go around a bar up to about 1.2 in (3.0 cm) across with a little ease. For a thicker bar, add 2–4 rows to the solid section before Row 25, and move the buttons down by the same number of rows.
Final Blocking
- Weave in all ends along the WS of the solid rows or inside the cream border, not through the open lace.
- Pin the cover RS up on the mat to 6.4 in × 12.1 in (16.3 cm × 30.7 cm).
- Pin the long sides straight first, keeping them parallel.
- Pin each of the three bottom scallops at its center dc, so the points line up evenly.
- Open each fan by pinning gently between the arch rows. Don’t stretch the solid band.
- Spray until the piece is damp all the way through.
- Leave it to dry completely, about 12 hours, before unpinning.
Final Quality-Control Checklist
- [ ] Every row has 25 sts of width (every fan row has 25 sts; every arch row has 7 sts and 6 ch-3 sps)
- [ ] There are seven tiers of fans, and the tiers are staggered
- [ ] The bottom edge has 3 even scallops
- [ ] Round 1 has 172 sc and Round 2 has 180 sc with 90 picots
- [ ] The cover measures 6.4 in × 12.1 in (16.3 cm × 30.7 cm) after blocking
- [ ] The buttons line up with the buttonholes and are firmly sewn
- [ ] There are no loose ends in the lace area
Troubleshooting
The fans are cupping or ruffling. Your dc are too loose compared with your sc. Go down half a hook size for the lace rows only.
The lace is narrower than the band. Your chains are too tight. Make the ch-3s more loosely, or work them with a hook one size larger.
The offset fans don’t line up. Check that each arch row has 7 sts. A missed sc or dc moves every fan above it.
The sides are wavy after the border. Too many sc went into the row ends. Use 2 sc in each lace row end instead of 3.
The sides are pulling in. Too few sc went into the row ends. Add 1 sc in each arch row end.
The tab is too loose on the bar. Move both buttons up 1–2 rows.
The buttonholes are too tight. Use 1/2 in (1.3 cm) buttons, or redo Row 3 with ch 4 over 3 skipped sts.
Care
Hand wash in cool water with mild soap, press out the water in a towel, and dry flat. Re-pin the scallops while the cover is damp if they need it.
Final Notes
Each stage of the Bluebell Fan Lace cover builds on the one before. You start with 25 sts at 5.6 in (14.2 cm) wide. The 24 solid rows make 4.8 in (12.2 cm) of tab and band. The 13 lace rows add 6.5 in (16.5 cm), for a total of 11.3 in (28.7 cm). Two cream border rounds add 0.4 in (1.0 cm) on each side, which gives the finished 6.4 in × 12.1 in (16.3 cm × 30.7 cm). If you check each stage as you go, the cover will hang neatly every time.
Happy crocheting!