

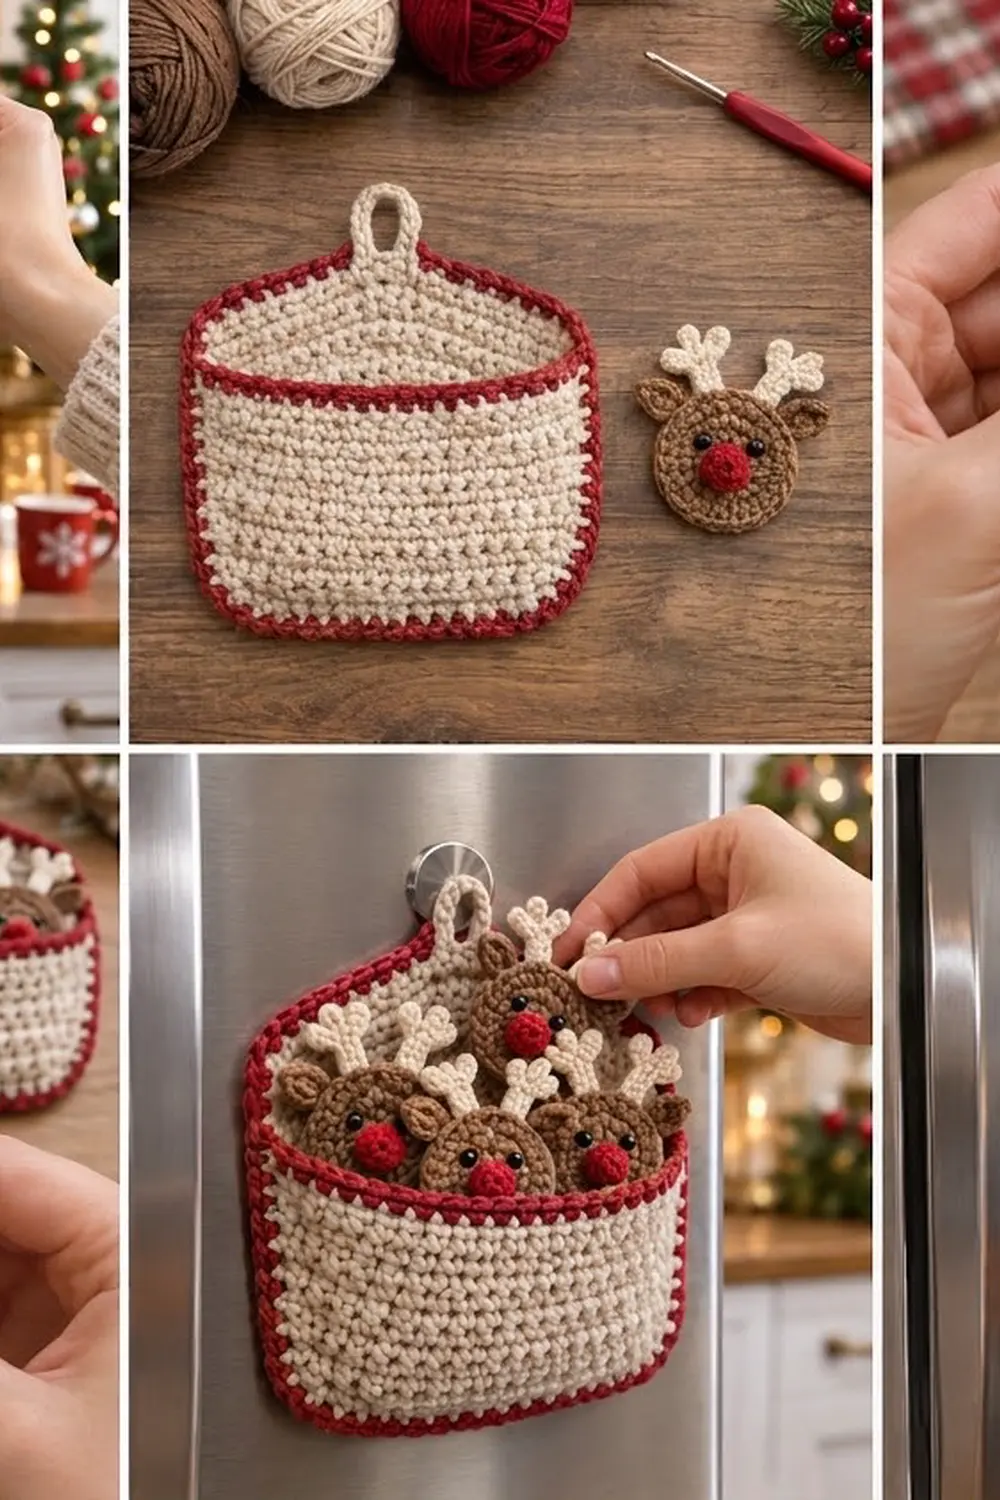
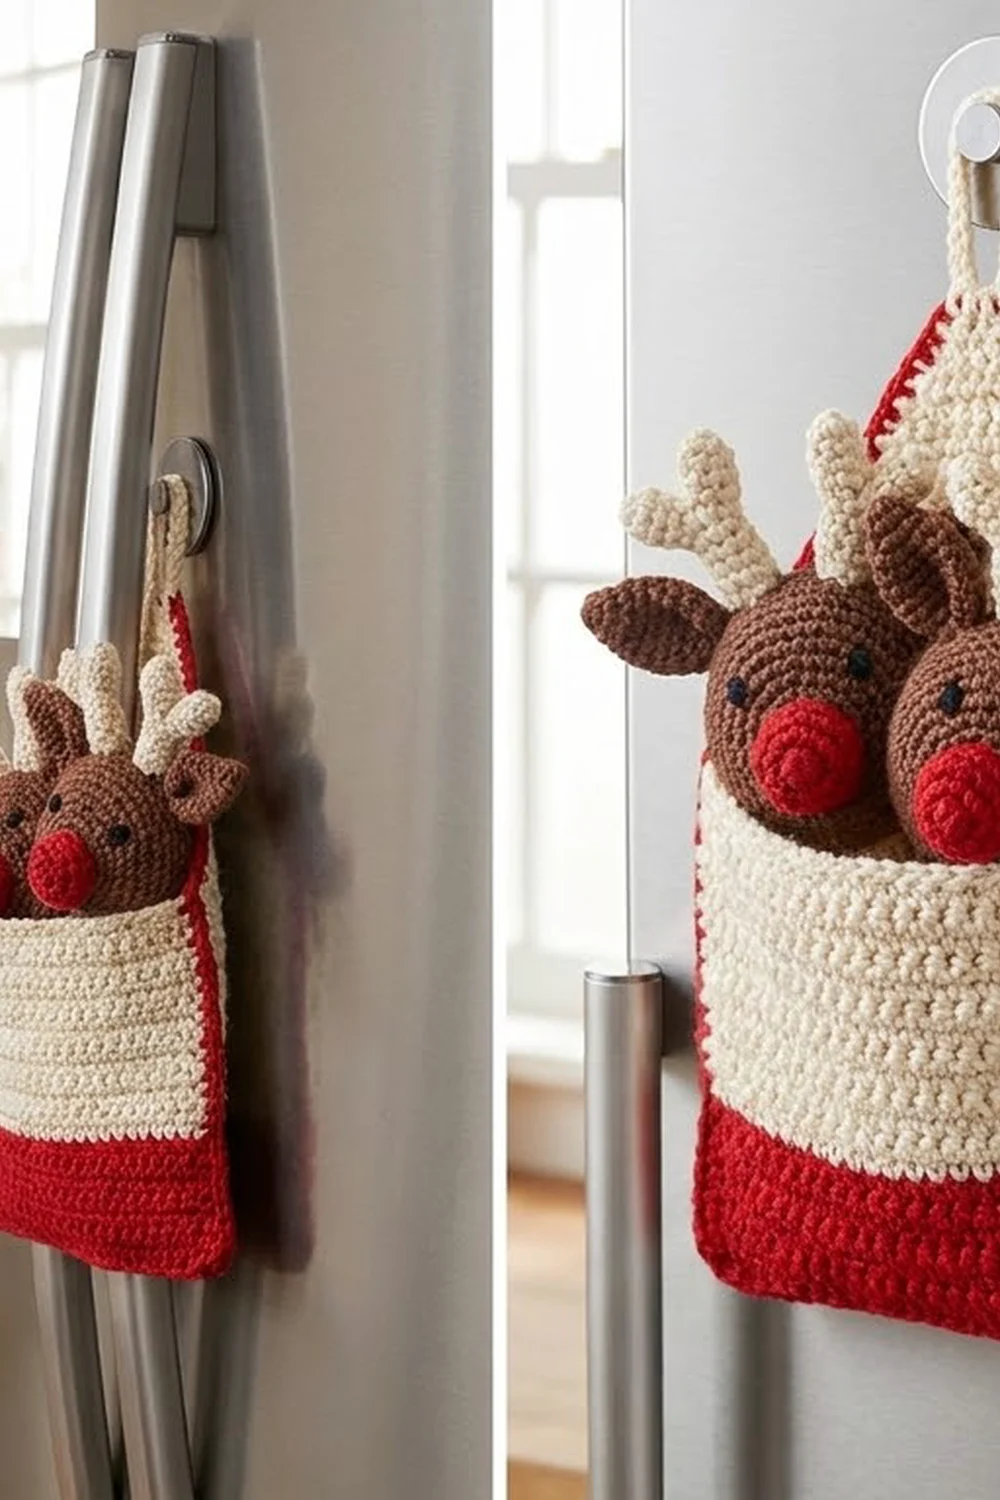
This set brings a little holiday cheer to the fridge door. It has four round reindeer face magnets and one cream wall pocket to keep them in. Each reindeer has a warm brown face, two pointed brown ears, chunky cream antlers, black eyes and a puffy red nose. The pocket is cream single crochet with a red border all the way around and a cream loop at the top for hanging.
The colors are classic Christmas cottage: cream, cocoa brown and berry red. The pocket hangs from a round magnetic hook. Each reindeer holds notes on the fridge with a small disc magnet stitched into a cream pouch on its back. When the reindeer aren’t holding notes, they sit in the pocket with their antlers peeking over the edge.
This pattern uses US crochet terms. Without the loop, the finished pocket measures 6 in wide x 5.9 in tall (15.2 cm x 15.0 cm). Each reindeer face is 2.2 in (5.6 cm) across. With the antlers, the full magnet is about 3.25 in (8.3 cm) tall.
The pocket is made from two flat panels worked in rows: a tall back panel and a shorter front panel, both with rounded bottom corners. A red border joins the two panels and edges the whole piece. The reindeer faces are worked in flat rounds, and then you sew on the ears, antlers, nose, eyes and magnet pouch.
Finished Size and Construction
- Finished pocket size: 6 in x 5.9 in (15.2 cm x 15.0 cm), plus a 1.25 in (3.2 cm) loop
- Finished magnet size: face 2.2 in (5.6 cm) across; 3.25 in (8.3 cm) tall with antlers
- Skill level: Easy to Intermediate
- Terminology: US
- Yarn weight: Worsted (#4)
- Hooks: 4.0 mm (G-6) for the pocket; 3.5 mm (E-4) for the magnets
- Number of pieces: 1 pocket (back panel, front panel, loop) + 4 reindeer magnets (each with a face, 2 ears, 2 antlers, a nose and a pouch)
- Layout: The front panel lies over the lower part of the back panel, with the bottom edges and curves lined up
- Back panel size before border: 5 in x 4.9 in (12.7 cm x 12.4 cm)
- Front panel size before border: 5 in x 3.3 in (12.7 cm x 8.4 cm)
- Border depth: 2 rounds, 0.5 in (1.3 cm) on every side
Materials
Use a smooth worsted-weight yarn in acrylic or cotton-acrylic so the stitches look crisp and the pocket keeps its shape.
- Cream: 30 g / 60 m (pocket panels, loop, antlers, magnet pouches)
- Cocoa brown: 15 g / 30 m (faces and ears)
- Berry red: 10 g / 20 m (border, front edge, noses)
These amounts include a safety margin of about 20%.
Tools and notions:
- 4.0 mm (G-6) and 3.5 mm (E-4) crochet hooks
- 8 black safety eyes, 6 mm (0.2 in), or black beads or French knots for a child-safe option
- 4 round disc magnets, 0.8 in (2.0 cm) in diameter
- 1 round magnetic hook for hanging the pocket
- Tapestry needle, scissors, stitch markers
- Pins and a blocking mat
Abbreviations (US Terms)
- ch – chain
- sl st – slip stitch
- sc – single crochet
- hdc – half double crochet
- dc – double crochet
- inc – 2 sc in the same stitch
- sc2tog – single crochet 2 together
- MR – magic ring
- st(s) – stitch(es)
- RS – right side
Row-end sc: Work 1 sc into the side of each sc row, putting the hook under the outer two strands of the turning stitch.
Gauge and Checkpoints
Pocket gauge (4.0 mm hook): 16 sc x 18 rows = 4 in (10.2 cm) square.
Magnet gauge (3.5 mm hook): Rounds 1–3 of the face measure 1.1 in (2.8 cm) across.
Make one reindeer face before you start the rest of the set. It’s quick and shows whether your tension is right.
Checkpoints:
- Face after Round 3: 1.1 in (2.8 cm)
- Face after Round 6: 2.2 in (5.6 cm)
- Back panel after Row 3: foundation edge 4 in (10.2 cm), Row 3 width 5 in (12.7 cm)
- Back panel after Row 22: 5 in x 4.9 in (12.7 cm x 12.4 cm)
- Front panel after Row 15: 5 in x 3.3 in (12.7 cm x 8.4 cm)
If your piece is too big, go down half a hook size. If it’s too small, go up half a hook size. Keep the stitch counts the same, because the border math depends on the counts, not the measurements.
Reindeer Magnet
Use the 3.5 mm hook for all magnet pieces. Make 4 of every piece in this section.
Face (Brown)
Work in joined rounds with the RS facing you. The ch 1 at the start of each round doesn’t count as a stitch.
- Round 1: MR, ch 1, 6 sc in ring, sl st to first sc. (6 sts)
- Round 2: Ch 1, inc in each st around, sl st to join. (12 sts)
- Round 3: Ch 1, (sc in next st, inc) 6 times, sl st to join. (18 sts)
- Round 4: Ch 1, (sc in next 2 sts, inc) 6 times, sl st to join. (24 sts)
- Round 5: Ch 1, (sc in next 3 sts, inc) 6 times, sl st to join. (30 sts)
- Round 6: Ch 1, (sc in next 4 sts, inc) 6 times, sl st to join. (36 sts)
- Round 7 (edge round): Sl st loosely in each st around. (36 sl sts)
Fasten off and weave in the tail. The circle should lie flat. If it cups, you worked Round 6 too tightly.
Ears (Brown, Make 2)
Ch 6. You’ll work along both sides of the chain.
Sl st in 2nd ch from hook, sc in next ch, hdc in next ch, dc in next ch, 5 dc in last ch. Rotate the piece to work along the other side of the foundation chain: dc in next ch, hdc in next ch, sc in next ch, (sl st, ch 2, sl st) in the last ch. (14 sts plus a ch-2 tip)
The 5-dc end is the wide base that you sew to the face, and the ch-2 end is the pointed tip. Each ear is about 0.9 in (2.3 cm) long. Leave a 6 in (15.2 cm) tail for sewing.
Antlers (Cream, Make 2)
Each antler has one main beam and two side branches.
- Ch 8 for the main beam.
- Top tine: Sc in 2nd ch from hook and in next 2 ch. (3 sc)
- Branch 1: Ch 3, sc in 2nd ch from hook and in next ch. (2 sc)
- Beam: Sc in next 2 ch of the main beam. (2 sc)
- Branch 2: Ch 3, sc in 2nd ch from hook and in next ch. (2 sc)
- Beam: Sc in last 2 ch of the main beam. (2 sc)
That’s 11 sc in total, using all 7 working chains of the beam (3 + 2 + 2 = 7). Each antler is about 1.4 in (3.6 cm) tall. Leave a 6 in (15.2 cm) tail. Flip the second antler over so the branches point outward and the two antlers mirror each other.
Nose (Red)
- Round 1: MR, 6 sc in ring. (6 sts)
- Round 2: Inc in each st around. (12 sts)
- Round 3: (Sc in next st, sc2tog) 4 times. (8 sts)
Tuck the starting tail inside to fill the nose out. Fasten off, leaving a 6 in (15.2 cm) tail. You should have a puffy dome about 0.7 in (1.8 cm) across.
Magnet Pouch (Cream)
- Row 1: Ch 7, sc in 2nd ch from hook and in each ch across. (6 sts)
- Rows 2–5: Ch 1, turn, sc in each st across. (6 sts)
The pouch should measure about 1.3 in x 1 in (3.3 cm x 2.5 cm). Leave a 12 in (30.5 cm) tail.
Assembling the Magnet
- Eyes: Place the safety eyes between Rounds 3 and 4, 4 sts apart, just above the center. Secure the backs.
- Nose: Center the nose over Rounds 1–2, just below the eyes. Whipstitch around its edge.
- Ears: Sew the wide 5-dc base of each ear behind Round 6, at about 10 o’clock and 2 o’clock, with the pointed tips angled outward.
- Antlers: Sew the bottom 2 sts of each antler beam to the back of Rounds 5–6, at about 11 o’clock and 1 o’clock, so the branches rise above the face.
- Pouch: Center the pouch on the back of the face. Sew 3 sides, slide in the magnet, then sew the 4th side shut.
Wall Pocket
Use the 4.0 mm hook. The ch 1 at the start of each row doesn’t count as a stitch.
Back Panel (Cream)
- Row 1: Ch 17, sc in 2nd ch from hook and in each ch across. (16 sts)
- Row 2: Ch 1, turn, 2 sc in first st, sc in next 14 sts, 2 sc in last st. (18 sts)
- Row 3: Ch 1, turn, 2 sc in first st, sc in next 16 sts, 2 sc in last st. (20 sts)
- Rows 4–22: Ch 1, turn, sc in each st across. (20 sts)
The increases in Rows 2–3 form the rounded bottom corners. Fasten off and weave in the ends. Check that the panel measures 5 in x 4.9 in (12.7 cm x 12.4 cm).
Front Panel (Cream and Red)
- Rows 1–3: Work the same as the back panel. (16, 18, 20 sts)
- Rows 4–14: Ch 1, turn, sc in each st across. (20 sts) Change to red at the end of Row 14.
- Row 15 (red): Ch 1, turn, sc in each st across. (20 sts)
Fasten off. Check that the panel measures 5 in x 3.3 in (12.7 cm x 8.4 cm). The red row is the top edge of the pocket opening.
Hanging Loop (Cream)
Ch 14 and sl st to the first ch to form a ring. Ch 1, work 20 sc into the ring, then sl st to the first sc. (20 sts) Fasten off, leaving an 8 in (20.3 cm) tail.
Border
Border gauge: Each sc round is about 0.25 in (0.6 cm) deep at a relaxed, even tension, so 2 rounds = 0.5 in (1.3 cm).
Place the front panel on top of the back panel, both with the RS facing you. Line up the foundation chains and the curved corners, then clip the layers together. Row 15 of the front should sit level with Row 15 of the back.
Round 1 (red): With the RS facing you, join red in the first st of back Row 22 (the top right corner).
- Top: 2 sc in first st, sc in next 18 sts, 2 sc in last st. (22 sts)
- Left side: Row-end sc in Rows 21–4. Work through the back panel only for Rows 21–16 (6 sts) and through both layers for Rows 15–4 (12 sts). (18 sts)
- Left curve: 2 row-end sc in each of Rows 3, 2 and 1, through both layers. (6 sts)
- Bottom: Sc in each of the 16 foundation ch loops, through both layers. (16 sts)
- Right curve: 2 row-end sc in each of Rows 1, 2 and 3, through both layers. (6 sts)
- Right side: Row-end sc in Rows 4–21. Work through both layers for Rows 4–15 (12 sts) and through the back panel only for Rows 16–21 (6 sts). (18 sts)
Sl st to the first sc. Total: 22 + 18 + 6 + 16 + 6 + 18 = 86 sts.
Round 2 (red): Ch 1, then sc in each st around, with these changes:
- Top corners: Work 2 sc in each of the 2 corner sts at both top corners. The top becomes 18 + 8 = 26 sts.
- Curves: Work 2 sc in the 2nd and 5th st of each curve. Each curve becomes 8 sts.
- Sides and bottom: These stay the same, with 18 sts on each side and 16 sts along the bottom.
Sl st to join. Total: 26 + 18 + 8 + 16 + 8 + 18 = 94 sts (86 + 8). Fasten off.
Why the math works: Each side gets 1 row-end sc per sc row, so the border matches the panel length. The bottom gets 1 sc in each of the 16 foundation chains. The curves get 2 sc per row end because each row end there has to cover the height of the row plus the width added by the increases. The top corners only get extra stitches in Round 2, so they stay square without ruffling.
Attach the loop: Center the loop behind the top edge. Sew the bottom 0.35 in (0.9 cm) of the ring to the back of the border and the back panel. About 0.9 in (2.3 cm) of the loop should show above the top edge.
Final Blocking
- Spray the pocket and magnets lightly with water so they’re damp but not wet.
- Pin the pocket to 6 in x 5.9 in (15.2 cm x 15.0 cm) on a blocking mat. Keep the sides straight and the bottom curves smooth.
- Shape the front opening into a slight curve with your fingers.
- Lay the magnet faces flat, magnet side down, and pin each antler branch so it points outward.
- Let everything dry completely before handling.
Final Quality-Control Checklist
- Pocket measures 6 in x 5.9 in (15.2 cm x 15.0 cm)
- Border Round 1 has 86 sts and Round 2 has 94 sts
- The red top edge of the front panel is level with back Row 15 on both sides
- Bottom corners are evenly curved, not pointed
- Loop is centered and firmly attached
- Each face lies flat at 2.2 in (5.6 cm)
- Ears and antlers are placed symmetrically
- Eyes are secure and the nose is centered
- Each magnet is fully sewn inside its pouch
Troubleshooting
Face cups or ruffles: Cupping means your tension is too tight, and ruffling means it’s too loose. Redo Round 6 with looser or firmer tension.
Pocket bottom looks pointed: Make sure each curve has exactly 2 sc per row end in Round 1 and 8 sts in Round 2.
Front panel gapes away from the back: Make sure you worked through both layers for Rows 4–15 on both sides.
Border waves along the sides: Work exactly 1 sc per row end. Extra stitches stretch the edge.
Antlers are floppy: Use the smaller hook and work more tightly, then pin the antlers during blocking.
Magnet slides around in the pouch: Add a dab of fabric glue under the magnet before you close the pouch.
Care
Take the magnets out before washing, then hand wash in cool water. Lay flat to dry and reshape while damp.
Final Notes
Here’s the full measurement chain:
- The face measures 1.1 in (2.8 cm) after Round 3 and 2.2 in (5.6 cm) after Round 6.
- The back panel measures 5 in x 4.9 in (12.7 cm x 12.4 cm).
- The front panel measures 5 in x 3.3 in (12.7 cm x 8.4 cm).
- The 2-round border adds 0.5 in (1.3 cm) on each side, bringing the pocket to 6 in x 5.9 in (15.2 cm x 15.0 cm).
If your face and panel checkpoints are right, everything else will be too. Your reindeer team will be ready to hold notes on the fridge all season.
Happy crocheting!