

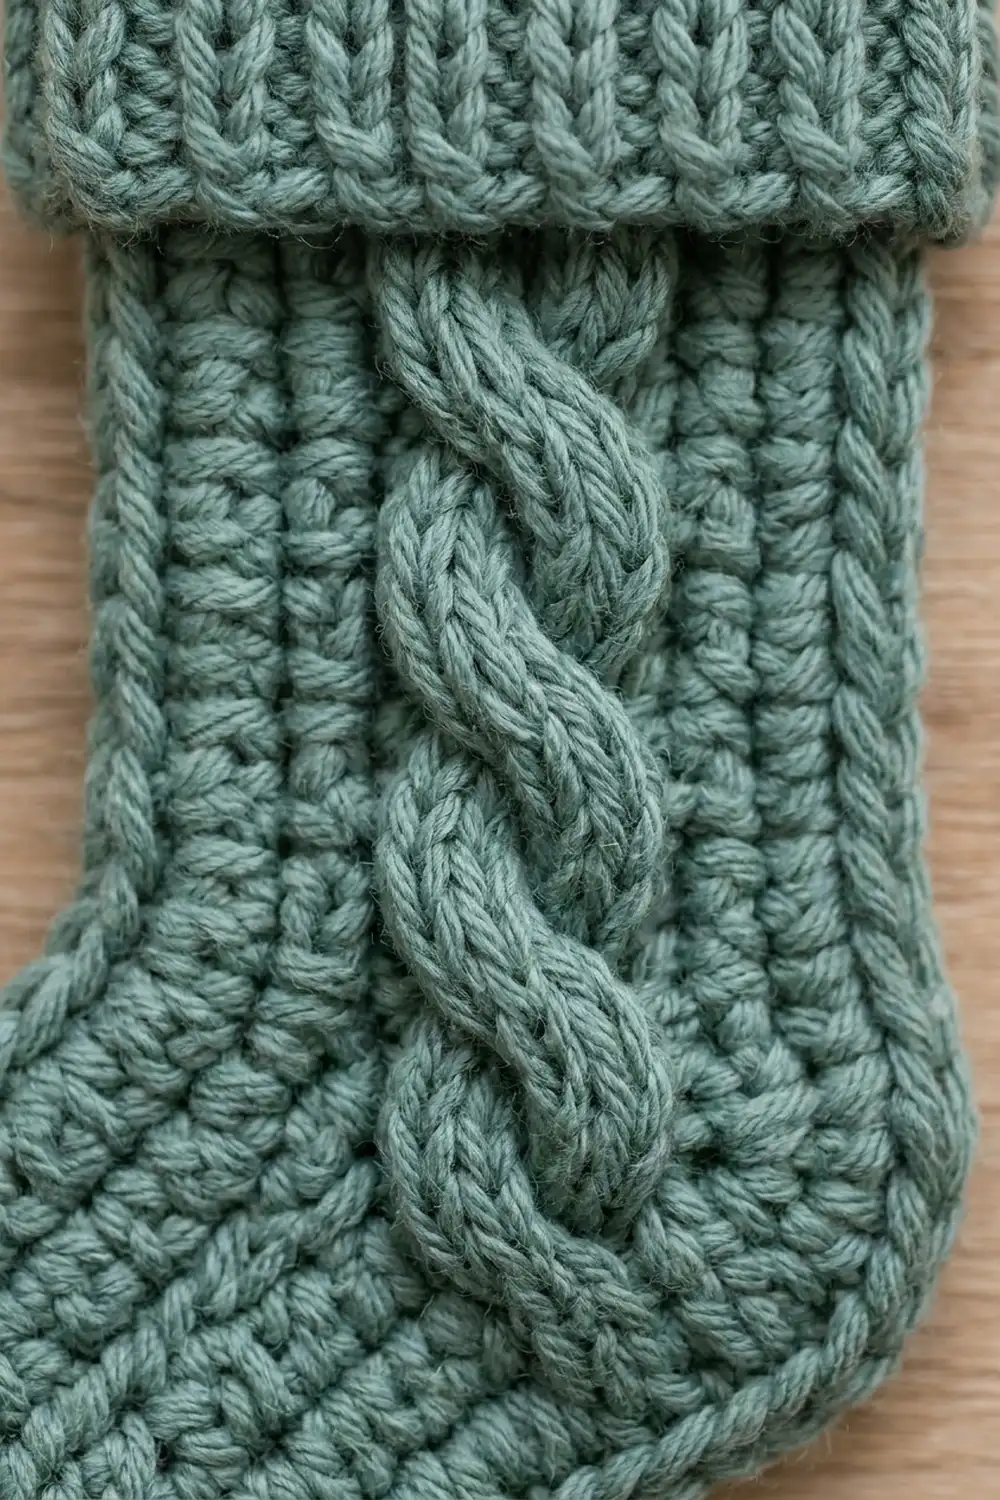
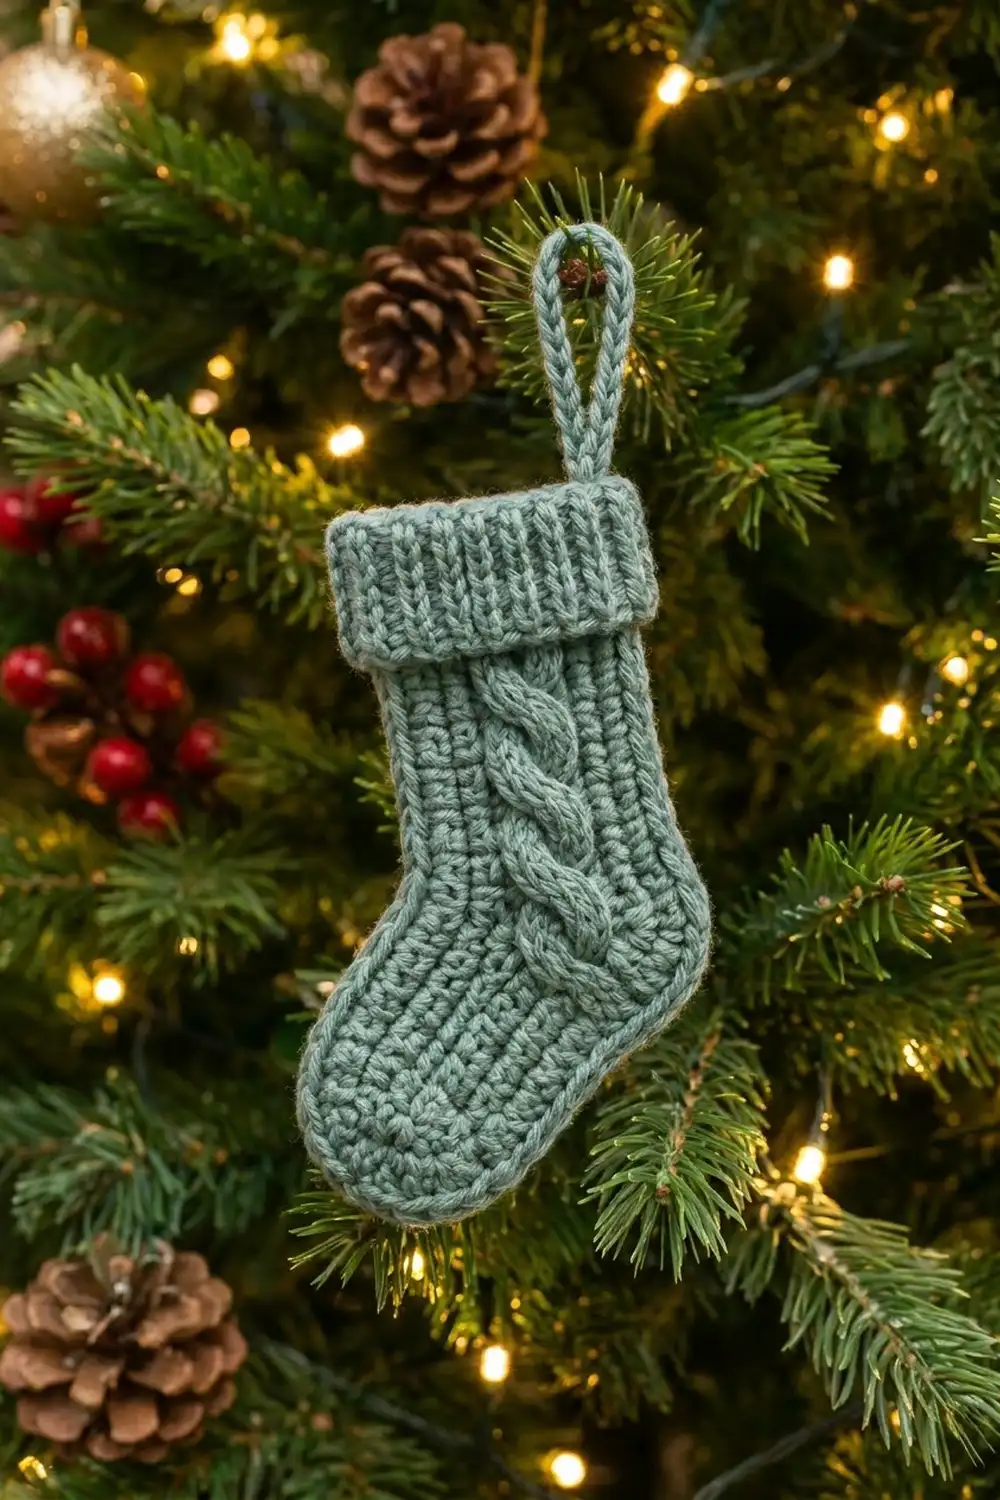
The Evergreen Twist Mini Stocking is a small flat ornament with a cozy hand-knit look. A rope cable twists down the center of the leg. A ribbed cuff sits across the top, a neat raised rim outlines the whole shape, and a corded loop lets it hang straight from a branch.
The sample uses a single soft sage green, which looks calm and wintry against tree lights and gold baubles. The plain stitches are half double crochet worked in the third loop, which pushes the stitches into knit-look V columns. The cable uses simple front and back post stitches.
This pattern uses US crochet terms. The finished ornament measures 4.25 in (10.8 cm) wide at the foot and 5.5 in (14.0 cm) tall, not counting the loop. With the loop it hangs about 7 in (17.8 cm) tall.
The body is worked flat in rows from the top of the leg down to the sole. Increases on the toe side shape the foot, and decreases at both ends round off the toe and heel. Next, a two-round edging frames the shape. Finally, you add a ribbed cuff made sideways in rows and a slip-stitch cord loop, then sew both in place.
Finished Size and Construction
- Finished size: 4.25 in (10.8 cm) wide at foot × 5.5 in (14.0 cm) tall, plus a 1.5 in (3.8 cm) loop
- Skill level: Intermediate (post-stitch cables, shaping)
- Terminology: US crochet terms
- Yarn weight: DK / light (#3)
- Hook: 4.0 mm (G-6)
- Number of pieces: 1 ornament, made of a body, a cuff band and a hanging loop
- Layout: single stocking, toe pointing left when the right side faces you
- Body size before border: 3.75 in (9.5 cm) wide at foot × 5 in (12.7 cm) tall; leg 2.5 in (6.4 cm) wide
- Border depth: 0.25 in (0.6 cm) on every edge
- Cuff: 3.5 in (8.9 cm) wide × 1.25 in (3.2 cm) tall
Materials
Yarn: DK-weight yarn in a smooth, light-colored fiber. A cotton blend or soft acrylic shows the cable and the V columns best. Avoid fuzzy or very dark yarn, because the texture will disappear.
- Sage green: 10 g, about 23 m (25 yd)
This quantity includes a margin for your gauge swatch, the sewing tails and one restart.
Tools:
– 4.0 mm (G-6) crochet hook
– Tapestry needle
– 2 stitch markers
– Rust-proof pins and a blocking mat or folded towel
– Ruler or tape measure
– Scissors
Abbreviations (US Terms)
- ch – chain
- sl st – slip stitch
- sc – single crochet
- hdc – half double crochet
- hdc2tog – half double crochet two together
- FPdc – front post double crochet
- BPdc – back post double crochet
- FPtr – front post treble crochet
- BLO – back loop only
- RS / WS – right side / wrong side
- st(s) – stitch(es)
Special stitches
- hdc3L (third-loop hdc): Work an hdc into the horizontal bar that sits just below the two top loops on the side facing away from you. Every plain hdc in the body, including increases and decreases, is an hdc3L. This creates the knit-look V columns. Where the pattern says “hdc,” always use the third loop.
- C4 (cable cross): Skip the next 2 sts. FPtr around each of the next 2 sts. Then, working in front of the stitches just made, FPtr around each of the 2 skipped sts. This makes 4 sts and one twist that leans right over left.
- Post placement: All post stitches go around the post stitch directly below them in the previous row. Skip the stitch behind each post stitch, so the count never changes.
- Turning chain: Ch 2 at the start of each row. It does not count as a stitch.
Gauge and Checkpoints
Body gauge: 16 hdc3L and 12 rows = 4 in (10.2 cm). That works out to 4 sts and 3 rows per 1 in (2.5 cm).
Cuff gauge: 5 sc = 1.25 in (3.2 cm), and 16 BLO rows = 3.5 in (8.9 cm).
Loop gauge: 15 ch = 3 in (7.6 cm).
Treat your first stocking as the test piece. Measure at each checkpoint below, because a small gauge error grows quickly on a piece this small.
- After Row 6: 2.5 in (6.4 cm) wide × 2 in (5.1 cm) tall
- After Row 12: 3.75 in (9.5 cm) wide × 4 in (10.2 cm) tall
- After Row 15: 5 in (12.7 cm) tall
- After the edging: 4.25 in (10.8 cm) wide at the foot, 3 in (7.6 cm) wide at the leg, 5.5 in (14.0 cm) tall
If the piece is too big: go down to a 3.75 mm hook. If it is too small, go up to a 4.5 mm hook. Change hooks if you are more than 0.25 in (0.6 cm) off at the Row 6 checkpoint. If only the height is off, check that you are not pulling up tall hdc loops.
Body
Work in rows. Row 1 is a RS row, and the foundation chain becomes the top edge of the stocking. The cable sits over stitches 4–7, counted from the heel-side (right) edge. All shaping happens at the toe-side (left) edge, so the cable stays in place.
Row 1 (RS): Ch 12. Hdc in the 3rd ch from the hook and in each ch across. Turn. (10 sts)
Row 2 (WS): Ch 2, hdc in each st across. Turn. (10 sts)
Row 3 (RS): Ch 2, hdc 3, FPdc around each of the next 4 sts, hdc 3. Turn. (10 sts)
Row 4 (WS): Ch 2, hdc 3, BPdc around each of the next 4 sts, hdc 3. Turn. (10 sts)
The BPdc stitches on WS rows show as raised posts on the RS. This keeps the cable column unbroken.
Row 5 (RS): Ch 2, hdc 3, C4, hdc 3. Turn. (10 sts)
Row 6 (WS): Ch 2, hdc 3, BPdc 4, hdc 3. Turn. (10 sts)
Checkpoint: 2.5 in (6.4 cm) wide × 2 in (5.1 cm) tall.
Foot Shaping
Increases now happen at the end of RS rows and at the start of WS rows. Both are on the toe edge.
Row 7 (RS): Ch 2, hdc 3, FPdc 4, hdc 2, 2 hdc in the last st. Turn. (11 sts)
Row 8 (WS): Ch 2, 2 hdc in the first st, hdc 3, BPdc 4, hdc 3. Turn. (12 sts)
Row 9 (RS): Ch 2, hdc 3, C4, hdc 4, 2 hdc in the last st. Turn. (13 sts)
Row 10 (WS): Ch 2, 2 hdc in the first st, hdc 5, BPdc 4, hdc 3. Turn. (14 sts)
Row 11 (RS): Ch 2, hdc 3, FPdc 4, hdc 6, 2 hdc in the last st. Turn. (15 sts)
Row 12 (WS): Ch 2, hdc 8, BPdc 4, hdc 3. Turn. (15 sts)
Checkpoint: 3.75 in (9.5 cm) wide × 4 in (10.2 cm) tall.
Toe and Heel Rounding
Row 13 (RS): Ch 2, hdc2tog, hdc 1, C4, hdc 6, hdc2tog. Turn. (13 sts)
This row works 2 + 1 + 4 + 6 + 2 = 15 sts and produces 1 + 1 + 4 + 6 + 1 = 13 sts. It also makes the third and final cable twist.
Row 14 (WS): Ch 2, hdc2tog, hdc 9, hdc2tog. Turn. (11 sts)
Work the old cable stitches as plain hdc3L. The cable ends here at the instep.
Row 15 (RS): Ch 2, hdc2tog, hdc 7, hdc2tog. (9 sts) Fasten off.
Checkpoint: 5 in (12.7 cm) tall. The foot is still 3.75 in (9.5 cm) at its widest, which is Row 12.
Border
Border gauge: 4 sc per 1 in (2.5 cm) along the stitch tops. Along the row ends, 4 sc per 3 rows, which also comes to 4 sc per inch.
Round 1 (RS): With the RS facing, join yarn in the free loop of the first foundation ch at the top heel-side corner. Ch 1. Then work each section in order:
- Top edge: 3 sc in the corner ch, sc in each of the next 8 ch, 3 sc in the last ch. (14 sc)
- Toe side: Work 1 sc in each of the 15 row ends, plus 1 extra sc in the row ends of Rows 3, 6, 9, 12 and 15. (20 sc)
- Bottom edge: 2 sc in the first st of Row 15, sc in each of the next 7 sts, 2 sc in the last st. (11 sc)
- Heel side: Repeat the toe-side method up the 15 row ends. (20 sc)
Join with a sl st to the first sc. (65 sc)
The corner increases are counted only within the top (14) and bottom (11) counts. The side counts (20 each) cover the row ends only. So the total is 14 + 20 + 11 + 20 = 65, and no corner is counted twice.
Round 2 (RS): Ch 1, sl st in the BLO of each sc around. Join to the first sl st. (65 sl sts) Fasten off and leave a 6 in (15.2 cm) tail.
This round rolls the edge forward into the raised rim you see on the finished ornament.
Why the math works:
– 10 top sts measure 2.5 in (6.4 cm). The 14 sc include 4 extra corner sts, which turn the corners without cupping.
– Each side has 15 rows, which measure 5 in (12.7 cm). At 4 sc per inch, 5 in needs 20 sc, so 15 + 5 = 20 matches exactly.
– The bottom has 9 sts, which measure 2.25 in (5.7 cm). The 2 extra corner sts ease around the rounded toe and heel.
– The 0.25 in (0.6 cm) border adds 0.5 in (1.3 cm) to each overall measurement. The foot becomes 3.75 + 0.5 = 4.25 in (10.8 cm), the leg 2.5 + 0.5 = 3 in (7.6 cm), and the height 5 + 0.5 = 5.5 in (14.0 cm).
Cuff
Row 1: Ch 6, sc in the 2nd ch from the hook and in each ch across. Turn. (5 sc)
Rows 2–16: Ch 1, sc in the BLO of each st across. Turn. (5 sc)
Fasten off and leave a 12 in (30.5 cm) tail for sewing.
Checkpoint: 3.5 in (8.9 cm) long × 1.25 in (3.2 cm) tall. The ridges run vertically when the band is turned sideways.
Attach the cuff: Turn the band so its ribs run vertically. Center it on the RS of the stocking, with its top edge level with the top of the border rim. The cuff is 3.5 in (8.9 cm) and the leg is 3 in (7.6 cm), so it overhangs by 0.25 in (0.6 cm) on each side, like the cuff in the photo. Whipstitch all four edges of the cuff to the body. Fold the overhanging ends around the edge and tack them to the back. The cuff covers the top 1.25 in (3.2 cm) of the leg, so the cable appears to come out from beneath it.
Hanging Loop
Ch 16. Sl st in the 2nd ch from the hook and in each ch across. (15 sl sts) Fasten off and leave a 6 in (15.2 cm) tail.
Checkpoint: the cord measures 3 in (7.6 cm).
Fold the cord in half to form a 1.5 in (3.8 cm) loop. Sew both ends to the back of the cuff, about 1 in (2.5 cm) in from the heel-side edge, so the loop rises just right of center. Stitch through the cord ends twice so the loop can carry the ornament’s weight.
Final Blocking
- Weave in all ends on the WS, running them through the stitches of matching texture.
- Lightly mist the ornament with water until it is damp but not soaked.
- Lay it RS up on a blocking mat.
- Pin the foot to 4.25 in (10.8 cm) wide and the full height to 5.5 in (14.0 cm).
- Pin the leg to 3 in (7.6 cm) wide and check that the cuff lies flat and level.
- Use your fingers to round the toe and heel curves smoothly.
- Pinch the cable gently upward so the posts stand out.
- Leave it to dry completely, at least 6 hours, then unpin.
Final Quality-Control Checklist
- The body has 15 rows, ending with 9 sts on Row 15.
- There are three cable twists, on Rows 5, 9 and 13.
- The cable sits over stitches 4–7 from the heel edge all the way down.
- Round 1 of the border has exactly 65 sc, and Round 2 has 65 sl sts.
- The ornament measures 4.25 in (10.8 cm) × 5.5 in (14.0 cm).
- The cuff overhangs 0.25 in (0.6 cm) on each side and its ribs run vertically.
- The loop is 1.5 in (3.8 cm) tall and the ornament hangs straight from it.
- No ends show on the RS.
Troubleshooting
The edges ripple. You have too many sc along the row ends. Leave out one or two of the extra sc on each side.
The edges pull in or cup. You have too few sc. Add an extra sc at the row ends of Rows 7 and 11.
The cable looks flat. Make sure you skip the stitch behind every post stitch. Also check that the WS rows use BPdc, not plain hdc, on the cable stitches.
The cable has moved sideways. You added a stitch on the heel edge by mistake. Recount from the right edge on every RS row, and keep the shaping on the toe edge only.
The texture does not look like knitting. You are probably working into the top loops. Use only the third-loop horizontal bar for every plain hdc.
The ornament leans when hung. Move the loop closer to the center of the cuff, or sew it more firmly.
Care
Hand wash in cool water, roll it in a towel to press out the water, and lay it flat to dry. Store it flat between tissue so the cuff and cable keep their shape.
Final Notes
Everything in this pattern follows one measurement chain. A gauge of 16 sts and 12 rows to 4 in (10.2 cm) makes a body 3.75 in (9.5 cm) wide by 5 in (12.7 cm) tall. The 0.25 in (0.6 cm) border brings that to 4.25 in (10.8 cm) by 5.5 in (14.0 cm). The 3.5 in (8.9 cm) cuff then overhangs the 3 in (7.6 cm) leg by 0.25 in (0.6 cm) on each side. Check your measurements at each step and your stocking will match the sample. Make one for every branch, or tuck one into a gift.
Happy crocheting!