
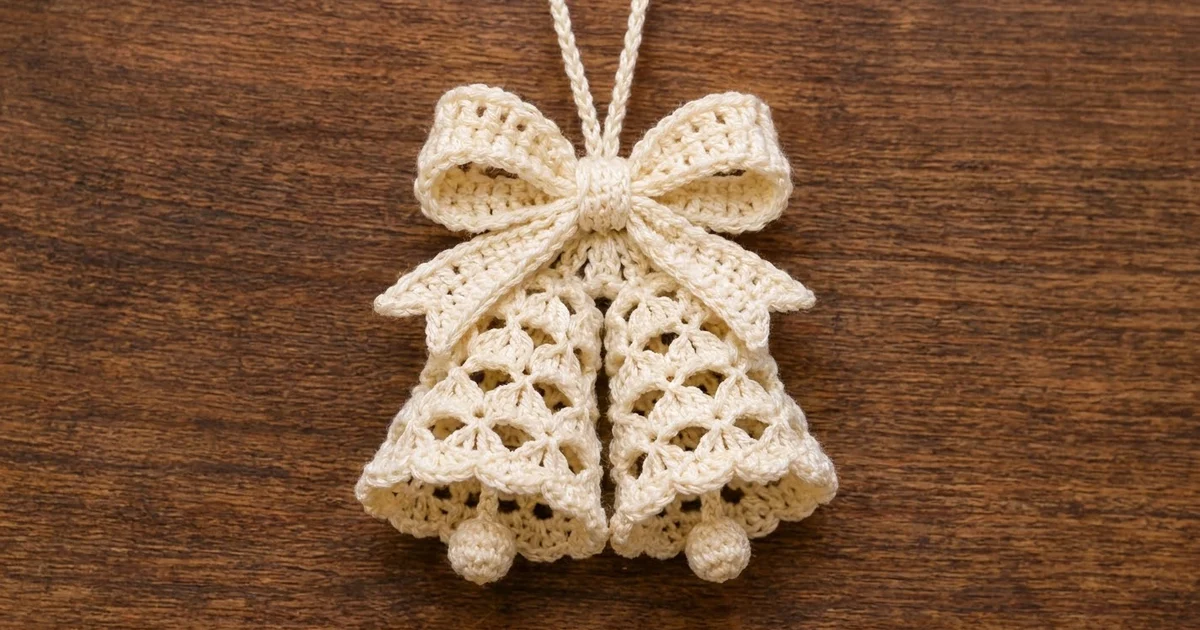
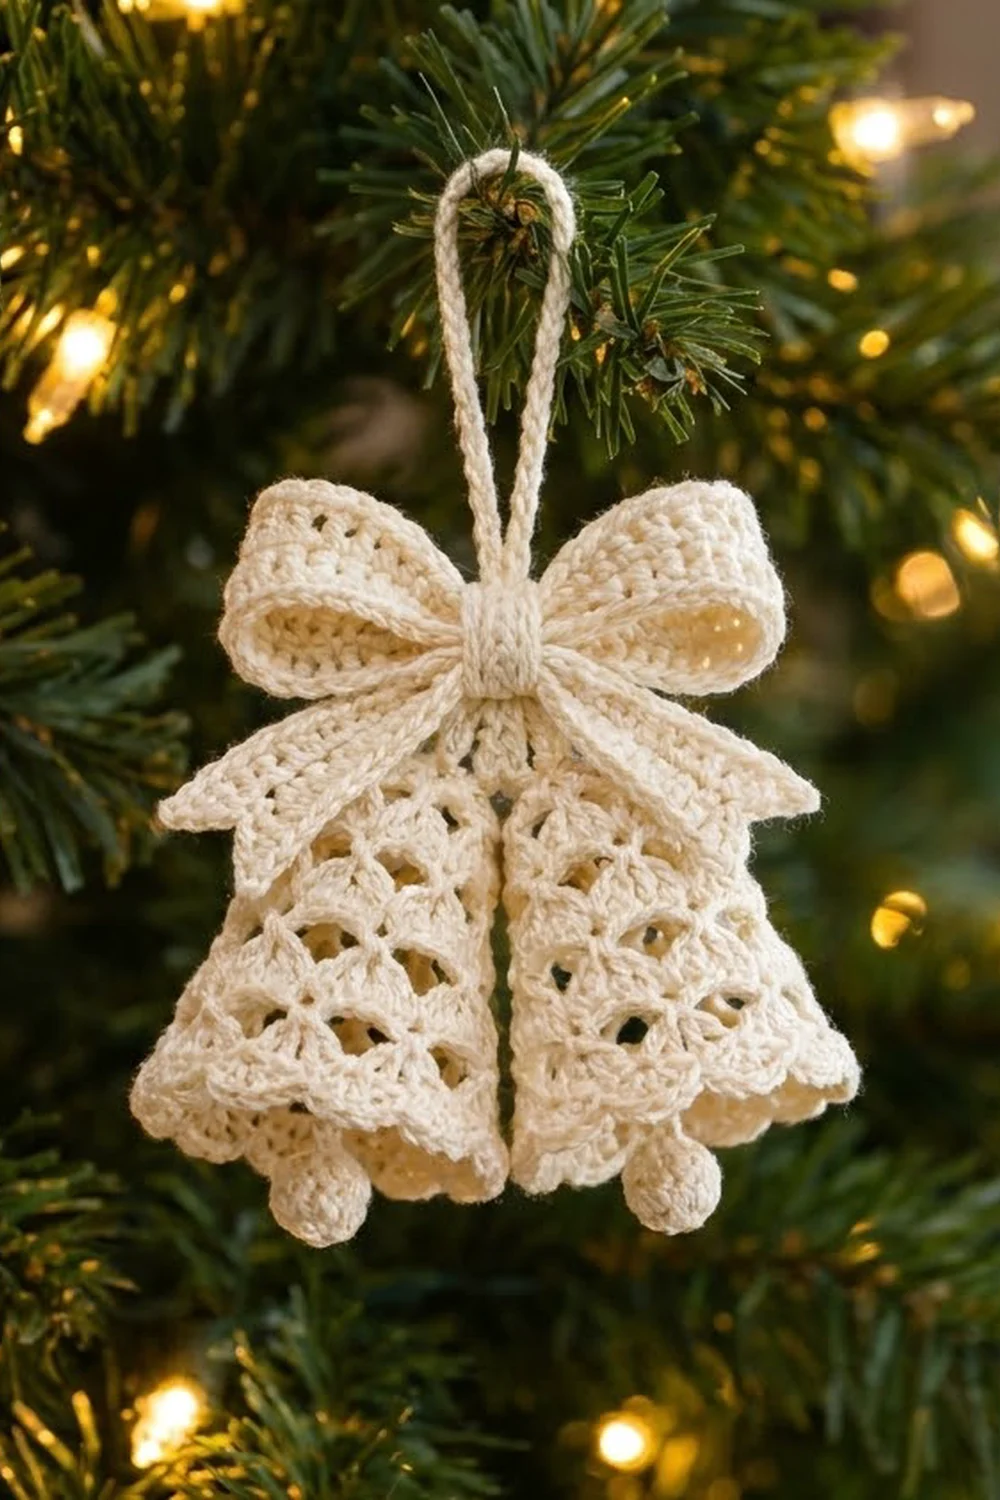
This double bell ornament has the soft, old-fashioned look of a lace heirloom. Two lacy bells hang side by side under a solid little bow, and a round clapper peeks out below each scalloped hem. It reads as delicate on the tree but is sturdy enough to handle for years.
The whole ornament is worked in one ivory cotton thread, so the stitch texture does all the work: a smooth dome top, open fans that widen toward the hem, and a scalloped picot edge. The pattern uses US crochet terms throughout.
The finished ornament measures about 4.5 in (11.4 cm) wide and 3.5 in (8.9 cm) tall, plus a 2 in (5.1 cm) hanging loop, so it is about 5.5 in (14.0 cm) tall overall.
Each bell is worked top-down in joined rounds and finished with a two-round hem border. The bow is a flat sc band folded into two loops, with separate tails and a center wrap. You’ll also make two clappers and a chain loop, then sew everything together and stiffen the bells so they hold their shape.
Finished Size and Construction
- Finished size: 4.5 in (11.4 cm) wide x 3.5 in (8.9 cm) tall, plus a 2 in (5.1 cm) loop
- Skill level: Intermediate
- Terminology: US crochet terms
- Yarn weight: Super fine (#1) cotton, size 3 crochet thread
- Hook: 2.5 mm
- Number of pieces: 9 (2 bells, 1 bow band, 2 tails, 1 center wrap, 2 clappers, 1 hanging loop)
- Layout: 2 bells side by side, bow centered on top
- Single bell size: 2.25 in (5.7 cm) tall x 2.5 in (6.4 cm) across the hem, flattened
- Bell size before border: 2 in (5.1 cm) tall x 2.25 in (5.7 cm) across, flattened
- Border depth: about 0.25 in (0.6 cm)
Materials
Choose a mercerized cotton thread in size 3, about 137 m (150 yd) per 50 g. Mercerized cotton gives crisp stitch definition and takes starch well. Avoid fuzzy or very stretchy fibers: they blur the lace and won’t hold a bell shape.
- Ivory/cream: 15 g, about 41 m (45 yd)
These quantities include a margin of about 20% for swatching and sewing tails. One ornament uses about 12 g.
Tools:
– 2.5 mm crochet hook
– Tapestry needle with a small eye
– Locking stitch markers
– Scissors
– Small scraps of the same thread, for stuffing the clappers
– Fabric stiffener or heavy spray starch
– Two cone-shaped drying forms about 2.5 in (6.4 cm) across, such as small funnels or rolled foil cones covered in plastic wrap
– Rustproof pins
Abbreviations (US Terms)
- ch – chain
- sl st – slip stitch
- sc – single crochet
- hdc – half double crochet
- dc – double crochet
- sc2tog – single crochet 2 together
- sk – skip
- sp(s) – space(s)
- st(s) – stitch(es)
- MR – magic ring
Special stitches:
– V-st: (dc, ch 2, dc) in the same st.
– Large V-st: (dc, ch 3, dc) in the same st.
– Picot: ch 3, sl st in the 3rd ch from hook.
Gauge and Checkpoints
Gauge: 26 sc and 28 rows = 4 in (10.2 cm) in sc worked flat.
Make one bell before anything else. It works as your gauge test because the lace rounds magnify any difference. Check it at each stage:
- After Rnd 3: the flat disc is 1.2 in (3.0 cm) across.
- After Rnd 7: the bell is 1 in (2.5 cm) tall.
- After Rnd 11 (before the border): 2 in (5.1 cm) tall and 2.25 in (5.7 cm) across, flattened.
- After Rnd 13 (border): 2.25 in (5.7 cm) tall and 2.5 in (6.4 cm) across the hem, flattened.
If your bell is more than 0.25 in (0.6 cm) too big, go down to a 2.25 mm hook. If it is too small, go up to a 2.75 mm hook. Don’t change the stitch counts, because the fan repeats and the border math depend on them.
Bell (Make 2)
Work in joined rounds with the right side facing. Do not turn. The beginning ch 3 counts as a dc. The ch 1 at the start of a round does not count as a st.
Dome top
Rnd 1: MR, ch 1, 8 sc in ring, join with sl st to first sc. (8 sts)
Rnd 2: Ch 1, 2 sc in each st around, join. (16 sts)
Rnd 3: Ch 1, *sc in next st, 2 sc in next st; rep from * 7 more times, join. (24 sts) The disc should be 1.2 in (3.0 cm) across.
Rnd 4: Ch 1, sc in each st around, join. (24 sts) The edge starts to curve down.
Rnd 5: Ch 1, sc in each st around, join. (24 sts) This completes the dome.
Lace body
Rnd 6 (set-up round): Ch 1, sc in first st, ch 1, sk 1, V-st in next st, ch 1, sk 1; *sc in next st, ch 1, sk 1, V-st in next st, ch 1, sk 1; rep from * 4 more times, join to first sc. (6 sc, 6 V-sts) This round uses all 24 sts of Rnd 5 as six 4-st repeats.
Rnd 7: Sl st in next ch-1 sp, sl st in next dc, sl st in next V-st sp. Ch 3, 4 dc in same sp, ch 1, sc in next sc, ch 1; *5 dc in next V-st sp, ch 1, sc in next sc, ch 1; rep from * 4 more times, join to top of beg ch 3. (6 fans of 5 dc = 30 dc, plus 6 sc) The bell should now be 1 in (2.5 cm) tall.
Rnd 8: Sl st in next 2 dc (the center dc of the fan). Ch 1, sc in same st, ch 2, V-st in next sc, ch 2; *sc in center dc of next fan, ch 2, V-st in next sc, ch 2; rep from * 4 more times, join to first sc. (6 sc, 6 V-sts) The V-sts now sit between the old fans, which creates the offset lattice.
Rnd 9: Sl st in next ch-2 sp, sl st in next dc, sl st in next V-st sp. Ch 3, 6 dc in same sp, ch 1, sc in next sc, ch 1; *7 dc in next V-st sp, ch 1, sc in next sc, ch 1; rep from * 4 more times, join to top of beg ch 3. (6 fans of 7 dc = 42 dc, plus 6 sc)
Rnd 10: Sl st in next 3 dc (the center dc of the fan). Ch 1, sc in same st, ch 3, Large V-st in next sc, ch 3; *sc in center dc of next fan, ch 3, Large V-st in next sc, ch 3; rep from * 4 more times, join to first sc. (6 sc, 6 Large V-sts)
Rnd 11: Sl st in next ch-3 sp, sl st in next dc, sl st in next V-st sp. Ch 3, 8 dc in same sp, ch 1, sc in next sc, ch 1; *9 dc in next V-st sp, ch 1, sc in next sc, ch 1; rep from * 4 more times, join to top of beg ch 3. (6 fans of 9 dc = 54 dc, plus 6 sc)
The bell should be 2 in (5.1 cm) tall and 2.25 in (5.7 cm) across, flattened. Don’t fasten off; go straight on to the Border section below.
Clapper (Make 2)
Rnd 1: MR, ch 1, 6 sc in ring, join. (6 sts)
Rnd 2: Ch 1, 2 sc in each st, join. (12 sts)
Rnd 3: Ch 1, sc in each st, join. (12 sts) Stuff firmly with thread scraps.
Rnd 4: Ch 1, sc2tog 6 times, join. (6 sts) Pull the ring closed.
Do not fasten off. Cord: ch 14, or until the cord measures 2 in (5.1 cm). Fasten off, leaving a 6 in (15.2 cm) tail. The ball is about 0.6 in (1.5 cm) across.
Bow Pieces
Bow band (make 1): Ch 43.
Row 1: Sc in 2nd ch from hook and in each ch across, turn. (42 sts)
Rows 2–6: Ch 1, sc in each st across, turn. (42 sts)
Edging round: Ch 1, 3 sc in first st, sc in next 40 sts, 3 sc in last st (46 sts across the top, including both corners). Work 1 sc in the end of each of Rows 5–2 (4 sts). Along the foundation ch, work 3 sc in first ch, sc in next 40 ch, 3 sc in last ch (46 sts). Work 1 sc in the end of each of Rows 2–5 (4 sts). Join. (100 sts)
The band measures 6.5 in (16.5 cm) x 1 in (2.5 cm). Fasten off.
Tail (make 2): Ch 5.
Row 1: Sc in 2nd ch from hook and across, turn. (4 sts)
Rows 2–14: Ch 1, sc across, turn. (4 sts)
Row 15: Ch 1, sc2tog twice, turn. (2 sts)
Row 16: Ch 1, sc2tog. (1 st) Fasten off.
Each tail is 0.6 in (1.5 cm) wide and 2.25 in (5.7 cm) long, with a tapered tip.
Center wrap (make 1): Ch 5. Work Rows 1–10 as for the tail. (4 sts per row) The wrap measures 0.6 in (1.5 cm) x 1.4 in (3.6 cm). Leave a 10 in (25.4 cm) tail.
Hanging Loop (Make 1)
Ch 36. Sl st in the back bump of the 2nd ch from hook and of each ch across. (35 sl sts) The cord measures about 4 in (10.2 cm). Leave 6 in (15.2 cm) tails at both ends.
Make All Pieces
All pieces are ivory:
- Bells: 2
- Clappers: 2
- Bow band: 1
- Tails: 2
- Center wrap: 1
- Hanging loop: 1
Layout (front view):
            [ hanging loop ]
   [ bow loop ]-(wrap)-[ bow loop ]
        / tail          tail \
   [   Bell A   ][   Bell B   ]
         (o)            (o)
       clapper        clapper
Joining
Clappers. Thread each cord tail through the center of a bell’s MR from the inside out and knot it on top. Check that the ball hangs about 0.25 in (0.6 cm) below the hem. The bow will cover the knot.
Bells. Flatten both bells so the round joins sit at the back. Place them side by side with the dome tops touching. Whipstitch the inner edge of Rnd 5 on Bell A to the inner edge of Rnd 5 on Bell B. Match them stitch to stitch: 6 sts on Bell A to 6 sts on Bell B, one at a time. Then tack the hems together with one stitch where the scallops meet.
Keep your tension snug but not tight. Pulled stitches pucker the domes and tilt the bells inward.
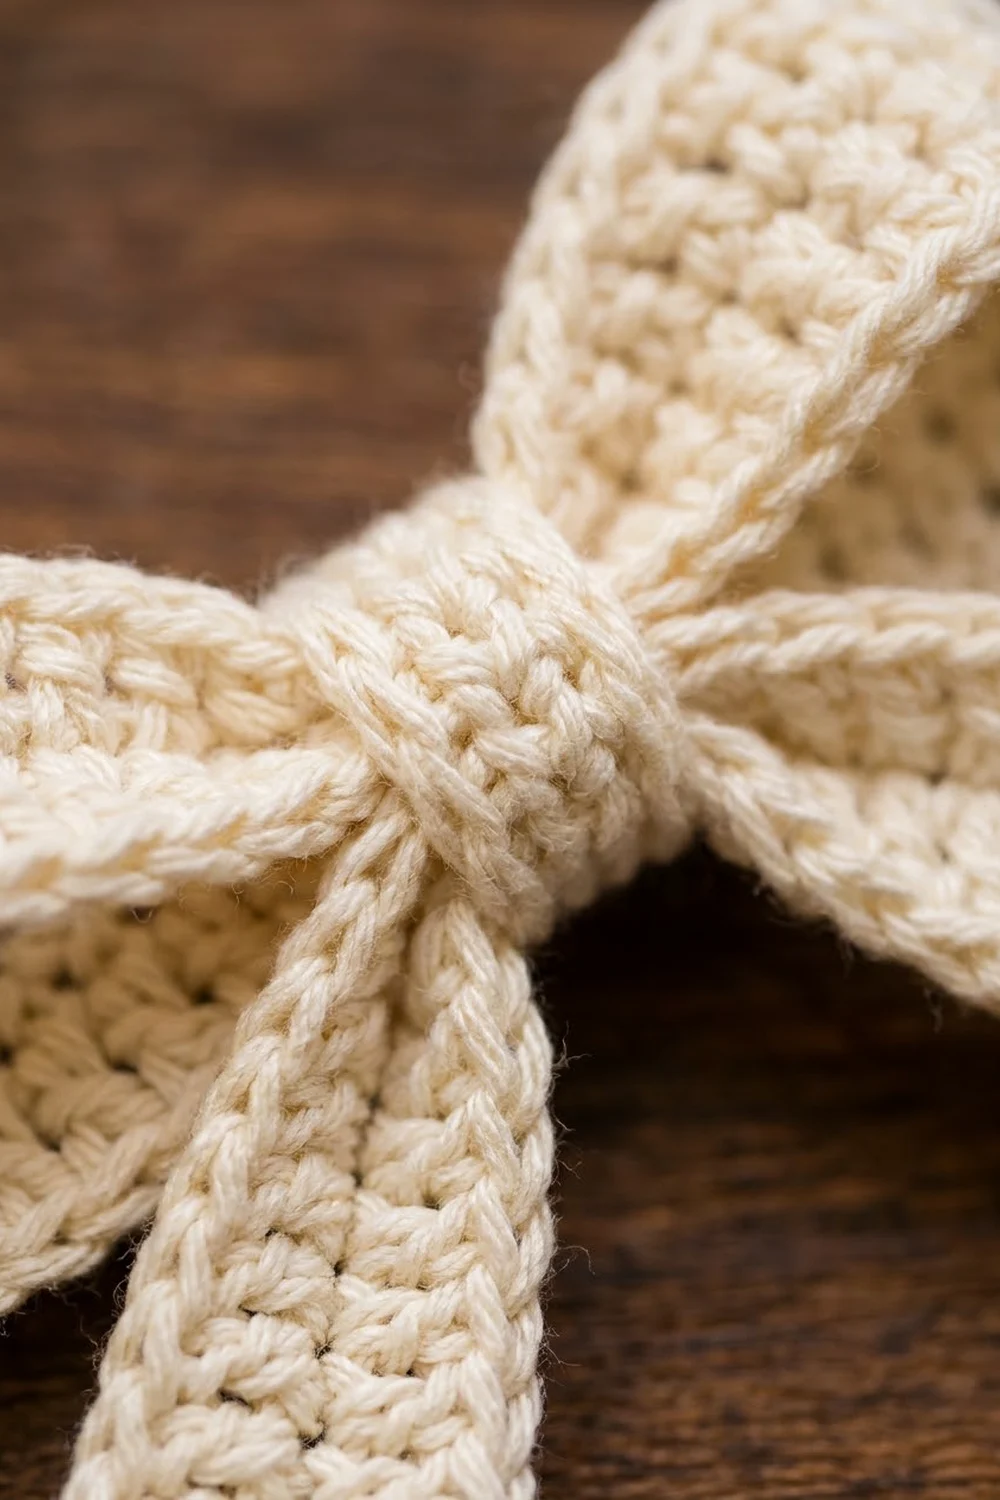
Bow. Fold both short ends of the band to the center back, overlapping 0.25 in (0.6 cm), and pinch the middle. Lay the two tails behind the pinch in a V. Wrap the center piece around everything and sew its ends together at the back.
Assembly. Sew the bow across both domes so it covers the bell seam and the clapper knots. Angle the tails down over the bells’ shoulders and tack each tail in 2 places. Fold the hanging loop in half and sew both ends behind the center wrap.
Size checkpoint: 2.5 in + 2.5 in − 0.5 in overlap at the tops = 4.5 in (11.4 cm) wide.
Border
Work the border on each bell straight after Rnd 11, with the same thread and hook.
Border gauge: 11 sc per fan repeat, so 6 repeats x 11 sc = 66 sc around. The border adds about 0.25 in (0.6 cm) of depth.
Rnd 12 (conversion round): Ch 1, sc in same st and in next 8 dc, sc in next ch-1 sp, sk sc, sc in next ch-1 sp; *sc in each of next 9 dc, sc in next ch-1 sp, sk sc, sc in next ch-1 sp; rep from * 4 more times, join. (54 sc worked 1 per dc + 12 sc worked in ch-1 sps = 66 sts)
Rnd 13 (scallops): Ch 1. *Sc in next st, hdc in next st, dc in each of next 2 sts, (dc, picot, dc) in next st, dc in each of next 2 sts, hdc in next st, sc in next st, sl st in each of next 2 sts; rep from * 5 more times, join to first sc. Each scallop has 2 sc, 2 hdc, 6 dc, 2 sl sts and 1 picot. (72 sts plus 6 picots)
Fasten off and weave in the ends.
Why the math works: Rnd 12 starts at the first dc of a fan, so stitch 5 of every 11-stitch repeat sits on that fan’s center dc. Each scallop in Rnd 13 uses exactly 11 stitches. That puts every picot over a fan center and the 2 sl sts over the dip between fans, giving 6 even scallops with no leftover stitches.
Final Blocking
- Weave in all ends.
- Soak the bells in fabric stiffener, or saturate them with heavy spray starch.
- Gently squeeze out the excess. Don’t wring.
- Slide each bell over a cone form covered in plastic wrap.
- Ease the fans open and pin each picot so the hem flares to 2.5 in (6.4 cm) across.
- Shape each bow loop around a rolled tissue and press the tails flat.
- Let everything dry completely, ideally overnight.
- Remove the forms and tissue, and finish any remaining sewing.
Final Quality-Control Checklist
- Each bell has 6 fans in Rnds 7, 9 and 11.
- Rnd 12 has 66 sts.
- Rnd 13 has 6 scallops, each with a centered picot.
- Each bell is 2.25 in (5.7 cm) tall and 2.5 in (6.4 cm) across.
- The finished ornament is 4.5 in (11.4 cm) wide.
- The clappers hang evenly, about 0.25 in (0.6 cm) below the hems.
- The bow is centered and covers the seam and knots.
- The loop is secure and the ornament hangs level.
Troubleshooting
- Bell is flat instead of domed: make sure Rnds 4–5 have no increases.
- Hem ruffles: a fan has extra dc. Recount Rnds 9 and 11.
- Fans drift sideways: recount the opening sl sts so each round starts in the V-st sp or on the center dc.
- Scallops are uneven: Rnd 12 must have exactly 66 sts before you start Rnd 13.
- Ornament tilts: move the loop ends to the true center behind the wrap.
- Bell collapses: re-starch it and let it dry longer on the form.
Care
Spot clean only, and re-starch if the bells soften. Store the ornament in a box so the bells aren’t crushed.
Final Notes
Here is the full measurement chain:
- Gauge: 26 sc = 4 in (10.2 cm).
- Dome disc: 1.2 in (3.0 cm) across.
- Bell before the border: 2 in (5.1 cm) tall.
- Bell after the 66-st border: 2.25 in (5.7 cm) tall and 2.5 in (6.4 cm) across.
- Two bells overlapping 0.5 in (1.3 cm): 4.5 in (11.4 cm) wide.
- With the bow and loop: 5.5 in (14.0 cm) tall overall.
If each checkpoint matches, the ornament will come together neatly.
Happy crocheting!