

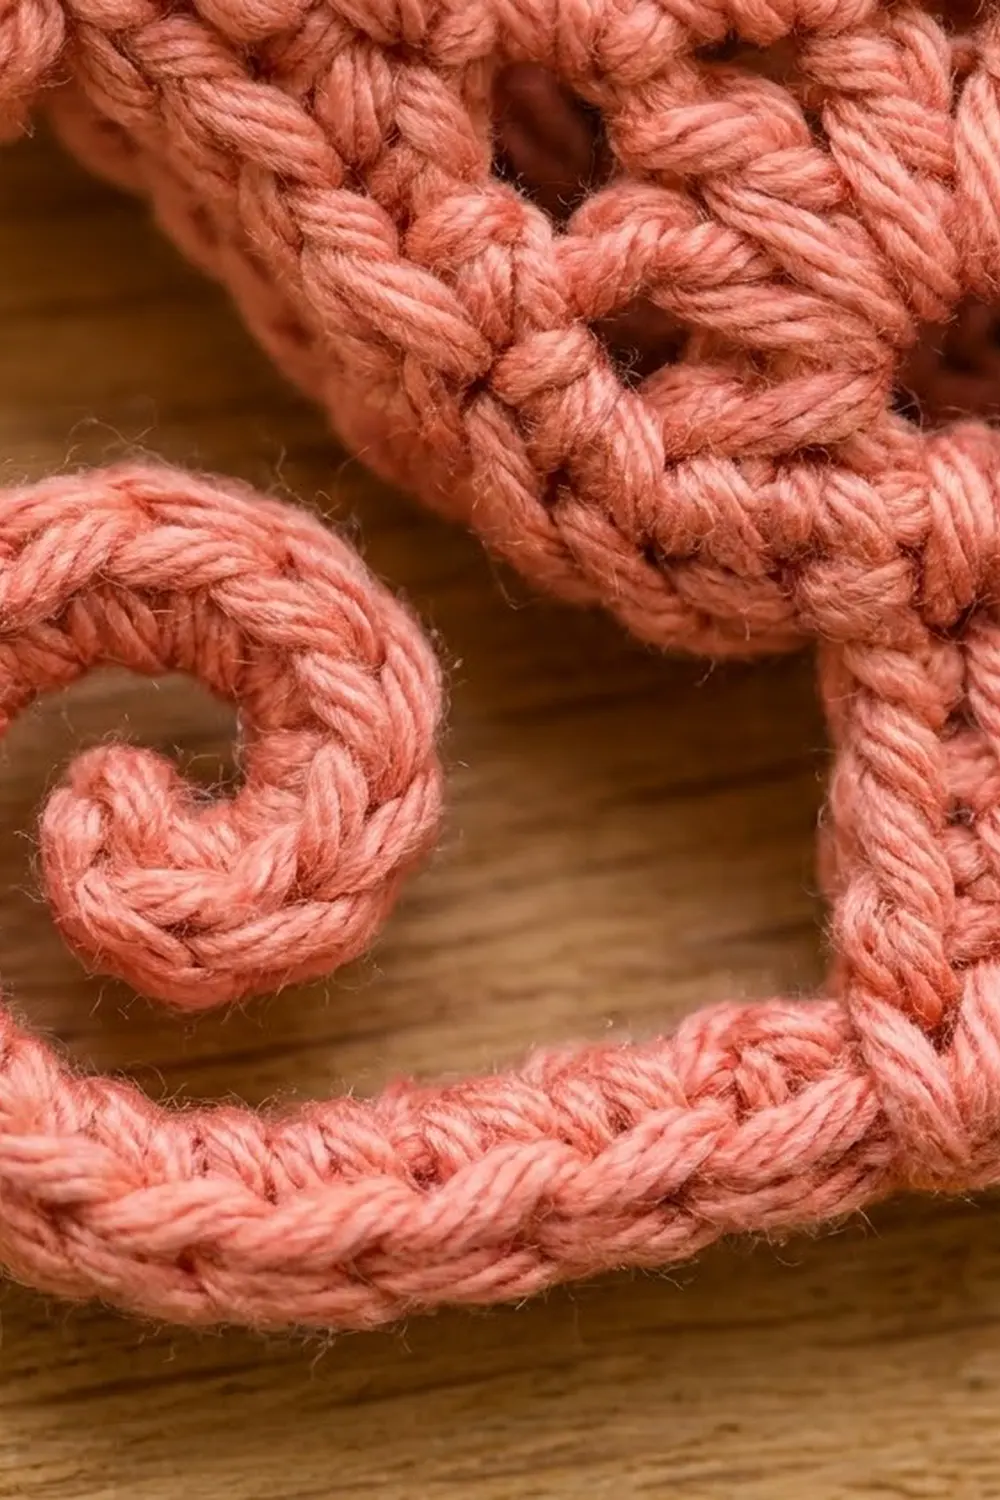
The Sugarplum Lace Sleigh is a small hanging ornament. It has a lacy fan-stitch body, a rolled front lip, a curled backrest, scrolled runners, and a tiny wrapped gift on the seat. It uses one color, a soft coral pink, so the texture does all the work.
The body is made of offset seven-double-crochet fans separated by chain-1 eyelets, which gives it a wheel-and-window look. A single crochet border frames the lace and keeps the outline crisp when the ornament hangs.
This pattern uses US crochet terms. The finished ornament measures about 5 in (12.7 cm) wide and 3.3 in (8.4 cm) tall without the loop. With the hanging loop it is about 5.3 in (13.5 cm) tall.
To make it, you crochet six small components flat: the lace body, an oval backing strip, the runner with struts, the gift box, the bow, and the hanging cord. Then you add a two-round border to the body, sew everything together, and block.
Finished Size and Construction
- Finished ornament: 5 in (12.7 cm) wide x 3.3 in (8.4 cm) tall, plus a 2 in (5.1 cm) loop
- Skill level: Intermediate (short rows, fans, simple assembly)
- Terminology: US
- Yarn weight: Sport / fine (#2) cotton
- Hook: 2.75 mm (US C-2)
- Number of pieces: 1 ornament made from 6 components
- Layout: lace body in front, oval strip behind its lower edge, runner below, gift on the front seat, loop at the inner corner of the backrest
- Body size before border: 4.2 in (10.7 cm) wide x 2.3 in (5.8 cm) tall at the back
- Body size after border: 4.5 in (11.4 cm) wide x 2.6 in (6.6 cm) tall at the back
- Border depth: about 1/4 in (0.6 cm)
Materials
Choose a smooth, tightly plied mercerized or combed cotton. Cotton holds fans and scrolls better than acrylic and blocks to a crisp finish.
- Coral pink sport cotton: 10 g / 30 m (32.8 yd) per ornament
Approximate use per component:
– Body with border: 5 g
– Runner: 1.5 g
– Oval strip: 1 g
– Gift box and bow: 1 g
– Cord: 0.5 g
These quantities include a margin of about 1 g for tails and checking your gauge. One 50 g ball makes about five ornaments.
Tools:
– 2.75 mm (US C-2) hook
– Tapestry needle
– 2 stitch markers
– Scissors
– Foam blocking mat and rustproof pins
– Optional fabric stiffener
Abbreviations (US Terms)
- ch: chain
- sl st: slip stitch
- sc: single crochet
- hdc: half double crochet
- dc: double crochet
- sk: skip
- st(s): stitch(es)
- sp: space
- RS / WS: right side / wrong side
Fan: 7 dc in the same stitch. The 4th dc is the center of the fan.
Half fan: 4 dc total in one stitch. At the start of a row, work ch 3 (counts as 1 dc) and 3 dc. At the end of a row, work 4 dc.
Gauge and Checkpoints
Gauge: 24 sc and 26 rows = 4 in (10.2 cm), which means 6 sc = 1 in (2.5 cm).
Make the body first and use it as your test piece. Measure it flat, without stretching:
- After Row 1: 25 sc = 4.2 in (10.7 cm) wide
- After Row 3: 1 in (2.5 cm) tall at the front
- After Row 6: 2.3 in (5.8 cm) tall at the back
- After the border: 4.5 in (11.4 cm) x 2.6 in (6.6 cm)
If Row 1 is wider than 4.4 in (11.2 cm), switch to a 2.5 mm hook. If it is narrower than 4 in (10.2 cm), switch to a 3 mm hook. Use the same hook for every component so all the parts fit together.
Body (Lace Panel)
The body is worked flat in rows from the bottom edge up. Rows 4–6 are short rows that build the tall backrest.
Foundation: Ch 26.
Row 1: Sc in 2nd ch from hook and in each ch across, turn. (25 sc)
Row 2: Ch 1, sc in first sc, [sk 2 sc, Fan in next sc, sk 2 sc, sc in next sc] 4 times, turn. (4 fans + 5 sc = 33 sts)
Row 3: Ch 3 (counts as dc), 3 dc in first sc (half fan made). [Ch 1, sc in center dc of next fan, ch 1, Fan in next sc] 3 times. Ch 1, sc in center dc of last fan, ch 1, 4 dc in last sc, turn. (2 half fans, 3 fans, 4 sc = 33 sts; 8 ch-1 sps)
The ch-1 spaces on each side of every sc form the eyelets. Mark the half fan you made first in this row. That end is the front of the sleigh, and the end where Row 3 finishes is the back.
Row 4 (short row, back only): Ch 1, sc in first dc, Fan in next sc, sc in center dc of next fan, Fan in next sc, sc in center dc of next fan, turn. Leave the rest of the row unworked. (2 fans + 3 sc = 17 sts)
Row 5: Ch 3 (counts as dc), 3 dc in first sc, ch 1, sc in center dc of next fan, ch 1, Fan in next sc, ch 1, sc in center dc of next fan, ch 1, 4 dc in last sc, turn. (2 half fans, 1 fan, 2 sc = 17 sts; 4 ch-1 sps)
Row 6: Ch 1, sc in first dc, Fan in next sc, sc in center dc of next fan, Fan in next sc, sc in top of turning ch-3. (2 fans + 3 sc = 17 sts) Fasten off.
Check that the back now measures 2.3 in (5.8 cm) tall and that the step where the backrest begins sits near the middle of the width.
Oval Backing Strip
This solid strip goes behind the lower part of the body. It makes the lace firmer and gives the struts a strong place to attach.
Foundation: Ch 21.
Rnd 1: Sc in 2nd ch from hook, sc in next 18 ch, 3 sc in last ch. Working along the other side of the chain, sc in next 18 ch, 2 sc in same ch as first sc, sl st to first sc. (42 sc)
Rnd 2: Ch 1, 2 sc in first st, sc in next 18, 2 sc in each of next 3, sc in next 18, 2 sc in each of last 2, sl st to first sc. (48 sc)
Fasten off with a 12 in (30.5 cm) tail. Check that the strip measures 3.8 in (9.7 cm) x 0.7 in (1.8 cm).
Runner with Scrolls and Struts
Foundation: Ch 41.
Row 1: 3 sc in 2nd ch from hook and in each of next 7 ch (front scroll), sc in each of next 24 ch (flat runner), 3 sc in each of last 8 ch (back scroll). (24 + 24 + 24 = 72 sc) Fasten off.
The 3-sc groups make each end twist into a tight spiral. The flat section should measure 4 in (10.2 cm).
Struts: Count the 24 flat sc and mark the 6th and 19th. That leaves 5 sc outside each marker. Join yarn in the 6th sc. Ch 4, sc in 2nd ch from hook and in next 2 ch, then sl st back into the same runner sc. Fasten off with a 10 in (25.4 cm) tail. Repeat in the 19th sc. Each strut is 0.5 in (1.3 cm) tall.
Gift Box and Bow
Foundation: Ch 6.
Row 1: Sc in 2nd ch from hook and in each ch across, turn. (5 sc)
Rows 2–6: Ch 1, sc in each sc across, turn. (5 sc)
Fasten off. The box should measure 0.8 in (2.0 cm) x 0.9 in (2.3 cm).
Ribbon: Join a new strand. Surface sl st up the center (3rd) column of sc, then surface sl st across the gap between Rows 3 and 4. This makes a raised ribbon cross.
Bow: Ch 6, sl st in first ch (first loop made). Ch 6, sl st in same ch (second loop made). Ch 3 and fasten off. Sew the knot of the bow to the top center of the box with the two loops standing upright.
Hanging Cord
Foundation: Ch 30.
Row 1: Sc in 2nd ch from hook and in each ch across. (29 sc)
Fasten off with a 10 in (25.4 cm) tail. The cord is 4.8 in (12.2 cm) long and folds into a loop about 2 in (5.1 cm) tall.
Make All Pieces
All components are coral pink. For one ornament, make 1 lace body, 1 oval strip, 1 runner with 2 struts, 1 gift box with bow, and 1 hanging cord.
Layout, viewed from the front:
             loop
              ||
   [gift] ____||____
  (lip  |  backrest )~ curl
  (   lace body     )
  [ oval behind     ]
      |         |       struts
  @---+---------+---@   runner with scrolls
Joining
Work the Body Border (next section) before you start assembling. The border gives you clean edge stitches to sew into.
- Oval strip to body: Place the oval behind the body, centered, with the WS of the body against it. Line up its lower edge with the bottom border. Using the oval’s tail, whipstitch stitch for stitch along the 18 straight stitches, easing the curved ends behind the corners. Then lightly tack the oval’s upper edge to the backs of the Row 2 fans.
- Runner to body: Center the runner under the body. Sew the top of each strut through both the bottom border and the oval with 3–4 small stitches. The runner should sit parallel to the bottom edge of the body.
- Gift box: On the RS, place the box over the front section. Its lower edge should rest on the Row 2 fans, and one side should touch the step where the backrest begins. Whipstitch around the outer edge, about 1 stitch per sc.
- Loop: Fold the cord in half. Sew both ends behind the inner corner of the backrest, where border Segments D and E meet, overlapping them by 0.4 in (1.0 cm).
Keep your sewing snug but not tight, so the lace lies flat without puckering. The assembled ornament should measure 5 in (12.7 cm) x 3.3 in (8.4 cm).
Body Border
The border uses the main gauge of 6 sc = 1 in (2.5 cm). Along the row ends, work 2 sc for each row that is dc height and 1 sc for each row that is sc height.
Rnd 1: Join yarn in the foundation ch at the front-bottom corner, below the marked half fan.
- A (bottom): 3 sc in this ch, sc in next 23 ch, 3 sc in last ch. (29 sc)
- F (back edge): 1 sc in each of Rows 1–2, 2 sc in each of Rows 3–6. (10 sc)
- E (top of Row 6): sc in each st. (17 sc)
- D (inner backrest edge, Rows 6–4): 2 sc in each row end. (6 sc)
- C (unworked top of Row 3): working toward the front, sc in each of 3 dc, ch-1 sp, sc, ch-1 sp, 7 dc, ch-1 sp, sc, ch-1 sp, and 4 dc. (20 sc)
- B (front edge, Rows 3–1): 2 sc in Row 3, 1 sc in each of Rows 2 and 1. (4 sc)
Sl st to first sc. (29 + 10 + 17 + 6 + 20 + 4 = 86 sc)
Rnd 2:
- A: sl st in each st. (29 sl st)
- F: sl st in each st. (10 sl st)
- E: For the back curl, ch 5, 2 sc in 2nd ch from hook and in each of next 3 ch, then sl st in first st of E. Hdc in each of the 17 sts. (8 sc + 17 hdc)
- D: sl st in each st. (6 sl st)
- C: sc in next 15 sts, 2 hdc in each of last 5 sts. (15 sc + 10 hdc)
- B: sl st in each st. (4 sl st)
Join and fasten off. (49 sl st + 23 sc + 27 hdc = 99 sts)
Why the math works:
– The bottom has 25 foundation stitches. Each 3-sc corner adds 2 more, so 25 + 4 = 29.
– Segment C is exactly the 20 stitches and spaces of Row 3 that the short rows leave uncovered.
– Rnd 2 uses only sl sts along the bottom and sides, so the width stays at 4.5 in (11.4 cm).
– The 5 increases at the front end of C make the edge flare into the rolled lip. The chain curl turns the top of the backrest over.
Final Blocking
- Soak the assembled ornament in cool water and press it in a towel.
- Pin the body flat to 4.5 in (11.4 cm) wide, with a pin in each eyelet to open the fans.
- Roll the flared 10-hdc section outward and pin it in a curl.
- Twist the back curl forward and pin it.
- Pin the runner straight and coil each scroll upward.
- If you like, brush the scrolls and loop with stiffener.
- Let the ornament dry for at least 12 hours before unpinning.
Final Quality-Control Checklist
- Row 1 has 25 sc, and every full fan has 7 dc.
- Border Rnd 1 has 86 sc, and Rnd 2 has 99 sts.
- The struts are on the 6th and 19th flat sc.
- The gift box is 5 sc x 6 rows, with a centered ribbon cross.
- The ornament measures 5 in (12.7 cm) x 3.3 in (8.4 cm).
- It hangs level, with all tails woven in on the WS.
Troubleshooting
- Fans cup or ruffle: Go down one hook size for the fan rows.
- Bottom edge pulls in: Make the foundation chain with a larger hook.
- Backrest leans: Check that Row 4 has exactly 2 fans and starts at the back edge.
- Scrolls stay flat: Make sure you worked 3 sc in each of the 8 scroll chains, then block them coiled.
- Ornament tilts when hung: Move the loop slightly toward the center.
- Lip won’t roll: Pin it rolled and let it dry fully.
Care
Hand wash in cool water, press in a towel, and reshape flat to dry. Store it where heavier ornaments can’t crush the scrolls.

Final Notes
Each stage has its own measurement:
– Row 1 is 25 sc = 4.2 in (10.7 cm).
– After six rows, the backrest is 2.3 in (5.8 cm) tall.
– The border brings the body to 4.5 in (11.4 cm) x 2.6 in (6.6 cm).
– The struts add 0.5 in (1.3 cm), and with the runner the ornament is 5 in (12.7 cm) x 3.3 in (8.4 cm).
If every checkpoint matches, your sleigh will too. Make one, then make a little fleet for the tree.
Happy crocheting!