

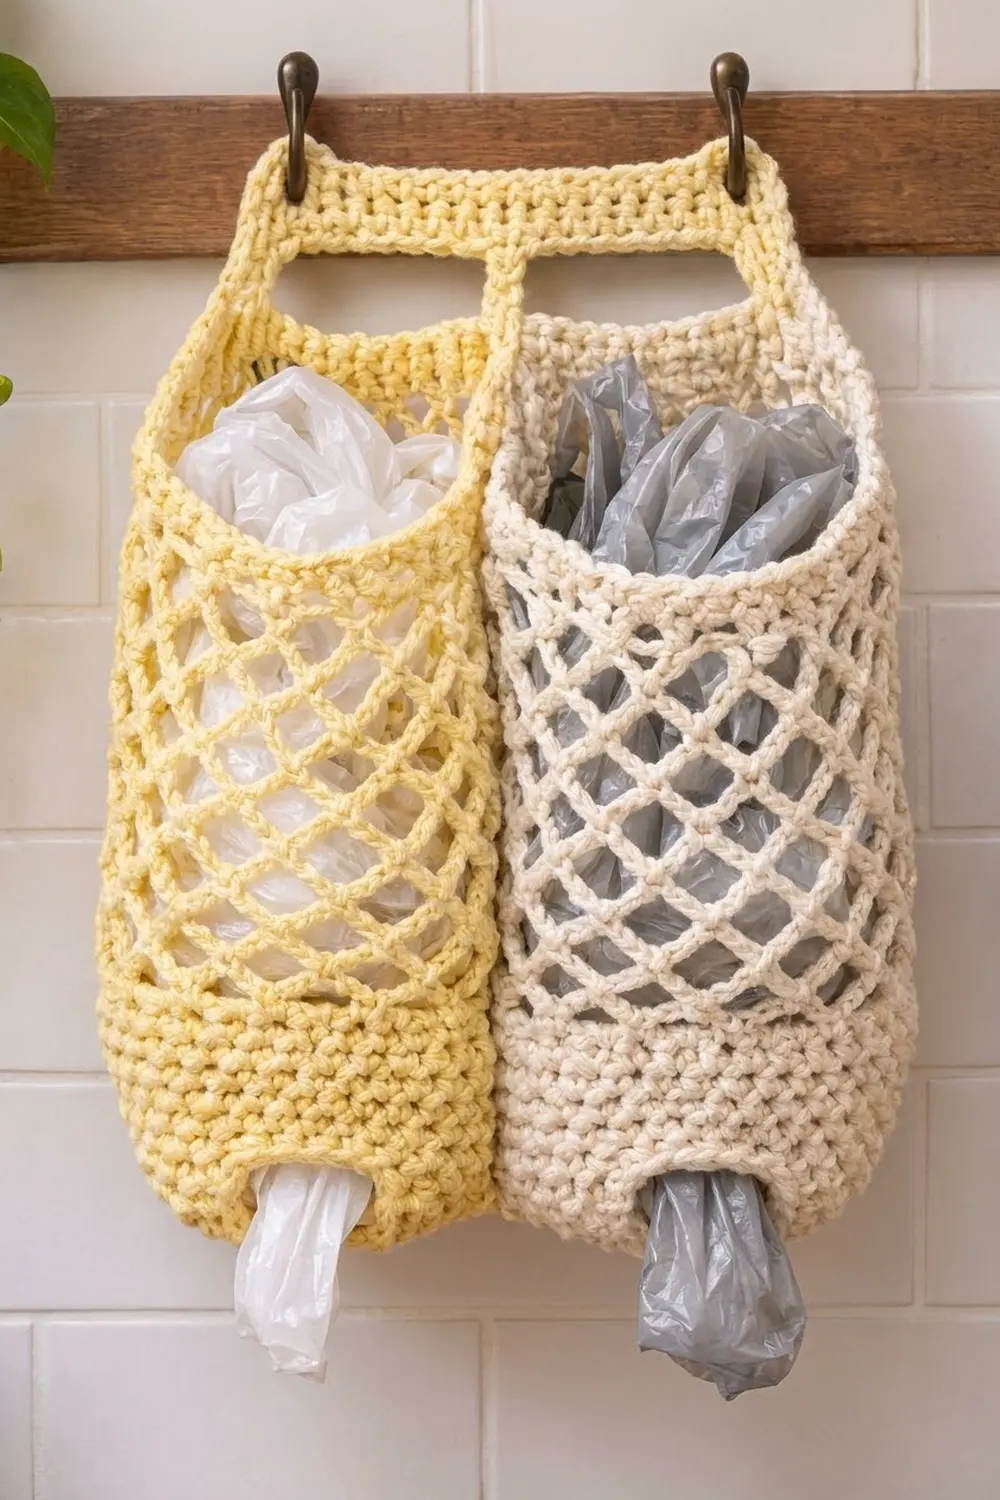
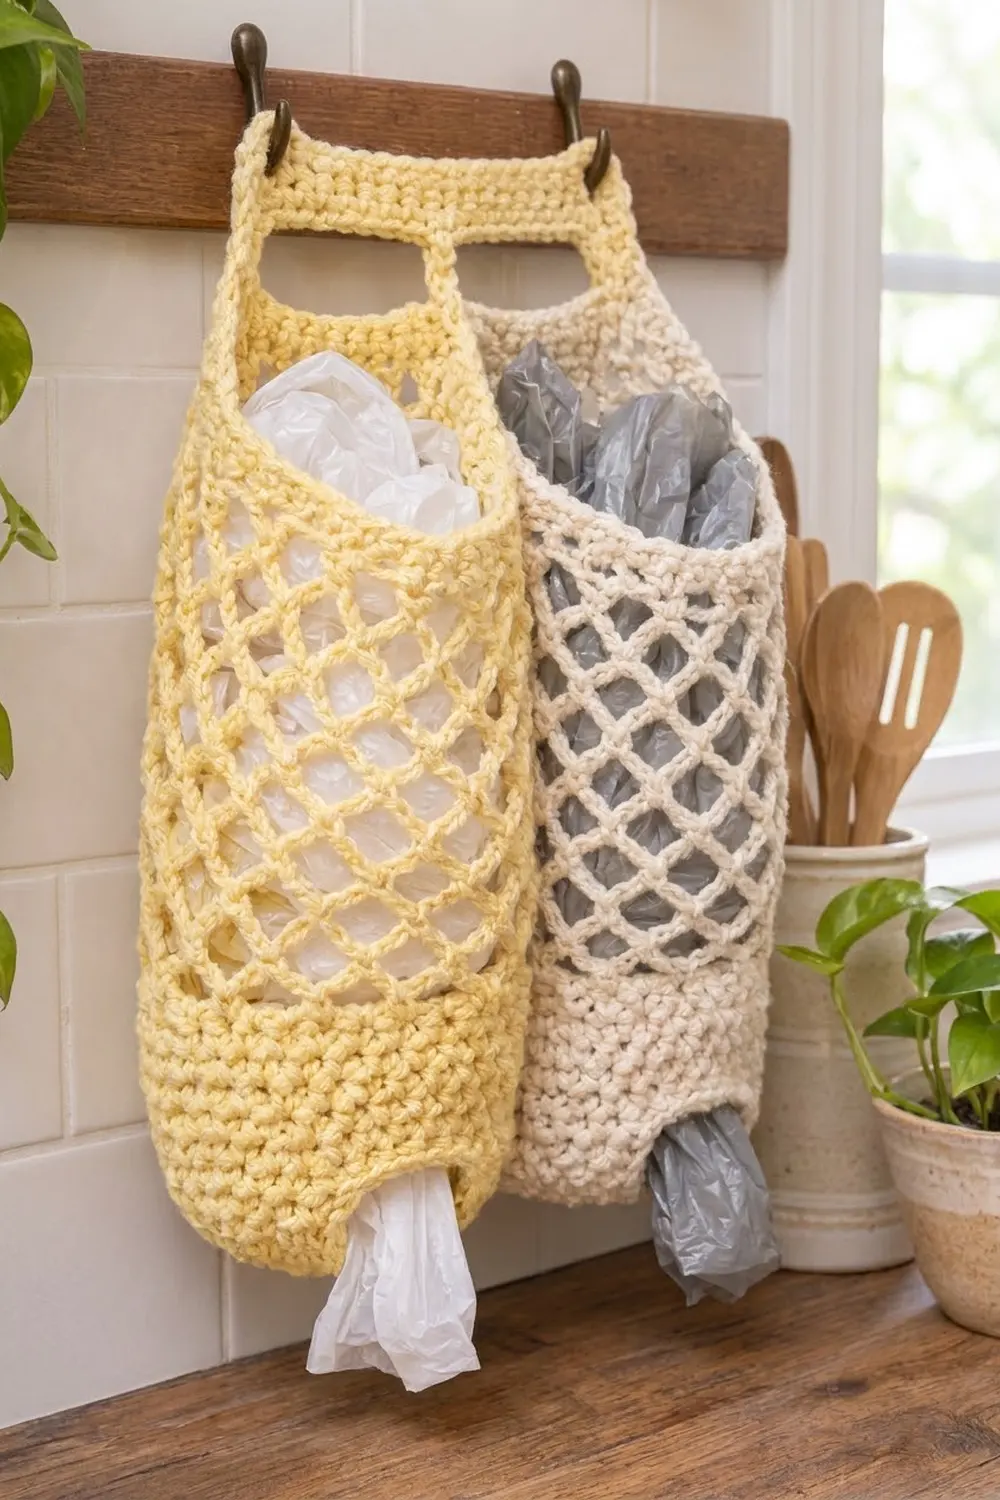
This twin bag keeper gives your plastic bags two tidy homes, side by side. You stuff loose bags in through the top and pull them out one at a time from the small outlet at the bottom. The left compartment is pale butter yellow and the right one is cream, so it’s easy to keep small bags and large bags apart.
Each compartment has a solid, rounded base, a tall open diamond-mesh middle, and a firm solid rim. A pale yellow yoke runs across the top. It forms two framed mouths and has two hanging loops that slip over ordinary wall hooks.
This pattern uses US crochet terms. The finished holder is 12 in (30.5 cm) wide across the two bodies laid flat, 12.5 in (31.8 cm) wide at the yoke, and 19.5 in (49.5 cm) tall, not counting the hanging loops.
You work each body in the round from the bottom outlet up, with no turning. The yoke is worked flat in rows with three legs and gets a one-round border with the loops built in. Then you seam the two bodies together and sew the yoke legs onto the back of the rims.
Finished Size and Construction
- Finished size: 12 in (30.5 cm) wide flat x 19.5 in (49.5 cm) tall; 12.5 in (31.8 cm) wide at the yoke
- Skill level: Easy intermediate
- Terminology: US
- Yarn weight: Worsted (#4), cotton or cotton blend
- Hook: 5.0 mm (H-8)
- Number of pieces: 3 (2 bodies, 1 yoke)
- Layout: 2 bodies side by side, yoke across the top
- Piece size: each body 6 in (15.2 cm) wide flat x 15 in (38.1 cm) tall
- Yoke size before border: 12 in (30.5 cm) x 4 in (10.2 cm)
- Border depth: 0.25 in (0.6 cm) per edge
Materials
Pick a smooth, firm worsted-weight cotton. Cotton keeps the mesh crisp and doesn’t stretch out much when the holder is packed full. These amounts assume about 186 yd (170 m) per 100 g.
- Color A, pale butter yellow: 130 g, about 221 m (242 yd), for 1 body and the yoke
- Color B, cream: 90 g, about 153 m (167 yd), for 1 body
Tools:
– 5.0 mm (H-8) crochet hook
– Tapestry needle
– Locking stitch markers (at least 6)
– Scissors
– Measuring tape
– Rust-proof pins and a blocking mat or folded towel
The quantities include a margin of about 15 percent for your gauge swatch and seaming.
Abbreviations (US Terms)
- ch – chain
- sl st – slip stitch
- sc – single crochet
- dc – double crochet
- sk – skip
- sp – space
- st(s) – stitch(es)
- rnd(s) – round(s)
- inc – 2 sc in the same st
Special stitch – mesh loop: ch 5, sc in the next ch-5 sp. Stacking these loops round after round makes the diamond lattice.
Gauge and Checkpoints
Gauge: 16 sc and 18 rows/rnds = 4 in (10.2 cm) in sc. Each mesh rnd adds about 0.75 in (1.9 cm) of height.
Make Body A completely before you start anything else. It’s the best gauge test you have.
Checkpoints:
– After Rnd 1: the outlet ring lies flat at about 3 in (7.6 cm) wide.
– After Rnd 18: the body is 6 in (15.2 cm) wide flat and the solid bottom is about 4 in (10.2 cm) tall.
– After Rnd 30: the mesh section is about 9 in (22.9 cm) tall when lightly stretched lengthwise.
– After Rnd 39: the body is 15 in (38.1 cm) tall in total.
If the body is too wide, go down a half size to a 4.5 mm hook. If it’s too narrow, go up to a 5.5 mm (I-9) hook. If the mesh is too short, add one mesh rnd. If it’s too long, leave one out. Make both bodies with the same number of rnds.
Body (Make 2: 1 in Color A, 1 in Color B)
Work in joined rnds with the right side facing you. Don’t turn. The ch 1 at the start of a rnd doesn’t count as a stitch.
Bottom Outlet and Rounded Base
Foundation: Ch 24 and sl st to the first ch to form a ring, taking care not to twist it.
Rnd 1: Ch 1, sc in each ch around, sl st to first sc. (24 sc)
Rnd 2: Ch 1, *sc in next 2 sts, inc in next st; rep from * 8 times, sl st to first sc. (32 sc)
Rnd 3: Ch 1, *sc in next 3 sts, inc in next st; rep from * 8 times, sl st to first sc. (40 sc)
Rnd 4: Ch 1, *sc in next 4 sts, inc in next st; rep from * 8 times, sl st to first sc. (48 sc)
These three increase rnds flare the outlet ring out into the rounded bottom.
Rnds 5–18: Ch 1, sc in each st around, sl st to first sc. (48 sc in each rnd)
Checkpoint: 6 in (15.2 cm) wide flat and 4 in (10.2 cm) tall.
Diamond Mesh Section
Rnd 19: Ch 1, sc in first st, *ch 5, sk 3 sts, sc in next st; rep from * 11 times, ch 2, sk 3 sts, dc in first sc. (12 loops: 11 ch-5 loops + 1 closing loop made by the ch 2 and dc)
The ch-2-and-dc close puts your hook at the top center of the last loop, so the next rnd starts in the right spot without any slip stitching.
Rnds 20–30: Ch 1, sc around the post of the joining dc, *ch 5, sc in next ch-5 sp; rep from * 11 times, ch 2, dc in first sc. (12 loops in each rnd)
Each sc sits at the center of a loop below it, so the loops shift half a loop each rnd. That’s what makes the diamond pattern. The mesh will lean a little because it’s worked in rnds. This is normal and settles in blocking.
Checkpoint: the mesh section is about 9 in (22.9 cm) tall.
Transition and Rim
Rnd 31 (conversion rnd): Ch 1, 4 sc around the joining dc loop, 4 sc in each of the next 11 ch-5 sps, sl st to first sc. (12 loops x 4 sc = 48 sc)
Putting 4 sc in each loop brings you back to the same 48 sts as the bottom, so the rim is exactly as wide as the base.
Rnds 32–39: Ch 1, sc in each st around, sl st to first sc. (48 sc in each rnd)
Fasten off and weave in the ends.
Checkpoint: the rim is 2 in (5.1 cm) tall and the body is 15 in (38.1 cm) tall overall.
Yoke (Make 1 in Color A)
Work in rows. Turn at the end of every row. The ch 1 doesn’t count as a stitch.
Foundation: Ch 49.
Row 1: Sc in 2nd ch from hook and in each ch across, turn. (48 sc)
Rows 2–9: Ch 1, sc in each st across, turn. (48 sc in each row)
Checkpoint: 12 in (30.5 cm) wide x 2 in (5.1 cm) tall.
Legs
You’ll work the three legs one at a time from the last row of the band. Before you start, place markers so the row reads: 4 sts (outer leg), 17 sts (gap), 6 sts (center leg), 17 sts (gap), 4 sts (outer leg). The total is 4 + 17 + 6 + 17 + 4 = 48 sts.
Outer leg 1, Rows 1–9: Ch 1, sc in first 4 sts, turn. Keep working these 4 sts only. (4 sc in each row) Fasten off.
Center leg, Rows 1–9: Join yarn in the 22nd st of Row 9 of the band. Ch 1, sc in sts 22–27, turn. Keep working these 6 sts only. (6 sc in each row) Fasten off.
Outer leg 2, Rows 1–9: Join yarn in st 45. Ch 1, sc in sts 45–48, turn. Keep working these 4 sts only. (4 sc in each row) Do not fasten off.
Checkpoint: the yoke is 12 in (30.5 cm) wide x 4 in (10.2 cm) tall, with legs 2 in (5.1 cm) long.
Make All Pieces
- Color A: 1 body, 1 yoke
- Color B: 1 body
Layout:
[ ======== YOKE (A) ======== ]
[ leg ]    [ leg ]    [ leg ]
[  BODY A  ][  BODY B  ]
[ (yellow) ][ (cream)  ]
[  outlet  ][  outlet  ]
Border (Yoke Only)
Border gauge: match the sc gauge, which is 4 sts per 1 in (2.5 cm). Sc rows are 4.5 per 1 in, so along the row-end edges you skip every 9th row end. That gives you 8 sc for every 9 rows, which works out to exactly 4 sc per inch.
Rnd 1: With the last loop of Outer leg 2 still on your hook, turn the piece so you’re working up its outer side edge. Work this rnd counterclockwise around the whole yoke:
- Outer side edges: 16 sc along each one (18 row ends minus 2 skipped). (32 sc)
- Top edge: sc in each of the 48 sts, with 3 sc in each corner st. (48 + 4 extra = 52 sc)
- Leg bottoms: 4 sts + 2 extra = 6 sc for each outer leg and 6 sts + 2 extra = 8 sc for the center leg, with 2 sc in each leg-bottom corner st. (20 sc)
- Inner leg edges: 8 sc along each of the 4 edges (9 row ends minus 1 skipped). (32 sc)
- Gaps under the band: sc in each of 17 sts, twice. (34 sc)
- Inner corners: no extra stitch. That keeps them sharp.
Sl st to first sc. Total: 32 + 52 + 20 + 32 + 34 = 170 sc.
Rnd 2 (hanging loops): Sl st loosely in each st around. When you reach the center st of each 3-sc top corner, work (sl st, ch 12, sl st) in that same st. Sl st to the first sl st. (170 sl sts + 2 extra = 172 sl sts, plus 2 ch-12 loops) Fasten off.
Loop finish: Join Color A to one ch-12 loop and work 18 sc into the loop. Sl st to the base and fasten off. Repeat on the other loop. Each loop lies about 1.5 in (3.8 cm) long.
Why the math works: the top edge has 48 sts, which is 12 in (30.5 cm) at 4 sts per inch. The 4 extra corner sts are only there to turn the corners and don’t stretch the edge. On the row-end edges you work 8 sc for every 9 rows, which keeps those edges the same length as the rows instead of letting them ruffle. Together, the border and the three leg widths still add up to 48 sts across the yoke, the same as the rim stitch count.
Checkpoint: the yoke is 12.5 in (31.8 cm) x 4.5 in (11.4 cm).
Joining
Method: whipstitch with Color A through both loops.
Prepare: Flatten each body so the join of each rnd sits at the center back, then pin the two bodies side by side. You now have a back half of 24 sts and a front half of 24 sts on each body. The seam runs along the inner fold, where Body A’s 24th-25th st meets Body B’s 1st st.
Stitch-to-stitch logic: both bodies have exactly 39 rnds. Match the fold st of Rnd 1 on Body A to the fold st of Rnd 1 on Body B, and keep going one rnd to one rnd:
- Whipstitch Rnds 1–18 (the solid base), 1 stitch per rnd.
- Tack the mesh at each sc-to-sc meeting point along the fold. That’s 12 tacks, 1 per mesh rnd, Rnds 19–30.
- Whipstitch Rnds 31–39 (the rim), 1 stitch per rnd.
Tension: pull each stitch snug enough to close the gap but not so tight that it puckers. The seam should lie flat and be the same length as the side folds.
Attach the yoke: sew the bottom edge of each yoke leg to the top rnd of the back half of the rims, stitch to stitch:
- Outer leg on Body A: its 6 sts go on the last 6 back sts at Body A’s outer side.
- Center leg: its 8 sts straddle the seam, 4 back sts on each body.
- Outer leg on Body B: its 6 sts go on the last 6 back sts at Body B’s outer side.
On each body, 14 back sts stay free between the legs (6 + 14 + 8 + 14 + 6 = 48 across both rims). The 17-st gaps in the yoke sit in a gentle arch above those 14 sts, which helps the mouths open.
Size checkpoint: the holder is 12 in (30.5 cm) wide flat across the bodies and 19.5 in (49.5 cm) tall without the loops.
Final Blocking
- Lay the holder face down on a towel or blocking mat.
- Spray it evenly with water until it’s damp, not soaking.
- Pin the base to 6 in (15.2 cm) wide on each body.
- Gently stretch the mesh lengthwise until each section is 9 in (22.9 cm) tall, then straighten the diamonds with your fingers.
- Pin the yoke to 12.5 in (31.8 cm) wide, making sure the legs are straight.
- Let it dry completely before you hang it.
Final Quality-Control Checklist
- Both bodies have 39 rnds and 48 sts at the base and rim.
- Each mesh rnd has 12 loops.
- The outlets are open and about 3 in (7.6 cm) wide flat.
- The center seam is straight and flat.
- The yoke legs are sewn to the back of the rims only, and the front of each rim is free.
- The hanging loops are covered with 18 sc and are secure.
- All ends are woven in at least 2 in (5.1 cm).
Troubleshooting
- The mesh twists to one side: the lean is normal. Block it straight and line up the center seam using the tacks.
- The rim is wider than the base: check that you worked exactly 4 sc in each loop on Rnd 31.
- The yoke edges ruffle: you probably skipped too few row ends. Rework the sides with 16 sc per outer edge.
- Bags fall out of the outlet: go down a hook size for Rnds 1–4, or work one extra rnd of 24 sc before Rnd 2.
- The mouths gape too wide: move the outer legs 1 st toward the center.
Care
Hand wash in cool water, press out the water in a towel, and lay flat to dry. Avoid hot dryers, which can shrink the cotton.
Final Notes
The measurements all build on each other. Gauge of 16 sc = 4 in (10.2 cm) gives you a 48-st body that is 6 in (15.2 cm) wide flat. A 4 in (10.2 cm) solid base, 9 in (22.9 cm) of mesh, and a 2 in (5.1 cm) rim give a 15 in (38.1 cm) body. Two bodies give you 12 in (30.5 cm) across. The bordered yoke measures 12.5 in (31.8 cm) x 4.5 in (11.4 cm), which brings the finished holder to 19.5 in (49.5 cm) tall. If you check each stage, the final piece will come out right.
Happy crocheting!