

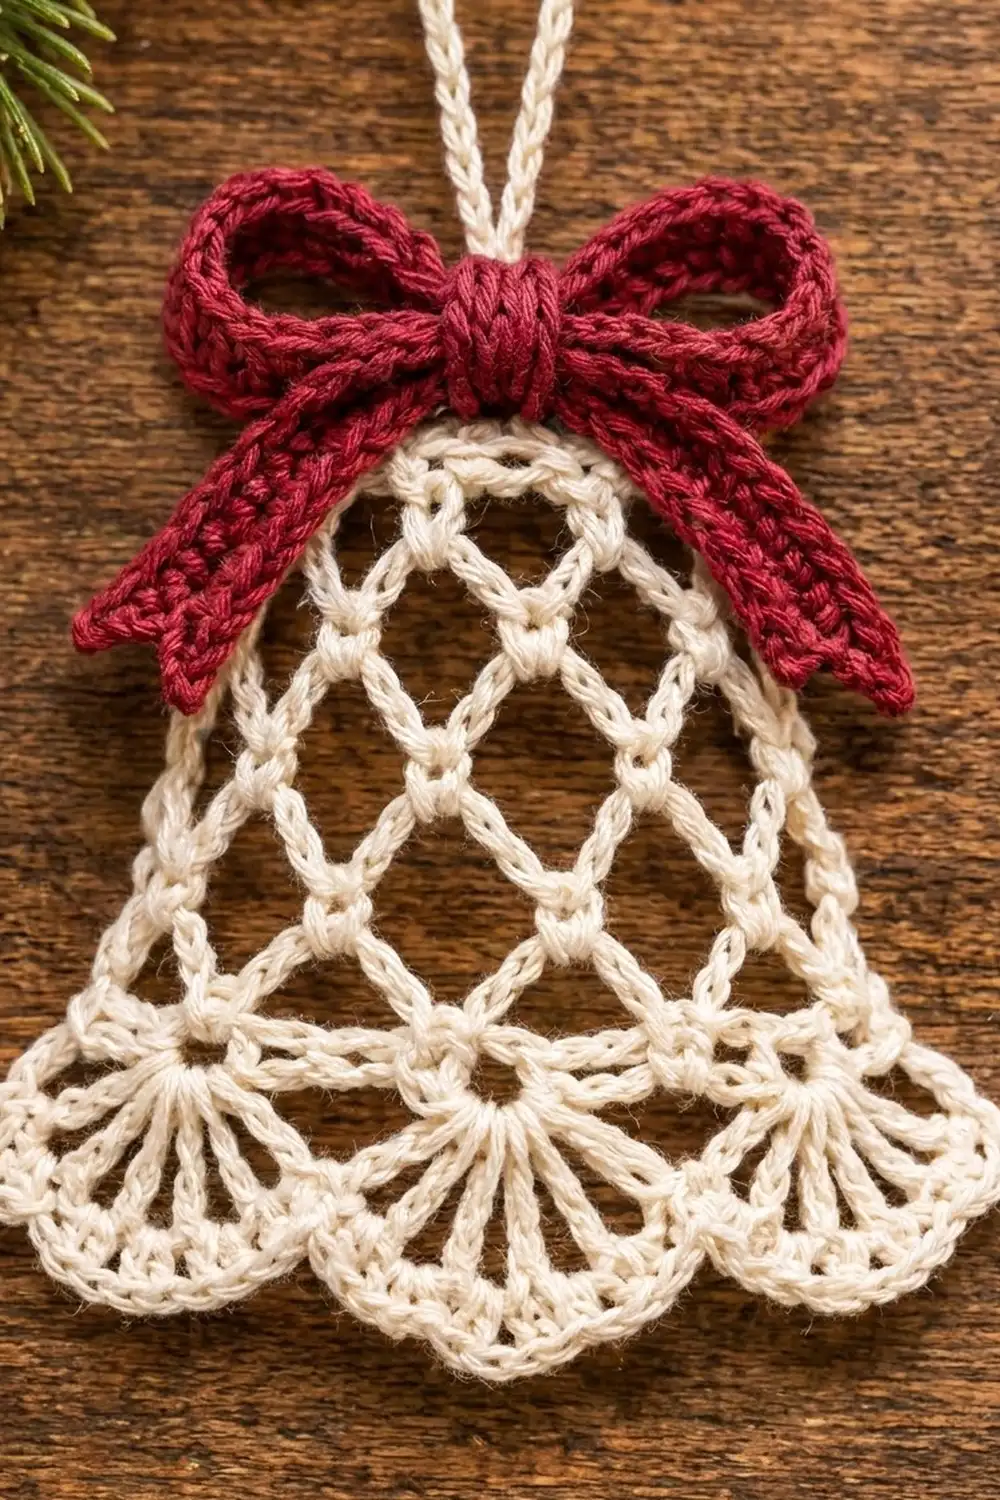
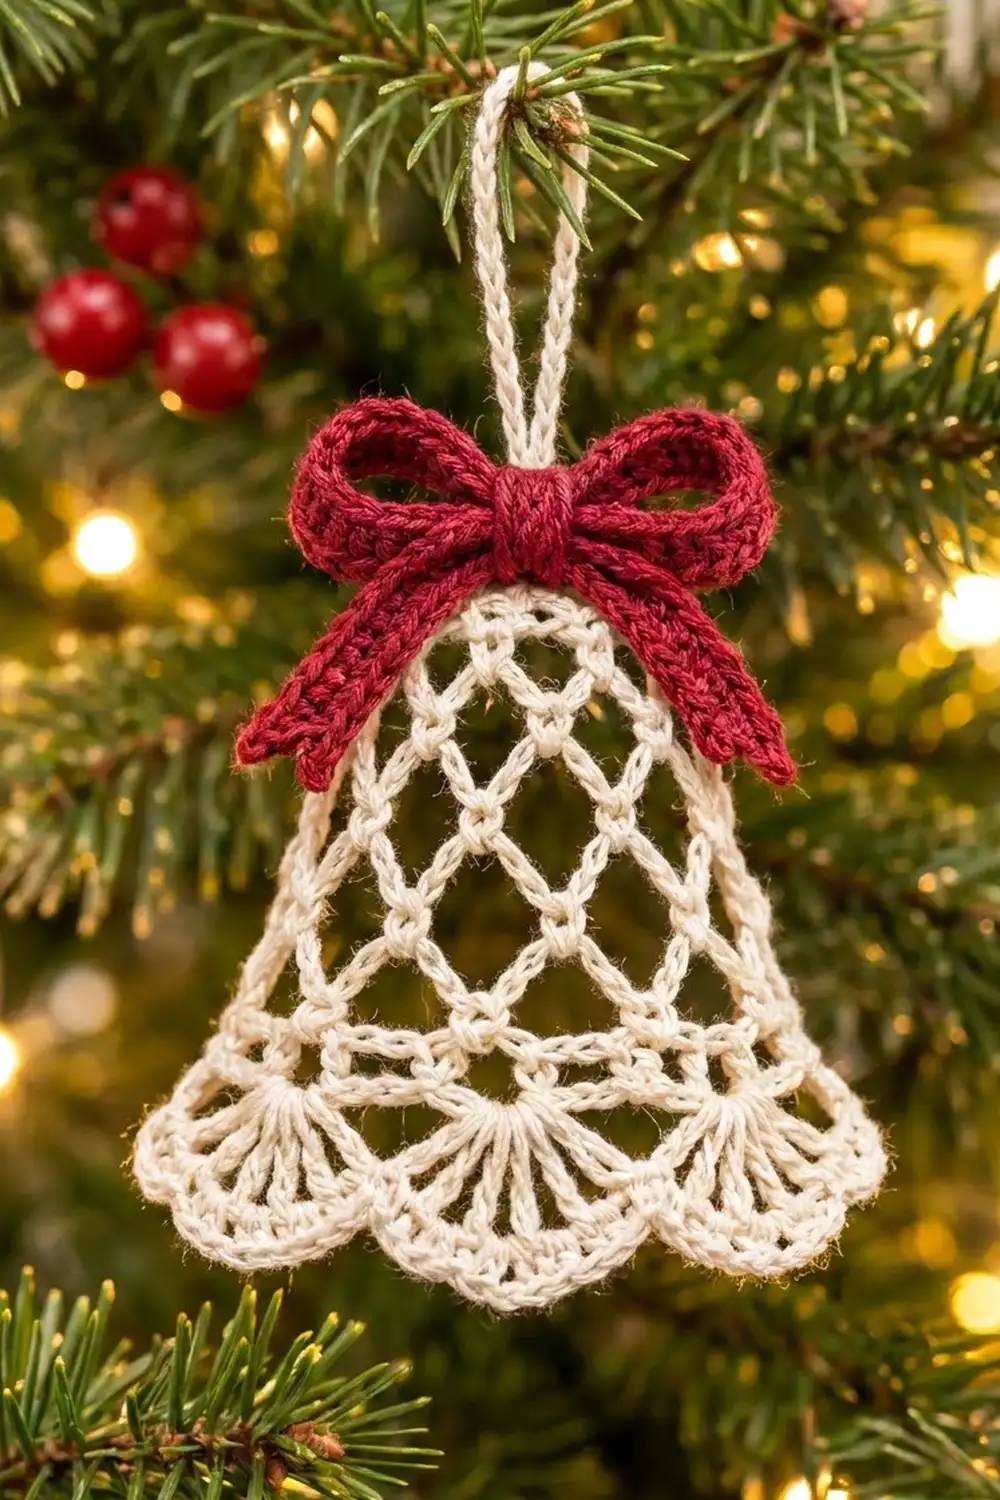
The Holly Lace Bell is a small, airy Christmas ornament worked in cream cotton thread. A narrow ring at the top opens into a diamond mesh body, and the hem finishes in a row of scalloped shell fans. A textured cranberry-red bow sits at the crown, and a slim cream loop lets it hang from a branch.
The palette is deliberately simple: cream or ivory for the lace and a deep cranberry red for the bow. The cream mesh stands out against dark green branches and warm lights, and the red bow gives it a classic holiday look. It suits a vintage or farmhouse tree, a gift tag or a wreath.
This pattern uses US crochet terms. Laid flat, the finished bell measures 3.5 in (8.9 cm) tall and 3.5 in (8.9 cm) wide across the scallops, not counting the hanging loop. The loop adds about 1.5 in (3.8 cm).
The bell is one seamless piece worked in the round from the top down. You start with a small single crochet ring and add a round of chain loops. Then you work seven mesh rounds, lengthening the loops every other round so the bell flares. A solid single crochet hem round sets up the scalloped border. The red bow is made separately and sewn to the top, and the hanging loop is added last.
Finished Size and Construction
- Finished size (flat): 3.5 in (8.9 cm) tall x 3.5 in (8.9 cm) wide, plus a 1.5 in (3.8 cm) hanging loop
- Skill level: Easy-intermediate (chain-loop mesh and shell fans)
- Terminology: US crochet terms
- Yarn weight: Size 3 mercerized cotton crochet thread
- Hook: 2.25 mm (US B-1)
- Number of pieces: 1 bell body, plus a small 3-part red bow and a cream hanging cord
- Layout: A single ornament, so no motifs need joining
- Piece size (bell body before border): 3 in (7.6 cm) tall x 3 in (7.6 cm) wide, flattened
- Stitch count before border: 48 sc around the hem, 24 sc per flattened side
- Border depth: 0.5 in (1.3 cm), worked in 2 rounds
Materials
Choose a mercerized cotton thread in size 3. It has a firm twist and a slight sheen, so the mesh holds its diamonds and the fans keep their shape after blocking. Acrylic or very soft thread will make the bell droop.
- Color A, Cream: 10 g, about 16 m (bell body, border, hanging loop)
- Color B, Cranberry Red: 5 g, about 8 m (bow)
These amounts include extra for a test bell and for weaving in ends. One standard ball of each color makes many ornaments.
Tools:
- 2.25 mm (US B-1) crochet hook
- Tapestry needle with a small eye
- Stitch marker
- Scissors
- Ruler or tape measure
- Fabric stiffener or spray starch (optional, for a crisper bell)
- Foam blocking mat and rustproof pins
- Small plastic bag or paper cone for shaping (optional)
Abbreviations (US Terms)
- ch – chain
- sl st – slip stitch
- sc – single crochet
- dc – double crochet
- sp(s) – space(s)
- sk – skip
- rep – repeat
- BLO – back loop only
- Rnd(s) – round(s)
Special stitch – Fan: Work (dc, ch 1) 6 times, then 1 more dc, all in the same stitch. Each fan has 7 dc and 6 ch-1 sps.
Gauge and Checkpoints
Gauge: 8 sc = 1 in (2.5 cm) with size 3 thread and a 2.25 mm hook.
Make one test bell before you plan a batch of ornaments. Measuring after a few rounds is quicker than making a separate swatch.
- After Rnd 1: The 24 sc ring is 3 in (7.6 cm) around and 1.5 in (3.8 cm) wide when flattened.
- After Rnd 5: About 1.5 in (3.8 cm) tall from the top edge.
- After Rnd 9: About 2.8 in (7.1 cm) tall, with the hem about 3 in (7.6 cm) wide when flattened.
- After Rnd 10: 3 in (7.6 cm) tall x 3 in (7.6 cm) wide, flattened.
- After the border: 3.5 in (8.9 cm) tall x 3.5 in (8.9 cm) wide.
If your ring is too big (wider than 1.75 in / 4.4 cm flattened), switch to a 2 mm hook or chain more tightly. If it is too small (narrower than 1.25 in / 3.2 cm), go up to a 2.5 mm hook. Do not change the stitch counts, because the mesh and border math depend on them.
Bell Body
Use Color A. Work in joined rounds with the right side facing you. Do not turn.
Foundation: Ch 24, then sl st in the first ch to form a ring. Make sure the chain is not twisted.
Rnd 1: Ch 1, sc in each ch around, sl st in the first sc to join. (24 sc)
Rnd 2: Ch 1, sc in the first sc, ch 4, sk next sc, sc in next sc; rep from * 10 more times, ch 4, sk last sc, sl st in the first sc to join. (12 sc, 12 ch-4 loops)*
This round makes the lacy ring of chain loops that the mesh hangs from.
How to work a mesh round: Every mesh round starts the same way.
- Sl st in the next 2 ch to reach the middle of the first loop.
- Ch 1 and sc in that same loop.
- *Ch [length], sc in next loop; rep from * 10 more times.
- Ch [length] and sl st in the first sc to join.
Each sc sits in the middle of a loop from the round below, so the loops stagger and form diamonds.
Rnd 3: Work a mesh round with ch-4 loops. (12 sc, 12 ch-4 loops)
Rnd 4: Work a mesh round with ch-5 loops. (12 sc, 12 ch-5 loops)
Rnd 5: Work a mesh round with ch-5 loops. (12 sc, 12 ch-5 loops)
Checkpoint: about 1.5 in (3.8 cm) tall. The bell should already flare slightly.
Rnd 6: Work a mesh round with ch-6 loops. From this round on, sl st in the next 3 ch (not 2) to reach the middle of the loop. (12 sc, 12 ch-6 loops)
Rnd 7: Work a mesh round with ch-6 loops. (12 sc, 12 ch-6 loops)
Rnd 8: Work a mesh round with ch-7 loops. (12 sc, 12 ch-7 loops)
Rnd 9: Work a mesh round with ch-7 loops. (12 sc, 12 ch-7 loops)
Checkpoint: about 2.8 in (7.1 cm) tall, with seven rows of diamonds.
The number of loops never changes. The bell widens only because the loops get longer, which keeps the diamonds even and opens them up gradually toward the hem.
Rnd 10 (hem conversion round): Ch 1, sc in the first sc, 3 sc in the next ch-7 loop, sc in next sc, 3 sc in next ch-7 loop; rep from * 10 more times, sl st in the first sc to join. (12 sc worked 1 per existing sc + 36 sc worked 3 per loop = 48 sc)*
Working only 3 sc into each long loop gathers it slightly. This makes the solid band above the scallops and keeps the hem from rippling.
Checkpoint: 3 in (7.6 cm) tall x 3 in (7.6 cm) wide, flattened. Flatten the bell so the Rnd 10 join sits on one side fold. Each flattened side should show 24 sc.
Bow
Use Color B. The bow is made from three small strips worked flat. Working the second row in the back loop only gives the strips a ridged, braided texture.
Bow loops strip: Ch 45.
- Row 1: Sc in the 2nd ch from hook and in each ch across. (44 sc)
- Row 2: Ch 1, turn, sc in BLO of each sc across. (44 sc)
Fasten off. The strip measures about 5.5 in (14.0 cm). Bring both ends to the center and overlap them by 0.25 in (0.6 cm) to form two loops, then stitch through the center. The bow is about 2.75 in (7.0 cm) wide.
Tails strip: Ch 21.
- Row 1: Sc in the 2nd ch from hook and in each ch across. (20 sc)
- Row 2: Ch 1, turn, sc in BLO of each sc across. (20 sc)
Fasten off. The strip measures 2.5 in (6.4 cm). Fold it into a V and tack the fold behind the center of the bow.
Center knot: Ch 9.
- Row 1: Sc in the 2nd ch from hook and in each ch across. (8 sc)
- Rows 2–3: Ch 1, turn, sc in BLO of each sc across. (8 sc)
Fasten off, leaving a 6 in (15.2 cm) tail. The strip measures 1 in (2.5 cm). Wrap it around the center of the bow, over the tails, and sew the ends together at the back.
Hanging Loop
Use Color A. Ch 30, then sl st in the back bump of the 2nd ch from hook and of each ch across. (29 sl st) Fasten off, leaving a 6 in (15.2 cm) tail. The row of slip stitches firms up the cord so it won’t stretch.
Fold the cord in half. Sew both ends to the inside of Rnd 1, at the top center of one flattened side, to make a 1.5 in (3.8 cm) loop.
Border
Border gauge: Each fan covers 6 hem sc, or 0.75 in (1.9 cm). The two border rounds add 0.5 in (1.3 cm) of depth. The fans spread a little wider than the hem, so the finished bell measures 3.5 in (8.9 cm) across.
Work with Color A, right side facing you.
Border Rnd 1 (fans): Ch 1, sc in the same st as the join, sk next 2 sc, Fan in next sc, sk next 2 sc, sc in next sc; rep from * 6 more times, sk next 2 sc, Fan in next sc, sk last 2 sc, sl st in the first sc to join.
(8 sc and 8 Fans, which is 8 sc, 56 dc and 48 ch-1 sps; per flattened side: 4 sc and 4 Fans)*
Border Rnd 2 (picot loops): Sl st in the first dc and in the first ch-1 sp. Ch 1, sc in the same sp, (ch 3, sc in next ch-1 sp) 5 times, sk the last dc, sl st in next sc. Sc in the first ch-1 sp of the next Fan, (ch 3, sc in next ch-1 sp) 5 times, sk the last dc, sl st in next sc; rep from * 6 more times. The final sl st lands in the joining sc of Border Rnd 1. Fasten off.
(48 sc, 40 ch-3 loops, 8 sl st; per flattened side: 24 sc, 20 ch-3 loops, 4 sl st)*
Why the math works: Rnd 10 has 48 sc, which is 24 per flattened side. Each fan repeat uses exactly 6 sc: the sc, 2 skipped, the Fan stitch and 2 more skipped. 48 ÷ 6 = 8 fans, or 4 per side, with nothing left over. In Rnd 2, each fan’s 6 ch-1 sps get 1 sc each (8 x 6 = 48 sc), with 5 ch-3 loops between them (8 x 5 = 40). A sl st anchors each scallop in the dip between fans. The round has no corners, so nothing is counted twice.
Final Blocking
- Weave in all cream ends along the solid hem round or the top ring, where they won’t show through the mesh.
- Soak the bell in cool water for a few minutes. Press out the water gently in a towel; do not wring it.
- For a crisp shape, dip the bell in fabric stiffener or spray it with starch.
- Lay the bell flat on the mat with the Rnd 10 join on one side fold. Each side should show 6 diamonds across and 4 scallops.
- Pin it to 3.5 in (8.9 cm) tall x 3.5 in (8.9 cm) wide. Put a pin in the center ch-3 loop at the tip of each scallop and in each sl st between scallops.
- Use your fingers to open each diamond so the sc knots line up in neat diagonal lines.
- For a 3D bell, skip pinning it flat. Slip a small rolled paper cone or plastic bag inside instead, and shape the hem outward.
- Let it dry completely, for at least 6 hours.
- Sew the bow to the top center of the front, over Rnds 1–2, with its lower edge touching Rnd 3. Check that the hanging loop stands straight above the bow.
Final Quality-Control Checklist
- Rnd 1 has 24 sc, and the ring is not twisted.
- Every mesh round has 12 sc and 12 loops of the correct length.
- Rnd 10 has 48 sc.
- There are 8 fans in total, 4 per flattened side, all the same size.
- Every fan has 7 dc and 6 ch-1 sps.
- Border Rnd 2 has 5 ch-3 loops per scallop.
- The bell measures 3.5 in (8.9 cm) x 3.5 in (8.9 cm) flat.
- The bow is centered and 2.75 in (7.0 cm) wide, and the tails hang evenly.
- The hanging loop is 1.5 in (3.8 cm) and firmly sewn.
- No ends show through the mesh.
Troubleshooting
The diamonds twist into a spiral. The sc is probably landing off-center in the loops. Count the sl sts at the start of each round, and put each sc in the middle chain of the loop.
The bell is too straight and doesn’t flare. Your chains are too tight. Chain more loosely, or add 1 ch to each loop in Rnds 8–9 only. Keep Rnd 10 at 3 sc per loop.
The hem ripples. The hem round is too loose for the loops. Use a hook one size smaller for Rnd 10 only, and check that you worked 3 sc, not 4, in each loop.
The fans cup or curl. Block again with a little more stiffener and pin each fan open. If they still cup, work Border Rnd 1 with a 2.5 mm hook.
Stitches are left over at the end of Border Rnd 1. Rnd 10 does not have 48 sc. Recount it and fix it before you work the fans.
The bow flops forward. Sew it down at the ends of both loops as well as at the center, not just through the knot.
Care
Spot clean or hand wash in cool water, then reshape the bell and dry it flat or over a cone. Store it flat in tissue paper so the scallops and bow keep their shape.
Final Notes
The measurement chain is short and easy to check. The 24 sc ring measures 1.5 in (3.8 cm) flattened. Seven mesh rounds of 12 loops, with the chains growing from 4 to 7, flare the bell to 3 in (7.6 cm) wide and 2.8 in (7.1 cm) tall. Rnd 10 sets 48 sc, or 24 per side, and brings the body to 3 in (7.6 cm) square. The 8 shell scallops add 0.5 in (1.3 cm) and spread the hem to the finished 3.5 in (8.9 cm) x 3.5 in (8.9 cm). If every checkpoint matches, the finished bell will too. Then add the bow and loop and hang it on the tree.
Happy crocheting!