

Two small bells hanging under a soft bow make a classic holiday shape, and this version keeps it calm and modern. Everything is worked in one muted sage green, so the texture does the work: firm single crochet bells, corded rims, round little clappers and a neatly edged bow.
The finished ornament measures about 4.5 in (11.4 cm) wide and 6 in (15.2 cm) tall including the hanging loop. It’s light enough for any tree branch, and it also works as a gift topper or a wreath accent.
This pattern uses US crochet terms throughout.
The ornament is made from 10 small pieces. The bells are worked top-down in a continuous spiral, and each one gets a two-round rim. The clappers are tiny stuffed balls on slip-stitch stems. The bow is two flat strips with slip-stitch edging, pinched by a small center wrap. Then the cords and the hanging loop tie it all together.
Finished Size and Construction
- Finished size: about 4.5 in (11.4 cm) wide x 6 in (15.2 cm) tall including the loop
- Skill level: Easy to Intermediate (spiral rounds, reverse single crochet)
- Terminology: US
- Yarn weight: DK (weight 3) cotton or cotton blend
- Hook: 3.0 mm (C/D)
- Number of pieces: 10 (2 bells, 2 clappers, 1 bow loop band, 1 tail band, 1 center wrap, 2 bell cords, 1 hanging loop)
- Layout: the bow sits at the center top, the hanging loop rises above it, and the two bells hang side by side below with their rims touching
- Bell size (finished): about 2 in (5.1 cm) tall, rim about 2.25 in (5.7 cm) across
- Bell size before rim (border): about 1.8 in (4.6 cm) tall, mouth about 2.1 in (5.3 cm) across
- Border depth: the bell rim adds about 0.2 in (0.5 cm); the bow edging adds about 0.1 in (0.3 cm) to each edge of the band
Materials
Yarn: Use a smooth, tightly plied DK cotton or cotton blend. Mercerized or matte cotton both work. Cotton holds the bell flare crisply and shows clear stitch definition. Avoid fuzzy or very stretchy acrylics, because the bells may sag.
- Sage green: 15 g, about 36 m (39 yd)
The quantity includes a margin of about 20% for gauge swatching and sewing tails.
Tools and notions:
- 3.0 mm (C/D) crochet hook
- Yarn needle
- Small pinch of fiberfill or matching scrap yarn (for the clappers)
- Stitch marker
- Scissors
- Pins
- Optional: spray bottle and a small round form (a cork or bottle cap) for blocking the bells
Abbreviations (US Terms)
- ch: chain
- sc: single crochet
- sl st: slip stitch
- inc: 2 sc in the same stitch
- dec: sc2tog (insert in the next st, pull up a loop, insert in the following st, pull up a loop, yarn over, pull through all 3 loops)
- st(s): stitch(es)
- rnd(s): round(s)
- MR: magic ring
- BB: back bump of a chain
Special stitch – reverse sc (crab stitch): Work from left to right (right-handers). Insert the hook into the next stitch to the right, yarn over, pull up a loop, yarn over, and pull through both loops. This makes a twisted, corded edge.
Gauge and Checkpoints
Gauge: 22 sc x 24 rnds = 4 in (10.2 cm) in sc worked in the round. That is 5.5 sc and 6 rnds per 1 in (2.5 cm). Chains and slip-stitch cords measure about 6 ch per 1 in (2.5 cm).
Test one piece first. Make one bell before anything else. It’s the most gauge-sensitive part, and it tells you whether the bow and cords will be in proportion.
Checkpoints:
- After Bell Rnd 3, the flat circle measures about 1 in (2.5 cm) across.
- After Bell Rnd 7, the bell is about 1.2 in (3.0 cm) tall.
- After Bell Rnd 11, the mouth is about 6.5 in (16.5 cm) around and about 2.1 in (5.3 cm) across. The height is about 1.8 in (4.6 cm).
- After the rim, the bell is about 2 in (5.1 cm) tall.
If your bell is too big: Go down to a 2.75 mm hook, or crochet more tightly. A loose bell will also look floppy.
If your bell is too small or stiff: Go up to a 3.25 mm hook. Keep the stitches firm but not so tight that the hook struggles to enter.
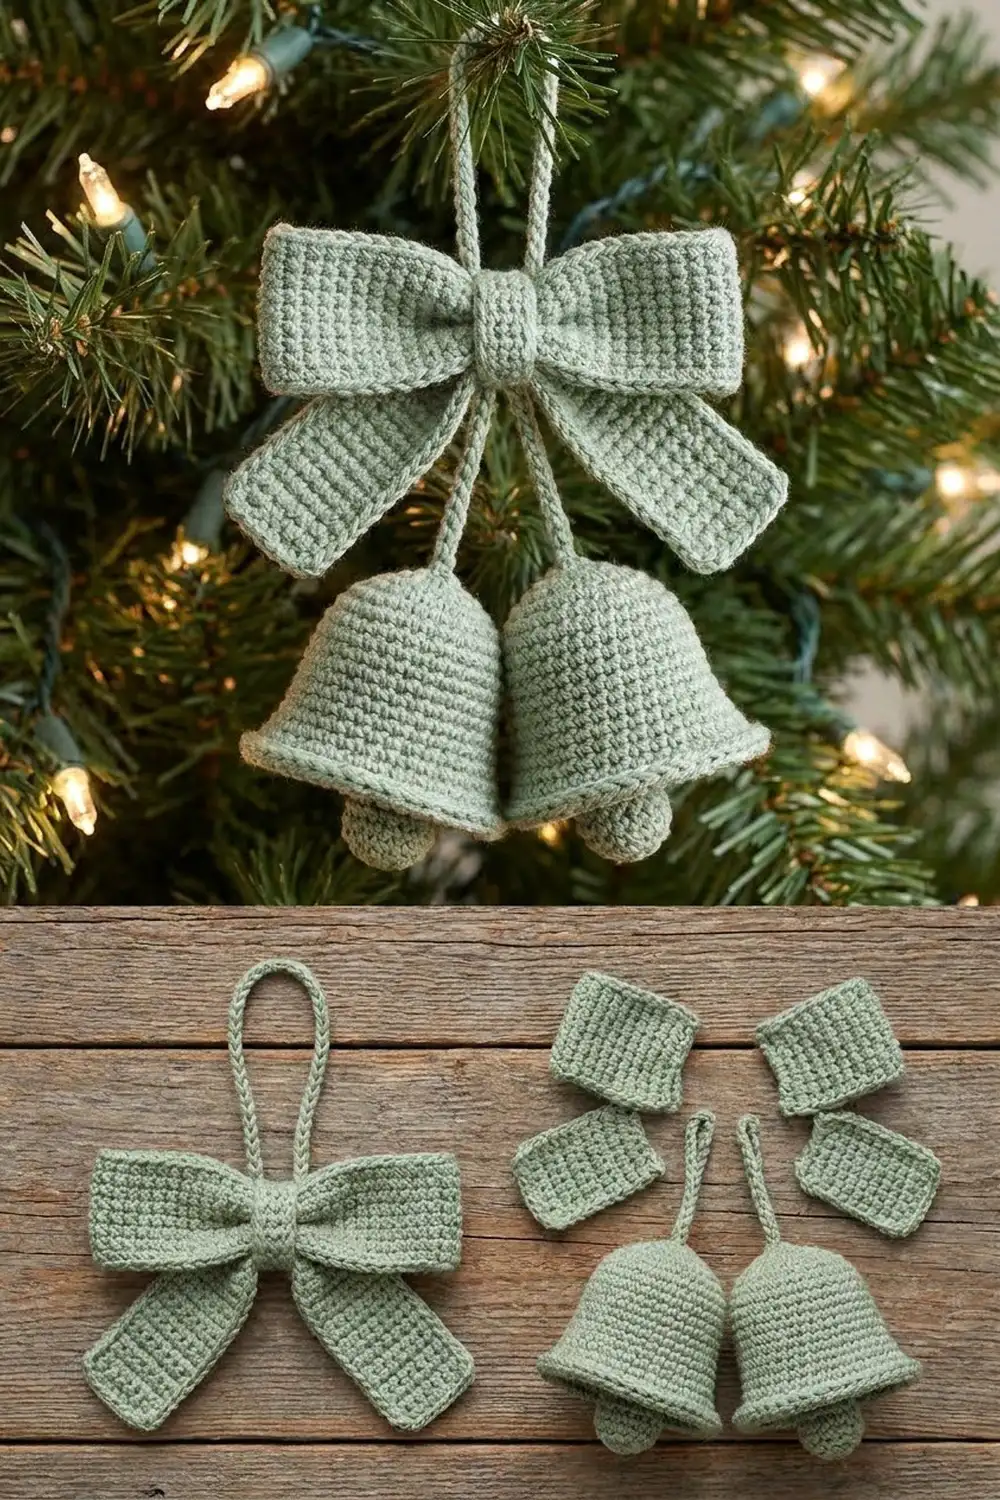
Bell (Make 2)
The bell is worked in a continuous spiral from the top down. Place a marker in the first stitch of each round and move it up as you go.
Rnd 1: Make a MR. Work 6 sc in the ring and pull it tight. (6)
Rnd 2: Inc in each st around. (12)
Rnd 3: (Sc in next st, inc) 6 times. (18)
Checkpoint: the flat circle is about 1 in (2.5 cm) across.
Rnds 4–7: Sc in each st around. (18 per rnd, 4 rnds)
The sides now turn down to form the narrow rounded top of the bell. Gently push the circle into a dome shape with your fingertip.
Checkpoint: the height is about 1.2 in (3.0 cm).
Rnd 8: (Sc in next 2 sts, inc) 6 times. (24)
Rnd 9: Sc in each st around. (24)
Rnd 10: (Sc in next 3 sts, inc) 6 times. (30)
Rnd 11: (Sc in next 4 sts, inc) 6 times. (36)
These closely spaced increase rounds create the flare. Rnds 10 and 11 increase back to back, so the bottom of the bell opens out quickly, like a real bell mouth.
Checkpoint: the mouth is about 2.1 in (5.3 cm) across. The bell is about 1.8 in (4.6 cm) tall.
Don’t fasten off. Continue straight into the Bell Rim (see Border).
Clapper (Make 2)
Rnd 1: Make a MR. Work 6 sc in the ring. (6)
Rnd 2: Inc in each st around. (12)
Rnd 3: Sc in each st around. (12)
Stuff firmly with a small pinch of fiberfill or matching scrap yarn.
Rnd 4: Dec 6 times. (6)
The ball measures about 0.6 in (1.5 cm) across.
Stem: Without fastening off, ch 11. Sl st in the BB of the 2nd ch from the hook and in the BB of each ch across. (10 sl st) Fasten off with a 6 in (15.2 cm) tail.
Before sewing, thread the beginning tail through the 6 sts of Rnd 4 and cinch it closed. Weave that tail into the ball. The stem measures about 1.7 in (4.3 cm).
Bow Loop Band (Make 1)
Foundation: Ch 51.
Row 1: Sc in the 2nd ch from the hook and in each ch across. Turn. (50)
Rows 2–3: Ch 1, sc in each st across. Turn. (50 per row)
Don’t fasten off. Continue into the Bow Edging (see Border).
The band measures about 9 in (22.9 cm) long and 0.5 in (1.3 cm) wide before edging.
Bow Tail Band (Make 1)
Foundation: Ch 31.
Row 1: Sc in the 2nd ch from the hook and in each ch across. Turn. (30)
Rows 2–3: Ch 1, sc in each st across. Turn. (30 per row)
Don’t fasten off. Continue into the Bow Edging (see Border).
The band measures about 5.5 in (14.0 cm) long and 0.5 in (1.3 cm) wide before edging.
Center Wrap (Make 1)
Foundation: Ch 9.
Row 1: Sc in the 2nd ch from the hook and in each ch across. Turn. (8)
Rows 2–3: Ch 1, sc in each st across. Turn. (8 per row)
Fasten off with a 10 in (25.4 cm) tail. The wrap measures about 1.5 in (3.8 cm) x 0.5 in (1.3 cm). It has no edging.
Bell Cords (Make 2) and Hanging Loop (Make 1)
Bell cord: Ch 8. Sl st in the BB of the 2nd ch from the hook and in the BB of each ch across. (7 sl st) Fasten off with an 8 in (20.3 cm) tail. Each cord measures about 1.25 in (3.2 cm).
Hanging loop: Ch 43. Sl st in the BB of the 2nd ch from the hook and in the BB of each ch across. (42 sl st) Fasten off with an 8 in (20.3 cm) tail. The cord measures about 7 in (17.8 cm). Folded in half, it makes a loop about 3.5 in (8.9 cm) long.
Working the slip stitches into the back bumps gives the cord a firm, braided look, and it won’t stretch on the branch.
Make All Pieces
Everything is in sage green:
| Piece | Quantity |
|---|---|
| Bells (with rim) | 2 |
| Clappers (with stem) | 2 |
| Bow loop band (with edging) | 1 |
| Bow tail band (with edging) | 1 |
| Center wrap | 1 |
| Bell cords | 2 |
| Hanging loop | 1 |
| Total | 10 |
Assembly layout (front view):
                 ( hanging loop )
                       ||
   (  loop  )====[center wrap]====(  loop  )
                  /           \
            tail /    cords    \ tail
                /    /     \    \
            [ Bell L ]   [ Bell R ]
              ( o )        ( o )
             clapper      clapper
Joining
All joins are sewn with the yarn needle and matching yarn.
1. Clappers into bells. Pass the stem’s end tail through the center of the bell’s Rnd 1 from the inside. Adjust it so the ball hangs about 0.3 in (0.8 cm) below the rim. Then stitch through the stem’s last sl st and the Rnd 1 stitches twice to lock it. Leave this tail on top of the bell to use in step 5.
2. Form the bow loops. Lay the loop band right side down. Bring both short ends to the center so they overlap by about 0.25 in (0.6 cm), then sew them together with 3 to 4 small stitches. Turn it over. You now have a flat ring with the join hidden at the back.
3. Add the tails. Fold the tail band at its center stitch (between sts 15 and 16) into an upside-down V. Place it behind the center of the loop ring with the tails pointing down and out at about 45°.
4. Pinch and wrap. Pinch the loops and the tail fold together at the center. Wrap the center wrap around them, with its sc rows running across the pinch. Sew its short ends together at the back, stitch-to-stitch (8 sts to… the 3 row ends meet the 3 row ends). Pull just firmly enough to gather the bow. Each loop should extend about 2 in (5.1 cm) from the wrap. The bow measures about 4.5 in (11.4 cm) across.
5. Hang the bells. Sew one end of each bell cord to the back of the center wrap, side by side. Sew the other end of each cord to the top of a bell, using the leftover clapper tail through the same Rnd 1 stitches. Set the bells so their rims touch at the center.
6. Add the hanging loop. Fold the loop in half. Sew both ends to the upper back of the center wrap, overlapping them by 0.5 in (1.3 cm).
Tension advice: Pull the sewing stitches snug enough to hide them, but don’t pull so hard that the bow puckers or the bell tops dimple. Make each join with 2 passes through the same stitches.
Size checkpoint: The ornament should be about 4.5 in (11.4 cm) wide at the bow and the bell rims. It should be about 6 in (15.2 cm) tall from the loop top to the bottom of the clappers.
Border
Border gauge: Work the rim and edging in the same yarn and hook as the main pieces, at your usual tension. Don’t loosen up for the reverse sc. Loose crab stitch flares and ruffles.
Bell Rim (on each bell, after Rnd 11)
Rnd 12: Sc in each st around. Sl st in the first sc to join, which ends the spiral. (36)
Rnd 13: Ch 1. Reverse sc in each st around. Sl st in the first st to join. (36)
Fasten off with a 12 in (30.5 cm) tail and weave it in up the inside.
Why the math works: Rnd 11 ends at 36 stitches. Both rim rounds work exactly 1 stitch into each existing stitch with nothing added, so the mouth keeps its 36 stitches and about 2.1 in (5.3 cm) diameter. The crab stitch rolls outward on its own, which makes the rim look about 2.25 in (5.7 cm) across without any extra stitches. Adding stitches here would ruffle the rim, and skipping stitches would pull the mouth in.
Bow Edging (on the loop band and tail band)
Continue from the last row. Work 1 sl st into each stitch or row end all around the strip. Keep the slip stitches loose enough to lie flat.
Loop band (50 sts per long side, 3 rows per short side):
- Side 1, along Row 3: sl st in each st. (50)
- Side 2, short end: 1 sl st in each row end. (3)
- Side 3, along the foundation chain: sl st in each ch. (50)
- Side 4, short end: 1 sl st in each row end. (3)
- Total: 106 sl st. Sl st in the first sl st and fasten off.
Tail band (30 sts per long side, 3 rows per short side):
- Side 1: 30. Side 2: 3. Side 3: 30. Side 4: 3.
- Total: 66 sl st. Join and fasten off.
Why the math works: Each long side has exactly as many edging stitches as the row has stitches (50 or 30). Each short side gets 1 per row (3). The corners don’t get extra stitches: on a strip only 3 rows deep, extra corner stitches would make little ears. A 1-to-1 edging keeps the bands flat and gives them the defined ribbon edge seen on the bow.
Final Blocking
- Lightly spray the whole ornament with water until it’s damp, not soaked.
- Push a cork or bottle cap into each bell to round the dome and open the mouth to about 2.1 in (5.3 cm).
- Roll the bell rims outward with your fingers so the crab stitch sits evenly.
- Lay the bow flat. Shape each loop into a smooth rounded curve and straighten the tails so their square ends line up.
- Pin the tails at a matching angle. Check that the bow is about 4.5 in (11.4 cm) wide.
- Let it dry completely, at least 4 to 6 hours, then remove the forms and pins.
Final Quality-Control Checklist
- Each bell has 36 sts at Rnd 11 and 36 sts in both rim rounds
- Both bells are about 2 in (5.1 cm) tall with the same flare
- The clappers peek about 0.3 in (0.8 cm) below the rims, level with each other
- The bow loops are equal in size, and the tails are equal in length and angle
- The center wrap is snug with its seam hidden at the back
- The hanging loop is centered and about 3.5 in (8.9 cm) long
- The overall size is about 4.5 in (11.4 cm) x 6 in (15.2 cm)
- All tails are woven in, with nothing visible on the front
Troubleshooting
- The bell flares too early or ripples: Your increases may be stacking. Check that each increase round has exactly 6 increases, and recount Rnds 8, 10 and 11.
- The bell looks like a cylinder: You may have skipped Rnd 10 or Rnd 11. The mouth must reach 36 sts.
- The rim ruffles: Your crab stitch is too loose. Redo Rnd 13 a little more tightly, or with a hook 0.25 mm smaller.
- The bow band curls: Block it flat. Check that the edging has exactly 1 sl st per stitch with no extras.
- The clapper doesn’t show: Lengthen the stem by 1 to 2 ch, or sew it a little lower inside the bell.
- The bells twist on the cords: Sew each cord with 2 stitches through the bell top, not just one point.
Care
Spot clean or hand wash in cool water with mild soap. Press out the water in a towel, reshape, and lay flat to dry.
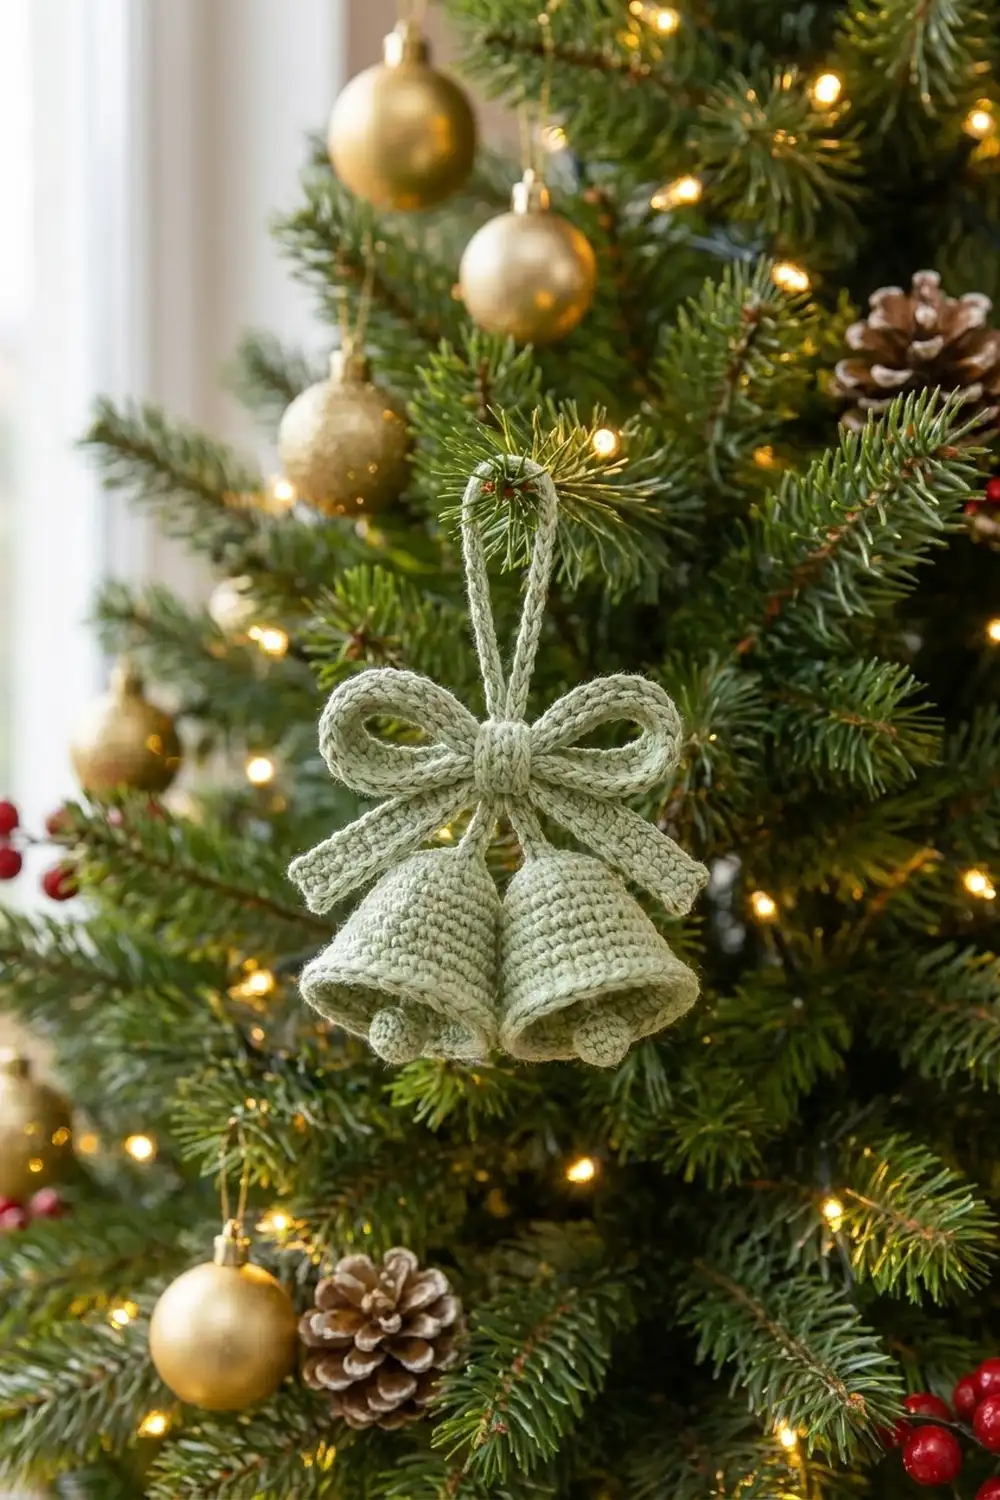
Final Notes
The measurement chain is simple. A 22-sc gauge gives a 1 in (2.5 cm) circle at Rnd 3, a 36-st mouth about 2.1 in (5.3 cm) across at Rnd 11, and a finished bell about 2 in (5.1 cm) tall after the 36-st rim. The 50-st loop band and 30-st tail band, each with a 1-to-1 edging, make a bow about 4.5 in (11.4 cm) wide. Add the cords and the loop, and the finished ornament is about 6 in (15.2 cm) tall. If you check your gauge on the first bell, the rest will fall into place.
Happy crocheting!