
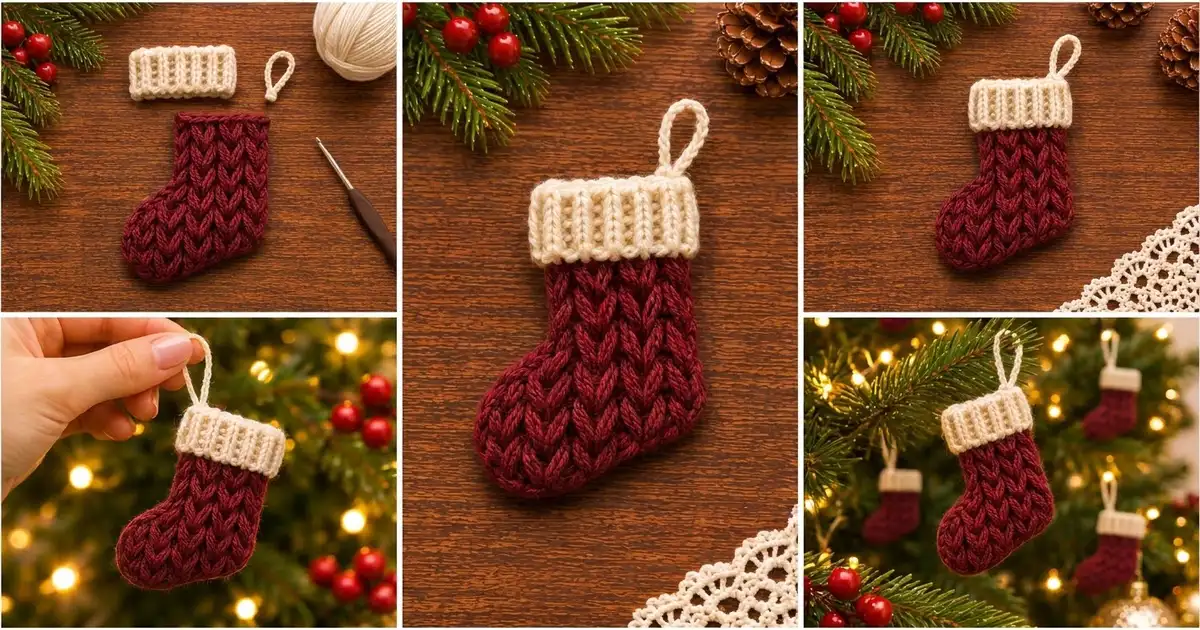
This little stocking ornament looks like a hand-knit stocking. The burgundy body has neat vertical columns of V-shaped stitches, and a soft cream ribbed cuff and a slim cream hanging loop finish it off. It looks good on a tree, tied to a gift, or hung from a garland hook.
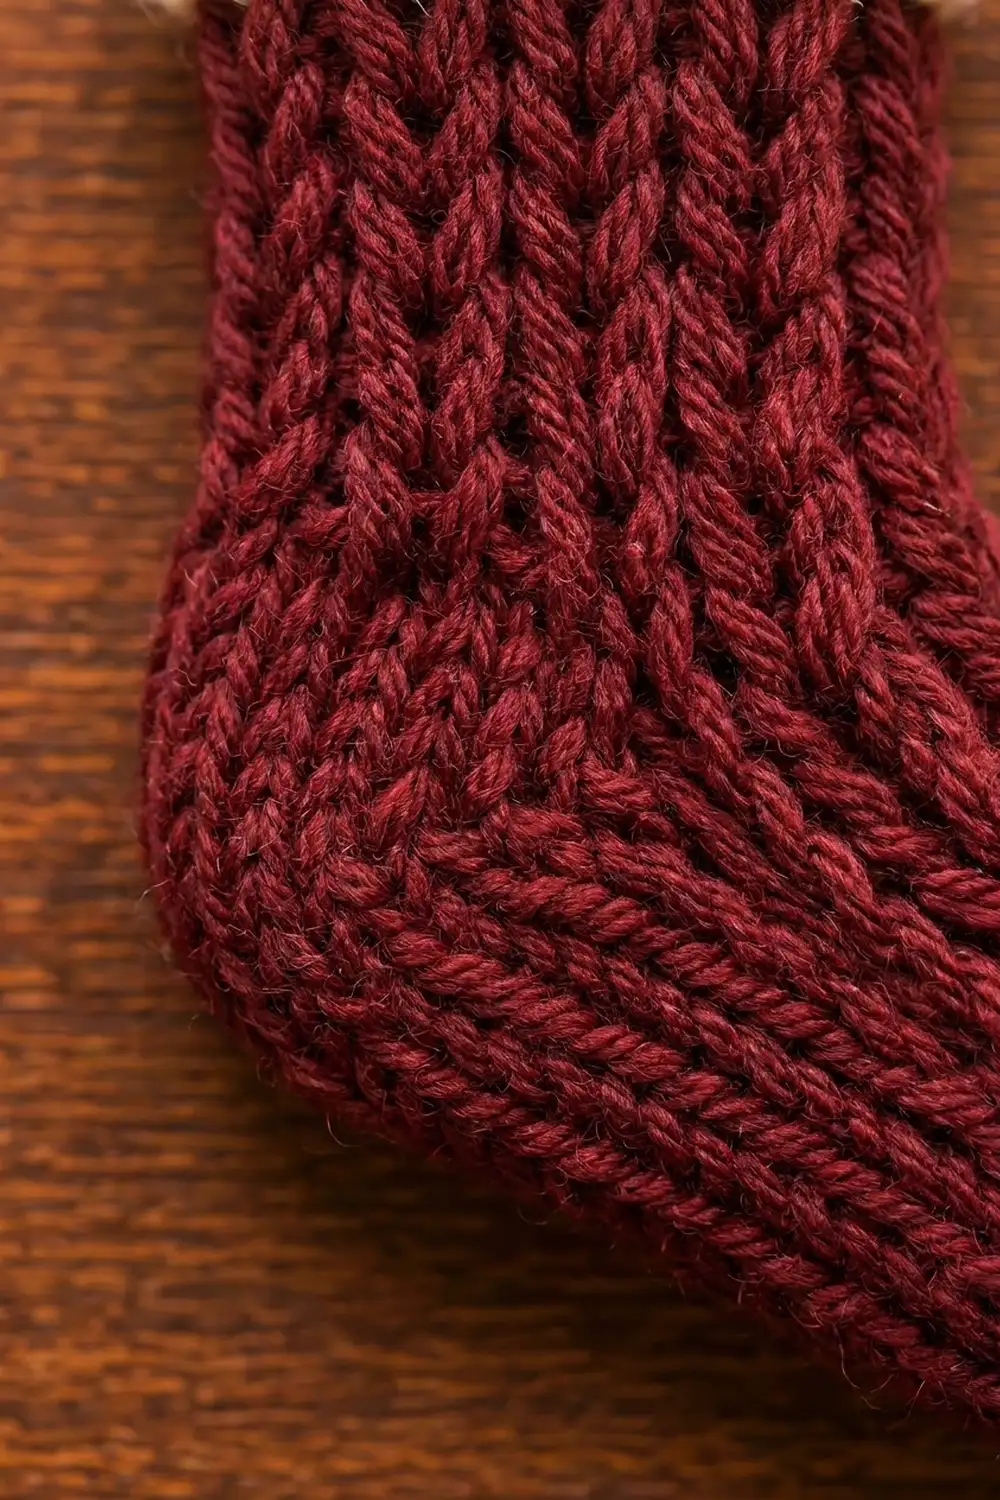
The look comes from waistcoat stitch, a single crochet variation worked in the round. Each new stitch sits right inside the one below, so the V shapes stack into straight columns. The cuff is made in back-loop single crochet rows, which form crisp vertical ribs once the strip is wrapped around the top of the stocking.
All instructions use US crochet terms. The finished ornament is about 3.75 in (9.5 cm) tall without the loop and about 5.25 in (13.3 cm) tall with the loop. The foot is 3 in (7.6 cm) wide at its widest point.
You work the body top-down as a seamless tube. It starts at the leg opening, grows toward the toe side to make the foot, and is then closed flat across the sole. You make the cuff separately as a short ribbed strip, seam it into a ring, and tack it over the top edge. The hanging loop is a reinforced chain sewn inside the cuff at the heel side.
Finished Size and Construction
- Finished size: 3.75 in (9.5 cm) tall × 3 in (7.6 cm) wide at the foot; 5.25 in (13.3 cm) tall including the loop
- Skill level: Easy / advanced beginner
- Terminology: US crochet terms
- Yarn weight: Worsted (#4)
- Hook: 5.0 mm (H-8)
- Number of pieces: 1 ornament, made in 3 parts (body, cuff, hanging loop)
- Layout: Single stocking, toe pointing left when viewed from the front
- Piece size: Body 3 in (7.6 cm) tall; leg 2 in (5.1 cm) wide; cuff 1 in (2.5 cm) tall × 2.2 in (5.6 cm) wide when flat
- Size before border: About 2.9 in (7.4 cm) tall after Round 15
- Border depth: The sole seam adds about 0.1 in (0.3 cm)
Materials
Use a smooth, plied worsted-weight yarn so the V columns show clearly. Wool, wool blends, and soft acrylic all work. Avoid fuzzy or very splitty yarns. Waistcoat stitch goes into the center of each stitch, and a splitty yarn makes that hard to see.
- Color A – Burgundy (body): 10 g, about 20 m
- Color B – Cream (cuff and loop): 4 g, about 8 m
These quantities include a margin for your gauge swatch and yarn tails. One ball of each color will make many ornaments.
Tools:
- 5.0 mm (H-8) crochet hook
- 2 stitch markers (one contrasting)
- Yarn needle
- Scissors
- Measuring tape or ruler
- Pins and a blocking mat or folded towel
- Spray bottle with water
Abbreviations (US Terms)
- ch – chain
- sl st – slip stitch
- sc – single crochet
- BLO – back loop only
- st(s) – stitch(es)
- rnd – round
- wst – waistcoat stitch (see below)
- wst2tog – waistcoat stitch decrease (see below)
- PM – place marker
Waistcoat stitch (wst): Look at the stitch below from the front. You will see two vertical legs forming an upside-down V under the top loops. Insert your hook from front to back between those two legs, through the center of the stitch and below the top loops. Yarn over, pull up a loop, yarn over, and pull through both loops on the hook.
Waistcoat stitch decrease (wst2tog): Insert your hook through the center of the next stitch and pull up a loop. Insert it through the center of the following stitch and pull up a loop. Yarn over and pull through all 3 loops on the hook.
Tip: Waistcoat stitch is firmer than regular single crochet. Keep your pulled-up loops slightly tall so the next round is easy to work into.
Gauge and Checkpoints
Gauge: In waistcoat stitch worked in the round, 4 sts and 5 rnds = 1 in (2.5 cm), measured on one flattened layer of the tube. For the cuff, 4 sts and 5 rows = 1 in (2.5 cm) in BLO sc.
Make the body first and use it as your test piece. Waistcoat stitch gauge is hard to match in a flat swatch, so the body itself is the most reliable check.
Checkpoints:
- After Rnd 8: The tube, flattened, is 2 in (5.1 cm) wide and 1.6 in (4.1 cm) tall.
- After Rnd 12: The flattened width across the foot is 3 in (7.6 cm).
- After Rnd 14: The body is 2.8 in (7.1 cm) tall from the top edge.
- After Rnd 15: The body is about 2.9 in (7.4 cm) tall, and the heel and toe corners are starting to curve.
- Cuff after Row 22: The strip is 4.4 in (11.2 cm) long and 1 in (2.5 cm) tall.
If your piece is too big: Change to a 4.5 mm (7) hook and start again.
If your piece is too small: Change to a 5.5 mm (I-9) hook.
A difference of 0.25 in (0.6 cm) across the leg means you are off by one stitch per side. That changes the finished width noticeably, so it’s worth fixing.
Body (Color A, Burgundy)
The body is worked in a continuous spiral. Do not join rounds. Move your marker up at the start of each round.
When the tube is flattened, the first half of each round is the front layer and the second half is the back layer. The round begins at the heel fold (right edge of the front when the toe points left). The toe fold sits halfway around.
Foundation: Ch 16. Being careful not to twist the chain, sl st into the first ch to form a ring.
Rnd 1: Ch 1, sc in each ch around. PM in the first st. (16 sts)
This sc round becomes the small rolled rim at the top of the stocking.
Rnd 2: Wst in each st around. (16 sts)
Rnds 3–8: Wst in each st around. (16 sts per round)
Flatten the tube so that sts 1–8 lie on the front and sts 9–16 lie on the back. Check the first checkpoint now: 2 in (5.1 cm) wide.
Foot Shaping
All increases are worked at the toe fold, one on the front and one on the back. The heel edge stays straight, and the foot grows outward toward the toe.
Rnd 9: Wst in next 7 sts, 2 wst in each of next 2 sts, wst in last 7 sts. (18 sts)
Rnd 10: Wst in next 8 sts, 2 wst in each of next 2 sts, wst in last 8 sts. (20 sts)
Rnd 11: Wst in next 9 sts, 2 wst in each of next 2 sts, wst in last 9 sts. (22 sts)
Rnd 12: Wst in next 10 sts, 2 wst in each of next 2 sts, wst in last 10 sts. (24 sts)
Each layer now has 12 sts, which equals 3 in (7.6 cm) at 4 sts per inch.
Rnds 13–14: Wst in each st around. (24 sts per round)
Rounding the Heel and Toe
Rnd 15: Wst2tog, wst in next 8 sts, wst2tog, wst2tog, wst in next 8 sts, wst2tog. (20 sts)
Count check: 1 + 8 + 1 + 1 + 8 + 1 = 20. You decrease once on each side of the heel fold and once on each side of the toe fold. This softens the four bottom corners into the rounded heel and toe of the stocking.
Do not fasten off. Continue to the Border (sole seam) below.
Border (Sole Seam)
On this ornament, the border is a single row of sc that closes the sole and gives a tidy, slightly raised edge along the bottom.
Border gauge: 4 sc = 1 in (2.5 cm), the same as the body.
Border Row: Flatten the body so the front and back layers line up exactly, with the heel fold on the right and the toe fold on the left (seen from the front). Ch 1. Working through both layers together (one front st and the matching back st), sc in each st across. (10 sc)
Fasten off and weave in the end inside the stocking.
Why the math works: Rnd 15 has 20 sts, which is 10 on the front and 10 on the back. Because the border row joins them in pairs, you get exactly 20 ÷ 2 = 10 sc, with nothing extra to add. Ten sc at 4 per inch make a flat sole 2.5 in (6.4 cm) long. The rounded heel and toe corners curve up from each end, so the widest point stays at 3 in (7.6 cm) at Rnd 14.
Cuff (Color B, Cream)
The cuff is worked sideways, so the rows become vertical ribs when the strip is wrapped around the stocking.
Foundation: Ch 5.
Row 1: Sc in 2nd ch from hook and in each ch across. (4 sts)
Rows 2–22: Ch 1, turn, sc BLO in each st across. (4 sts per row)
You now have 11 raised ridges, and the strip measures 4.4 in (11.2 cm) by 1 in (2.5 cm).
Seam: Fold the strip so Row 22 meets the foundation chain. Sl st through the back loops of Row 22 and the matching foundation chain loops to join them. (4 sl sts)
Fasten off and leave a 12 in (30.5 cm) tail for sewing.
Turn the ring right side out so the sl st seam is on the inside. When flat, the ring is 2.2 in (5.6 cm) wide. That’s slightly wider than the 2 in (5.1 cm) leg, so it fits loosely over the top like a turned-down cuff.
Hanging Loop (Color B, Cream)
Chain: Leave a 6 in (15.2 cm) starting tail and ch 16.
Row 1: Sl st in the back bump of the 2nd ch from hook and in each ch across. (15 sl sts)
Fasten off and leave a 6 in (15.2 cm) tail. This makes a firm, cord-like strip about 4 in (10.2 cm) long.
Assembly
- Slide the cuff over the top of the body, with the cuff seam at the heel fold.
- Position the cuff so its lower edge covers Rnd 1 and sits along Rnd 2. The cuff overlaps the body by 0.25 in (0.6 cm), and 0.75 in (1.9 cm) of cuff rises above the body.
- Using the cuff tail, tack the lower edge of the cuff to Rnd 2 at four points: the heel fold, the center front, the toe fold, and the center back. Make two small stitches at each point and keep them loose so the ribs don’t pucker.
- Fold the loop strip in half. Insert both ends inside the cuff at the heel fold so they reach down about 0.5 in (1.3 cm).
- Sew both loop ends securely to the inside of the cuff and the top of the body with the loop tails. About 1.5 in (3.8 cm) of loop should stand above the cuff.
- Weave in all ends inside the stocking.
Total height check: 3 in body − 0.25 in overlap + 1 in cuff = 3.75 in (9.5 cm).
Final Blocking
- Lightly mist the stocking with water until it is damp but not soaked.
- Lay it flat on a blocking mat or folded towel, toe pointing left.
- Gently straighten the V columns so they run straight down the leg.
- Pin the leg to 2 in (5.1 cm) wide and the foot to 3 in (7.6 cm) at its widest.
- Ease the heel and toe into smooth curves with your fingertips. Do not pin them into points.
- Flatten the cuff so the ribs stand vertically and the cuff measures 2.2 in (5.6 cm) across.
- Pin the loop into a neat teardrop shape.
- Let it dry completely, then remove the pins.
Final Quality-Control Checklist
- Leg width is 2 in (5.1 cm), and foot width is 3 in (7.6 cm).
- Total height is 3.75 in (9.5 cm) without the loop.
- The V columns run straight and do not slant noticeably.
- The heel edge is straight, and all foot growth is on the toe side.
- The sole seam has exactly 10 sc and lies flat.
- The cuff has 22 rows, and its ribs run vertically.
- The cuff seam and loop ends sit together at the heel fold.
- The loop stands about 1.5 in (3.8 cm) above the cuff and is firmly attached.
- All ends are hidden inside the stocking.
Troubleshooting
The columns twist around the leg. Spiraling causes a slight drift. Always insert the hook exactly through the center of the stitch, not between stitches. Blocking also straightens a mild slant.
Waistcoat stitch is too tight to work into. Pull up taller loops, or go up a hook size and check gauge again.
The foot bulges or ruffles. You may have increased in the wrong place. All four increase rounds must be worked only at the two toe-fold stitches.
The sole is longer than 10 sts. Recount Rnd 15. It must have 20 sts before you close the sole.
The cuff slides off. Add two more tacking stitches, or work 20 rows instead of 22 for a snugger fit.
The cuff ribs look flat. Make sure every row after Row 1 is worked in the back loop only.
The loop is floppy. Work a second row of sl sts along the other side of the chain to make it stiffer.
Care
Hand wash in cool water with mild soap, press out the water in a towel, and dry flat. Store flat or hanging, away from direct sunlight, so the burgundy stays rich.

Final Notes
Everything here comes from one measurement chain. At 4 sts per inch, the 16-st leg flattens to 2 in (5.1 cm). Increasing 2 sts per round for 4 rounds brings it to 24 sts, or 3 in (7.6 cm) across the foot. Rnd 15 reduces it to 20 sts, which close into a 10-sc sole.
Fourteen rounds plus the shaping round and the sole seam give a 3 in (7.6 cm) body. A 22-row cuff 1 in (2.5 cm) tall adds 0.75 in (1.9 cm) above the body, for a 3.75 in (9.5 cm) stocking. The 1.5 in (3.8 cm) loop brings the total to 5.25 in (13.3 cm).
If you match the gauge and check each of these points as you go, your stocking will come out the same size every time. Make one for every branch, or tuck a tiny note inside for a gift.
Happy crocheting!