

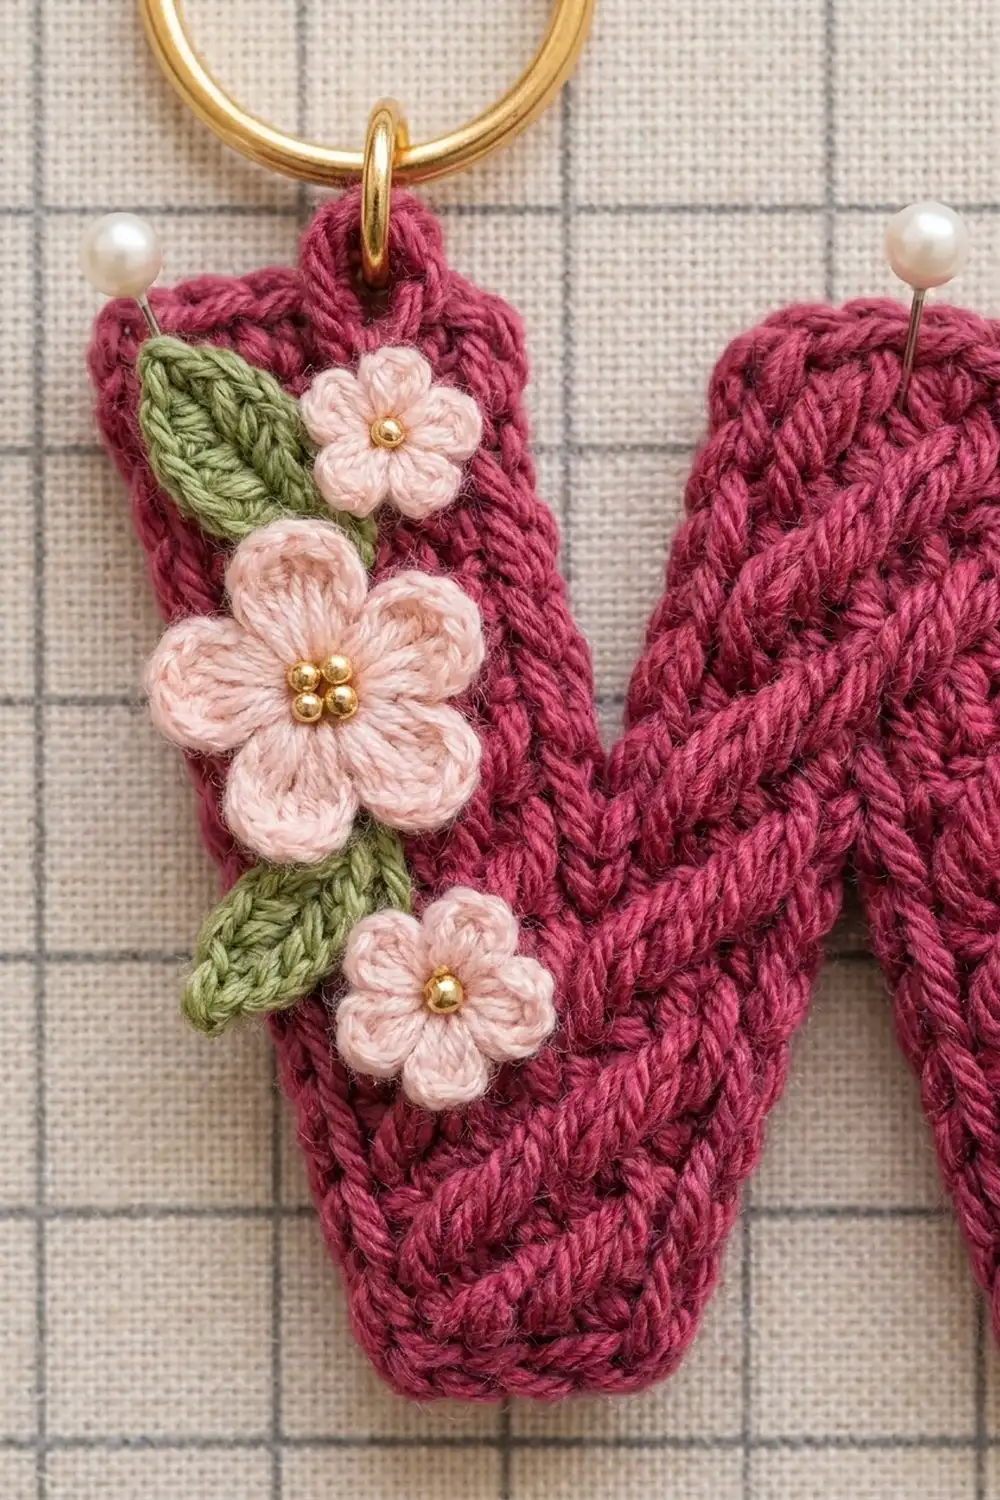
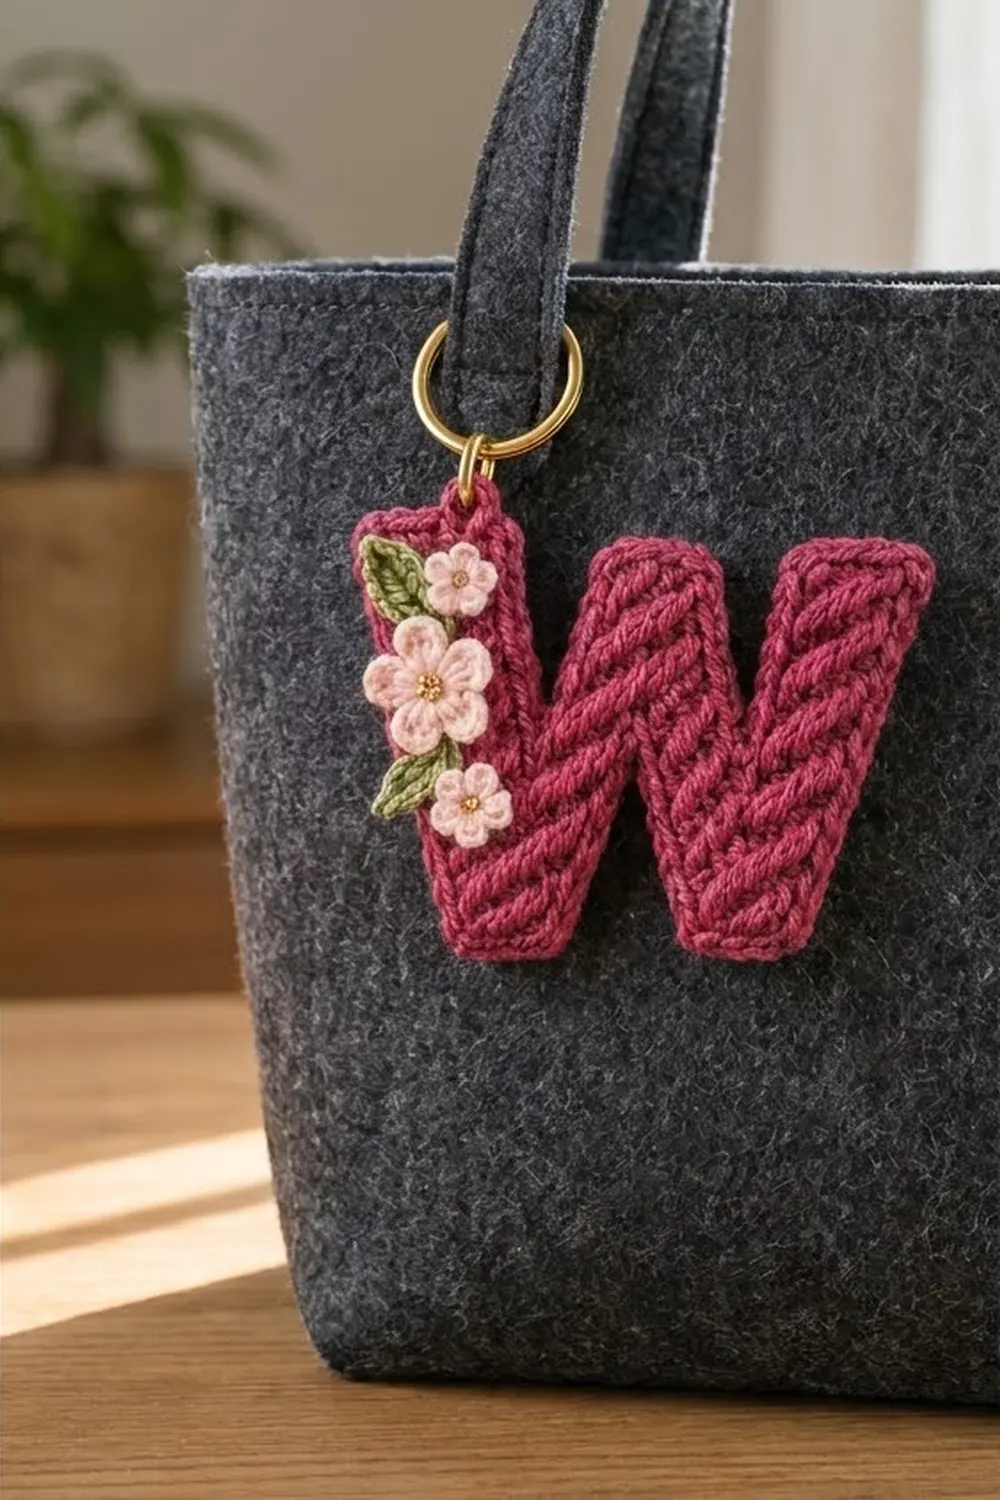
The Blossom Twist letter W is a small, sturdy keychain with a lot of texture. Rows of herringbone half double crochet give each stroke slanted, rope-like ridges, and a crisp outline frames the whole letter.
The letter is a deep raspberry-berry shade. A spray of blush-pink flowers with gold bead centers and two sage-green leaves runs down the left stroke. A gold jump ring and split key ring hang from the top.
The pattern uses US crochet terms. The finished letter measures 4.4 in (11.2 cm) wide and 3.4 in (8.6 cm) tall, not counting the key ring.
You work the letter from the bottom up in five connected sections: two feet, then the outer left stroke, the center peak and the outer right stroke. A round of single crochet and a round of slip stitch outline the letter. Then you add three flowers, two leaves and the hardware.
Finished Size and Construction
- Finished size: 4.4 in (11.2 cm) wide x 3.4 in (8.6 cm) tall
- Skill level: Intermediate
- Terminology: US
- Yarn weight: DK (#3) for the letter; sport (#2) for the appliqués
- Hooks: 3.5 mm (US E-4) and 2.5 mm
- Number of pieces: 1 letter body, plus 5 small appliqués (3 flowers, 2 leaves)
- Layout: single motif; nothing to join
- Piece size before border: 4.0 in (10.2 cm) x 3.0 in (7.6 cm), which is 20 stitches x 12 rows
- Border depth: about 0.2 in (0.5 cm) on every edge
Materials
Choose a smooth, tightly plied yarn so the slanted ridges show clearly. Cotton blends and acrylic both work well. Avoid fuzzy yarn, which blurs the texture and pills on a keychain.
- Color A, raspberry/berry pink (DK): 8 g, about 19 m
- Color B, blush pink (sport): 2 g, about 6 m
- Color C, sage green (sport): 1 g, about 3 m
These quantities include a margin for a gauge check and weaving in ends.
Tools and notions:
- 3.5 mm (US E-4) and 2.5 mm hooks
- 7 gold seed beads, size 8/0
- 1 gold jump ring, 8 mm
- 1 gold split key ring, 1 in (2.5 cm)
- Beading needle and pink sewing thread
- Tapestry needle
- Two pairs of flat-nose pliers
- Stitch markers
- Rustproof pins and a gridded blocking board
Abbreviations (US Terms)
- ch – chain
- sl st – slip stitch
- sc – single crochet
- hdc – half double crochet
- dc – double crochet
- st(s) – stitch(es)
- RS / WS – right side / wrong side
- rep – repeat
- hdc2tog – (yarn over, insert hook in next st, pull up a loop) twice, yarn over, draw through all 5 loops
Special stitch: herringbone half double crochet (HBhdc). Yarn over and insert your hook in the stitch. Yarn over and pull the loop through the stitch and the first loop on your hook in one motion (2 loops left on hook). Yarn over and draw through both loops. The twisted pull-through slants each stitch, so the rows build diagonal ridges.
Turning chains: On every row, ch 1 at the start. It never counts as a stitch.
Gauge and Checkpoints
Gauge: 10 sts and 8 rows of HBhdc = 2 in (5.1 cm) square with the 3.5 mm hook. That’s 5 sts and 4 rows per 1 in (2.5 cm).
Make the Left Foot first and use it as your gauge test.
- After Row 3: the foot is 1.2 in (3.0 cm) wide and 0.75 in (1.9 cm) tall.
- After Row 5: the foot is 1.6 in (4.1 cm) wide and 1.25 in (3.2 cm) tall.
- After Row 6: with all three sections started, the letter spans 3.6 in (9.1 cm).
- After Row 12: the body is 4.0 in (10.2 cm) x 3.0 in (7.6 cm).
- After the border: the letter is 4.4 in (11.2 cm) x 3.4 in (8.6 cm).
If the foot is too wide, go down 0.25 mm in hook size. If it’s too narrow, go up 0.25 mm. If 5 rows are taller than 1.25 in (3.2 cm), snug the first pull-through of each HBhdc.
Pattern
Shaping note: Edges are named “outer” (away from the letter’s center) and “inner.” If a row begins at the opposite edge, work the same steps in reverse order.
The body grid is 20 columns wide:
- The feet sit in columns 3–8 and 13–18.
- The outer strokes finish in columns 1–4 and 17–20.
- The center peak finishes in columns 9–12.
Left Foot (make 1)
With Color A and the 3.5 mm hook, ch 7.
Row 1 (RS): HBhdc in 2nd ch from hook and in each ch across, turn. (6 sts)
Rows 2–3: Ch 1, HBhdc in each st across, turn. (6 sts)
Row 4: Ch 1, 2 HBhdc in first st, HBhdc in next 4 sts, 2 HBhdc in last st, turn. (8 sts)
Row 5: Ch 1, HBhdc in each st across. (8 sts) Fasten off.
Right Foot (make 1)
Work the same as the Left Foot. The shape is symmetrical, so it fits either way.
Lay both feet WS up, with their inner edges about 0.4 in (1.0 cm) apart. Number the 8 sts of each Row 5 from the outer edge (st 1) to the inner edge (st 8).
Outer Left Stroke (Rows 6–12)
Row 6 (WS): Join Color A in st 1 of the Left Foot. Ch 1, HBhdc in the same st and next 3 sts, turn. (4 sts) Leave st 5 unworked; it becomes the floor of the left top notch.
Rows 7–8: Ch 1, HBhdc in each st across, turn. (4 sts)
Row 9: Ch 1. Work 2 HBhdc in the outer-edge st and HBhdc in the next st, then hdc2tog over the last 2 sts at the inner edge, turn. (4 sts) This shifts the stroke one column outward.
Rows 10–12: Ch 1, HBhdc in each st across, turn. (4 sts) Fasten off after Row 12.
Center Peak (Rows 6–11)
Row 6 (WS): Join Color A in st 6 of the Left Foot. Ch 1, HBhdc in the same st and in st 7, then 2 HBhdc in st 8. Continue onto the Right Foot: 2 HBhdc in st 8, then HBhdc in sts 7 and 6, turn. (8 sts) Leave st 5 of the Right Foot unworked.
The two increases bridge the gap between the feet. Their bases form the top of the bottom notch.
Row 7: Ch 1, HBhdc in each st across, turn. (8 sts)
Row 8: Ch 1, hdc2tog, HBhdc in next 4 sts, hdc2tog, turn. (6 sts)
Row 9: Ch 1, HBhdc in each st across, turn. (6 sts)
Row 10: Ch 1, hdc2tog, HBhdc in next 2 sts, hdc2tog, turn. (4 sts)
Row 11: Ch 1, HBhdc in each st across. (4 sts) Fasten off.
The peak ends one row below the outer strokes, so it sits 0.25 in (0.6 cm) lower.
Outer Right Stroke (Rows 6–12)
Row 6 (WS): Join Color A in st 4 of the Right Foot. Ch 1, HBhdc in the same st and in sts 3, 2 and 1, turn. (4 sts)
Rows 7–12: Work the same as Rows 7–12 of the Outer Left Stroke, including the outward shift on Row 9. Fasten off.
Row-total check:
| Rows | Stitches per row |
|---|---|
| 1–3 | 12 |
| 4–7 | 16 |
| 8–9 | 14 (4 + 6 + 4) |
| 10–11 | 12 (4 + 4 + 4) |
| 12 | 8 (4 + 4) |
The widest span is columns 1–20, which is 20 sts or 4.0 in (10.2 cm). Weave in all ends on the WS.
Border
Border gauge: 5 sc per 1 in (2.5 cm).
- Stitch edges: 1 sc per st.
- Row edges: 5 sc per 4 row ends (1 sc in each row end, with 2 sc in every 4th row end).
- Outward-pointing corners: 3 sc in the corner st. The counts below include these corner groups.
- The three inner notches: no extra stitches.
Round 1 (RS): With Color A, join in the outer corner st at the top of the Outer Left Stroke. Ch 1 and work clockwise:
| Edge | Count |
|---|---|
| Outer Left Stroke top, 4 sts (3, 1, 1, 3) | 8 sc |
| Outer Left Stroke inner edge, 7 row ends | 8 sc |
| Left notch floor, 1 unworked st | 1 sc |
| Center left edge, 6 row ends | 7 sc |
| Center top, 4 sts (3, 1, 1, 3) | 8 sc |
| Center right edge, 6 row ends | 7 sc |
| Right notch floor, 1 unworked st | 1 sc |
| Outer Right Stroke inner edge, 7 row ends | 8 sc |
| Outer Right Stroke top, 4 sts | 8 sc |
| Right outer edge, 12 row ends | 15 sc |
| Right Foot bottom, 6 ch loops (3, 1, 1, 1, 1, 3) | 10 sc |
| Right Foot inner edge, 5 row ends | 6 sc |
| Bottom notch, under the 2 bridging sts | 2 sc |
| Left Foot inner edge, 5 row ends | 6 sc |
| Left Foot bottom, 6 ch loops | 10 sc |
| Left outer edge, 12 row ends | 15 sc |
Sl st to the first sc. (120 sc)
Round 2: Ch 1. Working loosely, sl st in each sc around and join to the first sl st. (120 sl sts) Fasten off and weave in the end.
Why the math works:
- The body has 5 sts and 4 rows per inch. One sc per st matches the stitch edges exactly.
- Five sc per 4 row ends turns 1 in (2.5 cm) of rows into 5 sc, which matches the border gauge. Edges neither cup nor ruffle.
- The 3-sc corners let the points turn, and the plain notches stay sharp.
- Each side gains about 0.2 in (0.5 cm), so 4.0 x 3.0 in (10.2 x 7.6 cm) becomes 4.4 x 3.4 in (11.2 x 8.6 cm).
Appliqués
Use the 2.5 mm hook. Leave a 6 in (15.2 cm) tail on each piece.
Large Flower (make 1, Color B)
Rnd 1: Make a magic ring. Ch 1, 5 sc in the ring, sl st to the first sc. (5 sc)
Rnd 2: *(Sl st, ch 2, 3 dc, ch 2, sl st) in next sc; rep from * 4 more times. (5 petals)
The flower measures about 0.9 in (2.3 cm) across.
Small Flower (make 2, Color B)
Rnd 1: Make a magic ring. *Ch 2, 2 dc in ring, ch 2, sl st in ring; rep from * 4 more times. (5 petals) Pull the ring closed.
Each flower measures about 0.6 in (1.5 cm) across.
Leaf (make 2, Color C)
- Ch 6.
- Starting in the 2nd ch from the hook, work sc, hdc, dc and hdc across the next 4 chs.
- Work 3 sc in the last ch to make the tip.
- Rotate. Working in the free loops on the other side, work hdc, dc, hdc and sc across the next 4 chs.
- Sl st to the first sc. (11 sts)
Each leaf is about 0.6 in (1.5 cm) long.
Assembly
- With the beading needle and thread, sew 3 gold beads to the center of the large flower and 2 beads to the center of each small flower.
- Pin the pieces on the Outer Left Stroke. Measure each position from the top edge of the letter:
- Leaf 1 at 0.6 in (1.5 cm), tip angled up and out
- Small flower at 0.7 in (1.8 cm)
- Large flower at 1.5 in (3.8 cm), slightly overlapping the outer edge
- Leaf 2 at 2.1 in (5.3 cm), tucked under the large flower
- Second small flower at 2.6 in (6.6 cm)
- Whipstitch the petal bases and leaf edges in place with the tails. Keep the stitches gentle so the letter doesn’t pucker, and fasten off on the WS.
- Open the jump ring sideways with the pliers. Thread it through the 4th and 5th sc of Round 1 at the top of the Outer Left Stroke. Add the split ring and close the jump ring fully.
Final Blocking
- Block before adding the appliqués.
- Mist the letter lightly or hover steam over it. Never press it flat.
- Pin the letter to 4.4 in (11.2 cm) x 3.4 in (8.6 cm), with pins at the three tops and two foot bases.
- Straighten the foot bottoms and shape the three notches into clean V’s.
- Let it dry completely before unpinning.
Final Quality-Control Checklist
- The body measured 4.0 x 3.0 in (10.2 x 7.6 cm) before the border.
- Rounds 1 and 2 each have 120 sts.
- The notches are sharp, with no gap at the bridging increases.
- The ridges slant evenly on all four strokes.
- The center peak sits 0.25 in (0.6 cm) below the outer tops.
- The appliqués are secure and no sewing shows on the RS.
- The jump ring is fully closed.
Troubleshooting
- The border cups: You have too few sc on the row edges. Recheck the 5-per-4 rule.
- The border ruffles: You have extra sc. Recount against the table.
- There’s a hole at the bottom notch: Snug the bridging increases or close the hole with the tail.
- The texture looks flat: Try a firmer yarn or a smaller hook.
- The letter leans: On Row 9, both outer strokes must shift outward.
Care
Remove the key ring, then hand wash in cool water and lay flat to dry. Don’t tumble dry.
Final Notes
The measurement chain:
- Gauge is 5 sts and 4 rows per 1 in (2.5 cm).
- Each foot is 1.6 x 1.25 in (4.1 x 3.2 cm).
- Row 6 spans 3.6 in (9.1 cm).
- The body is 4.0 x 3.0 in (10.2 x 7.6 cm).
- The border has 120 sc.
- The finished letter is 4.4 x 3.4 in (11.2 x 8.6 cm).
If each checkpoint matches, your W will match too.
Happy crocheting!