

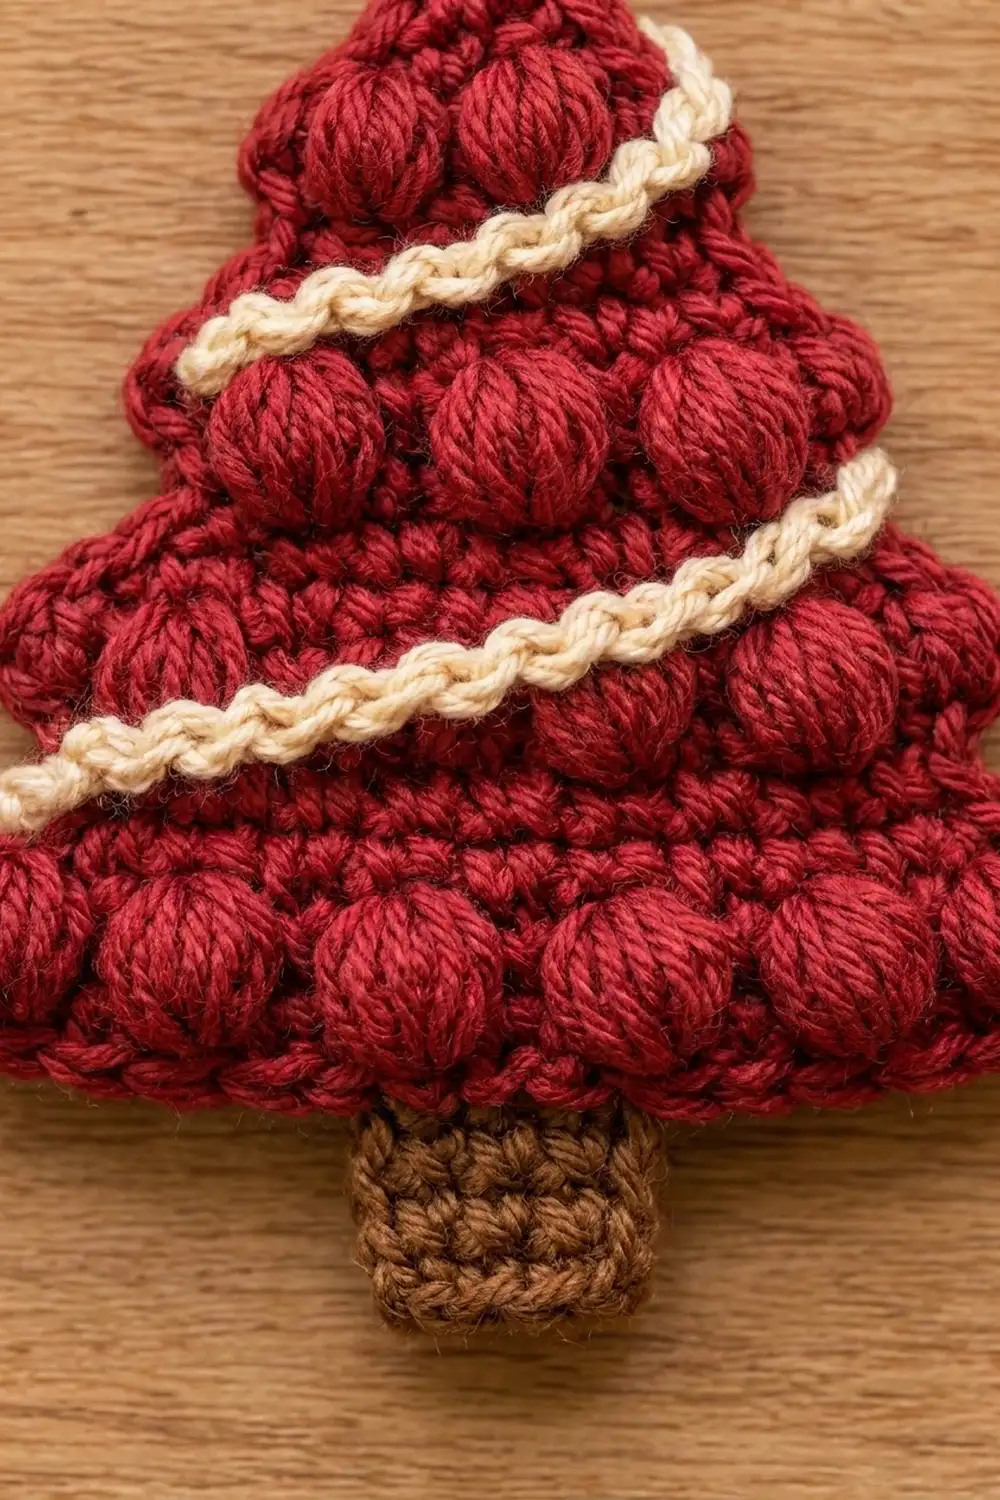
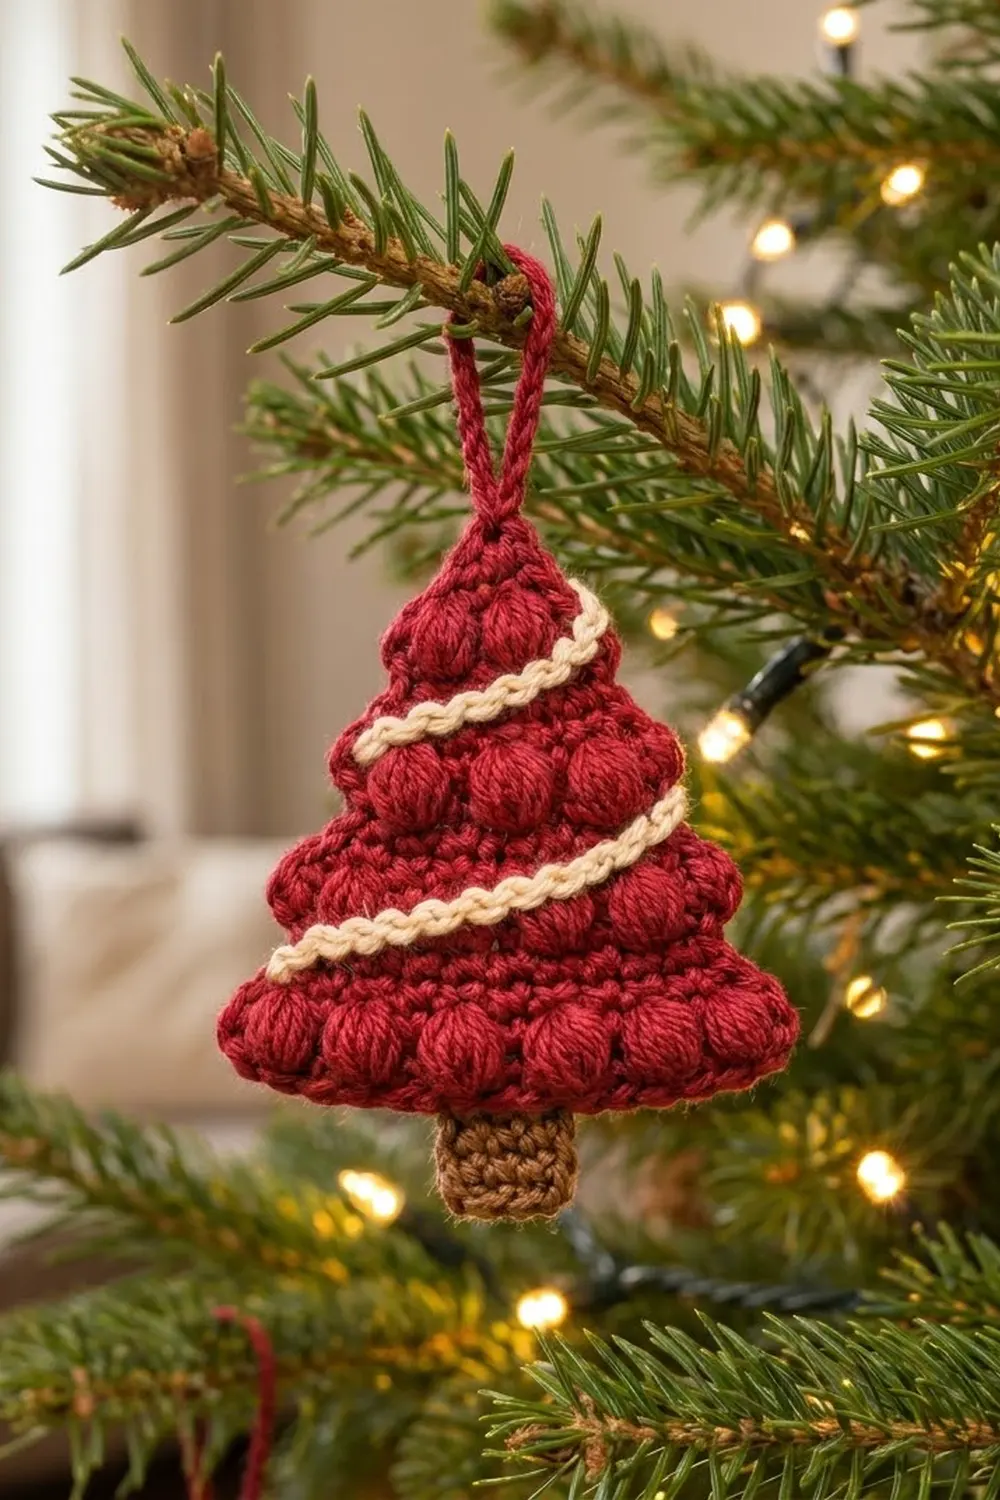
This little tree is a flat, textured ornament built from one piece of cranberry red crochet. Rows of plump puff stitches look like round baubles, and two cream garlands run diagonally across the tree like strings of beads. A short brown trunk finishes the classic shape.
The palette is simple and cozy: deep red for the tree, chocolate brown for the trunk, and soft cream for the garland. The style is rustic and handmade, perfect for a real tree, a gift tag, or a wreath. All instructions use US crochet terms.
The finished ornament measures about 3.75 in (9.5 cm) wide and 4 in (10.2 cm) tall from trunk to tip, plus a 1.25 in (3.2 cm) hanging loop, for a total height of 5.25 in (13.3 cm).
You will work the tree body bottom-up in turned rows, decreasing at both ends on every right-side row. One edging round outlines the triangle and makes the hanging loop. Then you add the trunk directly into the bottom edge and sew on two crocheted chains for the garland.
Finished Size and Construction
- Finished size: 3.75 in (9.5 cm) wide x 4 in (10.2 cm) tall, excluding loop
- Height with loop: 5.25 in (13.3 cm)
- Skill level: Easy
- Terminology: US crochet terms
- Yarn weight: Worsted (#4)
- Hook: 4.0 mm (G-6)
- Number of pieces: 1 tree body with the trunk worked on, plus 2 small chain garlands sewn to the surface
- Layout: single flat ornament
- Tree body before edging: 3.25 in (8.3 cm) wide at the base x 3 in (7.6 cm) tall
- Edging depth: 1 round of sc, adding about 0.25 in (0.6 cm) on each side
- Trunk: 1 in (2.5 cm) wide x 0.75 in (1.9 cm) tall
Materials
Choose a smooth worsted weight yarn so the puffs look rounded and the edges stay crisp. Cotton or a cotton blend gives the clearest stitch definition. Acrylic also works well and is lighter on the branch.
- Cranberry red (Color A): 12 g, about 24 m
- Chocolate brown (Color B): 2 g, about 4 m
- Cream (Color C): 2 g, about 4 m
Quantities are for one ornament and include a small margin for gauge checks and weaving in ends.
Tools
- 4.0 mm (G-6) crochet hook
- Tapestry needle
- Scissors
- Stitch markers (2)
- Ruler or tape measure
- Pins and a blocking mat or folded towel
- Spray bottle with water
Abbreviations (US Terms)
- ch – chain
- sl st – slip stitch
- sc – single crochet
- sc2tog – single crochet 2 together (1 decrease)
- sc3tog – single crochet 3 together (2 decreases)
- st(s) – stitch(es)
- RS / WS – right side / wrong side
- [ ] – repeat the instructions in brackets as directed
Special stitch – Puff: [Yarn over, insert hook in stitch, yarn over and pull up a loop to about 0.5 in (1.3 cm)] 3 times (7 loops on hook), yarn over and pull through all 7 loops. The puff counts as 1 stitch. Puffs are worked on WS rows, so they bulge toward the RS.
Gauge and Checkpoints
Gauge: 9 sc and 10 rows = 2 in (5.1 cm) in sc worked in rows with a 4.0 mm hook. Exact gauge is not critical for an ornament, but it controls the final size and the garland lengths.
The best gauge test is the ornament itself. Work Rows 1–6 and check:
- After Row 1: 15 sc measure 3.25 in (8.3 cm) across.
- After Row 6: the piece is 1.25 in (3.2 cm) tall and Row 6 is about 2.4 in (6.1 cm) wide.
- After Row 15: the triangle is 3 in (7.6 cm) tall and 3.25 in (8.3 cm) wide at the base.
- After edging: 3.75 in (9.5 cm) wide x 3.25 in (8.3 cm) tall.
- After trunk: 4 in (10.2 cm) total height, excluding loop.
If your Row 1 is wider than 3.25 in (8.3 cm), switch to a 3.75 mm hook. If it is narrower, switch to a 4.5 mm hook. Change hooks before going further, because every later measurement depends on Row 1.
Tree Body
Worked in turned rows with Color A. The ch 1 at the beginning of each row does not count as a stitch.
Foundation: With Color A, ch 16.
Row 1 (RS): Sc in 2nd ch from hook and in each ch across, turn. (15 sc)
Place a marker on the RS of this row so you can identify it.
Row 2 (WS, puff row): Ch 1, sc in first st, [puff in next st, sc in next st] 7 times, turn. (15 sts: 7 puffs, 8 sc)
Row 3 (RS): Ch 1, sc2tog, sc in next 11 sts, sc2tog, turn. (13 sc)
Treat each puff as a normal stitch: insert the hook under both top loops of the puff, not into its closing loop.
Row 4 (WS): Ch 1, sc in each st across, turn. (13 sc)
Row 5 (RS): Ch 1, sc2tog, sc in next 9 sts, sc2tog, turn. (11 sc)
Row 6 (WS, puff row): Ch 1, sc in first st, [puff in next st, sc in next st] 5 times, turn. (11 sts: 5 puffs, 6 sc)
Checkpoint: 1.25 in (3.2 cm) tall.
Row 7 (RS): Ch 1, sc2tog, sc in next 7 sts, sc2tog, turn. (9 sc)
Row 8 (WS): Ch 1, sc in each st across, turn. (9 sc)
Row 9 (RS): Ch 1, sc2tog, sc in next 5 sts, sc2tog, turn. (7 sc)
Row 10 (WS, puff row): Ch 1, sc in first st, [puff in next st, sc in next st] 3 times, turn. (7 sts: 3 puffs, 4 sc)
Row 11 (RS): Ch 1, sc2tog, sc in next 3 sts, sc2tog, turn. (5 sc)
Row 12 (WS): Ch 1, sc in each st across, turn. (5 sc)
Row 13 (RS): Ch 1, sc2tog, sc in next st, sc2tog, turn. (3 sc)
Row 14 (WS, puff row): Ch 1, sc in first st, puff in next st, sc in last st, turn. (3 sts: 1 puff, 2 sc)
Row 15 (RS): Ch 1, sc3tog. (1 sc)
Do not fasten off. Checkpoint: 3 in (7.6 cm) tall and 3.25 in (8.3 cm) wide at the base.
Each RS row removes exactly 2 stitches, one at each end, so the sides slope evenly. Each puff row starts and ends with a sc, so the edges stay flat for the edging.
Edging and Hanging Loop
The edging is one round of sc in Color A, worked with the RS facing. It smooths out the stepped edges and builds the hanging loop at the tip.
Edging gauge: 1 sc in each row-end along the sides, 1 sc in each foundation loop along the bottom, and 3 sc in each bottom corner.
Edging Round (RS): Ch 1, sc in the top st, ch 15, sc in the same top st (loop made). Rotate and work down the first side: 1 sc in each row-end of Rows 14 through 2 (13 sc). Working into the remaining loops of the foundation chain: 3 sc in the first foundation loop (corner), sc in each of the next 13 loops, 3 sc in the last foundation loop (corner). Work up the second side: 1 sc in each row-end of Rows 2 through 14 (13 sc). Join with sl st to the first sc. (47 sc plus the ch-15 loop)
Count per section:
- Top: 2 sc, one on each side of the ch-15 loop
- Side 1: 13 sc
- Bottom: 3 + 13 + 3 = 19 sc, including both corners
- Side 2: 13 sc
- Total: 2 + 13 + 19 + 13 = 47 sc
Loop cover: Sl st into the ch-15 loop, work 20 sc into the loop, sl st into the next sc at the tip. Fasten off and weave in the end.
Why the math works: The triangle has 15 rows. The end of Row 1 sits at the foundation corner, which gets its own 3-sc corner. Row 15 is the single top stitch, which holds the loop. That leaves Rows 2–14, which gives 13 row-ends per side, so each side gets 13 sc. Along the bottom, the 15 foundation loops take 3 sc in each of the 2 corner loops and 1 sc in each of the 13 between them, so 13 + (2 corners x 3) = 19 sc. One sc per row-end matches the height of sc rows closely, so the sides lie flat without ruffling.
The edging adds about 0.25 in (0.6 cm) on each side, bringing the body to 3.75 in (9.5 cm) wide x 3.25 in (8.3 cm) tall.
Trunk
Worked in turned rows with Color B directly into the bottom edge.
With the RS facing and the bottom edge at the top, find the 13 straight sc between the two 3-sc corners. Skip the first 4 of them. The trunk goes in the next 5 sc, leaving 4 sc on the other side (4 + 5 + 4 = 13). Mark the 1st and 5th trunk stitches.
Row 1 (RS): Join Color B with sl st in the 1st marked st, ch 1, sc in the same st and in the next 4 sts, turn. (5 sc)
Rows 2–4: Ch 1, sc in each st across, turn. (5 sc)
Fasten off after Row 4. The trunk measures 1 in (2.5 cm) wide x 0.75 in (1.9 cm) tall. Checkpoint: the ornament is now 4 in (10.2 cm) tall without the loop.
Garlands
The garlands are 2 separate chains in Color C, sewn on the RS. Each one sits in a flat sc band between puff rows and rises from the left edge to the right edge.
Chain gauge: 5 ch = 1 in (2.5 cm).
Lower garland: With Color C, ch 15, measuring about 3 in (7.6 cm). Fasten off, leaving an 8 in (20.3 cm) tail.
Upper garland: With Color C, ch 12, measuring about 2.4 in (6.1 cm). Fasten off, leaving an 8 in (20.3 cm) tail.
Placement:
- Lay the tree RS up with the trunk at the bottom.
- Pin the lower garland with its left end at the edging beside Row 3. Angle it upward so the right end meets the edging beside Row 5. It runs through the flat band between the 7-puff row and the 5-puff row.
- Pin the upper garland with its left end at the edging beside Row 7. Angle it upward so the right end meets the edging beside Row 9. It runs between the 5-puff row and the 3-puff row.
- Using the tail and a tapestry needle, whipstitch each chain down through its back bumps every 2 chains. Catch only the front of the red stitches so nothing shows on the WS.
- Tuck each chain end just behind the edging and secure it with 2 small stitches.
If a chain is too long or too short for its band, undo the last chains or add 1–2 more before sewing.
Final Blocking
- Weave in all ends on the WS, running each tail at least 1.5 in (3.8 cm) through stitches of the matching color.
- Lay the ornament RS up on a blocking mat or folded towel.
- Mist it lightly with water until it is damp, not soaked.
- Pin the 2 bottom corners 3.75 in (9.5 cm) apart. Pin the tip so it is centered above them.
- Gently straighten both sides into clean lines from corner to tip.
- Pin the trunk straight and centered.
- Shape the hanging loop into a neat teardrop. Do not pin through the puffs; let them stay round.
- Let it dry completely, then remove the pins.
Final Quality-Control Checklist
- Puff rows have 7, 5, 3 and 1 puffs from bottom to top.
- All puffs bulge on the RS.
- The edging has 47 sc: 13 per side and 19 across the bottom.
- Both bottom corners are sharp, with 3 sc each.
- The trunk is centered, with 4 sc of edging visible on each side.
- Both garlands rise from left to right and sit in the flat bands.
- The ornament measures 3.75 in (9.5 cm) x 4 in (10.2 cm) without the loop.
- The loop is fully covered with 20 sc and firmly attached.
- No ends show on the RS.
Troubleshooting
Puffs are on the wrong side: Make sure every puff row is a WS row. Row 1 is RS, so puffs belong on even rows only.
Puffs look flat or loose: Pull up every loop to the same height of about 0.5 in (1.3 cm). Tighten the sc after each puff.
The tree leans: You may have decreased at only one end. Recount each RS row against the stitch counts.
Sides ripple: You worked more than 1 sc per row-end. Rework with exactly 13 sc per side.
Sides pull inward: Your edging is too tight. Go up one hook size for the edging round only.
The trunk is off-center: Recount the 13 straight sc and start at the 5th one.
A garland sags: Sew it down more often, at every chain if needed.
Care
Spot clean with a damp cloth and mild soap, then reshape and dry flat. Store flat or hang by the loop, away from heavy ornaments that could crush the puffs.
Final Notes
The size depends on a simple chain of measurements. Row 1’s 15 sc measure 3.25 in (8.3 cm). Fifteen rows narrow that to a point 3 in (7.6 cm) tall. The 47-sc edging brings the body to 3.75 in (9.5 cm) x 3.25 in (8.3 cm). The 5-stitch trunk adds 0.75 in (1.9 cm), for a height of 4 in (10.2 cm), and the loop adds 1.25 in (3.2 cm) more. Check Row 1 first, and everything after it falls into place.
Happy crocheting!