

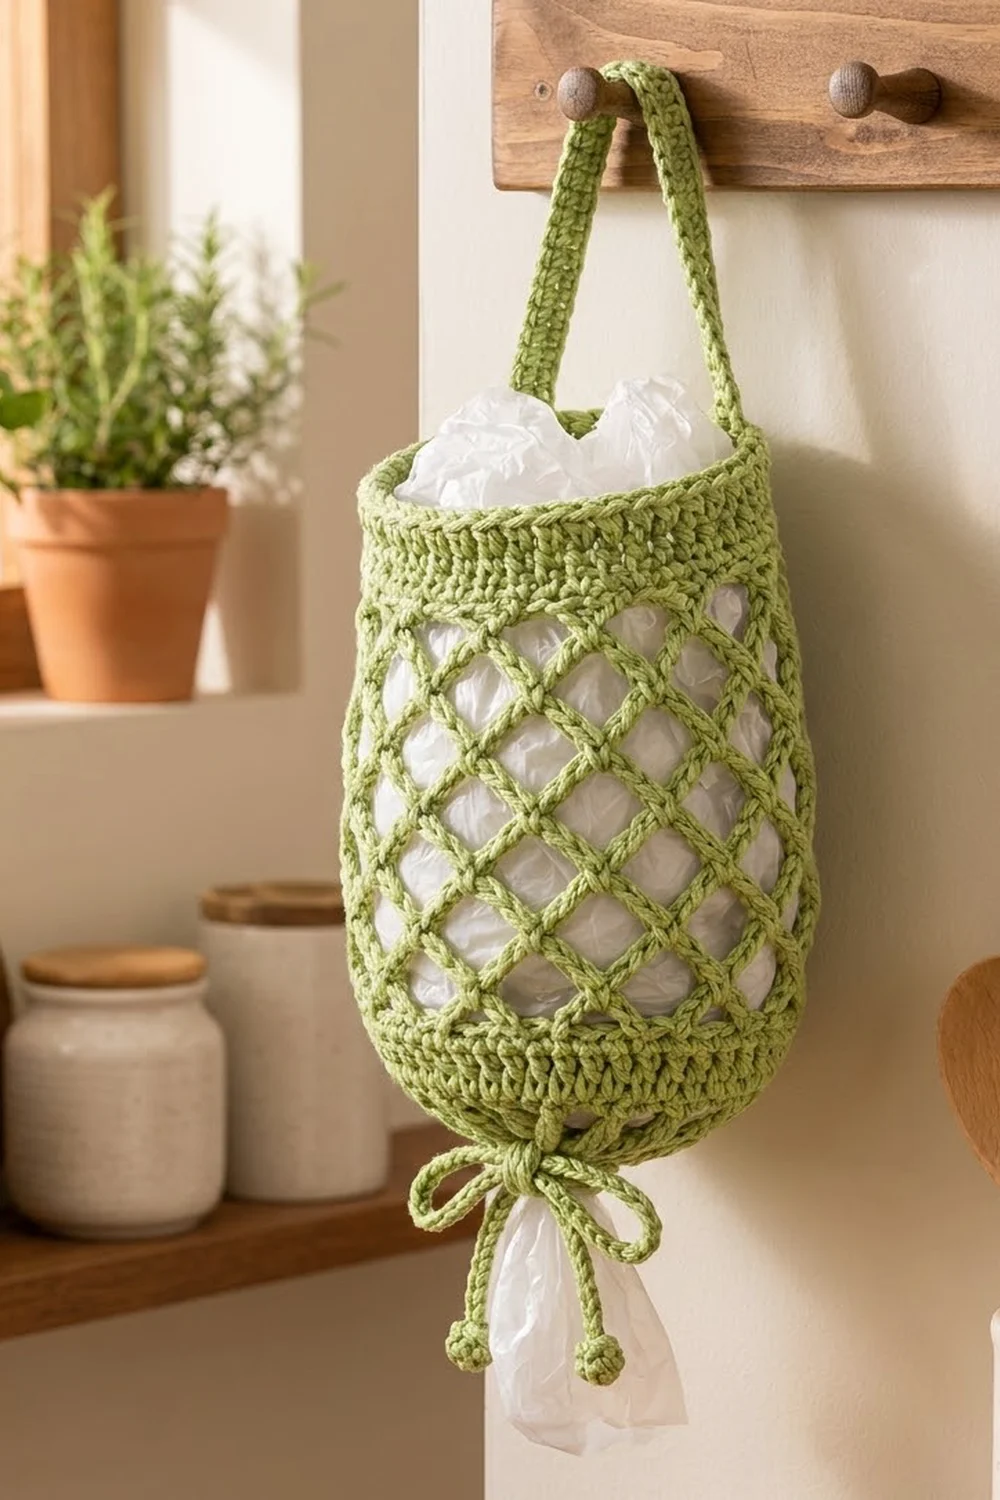
This Sage Lattice Plastic Bag Holder makes a kitchen chore look a lot nicer. The body is a soft green tube with an open diamond lattice in the middle and solid bands at the top and bottom. A narrow strap handle lets you hang it on a hook or a door knob.
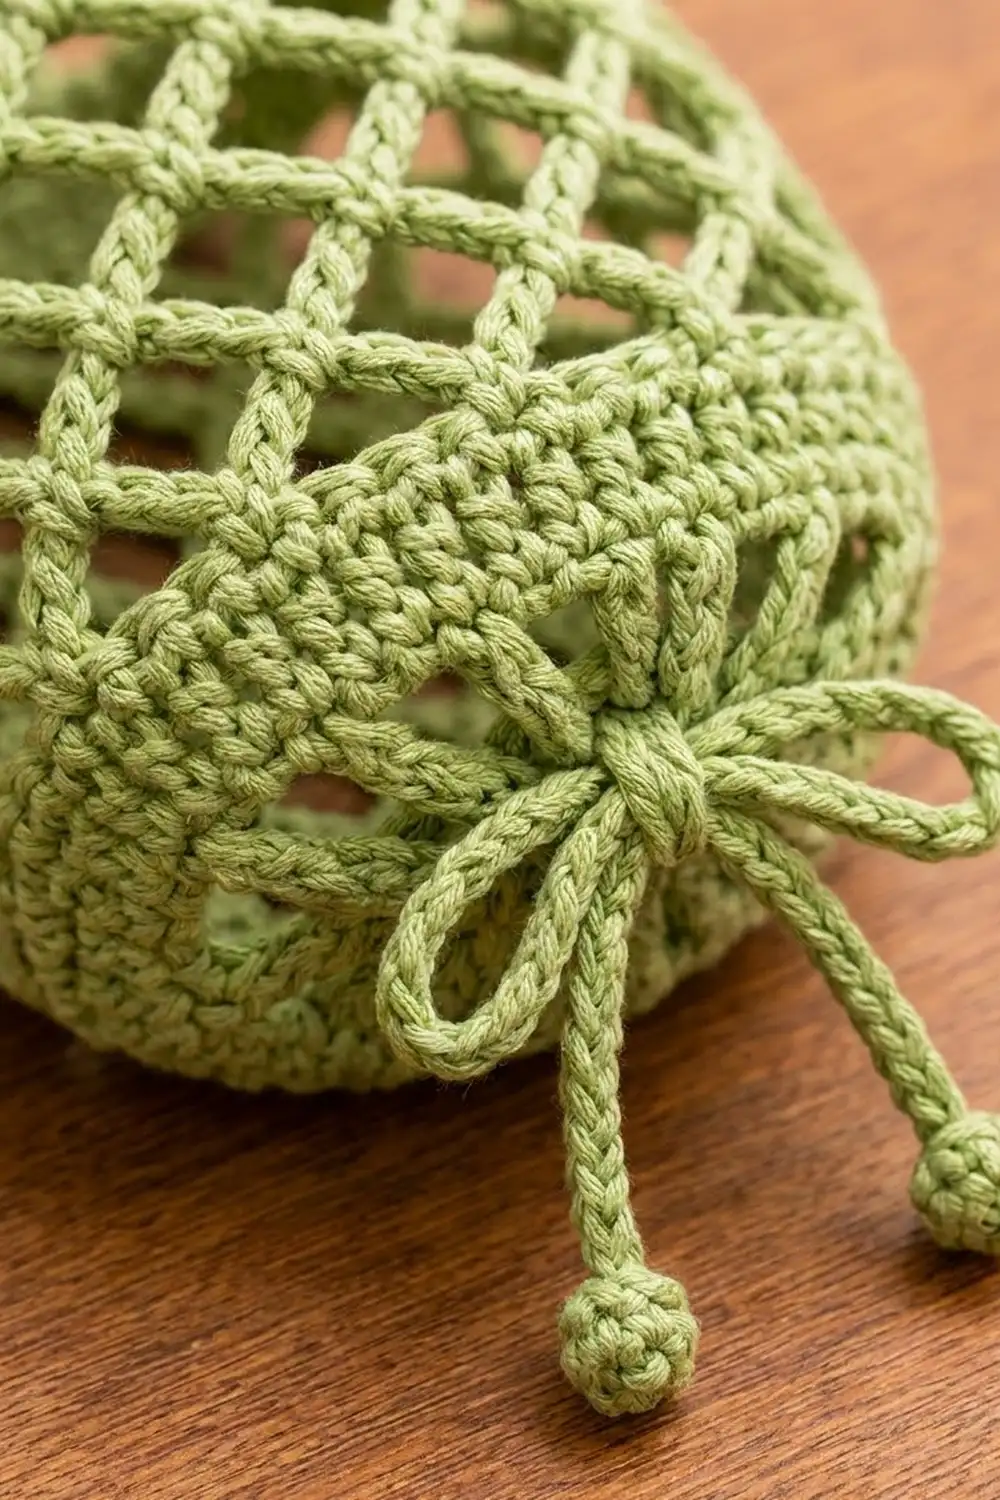
A drawstring runs through a row of eyelets and ties in a bow to gather the bottom. Stuff bags in from the top and pull them out one at a time through the small opening at the bottom. Two little knobs finish the cord ends. The lattice lets you see at a glance when the holder needs refilling.
The pattern uses US crochet terms and one color of worsted-weight cotton. The finished body measures 8 in (20.3 cm) wide when laid flat and 9.5 in (24.1 cm) tall, with a circumference of 16 in (40.6 cm).
The construction is simple. You work the body bottom-up in joined rounds as one piece: first the eyelet band, then the chain lattice, then the top band and rim. The handle, drawstring and knobs are made separately and attached at the end.
Finished Size and Construction
- Finished size (body, flat): 8 in (20.3 cm) wide x 9.5 in (24.1 cm) tall
- Circumference: 16 in (40.6 cm)
- Skill level: Easy / advanced beginner
- Terminology: US crochet terms
- Yarn weight: Worsted (#4), cotton or cotton blend
- Hook: 5.0 mm (US H-8)
- Number of pieces: 1 body, plus 1 handle, 1 drawstring and 2 small knobs. It is one finished item, with no motif joining.
- Layout: Tube worked in joined rounds, bottom to top
- Body size before rim border: 8 in (20.3 cm) wide x 9.1 in (23.1 cm) tall
- Rim border depth: 0.4 in (1.0 cm)
- Handle: 10 in (25.4 cm) long x 0.7 in (1.8 cm) wide before sewing
Materials
Choose a smooth, firm cotton. Cotton holds the lattice open, stands up to daily use and washes well. Acrylic also works, but the mesh will stretch more under the weight of the bags.
- Sage green worsted cotton: about 100 g (about 180 m / 197 yd)
- Body: about 70 g (126 m)
- Handle: about 12 g (22 m)
- Drawstring and knobs: about 10 g (18 m)
- Margin: about 8 g (14 m)
- 5.0 mm (US H-8) crochet hook
- Locking stitch marker
- Tapestry needle
- Scissors
- Measuring tape
- Rust-proof pins and a spray bottle for blocking
The yarn quantities include a small safety margin. If you crochet tightly, you may use slightly more yarn.
Abbreviations (US Terms)
- ch: chain
- sl st: slip stitch
- sc: single crochet
- dc: double crochet
- sc2tog: single crochet 2 together
- sk: skip
- sp: space
- st(s): stitch(es)
- MR: magic ring
- rnd(s): round(s)
- rev sc: reverse single crochet
Special stitch: Reverse single crochet (rev sc, crab stitch). Work from left to right (right to left if you are left-handed). Insert the hook into the next stitch to the right, yarn over and pull up a loop. Yarn over again and pull through both loops on the hook. This stitch makes the rounded, rope-like rim.
Gauge and Checkpoints
Gauge: 16 sc and 18 rnds = 4 in (10.2 cm) in sc worked in the round.
Gauge matters here because the tube needs to hold a typical stash of bags without sagging. Work the bottom band first (Rnds 1–8) and use it as your swatch.
Checkpoints:
- After Rnd 2: The ring lies flat at 8 in (20.3 cm) wide when folded flat (16 in / 40.6 cm around).
- After Rnd 8: The bottom band is about 2 in (5.1 cm) tall.
- After Rnd 17: The body is about 8 in (20.3 cm) tall when lightly stretched lengthwise.
- After Rnd 22: The body is about 9.1 in (23.1 cm) tall.
- After Rnd 24: The body is 9.5 in (24.1 cm) tall.
If your band is too wide, go down one hook size (4.5 mm). If it is too narrow, go up one hook size (5.5 mm). Don’t change the stitch count, because the lattice needs a multiple of 4.
Body
Work the body in joined rounds with the right side facing you the whole time. Do not turn. Place a marker in the first stitch of each round.
Bottom Band and Eyelets
Rnd 1: Ch 64 and sl st to the first ch to form a ring, taking care not to twist it. Ch 1, sc in each ch around, sl st to first sc. (64 sc)
Rnd 2: Ch 1, sc in each st around, sl st to first sc. (64 sc)
Rnd 3 (eyelet round): Ch 4 (counts as dc and ch 1), sk next st, dc in next st, ch 1, sk next st; repeat from * 30 more times, sl st to 3rd ch of beginning ch-4. (32 dc and 32 ch-1 sps = 64 sts)
This round makes the 32 small rectangular holes for the drawstring.
Rnd 4: Ch 1, sc in each dc and in each ch-1 sp around, sl st to first sc. (32 sc in dc + 32 sc in sps = 64 sc)
Rnds 5–8: Ch 1, sc in each st around, sl st to first sc. (64 sc)
Checkpoint: The bottom band measures about 2 in (5.1 cm) tall and 8 in (20.3 cm) wide when flat.
Diamond Lattice
The lattice is a chain-loop mesh. Each round of loops is anchored into the centers of the loops below. This creates the crossing diagonal lines and the diamond openings.
Rnd 9: Ch 1, sc in first st, ch 5, sk next 3 sts, sc in next st; repeat from * 14 more times, ch 5, sk last 3 sts, sl st to first sc. (16 sc and 16 ch-5 loops)
Check: 64 sts divided by 4 = 16 repeats.
Rnd 10: Sl st in each of next 3 ch (to the center of the first loop), ch 1, sc in same loop, ch 5, sc in next ch-5 loop; repeat from * 14 more times, ch 5, sl st to first sc. (16 sc and 16 ch-5 loops)
Rnds 11–16: Repeat Rnd 10. (16 sc and 16 ch-5 loops in each round)
Count your loops at the end of every round. If you miss a loop, the diamonds will skew, and it’s easy to spot only one round later. Keep your chains relaxed and even so the mesh opens into clean diamonds.
Rnd 17 (short-loop round): Sl st in each of next 3 ch, ch 1, sc in same loop, ch 3, sc in next ch-5 loop; repeat from * 14 more times, ch 3, sl st to first sc. (16 sc and 16 ch-3 sps)
The shorter loops pull the top of the lattice in slightly so the solid band above doesn’t ruffle.
Checkpoint: The lattice (Rnds 9–17) measures about 6 in (15.2 cm) tall with a light lengthwise stretch. The total body height is about 8 in (20.3 cm).
Top Band
Rnd 18 (conversion round): Ch 1, sc in first sc, 3 sc in next ch-3 sp, sc in next sc, 3 sc in next ch-3 sp; repeat from * around, sl st to first sc. (16 sc worked 1 per existing sc + 48 sc added in the 16 ch-3 sps = 64 sc)
Rnds 19–22: Ch 1, sc in each st around, sl st to first sc. (64 sc)
Checkpoint: The top band (Rnds 18–22) is about 1.1 in (2.8 cm) tall. The body is 9.1 in (23.1 cm) tall before the rim border. Do not fasten off.
Handle
Ch 41.
Row 1: Sc in 2nd ch from hook and in each ch across, turn. (40 sc)
Rows 2–3: Ch 1, sc in each st across, turn. (40 sc)
Fasten off, leaving a 12 in (30.5 cm) tail for sewing. The strap measures 10 in (25.4 cm) long and 0.7 in (1.8 cm) wide.
Drawstring and Knobs
Drawstring: Ch 121. Sl st in the back bump of the 2nd ch from the hook and in the back bump of each ch across. (120 sl sts) Fasten off. The cord measures about 30 in (76.2 cm) and is firm enough to thread easily.
Knob (make 2):
Rnd 1: 6 sc in MR. (6 sc)
Rnd 2: Sc in each st around. (6 sc)
Rnd 3: Sc2tog 3 times. (3 sts)
Before closing, push the starting tail inside as stuffing. Fasten off, leaving an 8 in (20.3 cm) tail. Weave the tail through the last 3 sts to close the knob.
Border (Top Rim)
The rim finishes the top edge with a rounded, rope-like ridge. It continues straight on from Rnd 22 with no change in stitch count.
Border gauge: The same as the body, 16 sts = 4 in (10.2 cm). With the body folded flat, each side (front and back) holds 32 sts, which equals 8 in (20.3 cm).
Rnd 23: Ch 1, sc in each st around, sl st to first sc. (64 sc: 32 on the front, 32 on the back)
Rnd 24: Ch 1, rev sc in each st around, sl st to first rev sc. (64 rev sc: 32 on the front, 32 on the back) Fasten off and weave in the end.
Why the math works: The rim keeps exactly 64 sts, the same count as every solid round of the body. No stitches are added at the fold lines, so there are no “corners” to count twice. Reverse sc uses slightly more yarn per stitch than regular sc, which keeps the edge from tightening. Because the count doesn’t increase, the rim won’t flare. The two rim rounds add 0.4 in (1.0 cm), taking the body from 9.1 in (23.1 cm) to 9.5 in (24.1 cm).
Assembly
Handle: Fold the body flat with the beginning-of-round seam at one side fold. Place each handle end on the inside of the top band, centered on a side fold, so it overlaps the band by 1 in (2.5 cm). Make sure the strap isn’t twisted. Whipstitch each end to Rnds 19–22 on the inside, working through both layers along all edges of the overlap. Because the ends sit at the side folds, the holder hangs straight and the front lattice faces outward. The visible loop is 8 in (20.3 cm) of strap.
Drawstring: Start at the center front and weave the cord in and out through the 32 eyelet spaces of Rnd 3 so both ends come out at the front, about 1 st apart. Sew one knob to each cord end with the knob tails, then weave in the ends inside the knob.
Pull the cord to gather the bottom until the opening is about 1.5 in (3.8 cm) across, then tie a bow.
Final Blocking
- Untie the drawstring and let the bottom open fully.
- Mist the body lightly with water until it is damp but not soaked.
- Lay the body flat on a blocking mat with the handle centered above it.
- Pin the bottom and top bands to 8 in (20.3 cm) wide.
- Gently stretch the lattice lengthwise until the body measures 9.5 in (24.1 cm) tall, then pin the sides. Open the diamonds evenly with your fingers.
- Straighten the handle and the drawstring.
- Let everything dry completely before you remove the pins.
- Re-tie the drawstring and hang the holder.
Final Quality-Control Checklist
- Rnds 1–8 and 18–24 each have 64 sts.
- Rnd 3 has 32 evenly spaced eyelets.
- Every lattice round has 16 loops.
- Rnd 18 has 64 sc (16 + 48).
- The body is 8 in (20.3 cm) wide when flat and 9.5 in (24.1 cm) tall.
- The rim lies flat and doesn’t ruffle or pull in.
- The handle is sewn securely on opposite sides and isn’t twisted.
- The drawstring runs through all 32 eyelets, and both knobs are firmly closed.
- All ends are woven in on the inside.
Troubleshooting
The ring twisted after Rnd 1. Start over. Lay the chain flat with all the bumps facing the same way before you join.
The lattice slants around the tube. At the start of each round, always sl st exactly 3 chs to reach the center of the loop.
The top band ruffles. Check that Rnd 17 uses ch-3 sps, not ch-5, and that Rnd 18 has 64 sts. If it still ruffles, go down one hook size for Rnds 18–24 only.
The top band pulls in. Your sc is tighter than your chains. Go up one hook size for Rnds 18–24 only.
Bags fall out of the bottom. Pull the drawstring tighter and double-knot the bow, or close the opening to about 1 in (2.5 cm).
The handle stretches too much. Add a 4th row of sc, or sew grosgrain ribbon along the back of the strap as a lining.
Care
Hand wash, or machine wash on a gentle cold cycle in a mesh laundry bag. Reshape while damp and dry flat.
Final Notes
The whole pattern follows one simple chain of measurements. At 16 sc to 4 in (10.2 cm), 64 sts make a 16 in (40.6 cm) tube that lies 8 in (20.3 cm) wide. The 2 in (5.1 cm) bottom band holds 32 eyelets. Sixteen lattice loops per round take the body to about 8 in (20.3 cm). The conversion round brings the count back to exactly 64 sts, and the top band takes the body to 9.1 in (23.1 cm). The two-round rim adds 0.4 in (1.0 cm), for a finished height of 9.5 in (24.1 cm). The 10 in (25.4 cm) handle and the 30 in (76.2 cm) drawstring complete the holder.
Check your gauge on the bottom band and count every round. Your bag holder will hang neatly and last for years.
Happy crocheting!