

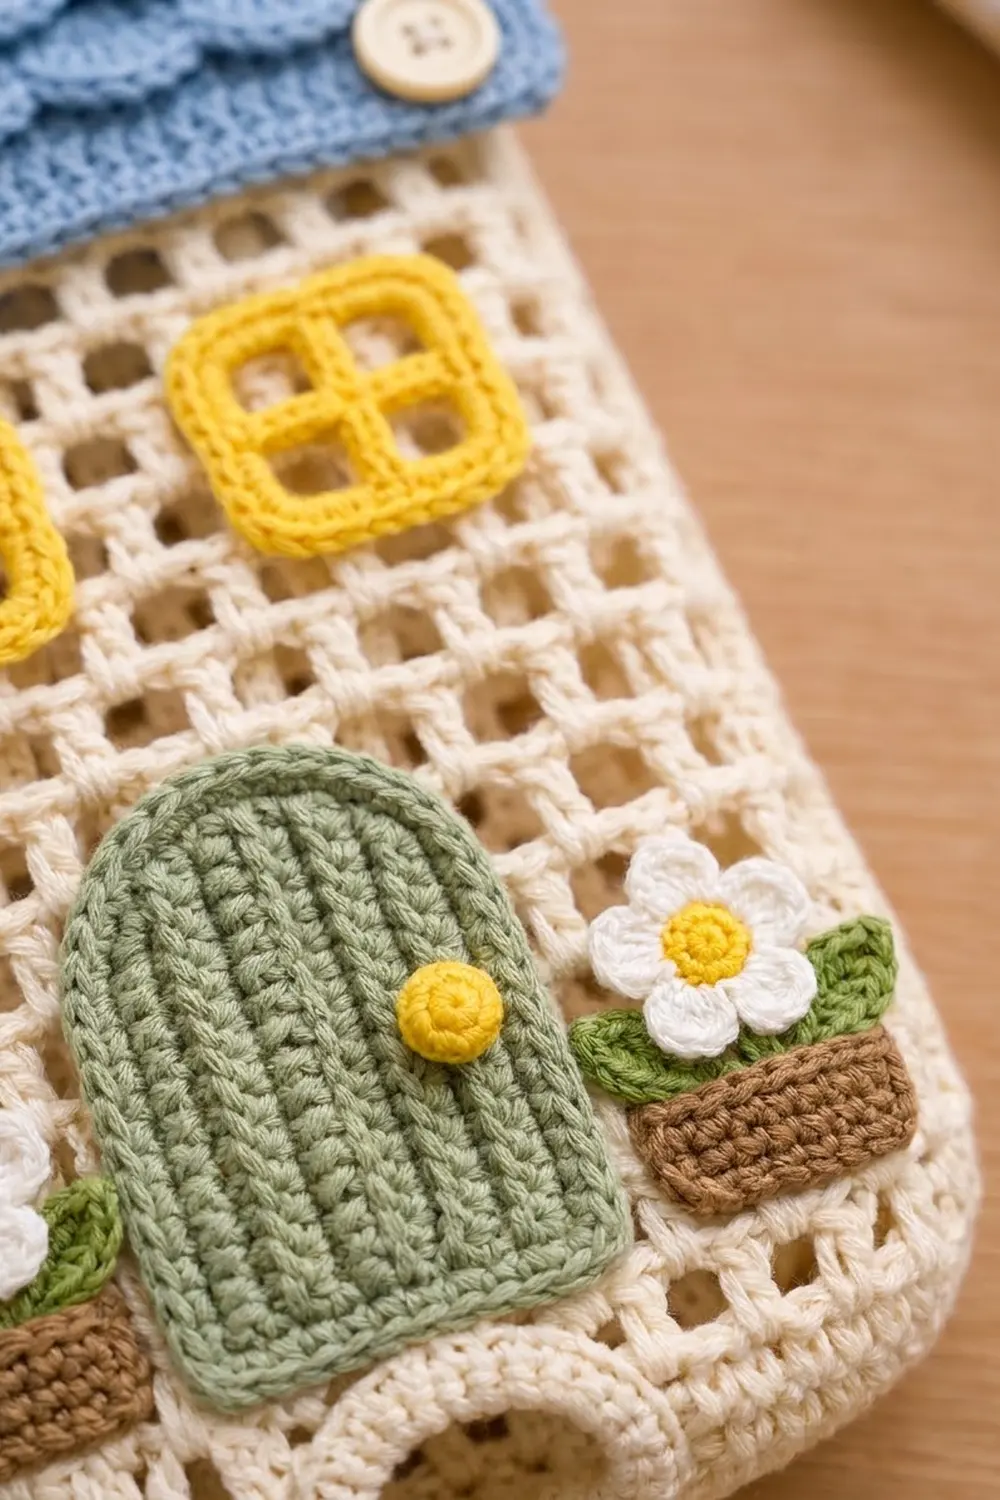
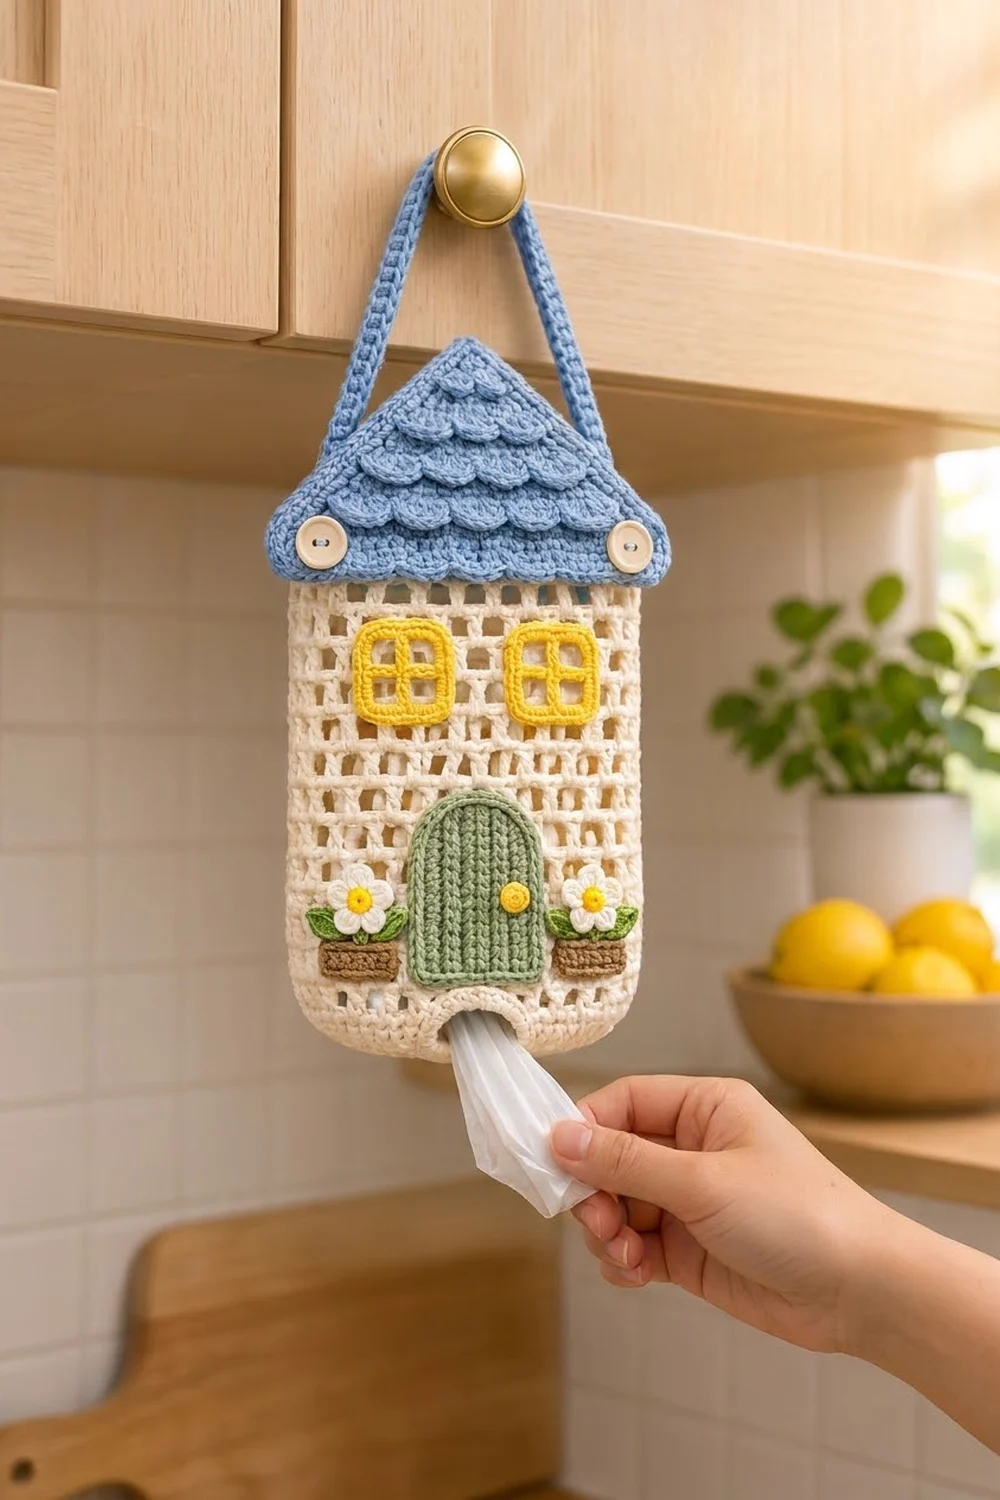
This cottage bag holder keeps your plastic bags in one place and looks good doing it. The body is an airy cream mesh tube. You stuff bags in through the top and pull them out through a small opening at the bottom. A scalloped blue roof buttons on over the top, and a blue strap hangs it from a cabinet knob or hook.
The colors are soft and cheerful: cream for the house, cornflower blue for the roof and strap, sunny yellow windows, a sage-green door, and two little flower boxes with white daisies. It has a cozy farmhouse feel that suits most kitchens.
This pattern uses US crochet terms. The finished body measures 6.75 in (17.1 cm) wide by 12.75 in (32.4 cm) tall. With the roof buttoned on, the house is about 15.75 in (40.0 cm) tall, not counting the strap.
The body is worked from the bottom up in joined rounds. It starts with a flat ring base around the bag opening, then rises into dc mesh and ends with a solid rim. The roof is worked flat in decreasing rows, with free loops left for the shingle scallops. The windows, door and flower boxes are small flat pieces that you sew onto the front.
Finished Size and Construction
- Finished size: body 6.75 in x 12.75 in (17.1 cm x 32.4 cm); roof 8 in (20.3 cm) wide x 4 in (10.2 cm) tall
- Skill level: Advanced beginner
- Terminology: US
- Yarn weight: Worsted (#4) cotton
- Hook: 4.5 mm (US 7)
- Number of pieces: 1 assembled holder (body, roof, strap, 2 windows, door, knob, 2 boxes, 2 daisies, 4 leaves)
- Layout: single tubular body, flattened; appliqués on the front face only
- Body size before border: 6.75 in x 12.5 in (17.1 cm x 31.8 cm)
- Border depth: 0.25 in (0.6 cm) at the top rim
Materials
Use a smooth, mercerized or soft cotton in worsted weight. Cotton holds the mesh shape well and won’t stretch out under the weight of the bags.
- Cream: 85 g / 136 m (body, buttons optional)
- Blue: 30 g / 48 m (roof, strap)
- Yellow: 10 g / 16 m (windows, door knob, daisy centers)
- Sage green: 10 g / 16 m (door, leaves)
- White: 5 g / 8 m (daisy petals)
- Brown: 5 g / 8 m (flower boxes)
Tools:
– 4.5 mm (US 7) crochet hook
– Tapestry needle
– 2 cream buttons, 0.75 in (1.9 cm)
– Stitch marker
– Pins and a blocking mat
– A piece of cardboard 6.75 in (17.1 cm) wide for blocking
All quantities include a small safety margin.
Abbreviations (US Terms)
- ch – chain
- sl st – slip stitch
- sc – single crochet
- hdc – half double crochet
- dc – double crochet
- inc – 2 sc in the same stitch
- sc2tog – single crochet 2 together
- BLO / FLO – back loop only / front loop only
- sp – space
- RS / WS – right side / wrong side
Reverse sc (crab stitch): Work from left to right (left-handers: right to left). Insert the hook into the next stitch to the right, yarn over, pull up a loop, then yarn over and pull through both loops.
Gauge and Checkpoints
- Sc gauge: 16 sts and 16 rnds = 4 in (10.2 cm)
- Mesh gauge: 6 mesh units (18 sts) = 4.5 in (11.4 cm); 8 mesh rnds = 4 in (10.2 cm)
Before starting the body, make one window (below) as your test piece. It should measure 1.75 in (4.4 cm) square before its edging.
Checkpoints:
– After body Rnd 8: the tube measures 6.75 in (17.1 cm) wide when flattened.
– After Rnd 18 (10 mesh rnds): the mesh measures 5 in (12.7 cm) tall.
– Before the top border: the body is 12.5 in (31.8 cm) tall.
If your piece is too big, go down 0.5 mm in hook size. If it is too small, go up 0.5 mm. Don’t add or remove stitches, because every count below depends on multiples of 3.
Body
Work in joined rounds with the RS facing. Use cream.
Rnd 1: Ch 18 and join with a sl st to the first ch, taking care not to twist. Ch 1, then sc in each ch, and join. (18)
This chain ring becomes the bag opening.
Rnd 2: Ch 1, (sc 2, inc) 6 times, join. (24)
Rnd 3: Ch 1, (sc 3, inc) 6 times, join. (30)
Rnd 4: Ch 1, (sc 4, inc) 6 times, join. (36)
Rnd 5: Ch 1, (sc 5, inc) 6 times, join. (42)
Rnd 6: Ch 1, (sc 6, inc) 6 times, join. (48)
Rnd 7: Ch 1, (sc 7, inc) 6 times, join. (54)
Rnd 8: Ch 1, sc in each st, join. (54)
Rounds 1–7 make a flat ring around the opening. When the tube is flattened, this ring folds in half and forms the rounded bottom with the small arched slot. The bottom band measures 1.75 in (4.4 cm).
Rnd 9 (mesh set-up): Ch 5 (counts as dc + ch 2), skip 2 sts, *dc in next st, ch 2, skip 2 sts; repeat from * 16 more times. Join with a sl st to the 3rd ch of the beginning ch-5. (18 dc + 18 ch-2 sps = 54 sts)
Rnds 10–28: Ch 5 (counts as dc + ch 2), skip the ch-2 sp, *dc in next dc, ch 2; repeat from * 16 more times. Join to the 3rd ch of the ch-5. (18 mesh units = 54 sts in each round)
That’s 20 mesh rounds in total, measuring 10 in (25.4 cm).
Rnd 29 (conversion round): Ch 1, then work sc in each dc and 2 sc in each ch-2 sp. Join. That’s 18 sc worked into the dc plus 36 sc worked into the chains (1 per chain), with 0 extra stitches added. (54)
Rnds 30–31: Ch 1, sc in each st, join. (54)
The top band measures 0.75 in (1.9 cm). The body is now 12.5 in (31.8 cm) tall. Leave the yarn attached for the border.
Roof
Use blue. Row 1 is a WS row.
Row 1 (WS): Ch 33, then sc in the 2nd ch from the hook and in each ch across. Turn. (32)
This row measures 8 in (20.3 cm).
Row 2 (RS, buttonholes): Ch 1, sc2tog, sc 1, ch 2, skip 2, sc 22, ch 2, skip 2, sc 1, sc2tog. Turn. (30, counting each ch as a st)
Row 3: Ch 1, sc2tog, sc in each st and ch to the last 2, sc2tog. Turn. (28)
Row 4 (RS): Ch 1, sc2tog, sc to the last 2, sc2tog. Turn. (26)
Rows 5–16: Repeat Row 4, so each row is 2 stitches shorter than the one before. On the WS rows (Rows 5, 7, 9, 11, 13 and 15), work every stitch, including the sc2tog, in FLO. This leaves the back loops of Rows 4, 6, 8, 10, 12 and 14 free on the RS.
Stitch counts for Rows 5–16: 24, 22, 20, 18, 16, 14, 12, 10, 8, 6, 4, 2.
Fasten off. The roof is 4 in (10.2 cm) tall.
Shingles: With the RS facing, join blue in the first free loop of Row 4. Sl st in that loop, then skip 1 loop, 5 dc in the next loop, skip 1 loop, sl st in the next loop. Repeat from * to * k times, then sl st in the last loop. Each row uses 1 + 4k + 1 loops. Fasten off.
Work the shingle rows in this order:
- Row 4: 26 loops, k = 6
- Row 6: 22 loops, k = 5
- Row 8: 18 loops, k = 4
- Row 10: 14 loops, k = 3
- Row 12: 10 loops, k = 2
- Row 14: 6 loops, k = 1
That gives 21 scallops in total. Press each scallop row down toward the lower edge so the rows overlap like shingles.
Strap
Use blue.
Row 1: Ch 61, then sc in the 2nd ch from the hook and in each ch across. Turn. (60)
Row 2: Ch 1, sc in each st. (60)
Fasten off and leave long tails. The strap is 15 in (38.1 cm) long and 0.5 in (1.3 cm) wide.
Windows (make 2)
Use yellow.
Row 1: Ch 8, then sc in the 2nd ch from the hook and in each ch across. Turn. (7)
Rows 2–3: Ch 1, sc 1, ch 2, skip 2, sc 1, ch 2, skip 2, sc 1. Turn. (7)
On Row 3, skip the chains of the row below and work the sc into the sc.
Row 4 (middle bar): Ch 1, sc 1, 2 sc in the ch-2 sp, sc 1, 2 sc in the ch-2 sp, sc 1. Turn. (7)
Rows 5–6: Repeat Rows 2–3. (7)
Row 7: Repeat Row 4. (7)
Edging Rnd: Ch 1. Work 3 sc in each corner stitch, 5 sc along each top or bottom edge between the corners, and 5 sc along each side edge (one in each row-end of Rows 2–6). Join. (4 x 3 + 4 x 5 = 32)
Each window measures 2.25 in (5.7 cm) square and has four open panes.
Door
Use sage green. The door is worked sideways in BLO, so the ridges run vertically on the finished door. The first chain is at the top of the door.
Row 1: Ch 10, then sc in the 2nd ch from the hook and in each ch across. Turn. (9)
Row 2: Ch 1, 2 sc BLO in the first st, sc BLO 8. Turn. (10)
Row 3: Sc BLO 9, 2 sc BLO in the last st. Turn. (11)
Rows 4–7: Ch 1, sc BLO 11. Turn. (11)
Row 8: Ch 1, sc2tog BLO, sc BLO 9. Turn. (10)
Row 9: Sc BLO 8, sc2tog BLO. (9)
Edging: Sc evenly along one side, around the arched top and down the other side. Leave the bottom edge plain.
The door measures 2.75 in (7.0 cm) wide x 3 in (7.6 cm) tall.
Knob: With yellow, make a magic ring and work 6 sc into it. Pull the ring tight and fasten off.
Flower Boxes (make 2)
Box (brown):
– Row 1: Ch 7, then sc in the 2nd ch from the hook and in each ch across. Turn. (6)
– Rows 2–3: Ch 1, sc 6. Turn. (6)
Each box measures 1.5 in (3.8 cm) x 0.75 in (1.9 cm).
Daisy:
– With yellow, make a magic ring, work 5 sc into it and join. (5)
– Join white in any sc. In each sc, work (sl st, ch 2, 2 dc, ch 2, sl st). (5 petals)
Leaves (make 4, green): Ch 5. Starting in the 2nd ch from the hook, work sc, hdc, hdc, sl st. (4)
Assembly
- Flatten the body so that the beginning-of-round joins run straight down one side fold.
- Sew the windows to the front face. Their tops should sit 2 in (5.1 cm) below the body’s top edge, with a 0.75 in (1.9 cm) gap between them and 0.75 in (1.9 cm) from each side fold.
- Center the door on the front face. Line its bottom edge up with Rnd 9 (the first mesh round). Sew the knob onto the door.
- Sew one box on each side of the door, with its bottom edge level with the door’s bottom. Sew 2 leaves and 1 daisy above each box.
- Sew each strap end to the inside back of the top rim, at the side folds, overlapping 1 in (2.5 cm).
- Sew the buttons to the front of the top band at Rnd 29, 0.5 in (1.3 cm) in from each side fold.
Sew through the dc posts and the solid stitches, not just across the open spaces, so the appliqués lie flat.
Border
The border gauge is the same as the sc gauge: 16 sts = 4 in (10.2 cm).
Top rim, Rnd 32: With the cream yarn still attached, ch 1 and work reverse sc in each st. Join. (54 total: 27 on the front face + 27 on the back)
Bag opening, Rnd A: Join cream in a free loop of the Rnd 1 foundation chain. Ch 1, then sc in each free loop and join. (18 total: 9 per face)
Bag opening, Rnd B: Ch 1, reverse sc in each st, join. (18) Fasten off.
Why the math works: At 16 sts per 4 in, 54 sts = 13.5 in (34.3 cm), which is exactly twice the flat width of 6.75 in (17.1 cm). Each border round works 1 stitch into each existing stitch and adds nothing, so the rim won’t ruffle or pull in. The top border adds 0.25 in (0.6 cm), bringing the body to 12.75 in (32.4 cm).
Final Blocking
- Slide the 6.75 in (17.1 cm) cardboard into the body so the mesh holes square up.
- Mist the body until it is damp but not soaked.
- Pin the roof flat at 8 in x 4 in (20.3 cm x 10.2 cm), with the scallops pressed downward.
- Hold a steam iron above the scallops and the door ridges without touching them.
- Let everything dry completely, then remove the cardboard.
- Button on the roof.
Final Quality-Control Checklist
- Body is 6.75 in (17.1 cm) wide and 12.75 in (32.4 cm) tall.
- All mesh rounds have 18 dc.
- Roof is 8 in (20.3 cm) at the base and has 6 scallop rows.
- Buttonholes line up with the buttons without stretching.
- Windows are level, and the door sits on Rnd 9.
- Strap ends are secure and hidden behind the roof.
- All yarn tails are woven in on the inside.
Troubleshooting
- Mesh slants or spirals: Join each round into the 3rd ch of the ch-5 rather than the 5th.
- Base cups instead of folding: Your increases are too tight. Try a larger hook for Rnds 1–7.
- Roof edges wavy: Check that you are working the sc2tog at both ends of every row.
- Scallops won’t lie flat: Steam them and pin each row down for a few minutes.
- Bags fall out on their own: Work an extra sc round before the reverse sc at the bag opening to make it tighter.
Care
Hand wash in cool water and lay flat to dry. Unbutton the roof before washing so both parts keep their shape.
Final Notes
Everything comes back to the measurements. Gauge gives 54 sts = 13.5 in (34.3 cm) around and a flat width of 6.75 in (17.1 cm). The body builds up from a 1.75 in (4.4 cm) base, 10 in (25.4 cm) of mesh and a 0.75 in (1.9 cm) band to 12.5 in (31.8 cm), and the border brings it to 12.75 in (32.4 cm). The 8 in (20.3 cm) roof completes the cottage. Check each stage and your house will come out true.
Happy crocheting!