

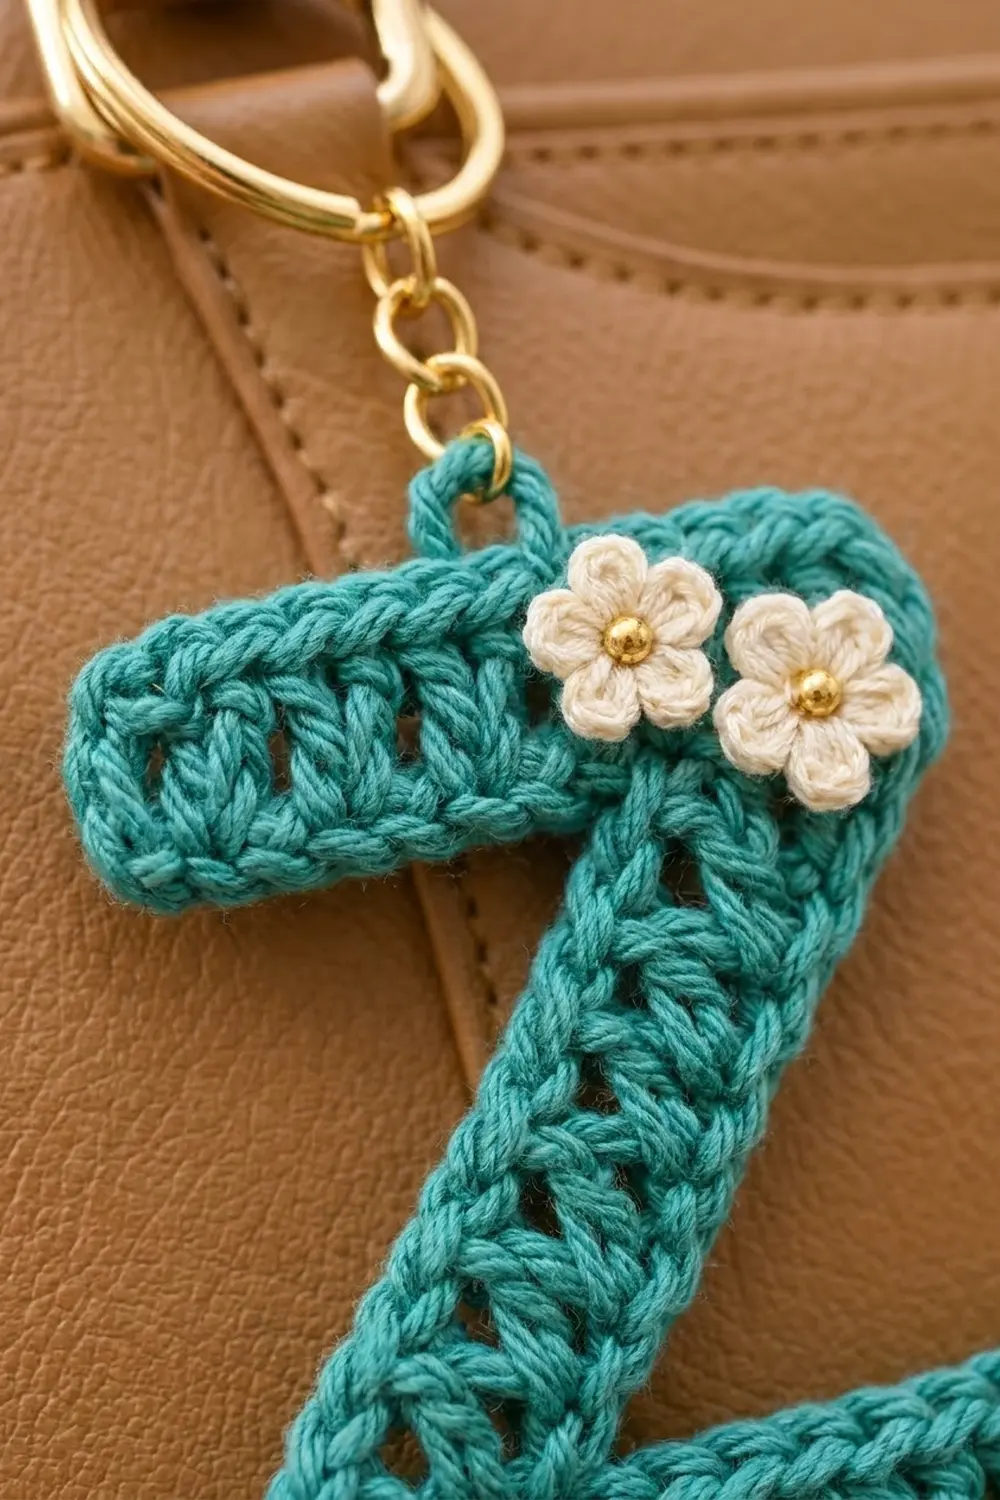
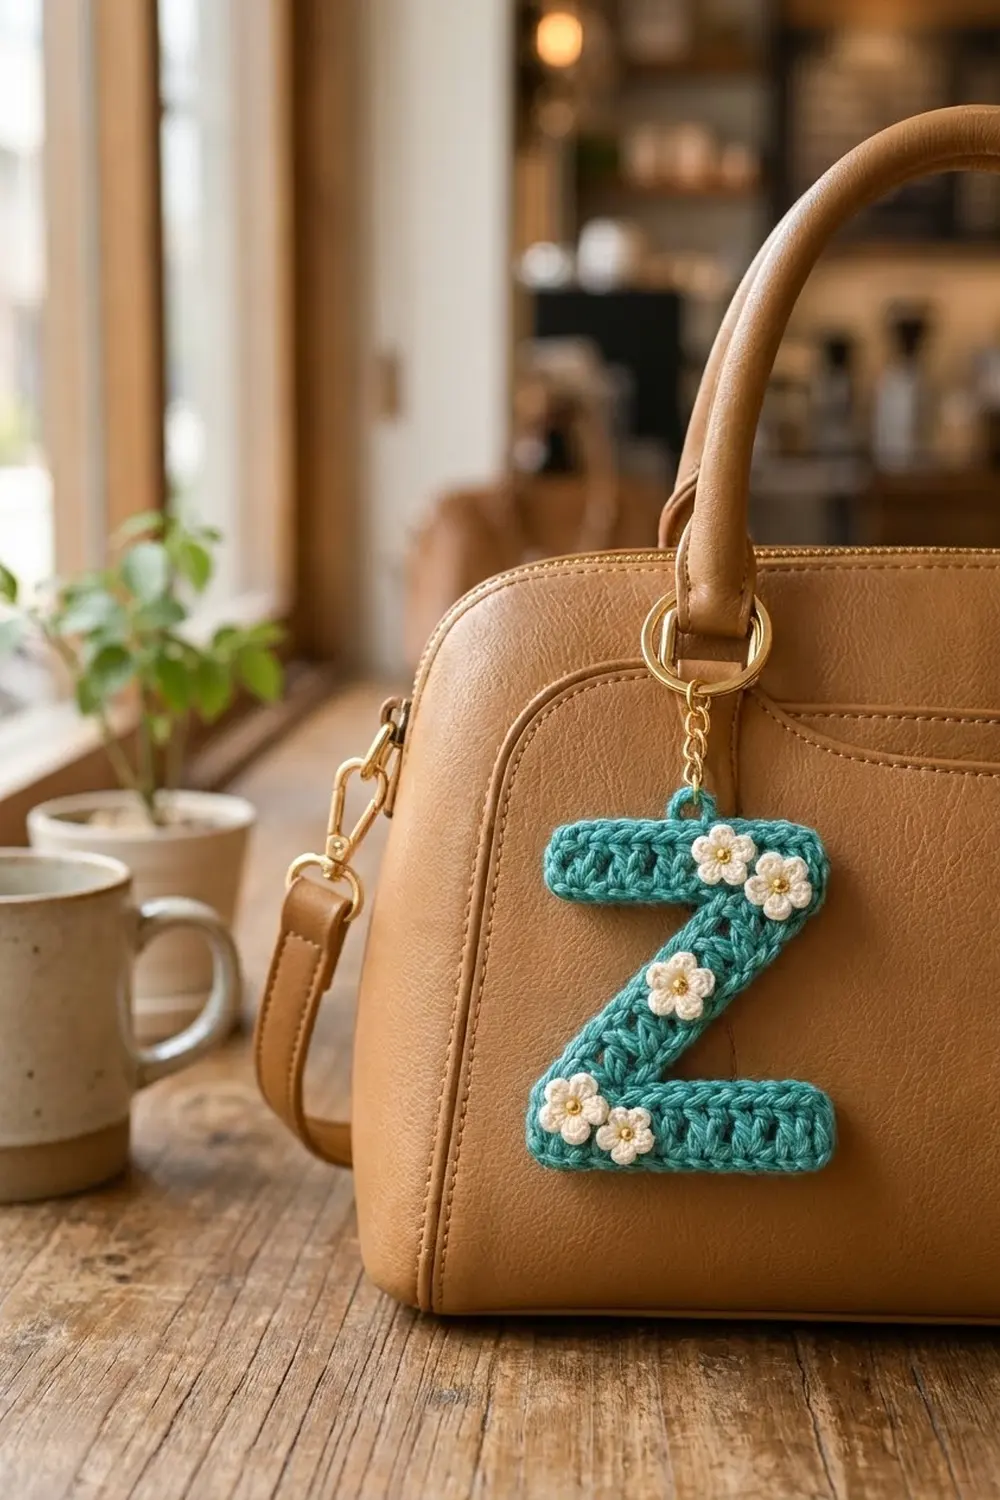
This little letter Z is a quick, satisfying make. It is a solid teal initial with a light, airy double crochet texture and a smooth single crochet outline. Five tiny cream flowers with gold bead centers are scattered across it, which turns a plain letter into a charm you can clip to a bag, a pencil case or a set of keys.
The colors are simple: medium teal for the letter and soft cream for the flowers, with gold hardware and gold bead centers to warm it up. The style is clean and graphic. The flowers add a cottage-garden touch without hiding the letter.
The pattern uses US crochet terms. The finished letter measures 3.5 in (8.9 cm) wide by 4.25 in (10.8 cm) tall, not counting the hanging loop and hardware.
The Z is worked flat in one piece from the top down. You make the top bar first, then a 5-stitch diagonal band that steps sideways 2 stitches every row, and then the bottom bar, which is extended with a short chain. One round of single crochet edging tidies the whole outline and adds the hanging loop. Last, you crochet five mini flowers, sew them on and attach the key ring.
Finished Size and Construction
- Finished size: 3.5 in (8.9 cm) wide x 4.25 in (10.8 cm) tall
- Skill level: Advanced beginner
- Terminology: US crochet terms
- Yarn weight: DK / light worsted (3) cotton for the letter; fingering (1) cotton or size 3 crochet thread for the flowers
- Hook: 3.5 mm (E-4) for the letter; 2.25 mm (B-1) for the flowers
- Number of pieces: 1 letter, plus 5 small flower appliqués
- Layout: single piece, no joining
- Piece size before border: 3.25 in (8.3 cm) x 4.0 in (10.2 cm)
- Border depth: about 0.125 in (0.3 cm) on every edge
- Hanging loop: extends about 0.5 in (1.3 cm) above the top-left corner
Materials
Use a smooth mercerized or matte cotton. Cotton keeps the stitch definition crisp and won’t fuzz on a keychain that gets handled every day. Acrylic works too, but the letter will be a little softer and less flat.
- Teal DK cotton: 10 g, about 23 m
- Cream fingering cotton or size 3 thread: 3 g, about 10 m
- 5 gold seed beads or round beads, 4 mm
- 1 gold split key ring, 1 in (2.5 cm), with a short chain and jump ring
- 3.5 mm and 2.25 mm crochet hooks
- Tapestry needle and a fine beading or sewing needle
- Cream sewing thread to attach the beads
- Scissors, stitch markers, ruler, rustproof pins and a blocking board
All quantities include a safety margin of about 30 percent.
Abbreviations (US Terms)
- ch: chain
- sl st: slip stitch
- sc: single crochet
- dc: double crochet
- dc2tog: double crochet 2 together
- dc3tog: double crochet 3 together
- MR: magic ring
- st(s): stitch(es)
- RS / WS: right side / wrong side
Special stitch, beginning dc3tog: Ch 2 (this sits on the first stitch), then work dc2tog over the next 2 stitches. The ch 2 and the dc2tog together count as 1 stitch, and they use up 3 stitches.
Standing sc: With a slip knot on the hook, insert the hook into the stitch, yarn over, pull up a loop, yarn over and pull through both loops.
Gauge and Checkpoints
Gauge: 16 dc and 8 rows = 4 in (10.2 cm) with a 3.5 mm hook. That works out to 4 sts per 1 in (2.5 cm), and each dc row is 0.5 in (1.3 cm) tall.
The letter itself is your best swatch. Work the top bar (Rows 1–2) and measure before you go on.
- After Row 2 (top bar): 3.25 in (8.3 cm) wide x 1.0 in (2.5 cm) tall
- After Row 6 (diagonal): total height 3.0 in (7.6 cm)
- After Row 8 (bottom bar): 3.25 in (8.3 cm) x 4.0 in (10.2 cm)
- After the border: 3.5 in (8.9 cm) x 4.25 in (10.8 cm)
If the piece is too big, go down 0.25 mm in hook size or tighten your yarn-overs. If it is too small, go up 0.25 mm. Row height matters most for the Z’s proportions. If your rows are short but your width is right, pull each dc loop up a little taller rather than changing hooks.
Pattern: The Letter Z
Use teal yarn and the 3.5 mm hook. The ch 3 at the start of a row counts as 1 dc. The ch 2 at the start of a diagonal row is part of the beginning dc3tog.
About orientation: Double crochet fabric looks almost the same on both sides. If your finished letter reads as a backward Z, flip it over. You will choose the front before you add the border.
Top Bar
Foundation: Ch 15.
Row 1: Dc in the 4th ch from the hook and in each ch across. The skipped 3 ch count as the first dc. (13 sts)
Row 2: Ch 3, turn. Dc in each st across, working the last dc into the top of the turning ch. (13 sts)
The gaps between the dc posts make the open, ladder-like texture you see in the photo. Don’t pack the stitches tightly.
Checkpoint: 3.25 in (8.3 cm) x 1.0 in (2.5 cm).
Diagonal Band
The diagonal is a 5-stitch strip. On every row it gains 2 stitches on its leading edge (3 dc in 1 st) and loses 2 on its trailing edge (dc3tog), so the whole strip moves 2 stitches sideways per row. It starts at the end of the top bar where you finished Row 2, and it ends flush with the opposite end of the bar.
Row 3: Work a beginning dc3tog (ch 2, turn, dc2tog over the next 2 sts). Dc in the next st, then 3 dc in the next st. Leave the remaining 8 sts of Row 2 unworked. (5 sts: 1 + 1 + 3)
Row 4: Ch 3, turn. Work 2 dc in the first st (the base of the ch 3), dc in the next st, then dc3tog over the last 3 sts. (5 sts: 3 + 1 + 1)
Row 5: Repeat Row 3, working only into the 5 sts of Row 4. (5 sts)
Row 6: Repeat Row 4. (5 sts)
Row 6 ends on the side of the strip that faces into the Z. That is exactly where the bottom bar needs to begin.
Checkpoint: Total height is 3.0 in (7.6 cm). The diagonal is about 1.25 in (3.2 cm) wide measured straight across. Its outer edge should line up with the end of the top bar that you didn’t work into. If it sits short or overshoots by more than 0.25 in (0.6 cm), check that each 3-dc group went into a single stitch and each dc3tog really used 3 stitches.
Bottom Bar
Row 7: Ch 10, turn. Dc in the 4th ch from the hook and in each of the next 6 ch. The skipped ch 3 counts as a st, so the chain gives you 8 sts. Then dc in each of the 5 sts of Row 6. (13 sts: 8 from the chain + 5 worked 1 per existing st)
Row 8: Ch 3, turn. Dc in each st across, working the last dc into the top of the turning ch. (13 sts)
Fasten off and weave in the ends.
Checkpoint: 3.25 in (8.3 cm) wide x 4.0 in (10.2 cm) tall. The top and bottom bars should be the same width.
Mini Flowers (make 5)
Use cream yarn and the 2.25 mm hook.
Make an MR. Then work ch 2, 2 dc, ch 2, sl st into the ring 5 times, for 5 petals. Pull the ring closed tightly and sl st into the base of the first petal. Fasten off and leave a 6 in (15.2 cm) tail for sewing.
Each flower measures about 0.6 in (1.5 cm) across. With cream sewing thread, sew one 4 mm gold bead into the center of each flower, passing through the bead twice so it stays snug.
Border
Lay the letter so it reads as a correct Z, with the foundation chain along the top. The side facing you is the front.
Border gauge:
- 1 sc in each stitch top or chain free loop
- 2 sc in the side of each dc row
- 3 sc in the stitch at each 90-degree outer corner
There are 6 outer corners: the top bar’s top-left, top-right and bottom-left corners, and the bottom bar’s top-right, bottom-right and bottom-left corners. Where the bars flow into the diagonal at a wide angle, and in the two inner corners, don’t add or skip any stitches. Just keep your tension snug.
Round 1: With teal and the 3.5 mm hook, join with a standing sc in the first free loop of the foundation chain at the top-left corner. Work 2 more sc in the same loop. Then work around the letter clockwise:
- Top edge: sc in each of the next 11 free loops, 3 sc in the last loop. 17 sc (3 + 11 + 3)
- Top bar right end: 2 sc in each of 2 row-ends. 4 sc
- Diagonal, outer edge: 2 sc in each of 4 row-ends (Rows 6–3). 8 sc
- Bottom bar top edge: sc in the free loop of each of the 7 chains that hold dc, then 3 sc in the turning-ch base at the corner. 10 sc (8 sts worked, plus 2 extra at the corner)
- Bottom bar right end: 2 sc in each of 2 row-ends. 4 sc
- Bottom edge: 3 sc in the first st, sc in each of the next 11 sts, 3 sc in the last st. 17 sc
- Bottom bar left end: 2 sc in each of 2 row-ends. 4 sc
- Diagonal, inner edge: 2 sc in each of 4 row-ends. 8 sc
- Top bar underside: sc in each of the 7 unworked sts of Row 2, then 3 sc in the 8th st at the corner. 10 sc
- Top bar left end: 2 sc in each of 2 row-ends. 4 sc
Join with a sl st to the first sc. (86 sc)
Total check: 17 + 4 + 8 + 10 + 4 + 17 + 4 + 8 + 10 + 4 = 86 sc.
Hanging loop: Ch 8, then sl st into the 2nd sc of the round, which is the center sc of the top-left corner. Fasten off and weave in the ends.
Why the math works: At 4 sts per inch, each sc is about 0.25 in (0.6 cm) wide. A dc row is 0.5 in (1.3 cm) tall, so 2 sc fit along each row-end with no ruffling or pulling. The 13 stitches across each bar get 1 sc each. Every 90-degree corner gets 3 sc so it can turn without cupping. Each 13-stitch edge with two corners is 13 + 4 = 17 sc. Each 8-stitch partial edge with one corner is 8 + 2 = 10 sc.
Final Blocking
- Draw a 3.5 in (8.9 cm) x 4.25 in (10.8 cm) rectangle on paper and pin it under clear plastic on your blocking board.
- Lightly mist the letter with water until it is damp but not wet.
- Pin the 6 outer corners to the template lines first, then straighten the top and bottom edges.
- Line up the diagonal so its edges are straight and parallel, and pin its midpoints.
- Let it dry completely, which takes about 2–4 hours.
- Block the flowers flat with a light mist, pressing each petal open with your fingers.
- Once everything is dry, sew the flowers on with their tails. Put two near the top-right end of the top bar, one at the middle of the diagonal and two on the bottom-left end of the bottom bar. Sew around each flower’s center and once through each petal tip.
- Open the jump ring, thread it through the hanging loop, attach the chain and key ring, and close it firmly.
Final Quality-Control Checklist
- Both bars have 13 sts and measure 3.25 in (8.3 cm) before the border.
- Every diagonal row has exactly 5 sts.
- The diagonal’s outer edges line up with the ends of both bars.
- The border has 86 sc, with 3 sc at each of the 6 outer corners.
- The finished letter measures 3.5 in (8.9 cm) x 4.25 in (10.8 cm).
- The hanging loop is firm and sits at the top-left corner.
- All 5 flowers are secure, and each bead is sewn on twice.
- All ends are woven in at least 1 in (2.5 cm) and trimmed.
Troubleshooting
- Diagonal curves instead of slanting straight: Your 3-dc increases and dc3tog decreases are probably on the wrong edges. The increase always goes on the edge that leads toward the bottom-left.
- Bottom bar shorter than the top bar: Recount the Row 7 chain. You need ch 10 to get 8 sts.
- Border ruffles along row-ends: Work 3 sc per 2 row-ends instead of 4, or go down a hook size for the border only.
- Corners look pointy or tight: Make sure all 3 corner sc go into one stitch, not spread over two.
- Flowers cup: Loosen the ch 2 between petals, or block them flat before sewing.
- Letter reads backward: Flip it over before working the border.
Care
Hand wash in cool water with mild soap, press out the water in a towel and dry flat. Avoid high heat, which can tarnish the hardware and loosen the bead stitching.
Final Notes
The measurement chain is simple to follow:
- The gauge of 4 sts and 2 rows per inch gives a 13-stitch top bar of 3.25 in (8.3 cm) x 1.0 in (2.5 cm).
- Four diagonal rows bring the height to 3.0 in (7.6 cm).
- The bottom bar brings the piece to 3.25 in (8.3 cm) x 4.0 in (10.2 cm).
- An 86-stitch single crochet border brings it to 3.5 in (8.9 cm) x 4.25 in (10.8 cm).
Check each stage before moving on, and your Z will come out square, flat and ready for its flowers.
Happy crocheting!