

This small letter K keychain is quick to make and easy to personalize. The letter is crocheted in soft periwinkle blue with a dense, slightly puffy single crochet texture. Five tiny white daisies with sunny yellow centers sit on top: three run down the stem and one sits on each diagonal tip. A gold split ring finishes it, so it’s ready to clip onto a bag strap, a set of keys or a zipper pull.
The pattern uses US crochet terms throughout. The finished letter measures about 3.3 in (8.4 cm) tall and 1.8 in (4.6 cm) wide, not counting the hardware.
The construction is simple and works in one piece. First you crochet the stem in short rows along a foundation chain. Next you work the lower leg and the upper arm straight off the stem’s right edge. Each one is a 4-stitch bias strip that moves one stitch diagonally per row. One round of single crochet edging smooths and rounds the whole outline. Last, you make five little daisies in finer cotton and sew them on.
You only need basic stitches: chain, single crochet, single crochet two together, double crochet and slip stitch. If you can count to four on every row, you can make this.
Finished Size and Construction
- Finished size: 3.3 in (8.4 cm) tall × 1.8 in (4.6 cm) wide
- Skill level: Easy
- Terminology: US crochet terms
- Yarn weight: DK (light worsted) cotton for the letter; fingering-weight cotton for the daisies
- Hook: 3.0 mm for the letter; 2.25 mm for the daisies
- Number of pieces: 1 letter piece plus 5 daisy appliqués (no joining of letter pieces)
- Layout: stem on the left, upper arm angled up and to the right, lower leg angled down and to the right
- Piece size before edging: 3.0 in (7.6 cm) tall × 1.5 in (3.8 cm) wide
- Edging depth: about 0.15 in (0.4 cm) on every side
- Daisy size: 0.6 in (1.5 cm) across
Materials
Yarn. Use a smooth, tightly plied cotton or cotton blend. Cotton holds the crisp outline of a letter better than fuzzy acrylic, and it wears well on a bag. Choose a DK weight for the letter and a fingering weight (or size 3 crochet thread) for the daisies, so the flowers stay small enough to fit the stem.
- Blue (letter): DK cotton, 6 g (about 14 m)
- White (petals): fingering cotton, 2 g (about 7 m)
- Yellow (centers): fingering cotton, 1 g (about 4 m)
All quantities include a comfortable margin for swatching and sewing tails.
Tools:
- 3.0 mm crochet hook
- 2.25 mm crochet hook
- Tapestry needle
- 3–4 locking stitch markers
- Scissors
- Rust-proof pins and a small blocking surface
- 1 in (2.5 cm) gold split key ring with a short chain
- One small gold jump ring and two pairs of flat-nose pliers
Abbreviations (US Terms)
- ch: chain
- sl st: slip stitch
- sc: single crochet
- sc2tog: single crochet 2 together (insert into the first stitch and pull up a loop, insert into the next stitch and pull up a loop, then yarn over and pull through all 3 loops on hook)
- dc: double crochet
- st(s): stitch(es)
- rep: repeat
- row-end: the side edge of a row; work 1 sc into the edge of each sc row
Special technique: the bias shift. The arm and leg each stay at 4 stitches, but they move diagonally because every shaping row has an increase (2 sc in one stitch) at one edge and a sc2tog at the other. Each shaping row moves the strip one stitch (about 0.17 in or 0.4 cm) up or down. With 6 sts and 6 rows per inch, that gives a 45° angle.
Gauge and Checkpoints
Gauge (3.0 mm hook, DK cotton): 6 sc and 6 rows = 1 in (2.5 cm) in sc worked in rows. Over a larger swatch, 12 sc × 12 rows = 2 in (5.1 cm).
Test with the stem itself. It’s only three rows, so it works as a swatch. Measure after Row 3 before you continue.
Checkpoints:
- Stem after Row 3: 3.0 in (7.6 cm) long × 0.5 in (1.3 cm) wide
- Lower leg after Row 6: sticks out 1.0 in (2.5 cm) to the right of the stem, with its bottom edge level with the bottom of the stem
- Upper arm after Row 6: sticks out 1.0 in (2.5 cm) to the right, with its top edge level with the top of the stem
- Before edging: 3.0 in (7.6 cm) × 1.5 in (3.8 cm)
- After edging and blocking: 3.3 in (8.4 cm) × 1.8 in (4.6 cm)
If the stem is too long (more than 3.1 in or 7.9 cm), go down to a 2.75 mm hook. If it’s too short (less than 2.9 in or 7.4 cm), go up to a 3.25 mm hook. Don’t change the stitch counts. The arm angle depends on stitch and row gauge being equal, so if your rows are much shorter than your stitches are wide, the arms will look flatter than 45°.
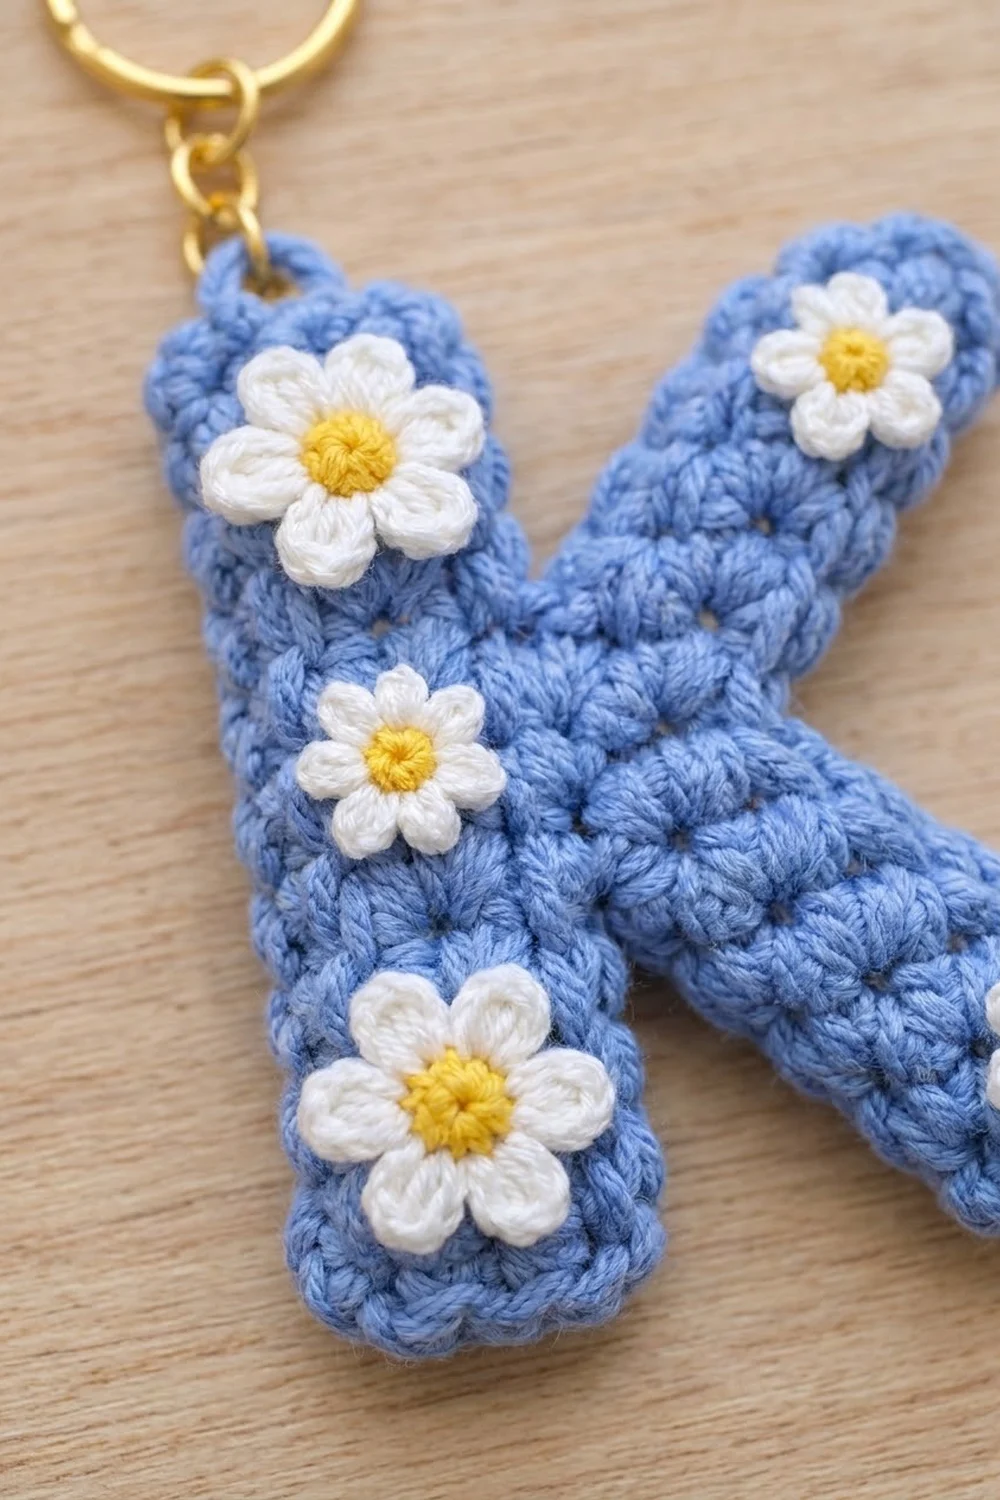
Letter K: Stem
With blue and the 3.0 mm hook:
Foundation: Ch 19.
Row 1: Sc in 2nd ch from hook and in each ch across. (18 sc)
Row 2: Ch 1, turn. Sc in each st across. (18 sc)
Row 3: Ch 1, turn. Sc in each st across. (18 sc) Fasten off.
Lay the stem down with the starting tail at the bottom left. Row 1 (the foundation edge) runs along the left, and Row 3 runs along the right. The side facing you is now the front.
Number the Row 3 stitches from the bottom up: st 1 is at the bottom and st 18 is at the top. Place markers in st 6 and st 10.
Checkpoint: 3.0 in (7.6 cm) × 0.5 in (1.3 cm).
Letter K: Lower Leg
The leg starts on sts 6–9 and moves down one stitch per row for five rows. It ends with its bottom edge level with st 1.
Row 1: With the front facing, join blue with a sl st in st 6 of Row 3 and ch 1. Sc in the same st and in sts 7, 8 and 9, working upward. (4 sc)
Row 2 (moving down): Ch 1, turn. Sc2tog over the first 2 sts (top edge), sc in the next st, 2 sc in the last st (bottom edge). (4 sc)
Row 3: Ch 1, turn. 2 sc in the first st (bottom edge), sc in the next st, sc2tog over the last 2 sts (top edge). (4 sc)
Rows 4 and 6: Repeat Row 2. (4 sc each)
Row 5: Repeat Row 3. (4 sc)
Fasten off after Row 6.
Why it works: Every row uses exactly 4 stitches and makes exactly 4 (sc2tog counts as 1, a 2-sc increase counts as 2, plus 1 plain sc). Five shaping rows move the strip down 5 stitches. The leg started at st 6, and 6 − 5 = 1, so its bottom edge now lines up with st 1, the bottom of the stem.
Checkpoint: the leg reaches 1.0 in (2.5 cm) to the right and its bottom edge is flush with the bottom of the stem.
Letter K: Upper Arm
The arm starts on sts 10–13, right above the leg, and moves up one stitch per row.
Row 1: With the front facing, join blue with a sl st in st 10 of Row 3 and ch 1. Sc in the same st and in sts 11, 12 and 13, working upward. (4 sc)
Row 2 (moving up): Ch 1, turn. 2 sc in the first st (top edge), sc in the next st, sc2tog over the last 2 sts (bottom edge). (4 sc)
Row 3: Ch 1, turn. Sc2tog over the first 2 sts (bottom edge), sc in the next st, 2 sc in the last st (top edge). (4 sc)
Rows 4 and 6: Repeat Row 2. (4 sc each)
Row 5: Repeat Row 3. (4 sc)
Fasten off after Row 6 and weave in all tails on the back.
Why it works: The arm’s top stitch started at st 13. Five shaping rows move it up 5 stitches, and 13 + 5 = 18, so the arm’s top edge lines up with the top of the stem. The leg ends at st 9 and the arm begins at st 10, so the two strips split apart right away and form the clean V in the middle of the K.
Checkpoint: the whole letter measures 3.0 in (7.6 cm) × 1.5 in (3.8 cm).
Edging
Edging gauge: One round of sc adds about 0.15 in (0.4 cm) to every outer edge. That takes the letter from 3.0 in to 3.3 in (7.6 cm to 8.4 cm) tall and from 1.5 in to 1.8 in (3.8 cm to 4.6 cm) wide.
The round follows the outline counterclockwise. The rules are:
- 1 sc in each stitch or row-end
- 3 sc in each of the 8 outer corner stitches
- 1 sc2tog at each of the 3 inside notches
With the front facing and blue, join with a sl st in the top end of stem Row 3 (the top-right corner of the stem) and ch 1. Then work the segments in this order:
| Segment | Instruction | Sts made |
|---|---|---|
| A. Stem top | 3 sc in Row 3 end, sc in Row 2 end, 3 sc in Row 1 end | 7 |
| B. Stem left side | Sc in each of the 18 foundation ch loops | 18 |
| C. Stem bottom | 3 sc in Row 1 end, sc in Row 2 end, 3 sc in Row 3 end | 7 |
| D. Stem right, lower | Sc in sts 1–4, then sc2tog over st 5 and the underside of leg Row 1 | 5 |
| E. Leg underside | Sc in the row-ends of leg Rows 2–6 | 5 |
| F. Leg tip | 3 sc in first st of Row 6, sc in next 2 sts, 3 sc in last st | 8 |
| G. Leg top edge | Sc in the row-ends of leg Rows 6–2 | 5 |
| H. Center V | Sc2tog over leg Row 1 end and arm Row 1 end | 1 |
| I. Arm underside | Sc in the row-ends of arm Rows 2–6 | 5 |
| J. Arm tip | 3 sc in first st of Row 6, sc in next 2 sts, 3 sc in last st | 8 |
| K. Arm top edge | Sc in the row-ends of arm Rows 6–2, then sc2tog over arm Row 1 end and stem st 14 | 6 |
| L. Stem right, upper | Sc in sts 15–18 | 4 |
Sl st into the first sc to join. (79 sc) Fasten off and weave in the ends.
Why the math works: Around the outline there are 66 edge positions (stitches and row-ends): 3 + 18 + 3 + 5 + 6 + 4 + 6 + 6 + 4 + 6 + 5. Every position gets 1 sc. Each of the 8 outer corners gets 2 extra sc (+16), and each of the 3 inside notches combines 2 positions into one sc2tog (−3). That gives 66 + 16 − 3 = 79. If your count is off, check the corners first.
Daisy Appliqués (Make 5)
With the 2.25 mm hook:
Rnd 1 (yellow): Make a magic ring. Work 6 sc into the ring, pull it tight, and sl st to the first sc. (6 sc) Fasten off.
Rnd 2 (white): Join white in any sc. *[Sl st, ch 2, 2 dc, ch 2, sl st] all in the same st, then move to the next st; rep from * around. (6 petals) Sl st to the joining st and fasten off, leaving a 6 in (15.2 cm) white tail for sewing.
Each daisy should measure 0.6 in (1.5 cm) across. If yours are bigger, switch to a 2.0 mm hook or thinner thread.
Placement (measured from the top edge of the edged letter to the center of each daisy):
- Stem: 0.5 in (1.3 cm), 1.5 in (3.8 cm) and 2.6 in (6.6 cm) down, centered across the stem’s width
- Arm and leg: one on each, centered across the strip, about 0.35 in (0.9 cm) in from the tip edge
Sew each daisy on with its white tail. Stitch once around the yellow center, then tack down the tip of each petal. Keep the stitches small so they don’t show through to the back. Pin all five daisies in place before you sew any of them.
Attaching the Key Ring
Open the jump ring with two pairs of pliers. Pass it through the edging at the top of the stem, around the center sc from segment A (the sc worked in the Row 2 end). Hook it onto the end link of the key ring chain and twist the ring closed so the gap is flush.
Final Blocking
- Before sewing on the daisies, mist the letter lightly with water until it’s just damp.
- Pin it face up to 3.3 in (8.4 cm) × 1.8 in (4.6 cm).
- Pin the two tips first, then the stem corners, then the inside notches, so the V stays crisp.
- Use your fingers to straighten the stem so the edging on the left side runs in one straight line.
- Let it dry completely, at least 2 hours, then unpin it.
- Sew on the daisies, then press each one flat with your fingertips. Don’t steam the daisies, because the petals will lose their roundness.
- Attach the hardware last.
Final Quality-Control Checklist
- Stem Rows 1–3 each have 18 sc
- Arm and leg have 4 sc in every one of their 6 rows
- The leg’s bottom edge is level with the bottom of the stem, and the arm’s top edge is level with the top of the stem
- The edging round counts 79 sc, with 3 sc at all 8 outer corners
- The letter measures 3.3 in (8.4 cm) × 1.8 in (4.6 cm)
- All five daisies measure 0.6 in (1.5 cm) and have 6 petals each
- No tails show on the front
- The jump ring is fully closed and the key ring is secure
Troubleshooting
The arm or leg doesn’t slant. You probably placed the increase and decrease at the same edge on two rows in a row. Check that the increase always stays on the same outer edge (bottom for the leg, top for the arm).
The leg hangs below the stem. You worked an extra shaping row. Frog back to Row 6.
The edging ruffles at the tips. You worked 3 sc into more than two stitches. Use exactly 2 corners per tip.
The center V looks rounded or gappy. Work the sc2tog in segment H firmly, and pin the notch to a point when you block.
The stem curves. Your Row 1 foundation chain was tighter than the rows. Re-chain with a hook one size larger and work Row 1 onwards with the 3.0 mm hook.
The daisy petals curl. Your tension is too tight on the dc. Loosen up slightly or go up to a 2.5 mm hook.
Care
Spot-clean with mild soap and cool water, then press flat and air-dry. Take the metal ring off if you ever need to soak the piece, so it doesn’t tarnish.
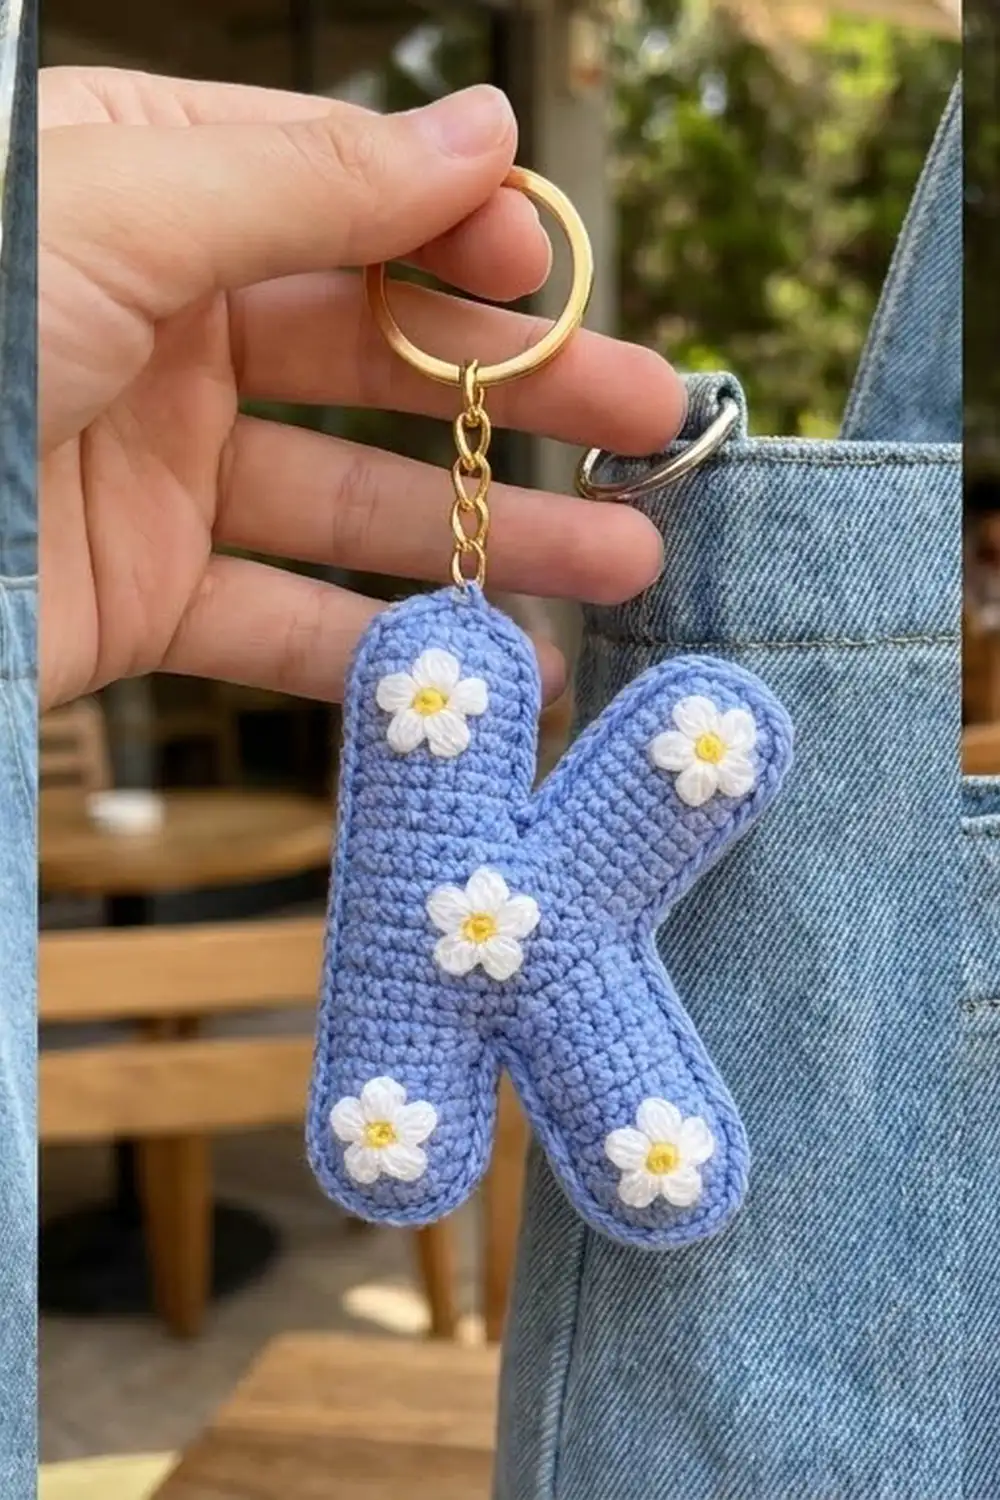
Final Notes
Every measurement depends on the one before it. A gauge of 6 sc and 6 rows per inch gives a stem of 3.0 in (7.6 cm) by 0.5 in (1.3 cm). Two 4-stitch bias strips shifted five times each add 1.0 in (2.5 cm) of width, so the letter measures 3.0 in by 1.5 in (7.6 cm by 3.8 cm). A 79-stitch edging round brings it to 3.3 in by 1.8 in (8.4 cm by 4.6 cm). Five 0.6 in (1.5 cm) daisies complete the design. Check each stage and the finished letter will come out right. Swap the colors to make your own initials.
Happy crocheting!