

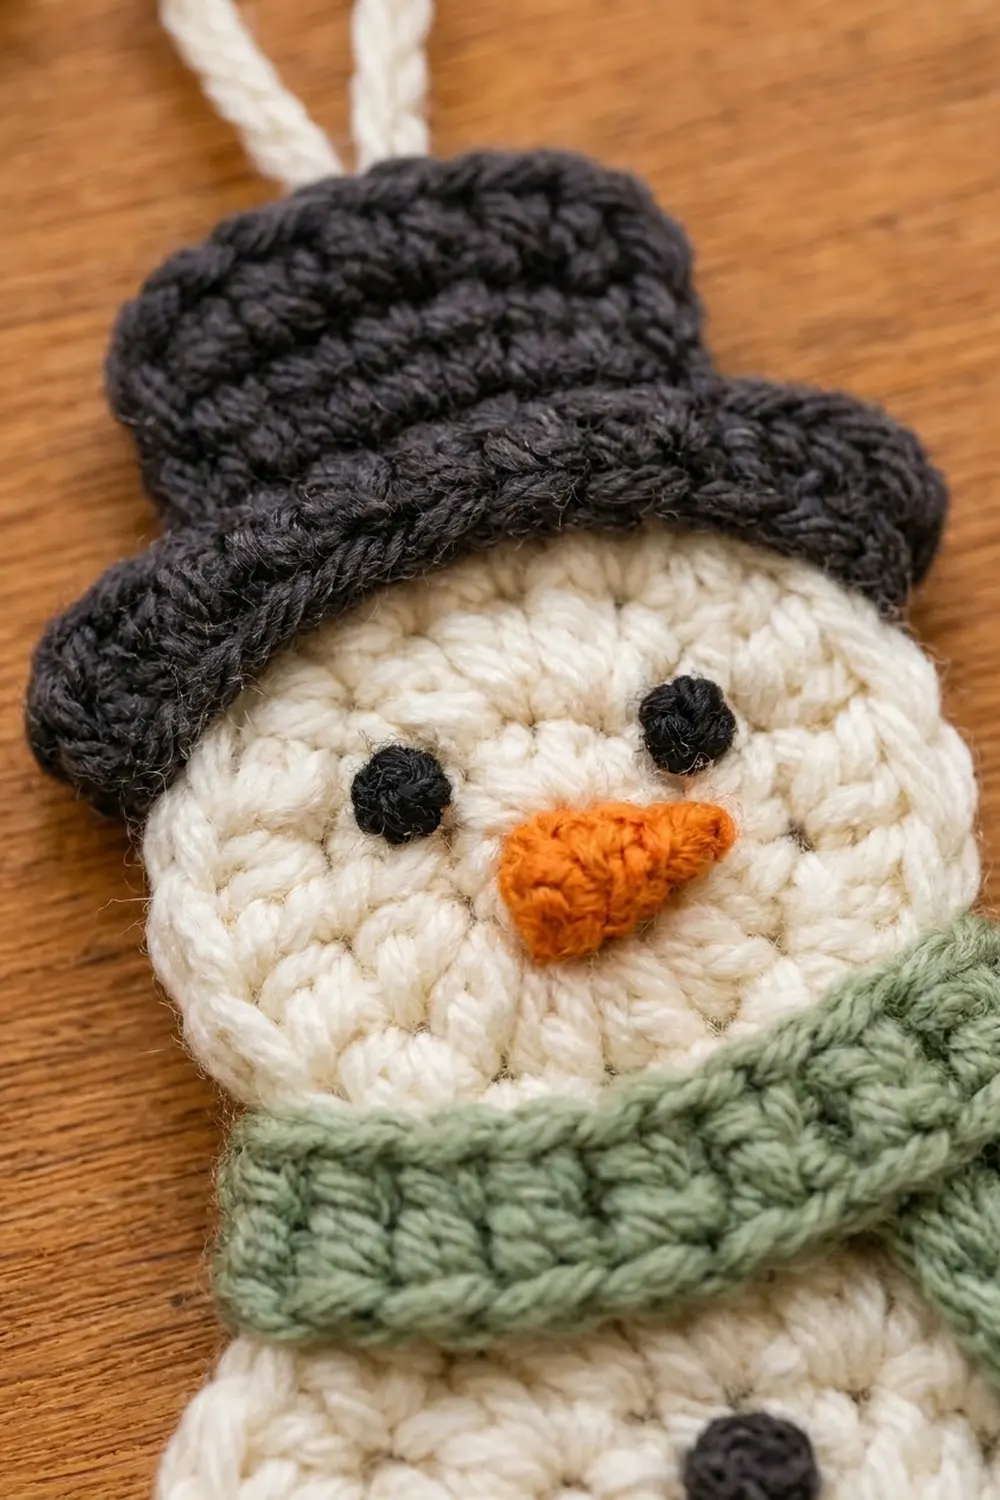
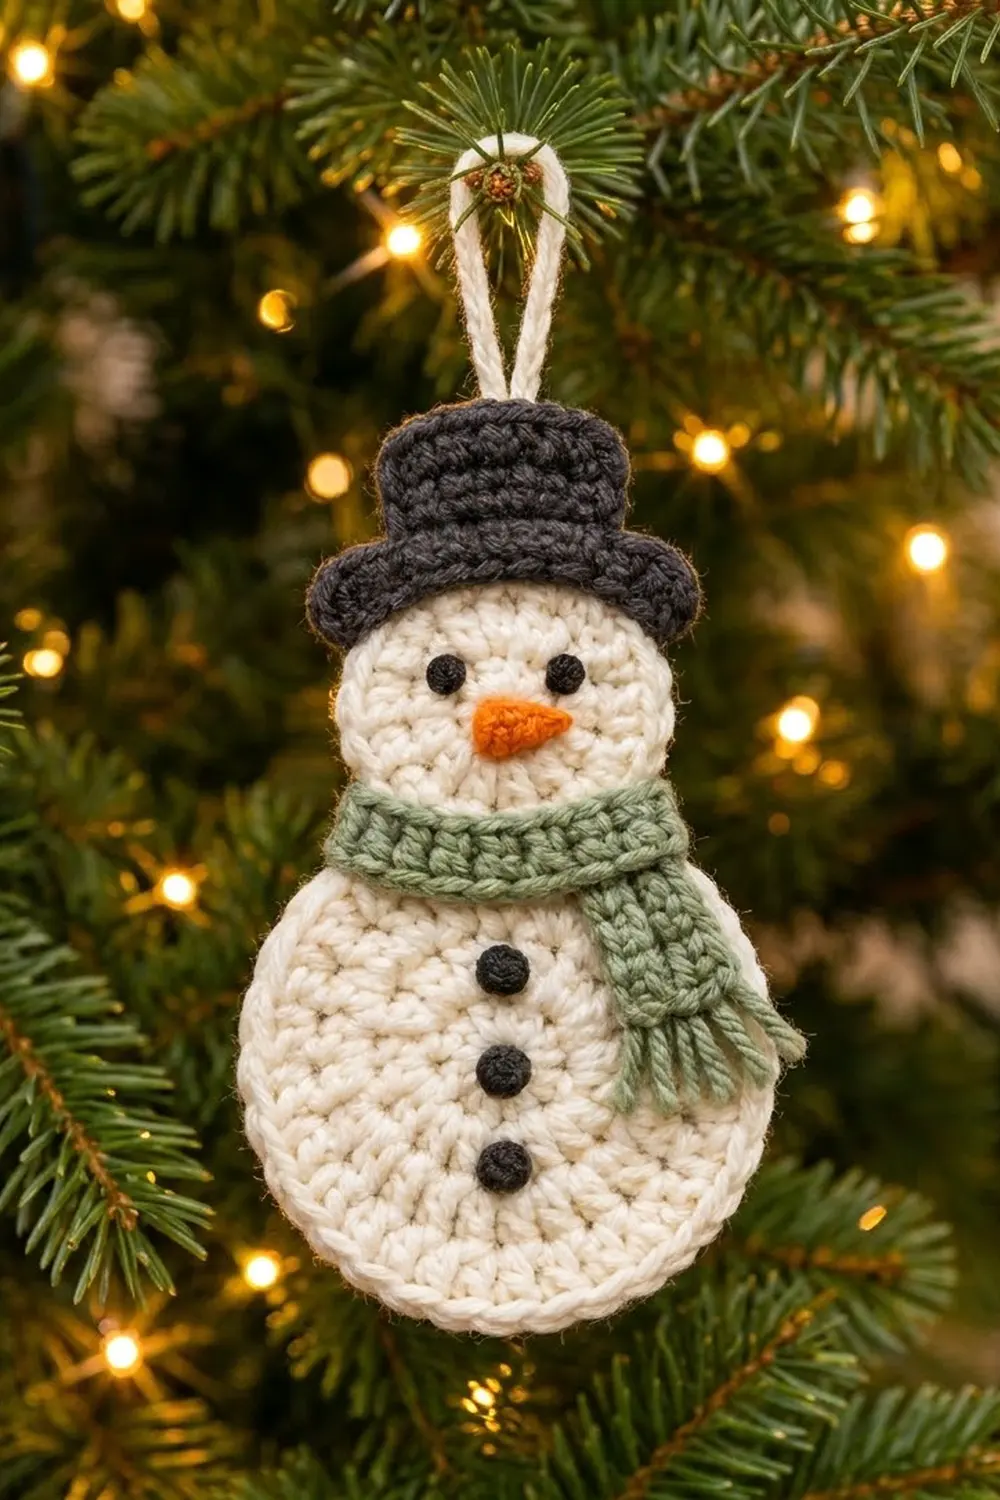
This little snowman is a flat ornament with layered pieces sewn on top. A round cream body and a smaller round head form the base. A charcoal top hat, a sage green scarf with fringe, an orange carrot nose, and three dark buttons are sewn on top.
The colors are classic and calm: warm cream, charcoal black, soft sage green, and a small pop of orange. The look is cozy farmhouse rather than bright and cartoonish. It suits a natural-toned tree, a gift tag, or a window hook.
This pattern uses US crochet terms. The finished snowman measures 4.25 in (10.8 cm) wide at the body. It is 7 in (17.8 cm) tall from the bottom of the body to the top of the hat, or about 9 in (22.9 cm) including the hanging loop.
Construction is simple. First you work two flat circles in double crochet rounds, finish each with a single crochet border round, and overlap them. Next you crochet the hat, scarf, nose, and buttons as small flat pieces and sew them on. Last, you add a slip-stitch cord loop.
Finished Size and Construction
- Finished size: 4.25 in (10.8 cm) wide x 7 in (17.8 cm) tall; about 9 in (22.9 cm) tall with the loop
- Skill level: Easy
- Terminology: US crochet terms
- Yarn weight: Worsted (Category 4)
- Hook: 4.0 mm (G-6)
- Number of pieces: One finished ornament, put together from small parts (body, head, hat crown, hat brim, scarf band, scarf tail, nose, 3 buttons, loop)
- Layout: The head sits above the body and overlaps it by 0.5 in (1.3 cm). The hat goes on the head and the scarf goes across the join.
- Body size before border: 3.75 in (9.5 cm) across
- Head size before border: 2 in (5.1 cm) across
- Border depth: 0.25 in (0.6 cm) all around each circle
- Body size after border: 4.25 in (10.8 cm); head size after border: 2.5 in (6.4 cm)
Materials
Choose a smooth worsted cotton, cotton blend, or soft acrylic. Smooth yarn shows the stitch texture clearly and helps the circles lie flat. Avoid fuzzy yarns, because the small pieces lose their shape.
- Cream (A): 15 g, about 30 m
- Charcoal black (B): 5 g, about 10 m (hat, buttons, eyes)
- Sage green (C): 4 g, about 8 m (scarf and fringe)
- Orange (D): 1 g, about 2 m (nose)
These amounts include a small margin for swatching and sewing tails.
Tools:
- 4.0 mm (G-6) crochet hook
- Tapestry needle
- Scissors
- Stitch marker
- Pins or clips for placing the sewn-on pieces
- Ruler or tape measure
- Spray bottle and blocking mat (optional)
Abbreviations (US Terms)
- ch – chain
- sl st – slip stitch
- sc – single crochet
- hdc – half double crochet
- dc – double crochet
- BLO – back loop only
- st(s) – stitch(es)
- MR – magic ring
- rep – repeat
Special technique – French knot: Bring a threaded needle up from the back. Wrap the yarn around the needle 3 times. Insert the needle back down right next to where it came up, holding the wraps snug.
Gauge and Checkpoints
Gauge: 9 sc and 10 rows = 2 in (5.1 cm) in sc. Rounds 1–2 of the body or head = 2 in (5.1 cm) across.
Make the head first. It is quick and works as your test piece. If it measures 2 in (5.1 cm) after Round 2 and 2.5 in (6.4 cm) after the border round, your gauge is right.
Checkpoints:
- After Body Round 2: 2 in (5.1 cm)
- After Body Round 3: 2.9 in (7.4 cm)
- After Body Round 4: 3.75 in (9.5 cm)
- After Body border: 4.25 in (10.8 cm)
- Hat crown: 1.8 in (4.6 cm) wide x 1 in (2.5 cm) tall
Too big? Go down to a 3.75 mm hook. Too small? Go up to a 4.5 mm hook. If the circle ruffles, your tension is loose for your hook size. If it cups, your tension is too tight. Change the hook size, not the stitch counts.
Body (Make 1, Color A)
Work in joined rounds with the right side facing. The ch 2 at the start of each round does not count as a stitch.
Round 1: In a MR, ch 2, 12 dc. Join with sl st to first dc. (12 sts) Pull the ring closed.
Round 2: Ch 2, 2 dc in each st around. Join. (24 sts)
Checkpoint: 2 in (5.1 cm) across.
Round 3: Ch 2, dc in next st, 2 dc in next st; rep from * around. Join. (36 sts)
Checkpoint: 2.9 in (7.4 cm) across.
Round 4: Ch 2, dc in next 2 sts, 2 dc in next st; rep from * around. Join. (48 sts)
Checkpoint: 3.75 in (9.5 cm) across. Do not fasten off. Continue to the Border section for Round 5.
Head (Make 1, Color A)
Round 1: In a MR, ch 2, 12 dc. Join. (12 sts)
Round 2: Ch 2, 2 dc in each st around. Join. (24 sts)
Checkpoint: 2 in (5.1 cm) across. Do not fasten off. Continue to the Border section for Round 3.
Hat (Color B)
The hat is made of two flat pieces: a crown with horizontal ridges and a wider brim with rounded ends.
Crown
Row 1: Ch 9, sc in 2nd ch from hook and in each ch across. Turn. (8 sc)
Rows 2–5: Ch 1 (does not count), sc in BLO of each st across. Turn. (8 sc)
Working in the back loop only creates the horizontal ridges across the crown. Checkpoint: 1.8 in (4.6 cm) wide x 1 in (2.5 cm) tall. Fasten off, leaving a 10 in (25.4 cm) tail.
Brim
Row 1: Ch 14, sc in 2nd ch from hook and in each ch across. Turn. (13 sc)
Row 2: Ch 1, sl st in first st, sc in next 11 sts, sl st in last st. (13 sts: 11 sc + 2 sl st)
The sl sts at each end round off the corners of the brim. Checkpoint: 2.9 in (7.4 cm) wide x 0.4 in (1.0 cm) tall. Fasten off, leaving a 10 in (25.4 cm) tail.
Center the bottom edge of the crown on the top edge of the brim (Row 2) and sew it in place. This leaves 0.55 in (1.4 cm) of brim showing on each side of the crown. The finished hat measures 1.4 in (3.6 cm) tall.
Scarf (Color C)
Band
Work the band in short rows so the back-loop ridges run up and down, like ribbing.
Row 1: Ch 5, sc in 2nd ch from hook and in each ch across. Turn. (4 sc)
Rows 2–16: Ch 1, sc in BLO of each st across. Turn. (4 sc)
Checkpoint: 0.9 in (2.3 cm) wide x 3.2 in (8.1 cm) long. Fasten off, leaving a 10 in (25.4 cm) tail.
Tail
Row 1: Ch 10, sc in 2nd ch from hook and in each ch across. Turn. (9 sc)
Rows 2–4: Ch 1, sc in BLO of each st across. Turn. (9 sc)
On the tail, the ridges run along its length. Checkpoint: 2 in (5.1 cm) long x 0.8 in (2.0 cm) wide. Fasten off, leaving a 10 in (25.4 cm) tail.
Fringe
Cut 8 strands of Color C, each 2 in (5.1 cm) long. Fold 2 strands in half and attach them to one short end of the tail with a lark’s head knot. Repeat to make 4 bundles spaced evenly across that end. Trim the fringe to 0.6 in (1.5 cm).
Nose (Make 1, Color D)
Row 1: Ch 4, sl st in 2nd ch from hook, sc in next ch, hdc in last ch. (3 sts)
Because each stitch is taller than the one before, the nose forms a small carrot-shaped triangle 0.6 in (1.5 cm) long. Fasten off, leaving an 8 in (20.3 cm) tail.
Buttons (Make 3, Color B)
Round 1: In a MR, ch 1, 6 sc. Pull the ring tight and join with sl st to first sc. (6 sc)
Each button is 0.4 in (1.0 cm) across. Fasten off, leaving an 8 in (20.3 cm) tail.
Hanging Loop (Color A)
Ch 25, sl st in 2nd ch from hook and in each ch across. (24 sl st)
The cord measures about 4.5 in (11.4 cm). Fasten off, leaving tails at both ends.
Border
Each circle gets a single crochet border round. Sc is shorter than dc, so the border adds a firm, neat rim 0.25 in (0.6 cm) deep all around.
Border gauge: 9 sc = 2 in (5.1 cm) along the outer edge.
Circles have no sides or corners, so all counts are per round.
Body Border
Round 5: Ch 1 (does not count), sc in next 3 sts, 2 sc in next st; rep from * around. Join. (60 sts = 48 sts worked 1-per-stitch + 12 increases)
Checkpoint: 4.25 in (10.8 cm) across. Fasten off and weave in the end.
Head Border
Round 3: Ch 1, sc in next st, 2 sc in next st; rep from * around. Join. (36 sts = 24 sts worked 1-per-stitch + 12 increases)
Checkpoint: 2.5 in (6.4 cm) across. Fasten off, leaving a 12 in (30.5 cm) tail for sewing.
Why the Math Works
A flat circle needs about 12 new stitches each round. The body border is 13.3 in (33.8 cm) around (4.25 in x 3.14). At 4.5 sc per inch, that needs about 60 sts. The head border is 7.9 in (20.1 cm) around (2.5 in x 3.14), which needs about 35–36 sts. Both rounds match these counts, so the edges lie flat without ruffling or cupping.
Assembly
- Head to body: Place the head behind the top of the body so the body overlaps it by 0.5 in (1.3 cm). Whipstitch along the body edge through both layers. Checkpoint: the snowman measures 6.25 in (15.9 cm) tall.
- Hat: Center the hat so the bottom of the brim sits 0.65 in (1.7 cm) below the top of the head. The hat now rises 0.75 in (1.9 cm) above the head, for a total height of 7 in (17.8 cm). Sew around all edges.
- Scarf band: Lay the band sideways across the place where the head meets the body, centered. It is wider than the head at that point, so its ends reach onto the top edges of the body. Sew around all edges.
- Scarf tail: Tuck the end without fringe under the right end of the band. Let the tail hang down over the right side of the body at a slight angle, with the fringe reaching just past the body edge. Sew the tail in place, leaving the fringe free.
- Face: Sew the nose to the center of the head, pointing slightly right. Make two French knots in Color B for eyes, 0.6 in (1.5 cm) apart, just above the nose.
- Buttons: Sew the three buttons in a straight line down the center of the body. Start 0.6 in (1.5 cm) below the scarf band and space them 0.6 in (1.5 cm) apart.
- Loop: Fold the cord in half. Sew both ends to the back of the hat crown, 0.4 in (1.0 cm) apart, so the loop stands about 2 in (5.1 cm) above the hat.
Weave in all ends on the back.
Final Blocking
- Lay the ornament face down on a blocking mat.
- Spray lightly with water until just damp.
- Gently pat the body and head into true circles of 4.25 in (10.8 cm) and 2.5 in (6.4 cm).
- Straighten the hat brim and the scarf edges.
- Comb the fringe straight with your fingers.
- Pin only if the edges curl, and do not stretch.
- Let it dry completely, then trim the fringe again if needed.
Final Quality-Control Checklist
- The body has 60 sts in the border round and measures 4.25 in (10.8 cm).
- The head has 36 sts in the border round and measures 2.5 in (6.4 cm).
- Both circles lie flat with no ripples.
- The head overlaps the body by 0.5 in (1.3 cm).
- Total height is 7 in (17.8 cm) without the loop.
- The hat crown ridges run side to side, and the scarf band ridges run up and down.
- The brim corners are rounded.
- The nose, eyes, and buttons are centered and secure.
- The fringe is an even 0.6 in (1.5 cm).
- The loop is firmly attached and the ornament hangs straight.
- No ends show on the front.
Troubleshooting
Circle ruffles: Your stitches are too loose, or you added extra increases. Recount each round, then try a smaller hook.
Circle cups: Your tension is too tight, or you missed increases. Recount and try a larger hook.
Seam line shows in each round: Join into the first dc, not the ch 2. Work the first stitch of the next round into the same stitch as the join.
Hat looks too narrow: Check that the brim has 13 sts and that the crown is centered on it.
Scarf twists: Block it flat before sewing, and pin both ends before stitching.
Ornament tilts when hung: Move the loop to the exact center of the crown.
Care
Hand wash in cool water with mild soap, press out the water in a towel, and dry flat. Do not tumble dry, because the fringe and small sewn-on pieces can loosen.
Final Notes
The whole ornament depends on a short chain of measurements. A head of 2 in (5.1 cm) after Round 2 confirms your gauge. The body grows to 3.75 in (9.5 cm) before the border and 4.25 in (10.8 cm) after it, and the head finishes at 2.5 in (6.4 cm). With a 0.5 in (1.3 cm) overlap the snowman stands 6.25 in (15.9 cm) tall, and the hat brings it to 7 in (17.8 cm). Check each step and the sewn-on pieces will fit exactly.
Happy crocheting!