
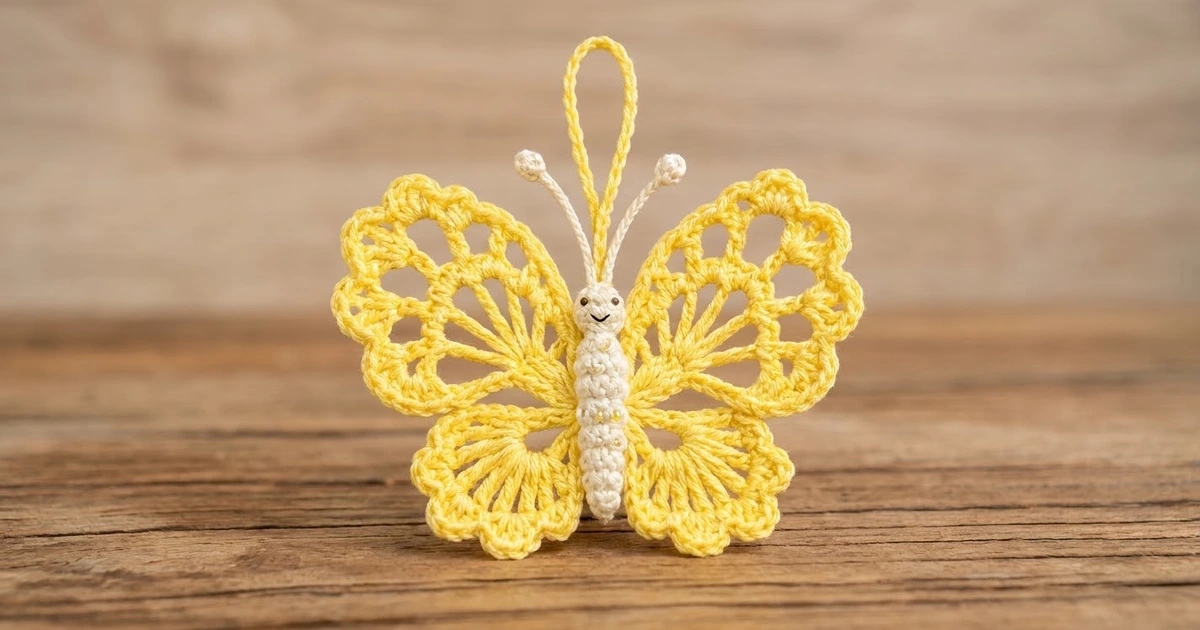
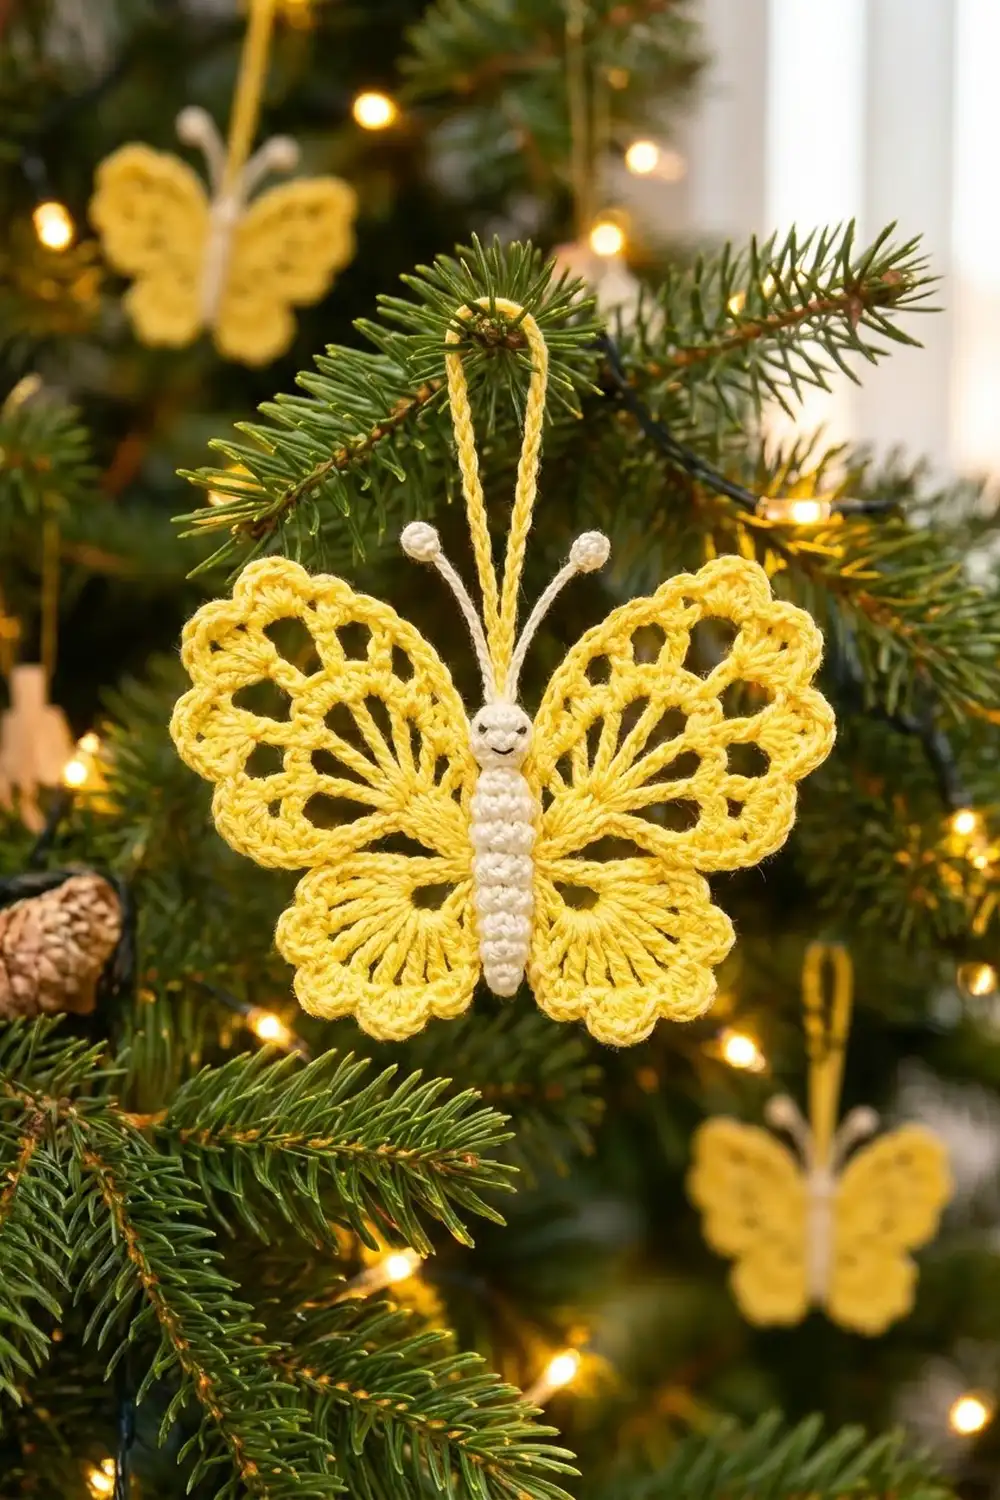
The Sunbeam Butterfly is a small, lacy ornament with four sunny yellow wings and a soft cream body. The wings are open fans of tall spokes edged with little scallops, so light passes through them when the ornament hangs on a tree branch or in a window.
The palette is simple: butter yellow for the wings and the hanging loop, and cream for the beaded body and the knobbed antennae. A few stitches of dark embroidery floss make the sleepy little face. This pattern uses US crochet terms throughout.
The finished butterfly measures about 4.25 in (10.8 cm) across the wings and 3.5 in (8.9 cm) tall, not counting the loop. The folded hanging loop adds about 2 in (5.1 cm).
How it’s made: you crochet four wing fans in rows, starting from a small ring. You sew them together at the center and then add a scalloped edging to each wing. Finally, you sew on a lightly stuffed, segmented body, two antennae, and a slip-stitch hanging loop.
Finished Size and Construction
- Finished size: 4.25 in (10.8 cm) wide × 3.5 in (8.9 cm) tall
- Skill level: Easy-intermediate
- Terminology: US crochet terms
- Yarn weight: Light (DK, #3) mercerized cotton
- Hook: 3.25 mm (US D-3)
- Number of pieces: 4 wings, 1 body, 2 antennae, 1 hanging loop
- Layout: 2 upper wings over 2 lower wings, with the body down the center
- Upper wing size before border: 3.5 in (8.9 cm) across the straight edge, 1.75 in (4.4 cm) from ring to edge
- Lower wing size before border: 2 in (5.1 cm) across the straight edge, 1 in (2.5 cm) from ring to edge
- Butterfly size before border: 3.75 in (9.5 cm) × 3 in (7.6 cm)
- Border depth: 0.25 in (0.6 cm) on the upper wings, 0.4 in (1.0 cm) on the lower wings
Materials
Yarn: Use a smooth, mercerized DK cotton. It gives the spokes crisp definition and blocks flat. Avoid fuzzy or very stretchy yarns, because the open fans will lose their shape.
- Yellow (wings, loop): 8 g (about 20 m)
- Cream (body, antennae): 3 g (about 8 m)
- Dark brown embroidery floss (face): about 12 in (30.5 cm)
All quantities include a small safety margin.
Tools:
– 3.25 mm (US D-3) crochet hook
– Tapestry needle
– Embroidery needle
– A pinch of fiberfill or yarn scraps
– Rustproof pins and a blocking mat
– Spray bottle with water
– Scissors
Abbreviations (US Terms)
- ch – chain
- sl st – slip stitch
- sc – single crochet
- hdc – half double crochet
- dc – double crochet
- tr – treble crochet
- sc2tog – single crochet 2 together
- sp – space
- tch – turning chain
- st(s) – stitch(es)
- [ ] – repeat the instructions in brackets the stated number of times
Special stitch: 3-dc bobble. [Yarn over, insert hook in the stitch, pull up a loop, yarn over, pull through 2 loops] 3 times in the same stitch (4 loops on hook). Yarn over and pull through all 4 loops.
Gauge and Checkpoints
Gauge isn’t critical for an ornament, but it decides whether the four wings fit together neatly. Make one upper wing first and measure it before you crochet the rest.
Upper wing checkpoints, measured across the straight edge:
– After Row 1: 1.75 in (4.4 cm)
– After Row 2: 3 in (7.6 cm)
– After Row 3: 3.5 in (8.9 cm)
Lower wing checkpoints, measured across the straight edge:
– After Row 1: 1.25 in (3.2 cm)
– After Row 2: 2 in (5.1 cm)
Body checkpoint: 2.25 in (5.7 cm) long and about 0.4 in (1.0 cm) wide before wrapping.
If your pieces come out too big, go down to a 3.0 mm hook. If they come out too small or the spokes crowd together, go up to a 3.5 mm (US E-4) hook. If the straight edge ruffles, you are probably pulling the starting ring too tight. Loosen the ring slightly before you begin Row 2.
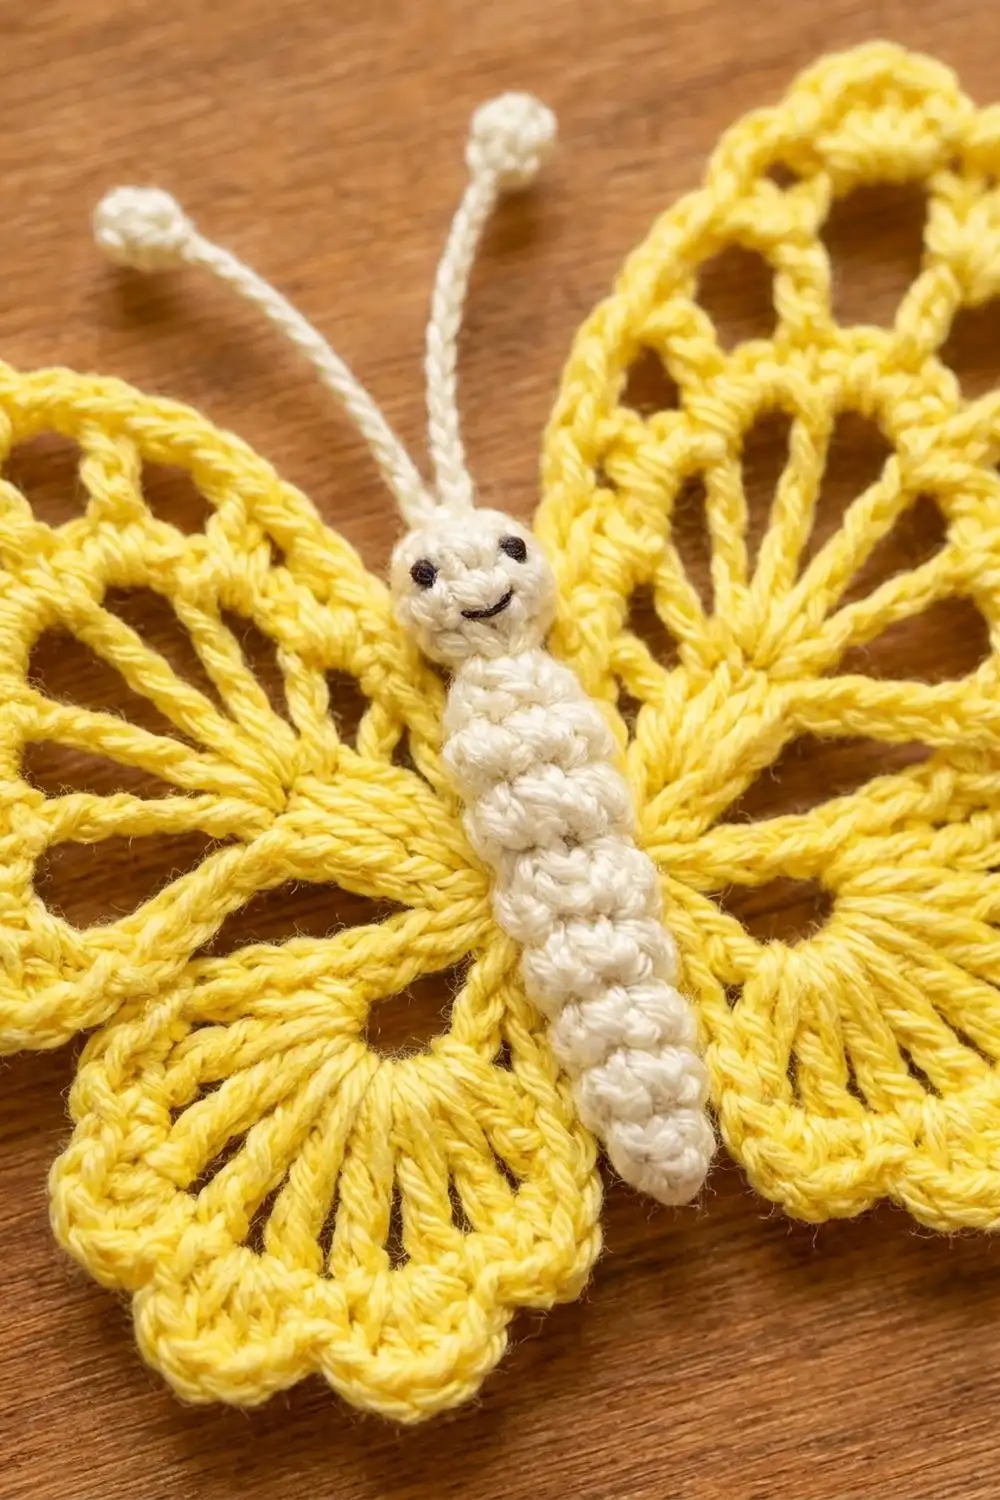
Upper Wings (make 2, yellow)
Ring: Ch 5, then sl st in the first ch to form a ring.
Row 1: Ch 4 (counts as tr), work 12 tr in the ring. Turn. (13 tr)
The stitches form a half-circle. The ring stays open and becomes the hole closest to the body.
Row 2: Ch 5 (counts as tr + ch 1), [tr in next st, ch 1] 11 times, then tr in the top of the tch. Turn. (13 tr and 12 ch-1 sps)
These are the long spokes. Keep each ch-1 relaxed so the spokes fan out evenly.
Row 3: Ch 1, sc in the first tr. [Ch 4, skip the next ch-1 sp, the next tr, and the next ch-1 sp, then sc in the next tr] 6 times. Your last sc goes in the 4th ch of the tch. (7 sc and 6 ch-4 loops)
Fasten off and leave a 6 in (15.2 cm) tail for joining.
Checkpoint: The straight edge measures 3.5 in (8.9 cm). The sc stitches sit on tr numbers 1, 3, 5, 7, 9, 11, and 13, so the loops are evenly spaced around the arc.
Lower Wings (make 2, yellow)
Ring: Ch 5, then sl st in the first ch to form a ring.
Row 1: Ch 3 (counts as dc), work 8 dc in the ring. Turn. (9 dc)
Row 2: Ch 4 (counts as dc + ch 1), [dc in next st, ch 1] 7 times, then dc in the top of the tch. (9 dc and 8 ch-1 sps)
Fasten off and leave a 6 in (15.2 cm) tail.
Checkpoint: The straight edge measures 2 in (5.1 cm), and the ring hole sits at the center of the straight edge.
Body (make 1, cream)
The body is worked in a continuous spiral. Don’t join the rounds, and use a stitch marker to mark the first stitch of each round.
Rnd 1: Make a magic ring and work 6 sc into it. (6)
Rnd 2: 2 sc in each st around. (12)
Rnds 3–4: Sc in each st around. (12)
The head is now finished and measures about 0.5 in (1.3 cm) across.
Rnd 5: Sc2tog around. (6)
Rnds 6–15: Sc in each st around. (6)
Stuff the head lightly as you go, and add a little stuffing to the body tube. Keep it slim so it stays flat enough to sit on the wings.
Rnd 16: Sc2tog 3 times. (3)
Fasten off. Thread the tail through the last 3 stitches and pull to close.
Segments: Thread a 12 in (30.5 cm) length of cream yarn onto a tapestry needle. Wrap it twice around the body tube at 6 evenly spaced points, about every 0.25 in (0.6 cm) below the neck. Pull each wrap snug before moving on. The wraps create 7 rounded, bead-like segments.
Face: With the brown floss, work two tiny French knots for eyes on Rnd 3. Add a short, curved backstitch smile just below them.
Antennae (make 2, cream)
Ch 11. Work a 3-dc bobble in the 3rd ch from the hook to make the knob. Then sl st in each of the remaining 8 ch. (8 sl st plus 1 knob)
Fasten off and leave a 6 in (15.2 cm) tail. Each antenna is about 1 in (2.5 cm) long. The slip stitches stiffen the cord so it stands up on its own.
Hanging Loop (make 1, yellow)
Ch 31. Sl st in the 2nd ch from the hook and in each ch across. (30 sl st)
Fasten off and leave a 6 in (15.2 cm) tail. When folded in half, the cord makes a loop about 2 in (5.1 cm) tall.
Make All Pieces
Before assembly, check that you have:
- Yellow: 2 upper wings, 2 lower wings, and 1 hanging loop
- Cream: 1 body and 2 antennae
Layout grid (front view):
[ Upper Wing L ] [ body ] [ Upper Wing R ]
[ Lower Wing L ] [ body ] [ Lower Wing R ]
Joining
Lay the four wings right side up. Each ring should point toward the center, with the upper wings angled slightly upward and the lower wings angled slightly downward. The rings should overlap the center line by about 0.25 in (0.6 cm).
Stitch-to-stitch logic:
- Upper wing to lower wing. On each side, take the upper wing’s tail and sew its Row 1 end stitch to the end stitch of the lower wing’s Row 1 directly below it. Then pass the tail through both rings twice so the two rings are stacked together.
- Left side to right side. Sew the left ring stack to the right ring stack with 3 small stitches through all the layers. This creates a central spine about 1 in (2.5 cm) long.
Keep your tension firm but not tight. If you pull too hard, the wings will cup forward. They should lie flat with no gaps showing at the center.
Size checkpoint: The joined butterfly measures about 3.75 in (9.5 cm) wide × 3 in (7.6 cm) tall. Don’t weave in the tails yet. The body will hide them.
Border
The border is the scalloped edging. You work it on each wing’s outer arc separately, after joining, so each set of scallops sits evenly once the wings are in position.
Border gauge: Each lower-wing shell spans about 0.3 in (0.8 cm). Each upper-wing scallop spans about 0.4 in (1.0 cm).
Upper wing edging (work on each upper wing): Join the yellow yarn with a sc in the first sc of Row 3. [Work (hdc, 4 dc, hdc) in the next ch-4 loop, then sc in the next sc] 6 times. Fasten off. (6 scallops: 7 sc + 36 scallop sts = 43 sts)
Lower wing edging (work on each lower wing): Join the yellow yarn with a sc in the first dc of Row 2. [Skip the next ch-1 sp, work 5 dc in the next dc, skip the next ch-1 sp, then sc in the next dc] 4 times. Fasten off. (4 shells: 5 sc + 20 dc = 25 sts)
Why the math works: Every arc has an odd number of anchor points, so each edging begins and ends with a sc at the straight edge. That keeps the wing bases flat where they meet the body.
- Upper wings: 7 sc anchor 6 loops.
- Lower wings: the 9 dc split into 5 sc anchors (dc 1, 3, 5, 7, 9) and 4 shell bases (dc 2, 4, 6, 8).
The border adds 0.25 in (0.6 cm) to each upper wing and 0.4 in (1.0 cm) to each lower wing. This brings the butterfly to 4.25 in (10.8 cm) × 3.5 in (8.9 cm).
Body, Antennae, and Loop Assembly
- Body. Center the body over the joined spine with the head just above the top of the wing join. Sew it down with the cream tail, working along both long sides and catching only the back half of each stitch so the beads stay raised.
- Antennae. Insert the plain end of each antenna behind the head, angled outward in a V. Sew them securely.
- Loop. Fold the loop in half and sew both ends to the back of the head, between the antennae.
- Tails. Weave all the tails into the wing spokes or under the body.
Final Blocking
- Lightly mist the butterfly with water until it is damp but not dripping.
- Lay it face up on the blocking mat.
- Pin each upper wing’s straight edge open to 3.5 in (8.9 cm) and each lower wing’s to 2 in (5.1 cm).
- Pin each scallop point outward so the arcs are smooth and even.
- Check the overall size: 4.25 in (10.8 cm) wide × 3.5 in (8.9 cm) tall.
- Shape the antennae into a symmetrical V, and keep the body clear of pins.
- Let it dry completely. For extra crispness, you can mist it with light spray starch.
Final Quality-Control Checklist
- [ ] Upper wings have 13 spokes, 6 loops, and 6 scallops each
- [ ] Lower wings have 9 spokes and 4 shells each
- [ ] Both sides are mirror-symmetrical
- [ ] No gaps are visible at the center join
- [ ] The body has 7 even segments and sits centered
- [ ] Both eyes are level
- [ ] The antennae are the same length and secure
- [ ] The loop is centered and strong enough to hang from
- [ ] All tails are hidden
- [ ] The butterfly measures 4.25 in (10.8 cm) × 3.5 in (8.9 cm)
Troubleshooting
- The wing curls into a cone: You added too many stitches to the ring. Recount Row 1 (13 tr on upper wings, 9 dc on lower wings).
- The wing ruffles at the edge: Your ch-1 spaces are too long. Pull them a little more snugly, or go down a hook size.
- The scallops are lopsided: Check that every scallop or shell is anchored with a sc on the correct stitch.
- The body won’t lie flat: It has too much stuffing. Remove some and press it gently while it’s damp.
- The antennae droop: Sl st a little more firmly, or stiffen them with a dab of starch.
- The two sides don’t match: Block both wings on the same side to the checkpoint widths before sewing the body on.
Care
Hand wash gently in cool water, press out the excess water in a towel, and pin flat to dry. Store the ornament flat or hanging, away from crushing weight.
Final Notes
Here is the full measurement chain:
- Upper wings: 3.5 in (8.9 cm) across, with a 1.75 in (4.4 cm) radius
- Lower wings: 2 in (5.1 cm) across, with a 1 in (2.5 cm) radius
- Joined butterfly before border: 3.75 in (9.5 cm) × 3 in (7.6 cm)
- Finished butterfly after border: 4.25 in (10.8 cm) × 3.5 in (8.9 cm)
- Body: 2.25 in (5.7 cm) long
- Antennae: 1 in (2.5 cm) each
- Loop: 2 in (5.1 cm) tall
If each checkpoint matches, the finished butterfly will too. Make one in yellow, then try a whole flutter in spring colors.
Happy crocheting!