

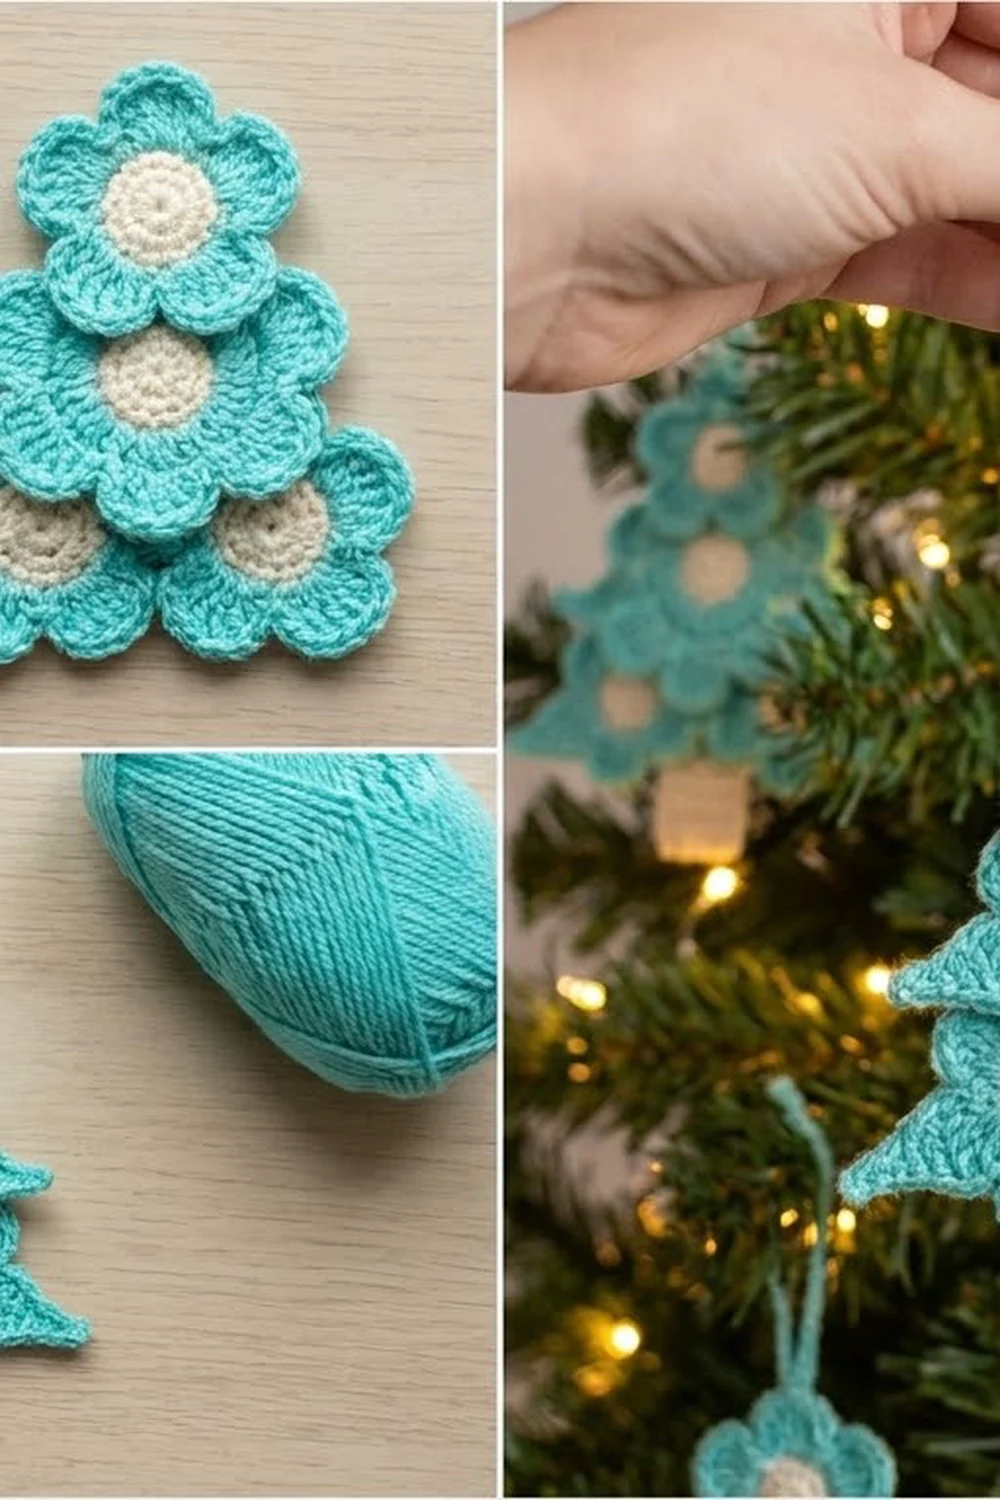
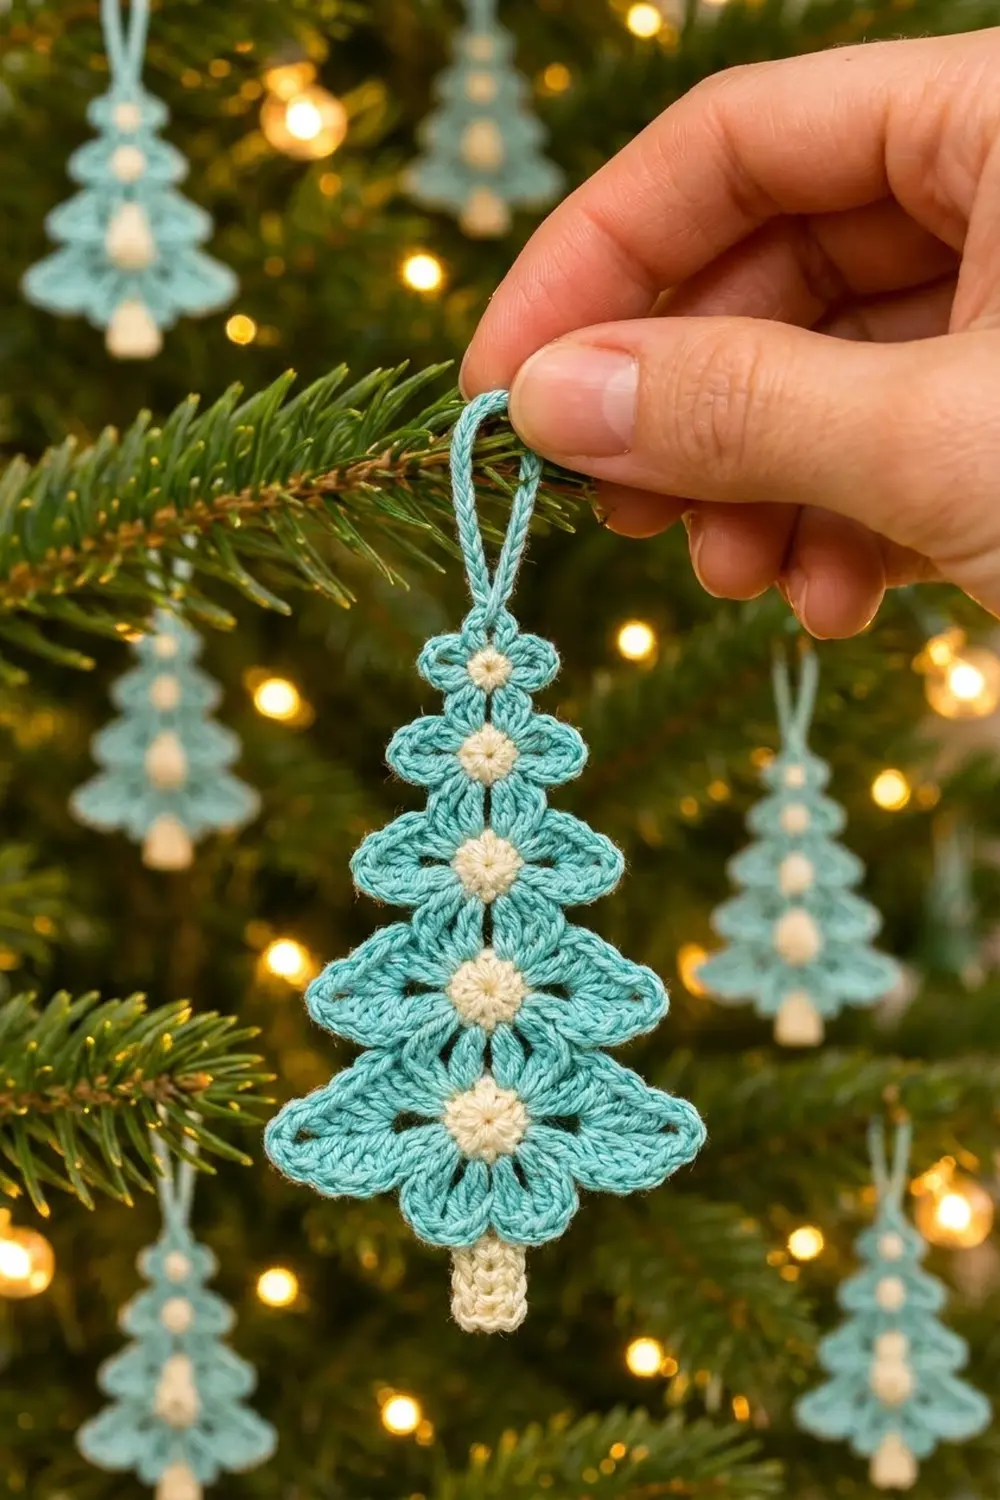
This little tree ornament is made from five flower motifs that get bigger from top to bottom. They are stacked so their petals form soft, scalloped branches. Each flower has a cream center, so a line of cream dots runs down the middle of the tree.
The sample uses aqua and cream cotton, with a cream trunk and an aqua hanging loop. The look is light and slightly vintage, and the ornament is easy to make in batches for a whole tree. All instructions use US crochet terms.
The finished ornament measures 3.25 in (8.3 cm) wide and 5.5 in (14.0 cm) tall from the top petal to the bottom of the trunk. With the hanging loop it is 7 in (17.8 cm) tall.
Construction is simple. You make five flower tiers in the round and a small trunk in rows. Then you layer the tiers and tack them together from the top down. The hanging loop is worked last, straight off the top flower.
Finished Size and Construction
- Finished size: 3.25 in (8.3 cm) wide x 5.5 in (14.0 cm) tall; 7 in (17.8 cm) with loop
- Skill level: Easy / advanced beginner
- Terminology: US crochet terms
- Yarn weight: DK / light (3) cotton
- Hook: 3.5 mm (E-4)
- Number of pieces: 6 (five flower tiers + one trunk)
- Layout: one vertical column, with Tier 1 (smallest) at the top and Tier 5 (largest) at the bottom
- Piece sizes: Tier 1 = 1.25 in (3.2 cm); Tier 2 = 1.75 in (4.4 cm); Tier 3 = 2.25 in (5.7 cm); Tier 4 = 2.75 in (7.0 cm); Tier 5 = 3.25 in (8.3 cm), measured tip to tip across the widest petals
- Size before border: tree body 3.25 in (8.3 cm) x 5 in (12.7 cm)
- Border depth: the petal rounds form the outer edge, so there is no border around the tree. The trunk edging adds 0.125 in (0.3 cm) on each side of the trunk.
Materials
Choose a smooth, tightly plied cotton in DK weight, either mercerized or matte. Cotton holds the petal shapes crisply and blocks flat. Acrylic also works, but it will look softer and puffier.
- Color A (aqua): 8 g, about 20 m
- Color B (cream): 3 g, about 8 m
These amounts are for one ornament and include a small extra margin for swatching and tails. One 50 g ball of aqua makes about five ornaments.
Tools:
– 3.5 mm (E-4) crochet hook
– Tapestry needle
– Scissors
– Stitch marker
– Rustproof pins and a foam blocking mat
– Spray bottle with water
– Optional: fabric stiffener or starch
Abbreviations (US Terms)
- ch – chain
- sl st – slip stitch
- sc – single crochet
- hdc – half double crochet
- dc – double crochet
- tr – treble crochet
- MR – magic ring
- st(s) – stitch(es)
- sp – space
- RS – right side
Special stitch – Standing sc: start with a slip knot on the hook. Insert the hook into the stitch, yarn over and pull up a loop, then yarn over and pull through both loops. This joins the aqua yarn without a visible chain.
The beginning ch 1 never counts as a stitch in this pattern.
Gauge and Checkpoints
Exact gauge doesn’t matter much for an ornament, but the tiers must grow at the right rate or the tree loses its tapered shape. Make Tier 1 first and measure it before you go on.
Checkpoints:
– Cream center (Round 1 of any tier): 0.5 in (1.3 cm) across
– Round 2 of Tiers 2–5 (20 sc): 1 in (2.5 cm) across
– Round 3 of Tiers 4–5 (30 sc): 1.5 in (3.8 cm) across
– Tier 1 finished: 1.25 in (3.2 cm) tip to tip
If Tier 1 is larger than 1.25 in (3.2 cm), go down to a 3.25 mm or 3 mm hook. If it is smaller, go up to a 3.75 mm or 4 mm hook. Being off by 0.125 in (0.3 cm) per tier adds up to 0.5 in (1.3 cm) across the four gaps between tier centers, so it’s worth checking.
Flower Tiers
All tiers start the same way. Keep the RS facing throughout and do not turn. On Tiers 3, 4, and 5, the first petal you make is the top petal, which will be hidden behind the tier above. Put a marker in it.
Center (all tiers)
Round 1 (Color B): MR, ch 1, 10 sc in ring, pull the ring closed, sl st to first sc. Fasten off. (10 sc)
Tier 1 (top)
Round 2 (Color A): Standing sc in any st of Round 1. Work (hdc, dc) in the same st, then (dc, hdc, sc) in the next st. This makes one petal. (sc, hdc, dc) in next st, (dc, hdc, sc) in next st; repeat from * 3 more times. Sl st to first sc. (30 sts: 5 petals of 6 sts)*
Fasten off, leaving a 6 in (15.2 cm) tail. Tier 1 measures 1.25 in (3.2 cm).
Tier 2
Round 1: Work the Center.
Round 2 (Color A): Standing sc in any st, sc in the same st, then 2 sc in each st around. Sl st to first sc. (20 sc)
Round 3: Ch 1, sc in next st, (hdc, dc) in next st, (dc, hdc) in next st, sc in next st; repeat from * 4 more times. Sl st to first sc. (30 sts: 5 petals of 6 sts)*
Fasten off, leaving a 10 in (25.4 cm) tail. Tier 2 measures 1.75 in (4.4 cm).
Tier 3
Rounds 1–2: Work as for Tier 2. (20 sc)
Round 3: Ch 1, then work the petals in this order:
- Top petal (rounded): sc in next st, (hdc, dc, dc) in next st, (dc, dc, hdc) in next st, sc in next st. (8 sts)
- Right branch petal (pointed): sc in next st, (hdc, dc, tr) in next st, ch 2, (tr, dc, hdc) in next st, sc in next st. (8 sts + ch-2 sp)
- Two bottom petals (rounded): work the top petal twice. (16 sts)
- Left branch petal (pointed): work as for the right branch petal. (8 sts + ch-2 sp)
Sl st to first sc. (40 sts + 2 ch-2 sps)
Fasten off, leaving a 10 in (25.4 cm) tail. Tier 3 measures 2.25 in (5.7 cm) between the two pointed tips.
Tier 4
Rounds 1–2: Work as for Tier 2. (20 sc)
Round 3: Ch 1, sc in next st, 2 sc in next st; repeat from * 9 more times. Sl st to first sc. (30 sc: 20 sts worked 1-per-stitch + 10 added)*
Round 4: Ch 1, then:
- Top petal (rounded): sc in next st, hdc in next st, 2 dc in each of next 2 sts, hdc in next st, sc in next st. (8 sts)
- Right branch petal (pointed): sc in next st, hdc in next st, (dc, tr) in next st, ch 2, (tr, dc) in next st, hdc in next st, sc in next st. (8 sts + ch-2 sp)
- Two bottom petals: work the top petal twice. (16 sts)
- Left branch petal: work as for the right branch petal. (8 sts + ch-2 sp)
Sl st to first sc. (40 sts + 2 ch-2 sps)
Fasten off, leaving a 10 in (25.4 cm) tail. Tier 4 measures 2.75 in (7.0 cm) tip to tip.
Tier 5 (bottom)
Rounds 1–3: Work as for Tier 4. (30 sc)
Round 4: Ch 1, then:
- Top petal (rounded): sc in next st, hdc in next st, (dc, tr) in next st, (tr, dc) in next st, hdc in next st, sc in next st. (8 sts)
- Right branch petal (pointed): sc in next st, (hdc, dc) in next st, 2 tr in next st, ch 3, 2 tr in next st, (dc, hdc) in next st, sc in next st. (10 sts + ch-3 sp)
- Two bottom petals: work the top petal twice. (16 sts)
- Left branch petal: work as for the right branch petal. (10 sts + ch-3 sp)
Sl st to first sc. (44 sts + 2 ch-3 sps)
Fasten off, leaving a 10 in (25.4 cm) tail. Tier 5 measures 3.25 in (8.3 cm) tip to tip.
Stitch check: each petal sits over exactly 2 sts (Tier 1), 4 sts (Tiers 2–3), or 6 sts (Tiers 4–5) of the round below. Five petals use every stitch: 5 x 2 = 10, 5 x 4 = 20, 5 x 6 = 30.
Trunk
With Color B, ch 4.
Row 1: Sc in 2nd ch from hook and in each ch across, turn. (3 sc)
Rows 2–5: Ch 1, sc in each st across, turn. (3 sc)
Do not fasten off. Go straight on to the trunk edging in the Border section. Before edging, the trunk measures 0.375 in (1.0 cm) wide x 0.75 in (1.9 cm) tall.
Make All Pieces
For one ornament you need:
- Color B centers: 5 (one per tier)
- Color A petal rounds: 5 (one each for Tiers 1–5)
- Color B trunk: 1
Layout, top to bottom, with all centers on one vertical line:
        [Loop]
       [Tier 1]
      [ Tier 2 ]
     [  Tier 3  ]
    [   Tier 4   ]
   [    Tier 5    ]
       [Trunk]
Weave in all the Color B tails on the centers now. Keep the Color A tails for joining.
Joining
The tiers are layered, not joined edge to edge. Each lower tier sits behind the one above, with its top petal tucked out of sight.
Method:
- Lay Tier 1 RS up. Slide Tier 2 underneath so its center is 0.75 in (1.9 cm) below the center of Tier 1, measured center to center.
- Turn both pieces over. Use Tier 2’s Color A tail and a tapestry needle to tack the tip of Tier 2’s top petal to the back of Tier 1’s cream center. Catch the back of 2 sc of Round 1.
- On each side, tack the sc at the base of Tier 2’s top petal to the back of the nearest dc on Tier 1’s bottom petals. Join 1 stitch to 1 stitch on each side.
- Repeat to join Tier 3 behind Tier 2, Tier 4 behind Tier 3, and Tier 5 behind Tier 4, keeping the same 0.75 in (1.9 cm) center spacing. On Tiers 3–5, the marked petal is the top petal. The pointed petals must sit level with each other and point out to the sides.
Tension: sew only through the back loops and back bars. Pull just firmly enough to hold the layers together. Tight stitches pucker the upper tier, and loose ones let the lower tier flap.
Size checkpoint: the distance from the center of Tier 1 to the center of Tier 5 is 3 in (7.6 cm), which is 4 spaces x 0.75 in. The tree body measures 5 in (12.7 cm) from Tier 1’s top petal tip to Tier 5’s lowest petal. It measures 3.25 in (8.3 cm) across Tier 5’s pointed tips.
Border
The petal rounds are the finished edge of the tree, so there is no border around the flowers. A border would round off the pointed branch tips. The only edge finishing is the trunk edging and the hanging loop.
Border gauge: 1 sc per sc stitch and 1 sc per sc row-end, about 8 sts per 1 in (2.5 cm).
Trunk Edging
Round 1 (Color B): Continue from Row 5. Ch 1 and do not turn.
– Top side: sc in each of 3 sts. (3 sts)
– Ch 1 for the corner.
– Left side: 1 sc in each row-end down the side. (5 sts)
– Ch 1 for the corner.
– Bottom side: sc in each of the 3 foundation chains. (3 sts)
– Ch 1 for the corner.
– Right side: 1 sc in each row-end. (5 sts)
– Ch 1, sl st to first sc. (16 sc + 4 corner ch-1 sps)
Fasten off, leaving a 10 in (25.4 cm) tail.
Why the math works: a sc row is about as tall as a sc stitch is wide, so 1 sc per row-end keeps the sides flat. The ch-1 corners turn the edge without adding bulk. Each side keeps its own count: 3 + 5 + 3 + 5 = 16. The trunk now measures 0.625 in (1.6 cm) wide x 1 in (2.5 cm) tall.
Center the trunk behind Tier 5. Tuck 0.5 in (1.3 cm) of it behind the tier and leave 0.5 in (1.3 cm) showing below the bottom petals. Sew the top edge of the trunk to the back of Tier 5’s Round 3. The total height is now 5.5 in (14.0 cm).
Hanging Loop
With Color A, join with a sl st at the tip of Tier 1’s top petal, between the 2 dc at the top. Ch 20, then sl st in the same st. Sl st in each ch around the loop, then sl st in the starting st. (20 ch + 20 sl st) Fasten off and weave in the ends.
The loop stands 1.5 in (3.8 cm) tall, so the ornament hangs 7 in (17.8 cm) long in total.
Final Blocking
- Weave in any remaining tails behind the cream centers.
- Mist the ornament until it is damp but not soaked.
- Pin it RS up on the mat with Tier 1 at the top and all centers in a straight line.
- Pin each pointed branch tip outward through its ch-2 or ch-3 sp, so Tier 5 measures 3.25 in (8.3 cm) wide.
- Pin the rounded petals gently to open up the scallops.
- Check that the height from Tier 1’s top petal to the bottom of the trunk is 5.5 in (14.0 cm).
- For a stiffer ornament, brush on diluted fabric stiffener.
- Let it dry completely before you take out the pins.
Final Quality-Control Checklist
- The five cream centers line up vertically
- Each tier is wider than the one above it
- The pointed petals on Tiers 3–5 face left and right and sit level with each other
- No top petals peek out above any tier
- The trunk is centered, with 0.5 in (1.3 cm) showing
- The loop is centered above Tier 1
- Total size is 3.25 in (8.3 cm) x 5.5 in (14.0 cm), or 7 in (17.8 cm) with the loop
- All tails are hidden on the back
Troubleshooting
The center ring has a hole: pull the magic ring tighter before the sl st, then weave the tail around the ring once more.
The petals cup or ruffle: the base round is too tight. Go up one hook size for the petal round only.
The tiers look the same size: check that Tiers 4 and 5 have the extra 30-sc round.
The branch tips droop: block again and pin through the ch sps. Use stiffener if needed.
The tree leans: one tier is off-center. Unpick its tacking stitches and line it up with the center line again.
The trunk flares: you worked more than 1 sc per row-end. Redo the edging.
Care
Hand wash in cool water, roll in a towel to press out the water, and dry flat with the branch tips pinned again. Store the ornament flat or hanging, where nothing heavy can crush it.
Final Notes
Here is the measurement chain. A 0.5 in (1.3 cm) center grows into tiers of 1.25, 1.75, 2.25, 2.75, and 3.25 in (3.2, 4.4, 5.7, 7.0, and 8.3 cm). Spaced 0.75 in (1.9 cm) apart, the tiers form a 5 in (12.7 cm) tree body. The trunk brings the height to 5.5 in (14.0 cm), and the loop brings it to 7 in (17.8 cm).
Check Tier 1 first, keep every center on one line, and block the branch tips well. Then make a whole set for your tree.
Happy crocheting!