

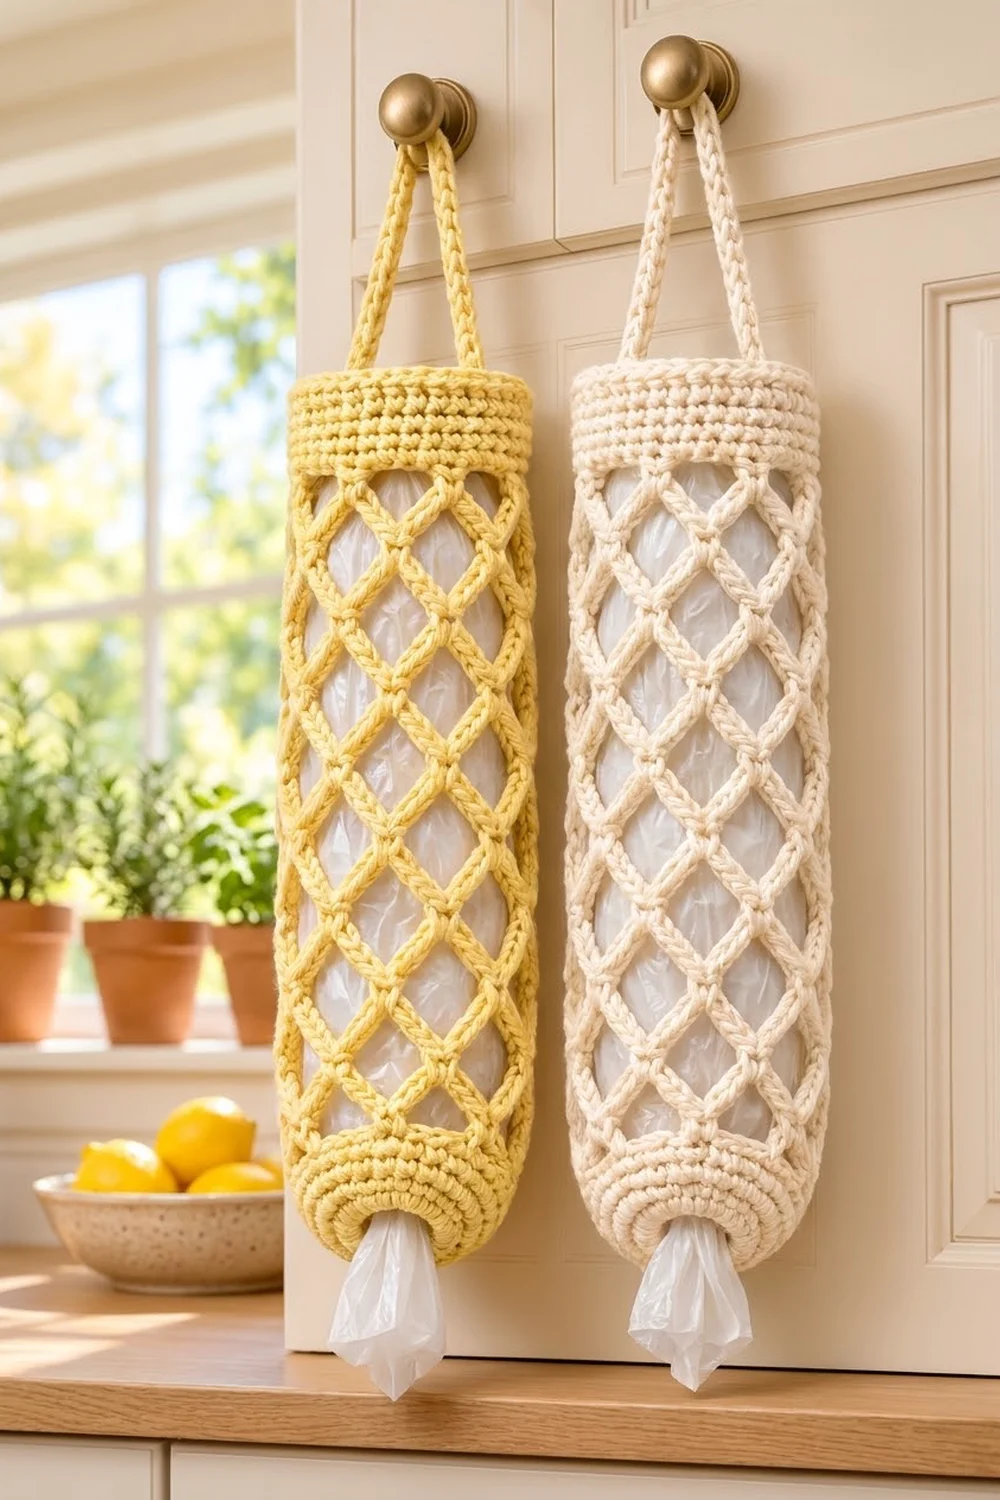
The Buttercup Lattice Plastic Bag Holder is a slim, practical kitchen piece with a cheerful look. Its open diamond mesh lets you see how many bags are left. A solid base and top band keep it neat, and a sturdy strap loops over a cabinet knob or hook.
The sample uses a soft butter-yellow cotton. A cream version looks just as good, and it suits farmhouse and neutral kitchens. Smooth, rounded worsted cotton gives the lattice clear, rope-like definition.
The finished holder measures about 14 1/4 in (36.2 cm) tall and 5.7 in (14.5 cm) wide when flattened. The strap adds an arch of about 4 in (10.2 cm). This pattern uses US crochet terms throughout.
You work everything in one piece from the bottom up. First you make a solid ring-shaped base with a center opening for pulling bags out. Next you work 18 rounds of chain-5 lattice, then convert back to solid single crochet for the top band. The strap is worked straight off the band in rows and sewn to the opposite side.
Finished Size and Construction
- Finished size: 14 1/4 in (36.2 cm) tall x 5.7 in (14.5 cm) wide flat; circumference 11.4 in (29.0 cm)
- Skill level: Easy / advanced beginner
- Terminology: US crochet terms
- Yarn weight: Worsted (#4), 100% cotton or cotton blend
- Hook: 5.0 mm (H-8)
- Number of pieces: 1 (seamless tube plus attached strap)
- Layout: Base ring → lattice body → solid top band → strap arch
- Piece size (body before band): 12 3/4 in (32.4 cm) tall, including the 0.75 in (1.9 cm) base wall
- Band depth: 1.5 in (3.8 cm), 6 rounds
- Strap: 1.1 in (2.8 cm) wide x 9 in (22.9 cm) long
Materials
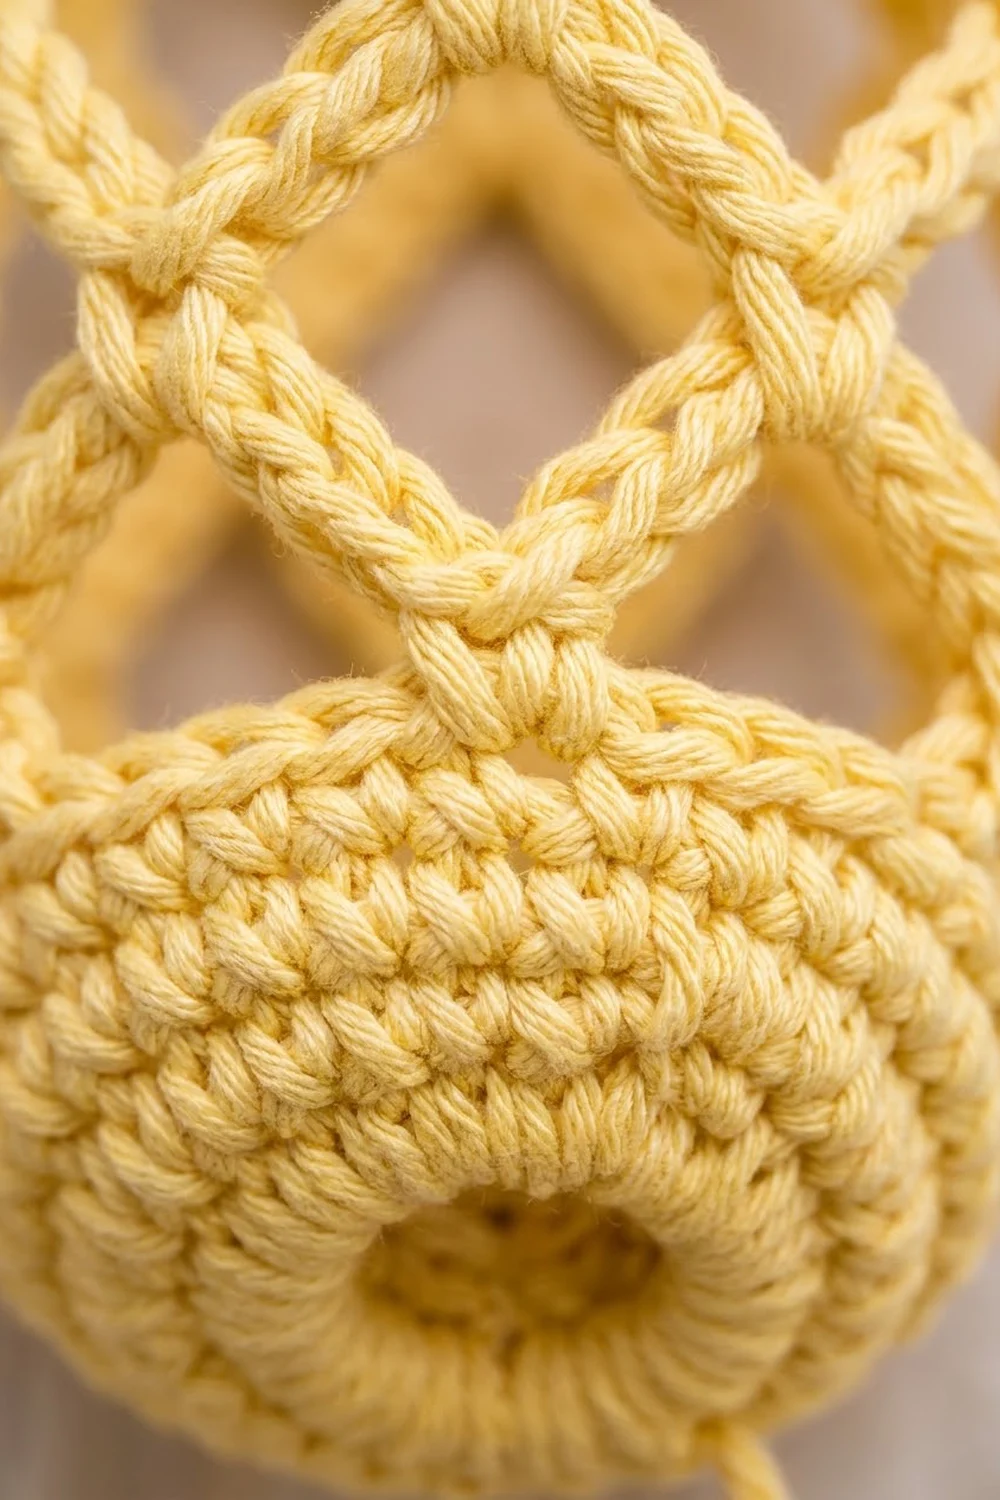
Yarn: Choose a smooth worsted cotton with a rounded, plied or cabled twist. Cotton holds the lattice shape and doesn’t sag much under the weight of the bags. Avoid splitty or fuzzy yarns, because the mesh should read as clean lines.
- Main color, butter yellow: 110 g, about 190 m (208 yd)
- Optional cream colorway: the same amount, 110 g, about 190 m (208 yd), if you want a second holder
These quantities include a margin of about 15% for your gauge swatch and tension differences.
Tools:
- 5.0 mm (H-8) crochet hook
- Locking stitch markers (at least 2)
- Tapestry needle
- Scissors
- Measuring tape
- A 1-liter bottle, rolled towel or cardboard tube about 3.6 in (9.1 cm) across, for blocking
Abbreviations (US Terms)
- ch – chain
- sc – single crochet
- dc – double crochet
- sl st – slip stitch
- sk – skip
- st(s) – stitch(es)
- inc – 2 sc in the same stitch
- rnd – round
- ch-5 loop – the chain-5 space formed in the lattice
Special technique – dc join: At the end of a lattice round, ch 2, then dc in the first sc of the round. Together, the ch 2 and the dc make a loop the same length as a ch-5 loop. They also leave your hook at the center of that loop, ready for the next round.
Gauge and Checkpoints
Solid gauge: 14 sc and 16 rnds = 4 in (10.2 cm). That works out to 3.5 sc per inch and 4 rnds per inch, so each round is 0.25 in (0.6 cm) tall.
Lattice gauge: 3 lattice rounds = 2 in (5.1 cm) tall, measured relaxed and not stretched.
Since this is a single piece, the base works as your test swatch. Make Rnds 1–5, then check it before going on.
Checkpoints:
- After Rnd 5: the flat ring is about 3.6 in (9.1 cm) across, with a center opening of about 1.8 in (4.6 cm).
- After Rnd 8: the base wall stands 0.75 in (1.9 cm), and the tube measures 5.7 in (14.5 cm) flat.
- After Rnd 17 (9 lattice rounds): the lattice is 6 in (15.2 cm) tall, relaxed.
- After Rnd 26: the total height is 12 3/4 in (32.4 cm).
- After Rnd 32: the total height is 14 1/4 in (36.2 cm).
If the base is too big (more than 3.8 in / 9.7 cm across after Rnd 5), go down to a 4.5 mm hook. If it is too small (under 3.4 in / 8.6 cm), go up to a 5.5 mm hook. For a lattice that’s too long, work fewer rounds rather than changing hooks. Each lattice round you remove takes off about 0.67 in (1.7 cm).
Pattern
Base (Solid Ring)
Ch 20, then sl st to the first ch to form a ring, taking care not to twist it. This ring becomes the bag-pulling opening, about 5.7 in (14.5 cm) around.
Rnd 1: Ch 1, sc in each ch around, sl st to the first sc. (20 sts)
Rnd 2: Ch 1, sc in next 3 sts, inc; repeat from * 5 times total, sl st to the first sc. (25 sts)
Rnd 3: Ch 1, sc in next 4 sts, inc; repeat from * 5 times total, sl st to the first sc. (30 sts)
Rnd 4: Ch 1, sc in next 5 sts, inc; repeat from * 5 times total, sl st to the first sc. (35 sts)
Rnd 5: Ch 1, sc in next 6 sts, inc; repeat from * 5 times total, sl st to the first sc. (40 sts)
The ring should lie flat. Each increase round adds 5 sts, about 1.4 in (3.6 cm), which closely matches how much a flat ring grows per 0.25 in round. Check Checkpoint 1 now.
Rnds 6–8: Ch 1, sc in each st around, sl st to the first sc. (40 sts each)
Working even makes the edge turn upward, so the base becomes a shallow cup with a solid wall. Check Checkpoint 2.
Lattice Body
Rnd 9 (set-up): Ch 1, sc in the same st as the join, ch 5, sk 3 sts, sc in next st; repeat from * 8 more times (9 loops made). Ch 2, sk the last 3 sts, then dc in the first sc. (10 loops: 9 ch-5 loops + 1 dc-join loop; 10 sc anchors)
Math check: 10 anchors x 4 sts each (1 sc + 3 skipped) = 40, so every base stitch is used.
Rnds 10–25: Ch 1, sc around the post of the joining dc (this puts the sc in the center of the last loop). Ch 5, sc in next ch-5 loop; repeat from * 8 more times. Ch 2, dc in the first sc. (10 loops each round)
Each sc lands in the middle of a loop from the round below, which staggers the anchors and makes the diamonds. Keep the chains relaxed and even. Check Checkpoint 3 after Rnd 17.
Rnd 26 (closing lattice round): Ch 1, sc around the post of the joining dc. Ch 5, sc in next ch-5 loop; repeat from * 8 more times. Ch 5, sl st to the first sc. (10 full ch-5 loops; 10 sc anchors)
This round ends with a full loop instead of a dc join, so the transition round starts on a clean anchor. The body now has 18 lattice rounds (Rnds 9–26), about 12 in (30.5 cm) relaxed. Check Checkpoint 4.
Border: Top Band and Strap
Border gauge: the band uses the same 14 sc = 4 in (10.2 cm) gauge. With the tube flattened, each side carries 20 sts, which is half of 40. At 3.5 sts per inch, 20 sts measures 5.7 in (14.5 cm). That matches the flat width of the base, so the holder hangs straight instead of flaring or pinching.
Rnd 27 (conversion round): Ch 1, sc in the same st as the join, 3 sc in next ch-5 loop, sc in next sc, 3 sc in next ch-5 loop; repeat from * 8 more times, sl st to the first sc. (40 sts = 10 sts worked 1-per-existing sc + 30 sts worked into the 10 loops)
When flattened, that gives 20 sts per side: 5 anchors + 15 loop sts on each side.
Rnds 28–32: Ch 1, sc in each st around, sl st to the first sc. (40 sts each round; 20 sts per flattened side)
Including Rnd 27, the band is 6 rnds deep, which equals 1.5 in (3.8 cm). Check Checkpoint 5. Don’t fasten off.
Why the math works: The base ends at 40 sts. The lattice splits those 40 sts into 10 groups of 4, and the conversion round puts each group of 4 back exactly: 1 sc on the anchor + 3 sc in the loop. Top and bottom therefore have the same stitch count, and both measure 5.7 in (14.5 cm) flat.
Strap
Place a marker in st 1 of Rnd 32. Place a second marker in st 21, which sits directly opposite.
Row 1: Ch 1, sc in the same st as the join and in the next 3 sts (sts 1–4), turn. (4 sts)
Rows 2–36: Ch 1, sc in each st across, turn. (4 sts each row)
The strap measures 9 in (22.9 cm) long (36 rows ÷ 4 rows per inch) and 1.1 in (2.8 cm) wide. Fasten off, leaving a 12 in (30.5 cm) tail.
Attach: Without twisting the strap, line up its last row with sts 21–24 of Rnd 32, starting at the second marker. Whipstitch the 4 strap sts to those 4 band sts. Go through both loops, and make a second pass for strength. The strap forms an arch about 4 in (10.2 cm) high above the band.
Weave in all ends inside the solid band or base, never through the lattice.
Final Blocking
- Soak the holder in cool water for 10 minutes, then press out the water in a towel. Don’t wring it.
- Slide the holder over a 1-liter bottle, a rolled towel or a cardboard tube about 3.6 in (9.1 cm) across.
- Pull it gently lengthwise until the lattice reaches 12 in (30.5 cm) between the base wall and the band.
- With your fingers, even out the diamonds so each anchor sits centered in its loop.
- Flatten the base ring around the bottom of the form, then lay the strap straight.
- Let it dry completely, which takes about 24 hours. Check that the total height is 14 1/4 in (36.2 cm).
Final Quality-Control Checklist
- Base ring lies flat, with a round opening of about 1.8 in (4.6 cm)
- Exactly 40 sts in Rnds 5–8 and in Rnds 27–32
- 10 loops in every lattice round, with no twisted or doubled loops
- Diamonds line up in straight diagonals around the tube
- Flattened width is 5.7 in (14.5 cm) at both the base and the band
- Strap isn’t twisted and is sewn exactly opposite its starting point
- All ends are woven into the solid sections
Troubleshooting
Base ruffles: Your tension is too loose, or extra increases slipped in. Count to 40 and drop down a hook size.
Base cups before Rnd 6: You’re working too tightly. Go up a hook size, or loosen up on the increase rounds.
Lattice spirals: Your anchors are drifting. Make sure each sc goes into the center of a loop, never into a chain stitch next to the center.
Loop count is wrong: Count the anchors after each round. If you have 9 or 11, rip back to the last round with 10.
Band flares: You may have worked 4 sc into some loops. The conversion round must use exactly 3 sc per loop.
Strap stretches over time: Add a row of sl sts along both long edges to firm it up.
Care
Hand wash or machine wash on gentle in cool water, then reshape over your blocking form and lay flat to dry. Avoid hot tumble drying, because it can shrink the cotton and tighten the lattice.
Final Notes
Everything in this pattern follows one measurement chain. The 40-st base measures 5.7 in (14.5 cm) flat. The lattice splits those 40 sts into 10 groups of 4 and grows to 12 in (30.5 cm) over 18 rounds. The conversion round brings the count back to exactly 40 sts, so the 1.5 in (3.8 cm) band matches the base width. Altogether the holder stands 14 1/4 in (36.2 cm) tall, with a 9 in (22.9 cm) strap arching over the top. If you check each point along the way, the holder will hang straight and hold plenty of bags.
Happy crocheting!