
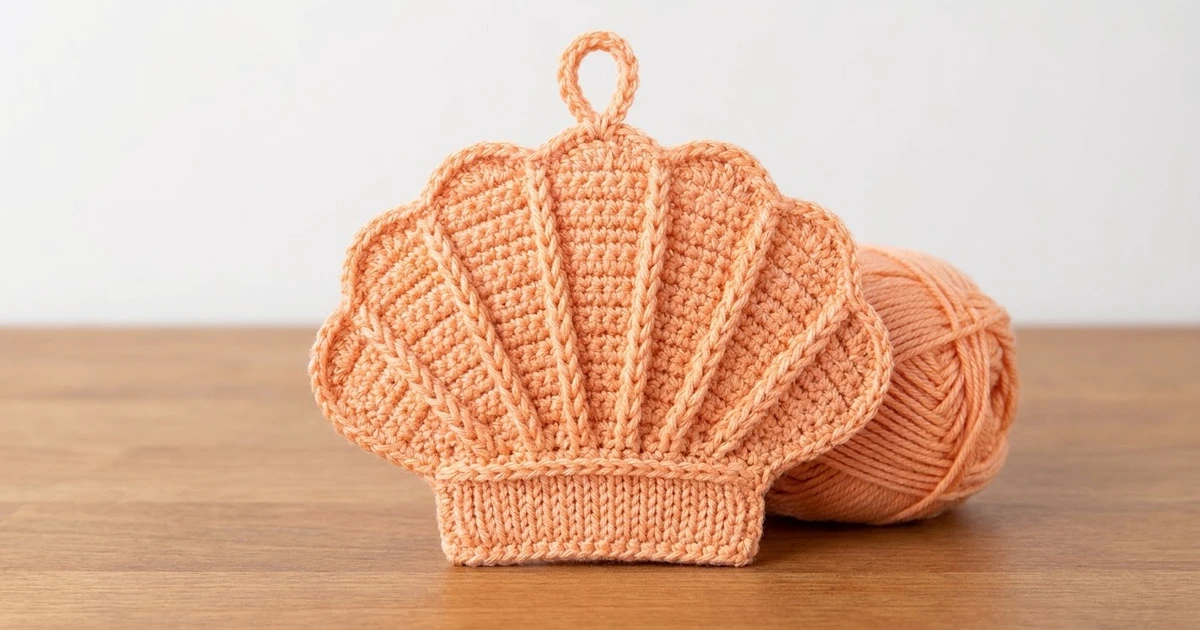
This little scallop shell ornament is a single flat piece in soft peach. Six raised ribs fan out from a ribbed hinge at the base. A row of rounded scallops finishes the top, and a slip-stitched outline makes the edge crisp. A sturdy chain loop at the top center lets it hang from a tree branch, a gift bag or a window hook.
The design is all one color, which keeps it calm and lets the ribs and scallops show. Peach, coral, sand, ivory and pale aqua all suit a seaside look. Hung on a Christmas tree, it makes a cozy coastal ornament.
The pattern uses US crochet terms. The finished shell is about 4.5 in (11.4 cm) wide and 3.3 in (8.4 cm) tall, not counting the loop, which adds about 1.5 in (3.8 cm).
The shell is worked flat in turned rows, starting at the hinge. Each row adds 7 stitches, which keeps the fan lying flat. The ribs are front- and back-post double crochets stacked over each other. A scallop row and an outline round form the border, and the loop is added last.
Finished Size and Construction
- Finished size: 4.5 in (11.4 cm) wide × 3.3 in (8.4 cm) tall, plus 1.5 in (3.8 cm) loop
- Skill level: Easy-intermediate (post stitches, shaping in rows)
- Terminology: US crochet terms
- Yarn weight: DK (light worsted, #3)
- Hook: 3.5 mm (E-4)
- Number of pieces: 1
- Layout: Single fan-shaped motif; 7 panels separated by 6 raised ribs
- Piece size before border: 4 in (10.2 cm) wide × 2.6 in (6.6 cm) tall
- Border depth: about 0.5 in (1.3 cm) at the scallop tips, 0.25 in (0.6 cm) at the sides, 0.2 in (0.5 cm) at the base
Materials
Yarn: A smooth DK yarn shows the ribs best. Cotton or a cotton blend gives crisp stitch lines and holds its shape well as an ornament. Soft acrylic works too and is easier on the hands. Avoid fuzzy or very splitty yarns, because they hide the post-stitch ribs.
- Peach (main and only color): 12 g, about 29 m (32 yd)
These quantities include a margin for a gauge swatch, weaving in ends and the hanging loop. One shell uses about 9 g.
Tools:
- 3.5 mm (E-4) crochet hook
- Tapestry needle
- Scissors
- 2 locking stitch markers
- Ruler or tape measure
- Blocking mat and rust-proof pins
- Spray bottle with water
Abbreviations (US Terms)
- ch – chain
- sl st – slip stitch
- sc – single crochet
- dc – double crochet
- FLO – front loop only
- BLO – back loop only
- FPdc – front post double crochet
- BPdc – back post double crochet
- st(s) – stitch(es)
- RS / WS – right side / wrong side
- rep – repeat
Special stitches:
- FPdc: Yarn over and insert the hook from front to back to front around the post of the stated stitch. Yarn over and pull up a loop, then (yarn over, pull through 2 loops) twice.
- BPdc: Yarn over and insert the hook from back to front to back around the post of the stated stitch. Finish like a dc.
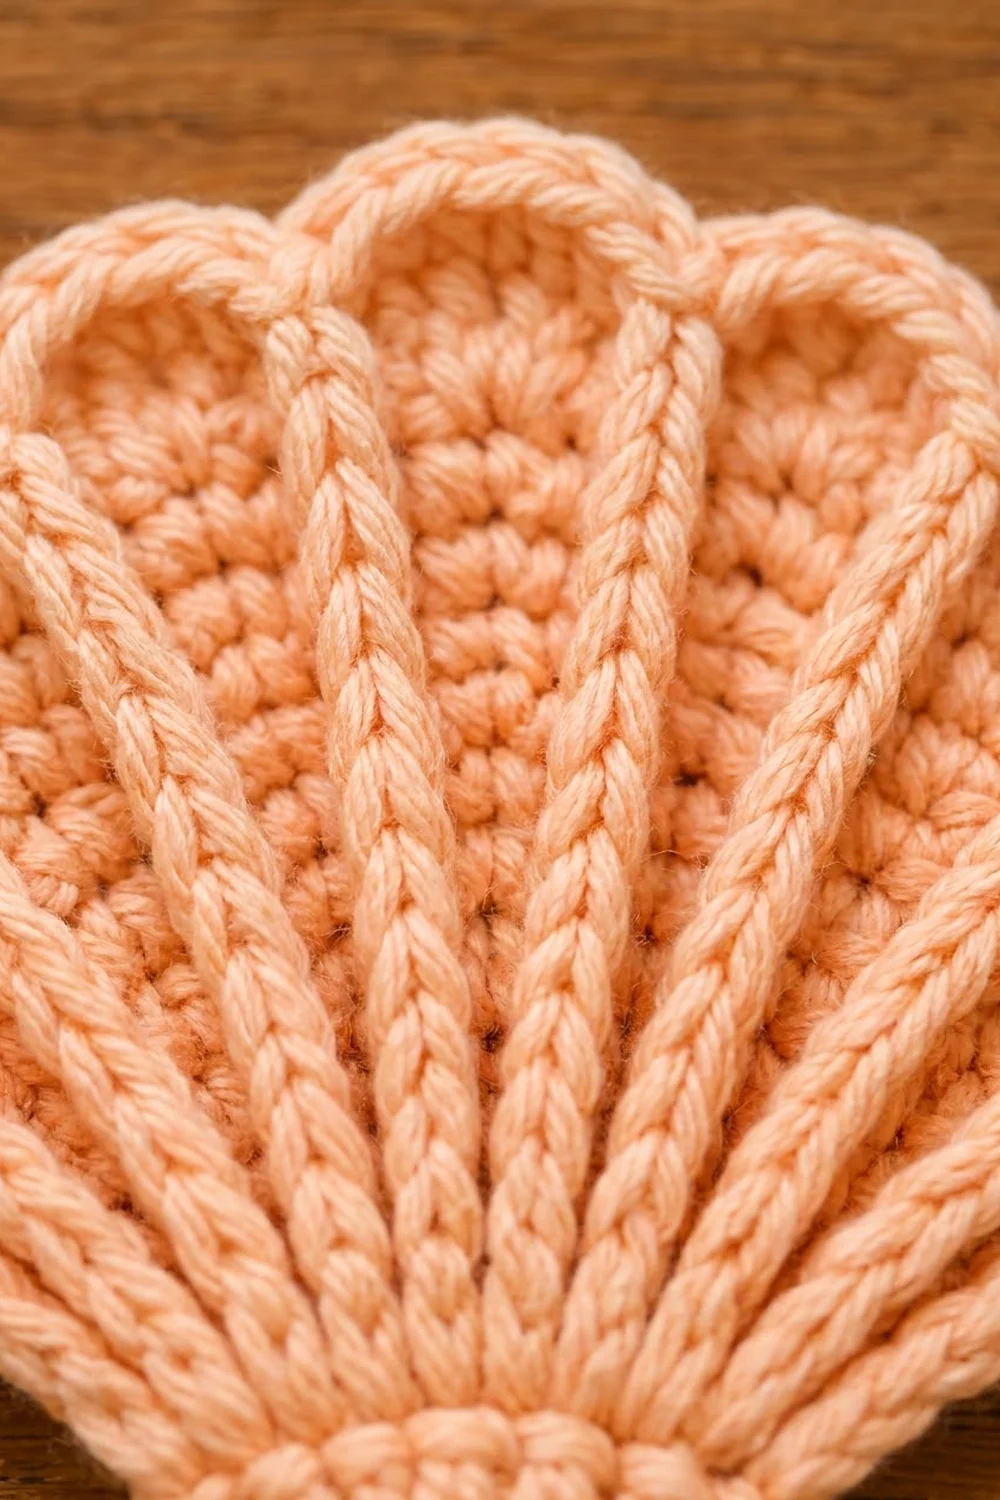
On RS rows the ribs are FPdc, and on WS rows they are BPdc. Both push the rib toward the RS, so all six ribs stand up on the front of the shell.
The beginning ch-3 counts as a dc throughout.
Gauge and Checkpoints
Gauge: 22 dc and 10 rows = 4 in (10.2 cm) in plain dc. That works out to 5.5 dc per inch, with each dc row about 0.4 in (1.0 cm) tall.
The shell is small, so the shell itself makes a good swatch. Make one shell, check it against the checkpoints below, and adjust before making more.
Checkpoints:
- After Row 1: strip measures 1.6 in (4.1 cm) wide × 0.4 in (1.0 cm) tall.
- After Row 2: total height 0.6 in (1.5 cm).
- After Row 4: total height 1.4 in (3.6 cm); fan about 2.75 in (7.0 cm) wide.
- After Row 7 (before border): 2.6 in (6.6 cm) tall × 4 in (10.2 cm) wide.
- Finished: 3.3 in (8.4 cm) tall × 4.5 in (11.4 cm) wide.
If your piece is too big, go down to a 3.25 mm (D-3) hook. If it is too small, go up to a 3.75 mm (F-5) hook. If the fan cups or curls up, your increase rows are tight, so go up a hook size or relax your tension. If it ruffles, go down a hook size.
Shell Pattern
Hinge Band
Row 1 (RS): Ch 11. Dc in the 4th ch from the hook and in each ch across. Skipped ch-3 counts as a dc. (9 sts)
These short dc posts form the vertical ribbing of the hinge band.
Row 2 (WS): Turn. Working in FLO only: ch 1, sc in the first st, [2 sc in the next st, sc in the next st] 4 times. (13 sts)
Working in FLO on a WS row leaves the back loops free on the RS. Those loops make the horizontal ridge line that separates the hinge from the fan.
Place a marker in this row to mark the RS. Check your measurements now: 1.6 in (4.1 cm) across and 0.6 in (1.5 cm) tall.
Fan Body
In every row from here on, the panels are dc stitches and the ribs are post stitches. You increase only inside the panels and never on a rib, so each rib stays one stitch wide and stays straight.
Row 3 (RS): Turn. Ch 3 (counts as first dc), FPdc around the next st, dc in the next st; rep from * 5 more times. (13 sts: 7 panels of 1 dc and 6 FPdc ribs)*
Row 4 (WS): Turn. Ch 3, dc in the same st. BPdc around the next FPdc, 2 dc in the next dc; rep from * 5 more times. (20 sts: 7 panels of 2 dc and 6 ribs)*
Row 5 (RS): Turn. Ch 3, dc in the same st, dc in the next st. FPdc around the next BPdc, 2 dc in the next st, dc in the next st; rep from * 5 more times. (27 sts: 7 panels of 3 dc and 6 ribs)*
Checkpoint: 1.8 in (4.6 cm) tall from the base. The fan should lie flat, with the ribs fanning out evenly.
Row 6 (WS): Turn. Ch 3, dc in the same st, dc in the next 2 sts. BPdc around the next FPdc, 2 dc in the next st, dc in the next 2 sts; rep from * 5 more times. (34 sts: 7 panels of 4 dc and 6 ribs)*
Row 7 (RS): Turn. Ch 3, dc in the same st, dc in the next 3 sts. FPdc around the next BPdc, 2 dc in the next st, dc in the next 3 sts; rep from * 5 more times. (41 sts: 7 panels of 5 dc and 6 ribs)*
Check the math: 7 panels × 5 dc = 35, plus 6 ribs = 41. Each row added exactly 7 sts, one per panel.
Checkpoint before border: 2.6 in (6.6 cm) tall and 4 in (10.2 cm) across the widest point. Do not fasten off.
Border
Border gauge: Along the row ends, work 5 sc per inch. That means 2 sc per dc row-end (0.4 in / 1.0 cm) and 1 sc per sc row-end (0.2 in / 0.5 cm). This rate matches the row heights, so the sides stay flat without flaring or pulling in.
Row 8 – Scallops (WS)
Turn. Ch 1.
First panel: sc in the first st, skip 1 st, 5 dc in the next st, skip 1 st, sc in the next st.
*Rib: sl st in the top of the next rib st.
Next panel: sc in the next st, skip 1 st, 5 dc in the next st, skip 1 st, sc in the next st. Rep from * 5 more times.
Count: each panel = 1 sc + 5 dc + 1 sc = 7 sts, and 7 panels × 7 = 49. Add 6 rib sl sts for 55 sts.
Why it works: each scallop uses exactly the 5 sts of one panel (sc, skip, shell, skip, sc). The 5-dc shell is centered on the 3rd st of the panel. The sl st on each rib pulls the edge down into a dip between lobes, so every rib runs straight into a valley, just like a real scallop shell.
Round 9 – Outline (RS)
Turn so the RS faces you. This round outlines the whole shell.
- Top edge: Ch 1. Working loosely, sl st in each of the 55 sts across the scallop row. (55 sl sts)
- First side: Rotate to work down the row ends. Work 1 sc in the end of Row 8, 2 sc in the end of each of Rows 7, 6, 5, 4 and 3, 1 sc in the end of Row 2, and 2 sc in the end of Row 1. (14 sc)
- Base: Working into the bottom of the 9 Row 1 sts (opposite side of the foundation chain): 3 sc at the base of the first st, sc at the base of the next 7 sts, 3 sc at the base of the last st. (13 sc: 9 sts + 2 extra per corner)
- Second side: Work up the other side to match the first: 2 sc in Row 1, 1 sc in Row 2, 2 sc in each of Rows 3–7, and 1 sc in Row 8. (14 sc)
- Join with a sl st to the first sl st of the round.
Round total: 55 + 14 + 13 + 14 = 96 sts.
Why the math works:
- Sides: 1 + 10 + 1 + 2 = 14 sc for 2.8 in (7.1 cm) of side, which is exactly 5 sc per inch. The two corner sc are counted in the base, not the sides, so no corner is counted twice.
- Base: The 3-sc groups turn each bottom corner neatly without cupping.
- Top: The sl sts sit on the scallops, so the outline adds a crisp edge without making the lobes bigger.
Fasten off, leaving a 6 in (15.2 cm) tail.
Hanging Loop
- With the RS facing, find the 3rd dc of the center (4th) scallop.
- Join the yarn there with a sl st, leaving an 8 in (20.3 cm) tail.
- Ch 22. Sl st into the same st to close the loop.
- Sl st loosely into each of the 22 ch around the loop. This gives the loop its braided look and stops it from stretching.
- Sl st into the base st and fasten off.
The loop stands about 1.5 in (3.8 cm) tall. Weave the tails through the top of the center scallop and back again to anchor the loop firmly.
Final Blocking
- Weave in all ends along the outline round, inside the fabric, so they don’t show on the RS.
- Mist the shell evenly with water until it is damp, but not dripping.
- Lay it RS up on the blocking mat.
- Pin the base first: a straight 1.75 in (4.4 cm) line along the hinge.
- Pin the outer edge of the fan to 4.5 in (11.4 cm) wide and 3.3 in (8.4 cm) tall.
- Put one pin in the dip at the end of each rib. Ease each scallop into a round lobe with your fingertips.
- Run a finger along each rib to straighten it and lift it slightly.
- Leave the shell to dry completely before you remove the pins.
- For a stiffer ornament, you can brush on a thin layer of diluted fabric stiffener while it is still pinned.
Final Quality-Control Checklist
- [ ] Row 7 ends with 41 sts: 7 panels of 5 dc and 6 ribs
- [ ] All six ribs stand on the RS and run straight from the hinge to a scallop dip
- [ ] Seven even scallops, each with a 5-dc shell
- [ ] The hinge ridge line is visible on the RS
- [ ] Outline round counts 96 sts; sides have 14 sc each
- [ ] The shell lies flat without cupping or ruffling
- [ ] Size is 4.5 in (11.4 cm) × 3.3 in (8.4 cm)
- [ ] The loop is centered and secure, and about 1.5 in (3.8 cm) tall
- [ ] No ends show on the RS
Troubleshooting
Ribs show on the back on some rows. You used FPdc on a WS row, or the other way round. Use FPdc on RS rows (odd rows) and BPdc on WS rows (even rows).
Ribs drift or wander. You increased next to a rib in the wrong place. The 2-dc increase always goes in the first panel st after a rib.
Fan cups. Your dc are tight. Go up a hook size or pull up taller loops.
Fan ruffles. Your gauge is loose. Go down a hook size.
Scallops are uneven. Count 5 sts per panel before working Row 8, and make sure each shell lands on the 3rd st of its panel.
Sides flare. You worked more than 2 sc per dc row-end. Stick to the 14-sc count.
Loop stretches. Don’t skip the slip-stitched return along the chain.
Care
Hand wash in cool water with mild soap, press out the water in a towel, and reshape while damp. Store flat or hanging so the scallops keep their curve.

Final Notes
Each stage builds on the one before it:
- The hinge measures 1.6 in (4.1 cm).
- Each fan row adds 7 sts, one per panel: 13, 20, 27, 34 and finally 41 sts.
- That brings the fan to 4 in (10.2 cm) × 2.6 in (6.6 cm).
- The scallop row turns the 41 sts into 55 sts of lobes and dips.
- The 96-st outline brings the shell to 4.5 in (11.4 cm) × 3.3 in (8.4 cm).
If your measurements match at each checkpoint, the finished shell will match too. Make one in peach for the tree, then try sand or aqua for a whole beach of them.
Happy crocheting!