
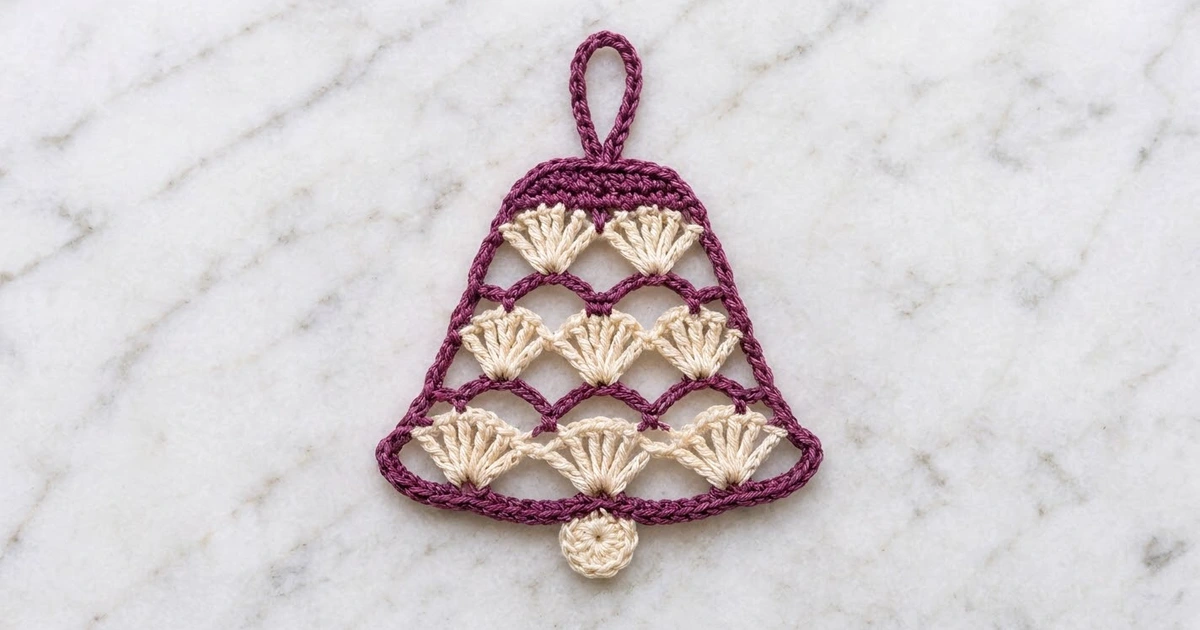
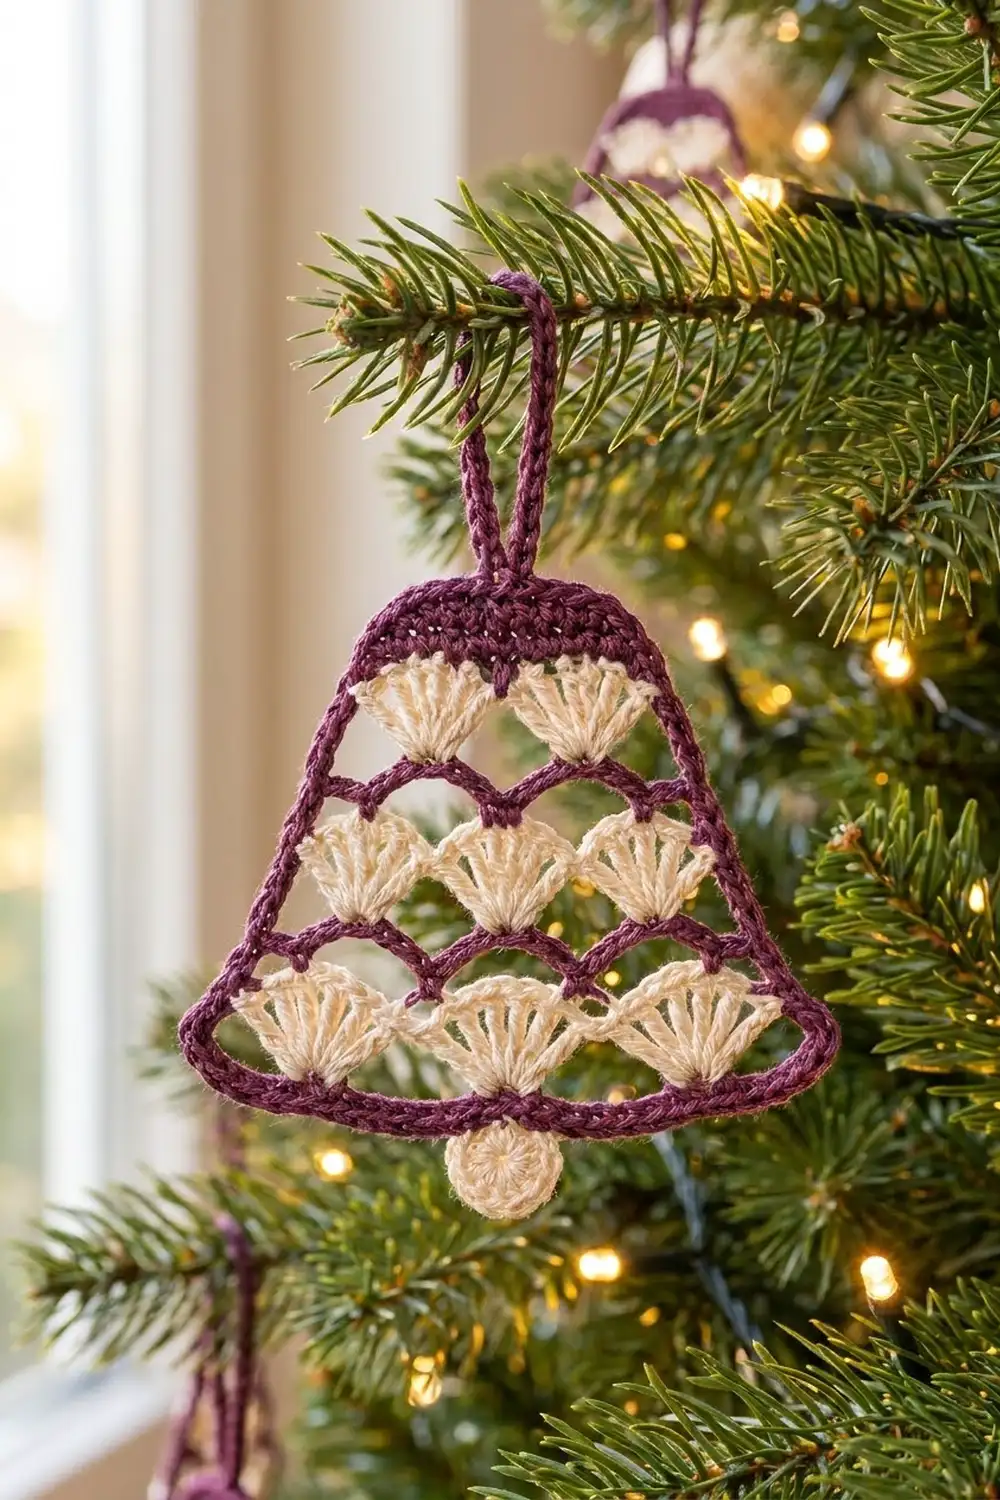
This Plum Lace Shell Bell is a flat, lacy Christmas ornament with a classic bell shape. Rows of cream shells sit inside a deep plum frame, with airy chain arches between them, so the tree lights glow through the open spaces.
There are two colors. Plum is used for the outline, arches, top band and hanging loop. Cream is used for the shells and the round clapper. The look is traditional and a little vintage, like a lace doily shaped into a bell.
The pattern uses US crochet terms. The finished bell body measures 4 in (10.2 cm) wide at the bottom and 3.5 in (8.9 cm) tall. With the loop and clapper, the full ornament is about 5.25 in (13.3 cm) tall.
You work the bell flat in rows from the bottom edge up. In the lace section you change color every row, and a solid plum band finishes the top. A two-round border outlines the whole shape. You make the small loop and the cream clapper separately and sew them on.
Finished Size and Construction
- Finished size: 4 in (10.2 cm) wide x 3.5 in (8.9 cm) tall (bell body); about 5.25 in (13.3 cm) tall including loop and clapper
- Skill level: Easy-intermediate
- Terminology: US crochet terms
- Yarn weight: Size 3 mercerized cotton crochet thread (fine, close to fingering weight)
- Hook: 2.25 mm (US B-1)
- Number of pieces: 1 bell ornament (one bell body, plus a hanging loop and a clapper sewn on)
- Layout: Single piece, no joining
- Bell body before border: 3.5 in (8.9 cm) wide at the bottom x 3 in (7.6 cm) tall
- Border depth: 0.25 in (0.6 cm) on every edge
- Top band after border: about 2.5 in (6.4 cm) wide
Materials
Choose a smooth, mercerized cotton thread. It gives crisp shells, clear stitches and a firm edge that holds its shape on the tree. Avoid fuzzy or very soft yarns because they blur the lace.
- Plum (Color A): 10 g, about 40 m (44 yd)
- Cream (Color B): 6 g, about 24 m (26 yd)
These amounts include extra for swatching and weaving in ends. One ball of each color will make several bells.
Tools:
- 2.25 mm (US B-1) crochet hook
- Tapestry needle
- Scissors
- Rust-proof pins and a foam blocking mat
- Spray bottle with water
- Optional: liquid starch or fabric stiffener
Abbreviations (US Terms)
- ch – chain
- sl st – slip stitch
- sc – single crochet
- dc – double crochet
- sk – skip
- sp – space
- st(s) – stitch(es)
- rev sc – reverse single crochet
- RS / WS – right side / wrong side
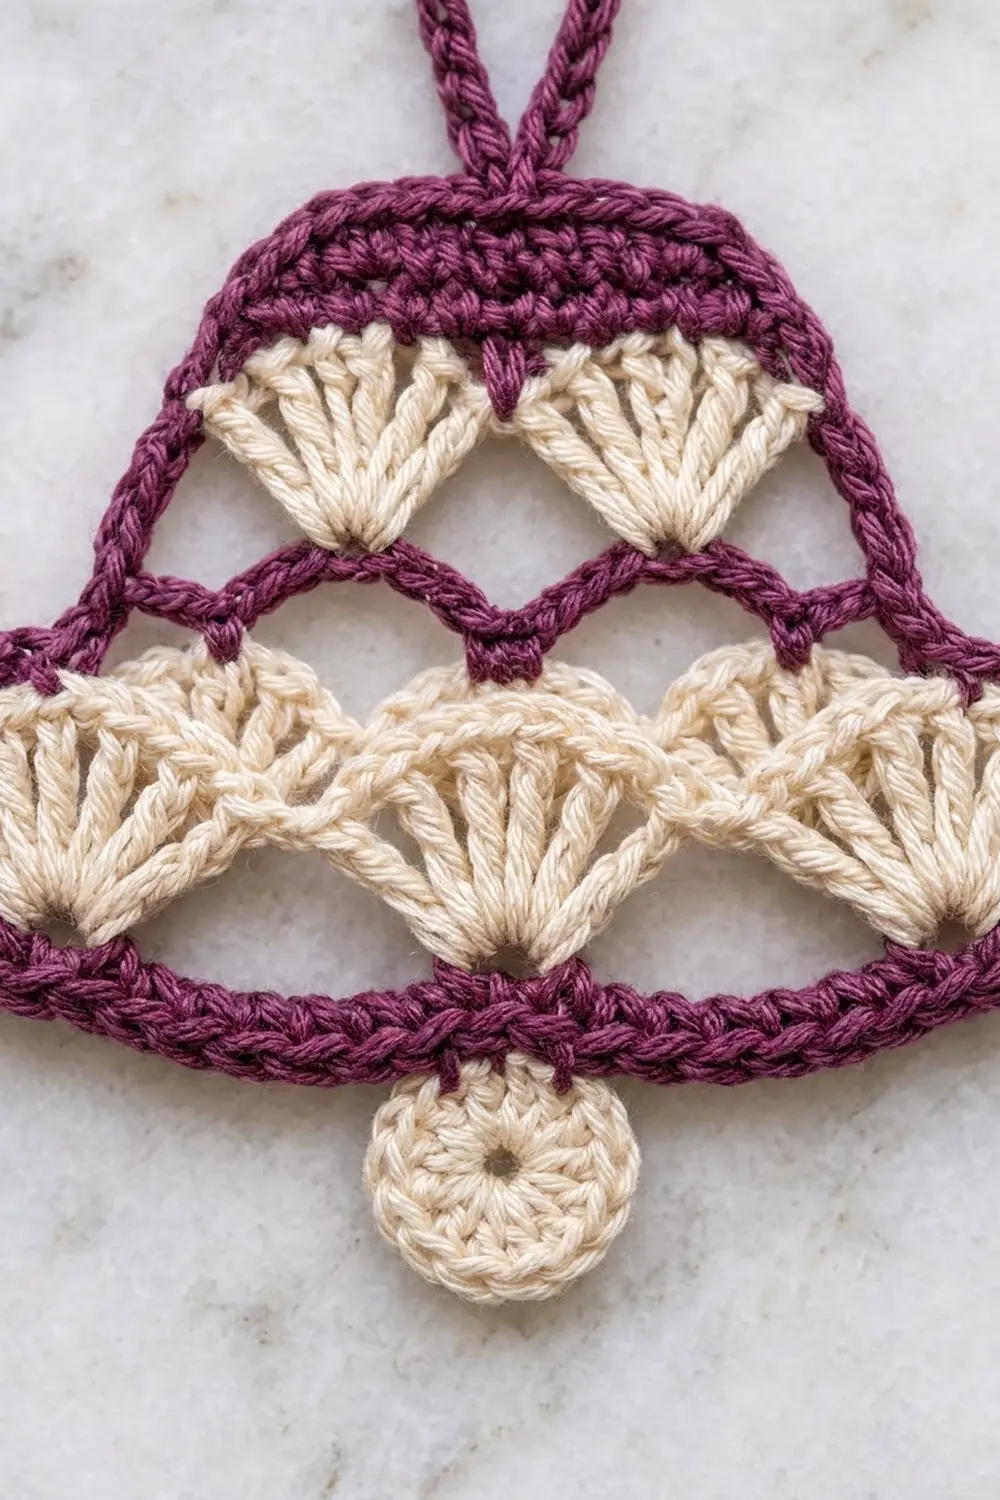
Shell: 7 dc worked in the same stitch or space. The 4th dc is the center of the shell.
Reverse single crochet (rev sc): Work from left to right. Insert the hook into the next stitch to the right, yarn over and pull up a loop, then yarn over and pull through both loops. This makes the twisted, rope-like edge.
Gauge and Checkpoints
Gauge: 7 sc and 8 sc rows = 1 in (2.5 cm). One shell is about 1.1 in (2.8 cm) wide and 0.5 in (1.3 cm) tall.
Make one full bell before you plan a batch. Gauge errors show up quickly on small ornaments, and the checkpoints below help you catch them early.
Checkpoints:
- After Row 1: the foundation is 3.5 in (8.9 cm) wide.
- After Row 6: the piece is about 2.25 in (5.7 cm) tall.
- After Row 7: about 2.5 in (6.4 cm) tall.
- After Row 11: 3 in (7.6 cm) tall; top band about 2 in (5.1 cm) wide.
- After the border: 4 in (10.2 cm) wide x 3.5 in (8.9 cm) tall.
If your bell is too big: go down to a 2 mm hook, or make each arch chain one chain shorter.
If your bell is too small: go up to a 2.5 mm hook. Do not add shells, because the shell counts set the bell shape.
Bell Body
Work Rows 1 to 7 with the RS facing, from right to left. Fasten off at the end of each row and join the next color at the right-hand edge. Leave 4 in (10.2 cm) tails and weave them in as you go to keep the edges tidy.
Row 1 (Plum): Ch 26. Sc in 2nd ch from hook and in each ch across. Fasten off. (25 sc)
This row is the bottom edge of the bell. You will work the border into its free loops later.
Row 2 (Cream): With RS facing, join Cream with a sl st in the first sc. Ch 1, sc in the same st, sk 3 sts, shell in next st, sk 3 sts, sc in next st; repeat from * 2 more times. Fasten off. (3 shells, 4 sc = 25 sts)
The shells sit in sc 5, 13 and 21. They are evenly spaced, with an sc anchor between each pair.
Row 3 (Plum arches): Join Plum with a sl st in the first sc. Ch 1, sc in the same st, ch 4, sc in the 4th dc of the next shell, ch 4, sc in the next sc; repeat from * 2 more times. Fasten off. (7 sc, 6 ch-4 sps)
Each shell now has a plum point at its center, with an arch on each side.
Row 4 (Cream): Join Cream with a sl st in the first ch-4 sp. Ch 1, sc in the same sp, shell in the next sc (center of the shell below), sc in the next ch-4 sp, sk the next sc, sc in the next ch-4 sp, shell in the next sc, sc in the next ch-4 sp; repeat from * once more. Fasten off. (3 shells, 6 sc = 27 sts)
Leave the first and last sc of Row 3 unworked. They become part of the side outline. The middle shells sit directly above the bottom shells.
Row 5 (Plum arches): Join Plum with a sl st in the first sc. Ch 1, sc in the same st, ch 4, sc in the 4th dc of the first shell, ch 5, sc in the 4th dc of the next shell, ch 5, sc in the 4th dc of the last shell, ch 4, sc in the last sc. Fasten off. (5 sc, 2 ch-4 sps, 2 ch-5 sps)
The longer ch-5 arches span the gaps between the middle shells. The top shells will sit in them.
Row 6 (Cream): Join Cream with a sl st in the 2nd sc of Row 5 (the sc on the center of the first shell). Ch 1, sc in the same st, shell in the next ch-5 sp, sc in the next sc, shell in the next ch-5 sp, sc in the next sc. Fasten off. (2 shells, 3 sc = 17 sts)
Leave the two ch-4 sps at the ends unworked. This step-in narrows the bell. Check the height: about 2.25 in (5.7 cm).
Row 7 (Plum arches): Join Plum with a sl st in the first sc. Ch 1, sc in the same st, ch 3, sc in the 4th dc of the next shell, ch 3, sc in the center sc, ch 3, sc in the 4th dc of the next shell, ch 3, sc in the last sc. Do not fasten off. (5 sc, 4 ch-3 sps)
Row 8 (Plum, conversion row): Ch 1, turn. Sc in the first sc, 2 sc in the next ch-3 sp, sc in the next sc; repeat from * 3 more times. (5 sc worked 1-per-sc + 8 sc worked into spaces = 13 sc)
Rows 9–11 (Plum): Ch 1, turn, sc in each st across. (13 sc)
Fasten off after Row 11, which is a RS row. The solid plum band at the top is now 4 rows deep. Check that the body is 3 in (7.6 cm) tall, 3.5 in (8.9 cm) wide at the bottom and about 2 in (5.1 cm) wide across the top band.
Border
Border gauge: The border uses the same 7 sc = 1 in (2.5 cm) gauge. The two rounds add 0.25 in (0.6 cm) to every edge.
Work all border rounds in Plum with the RS facing.
Round 1 (sc): With RS facing, join Plum with a sl st in the first st of Row 11 (top right corner).
- Top edge: Ch 1, 3 sc in the first st (corner), sc in the next 11 sts, 3 sc in the last st (corner). (17 sc, including both corner groups)
- Left side (top to bottom), working into row ends:
- 1 sc in each row end of Rows 11–8 (4 sc)
- 2 sc around the end of Row 7
- 3 sc around the end sc and first dc post of Row 6
- 3 sc around the ch-4 of Row 5
- 3 sc around the end of Row 4
- 2 sc around the exposed end sc and ch-4 of Row 3
- 3 sc around the end of Row 2
- 1 sc in the row end of Row 1
(21 sc)
– Bottom edge, working in the free loops of the foundation ch: 3 sc in the first free loop (corner), sc in the next 23 free loops, 3 sc in the last free loop (corner). (29 sc, including both corner groups)
– Right side (bottom to top): Use the left side’s placements in reverse order: 1 sc in Row 1, 3 sc around Row 2, 2 sc around Row 3, 3 sc around Row 4, 3 sc around Row 5, 3 sc around Row 6, 2 sc around Row 7, then 1 sc in each row end of Rows 8–11. (21 sc)
Join with a sl st to the first sc. (88 sc total: 17 + 21 + 29 + 21)
Round 2 (rev sc): Ch 1, do not turn. Rev sc in each sc around. Join with a sl st to the first rev sc and fasten off. (88 rev sc)
Why the math works:
- Top edge: 13 sts plus 2 extra sc in each 3-sc corner group, so 13 + 4 = 17.
- Bottom edge: 25 free loops plus the same 4 corner extras, so 25 + 4 = 29.
- Corners: counted once, inside the top and bottom totals, and never again on the sides.
- Sides: each slanted side is about 3 in (7.6 cm) long, and 21 sc at 7 sc per inch fills exactly 3 in (7.6 cm). The edge lies flat without ruffling or cupping.
- Flare: the 3-sc corners at the bottom form the small flared points of the bell.
Hanging Loop
With Plum: Ch 20. Sc in 2nd ch from hook and in each ch across. (19 sc)
Fasten off, leaving a 6 in (15.2 cm) tail. The strip is about 2.75 in (7.0 cm) long. Fold it in half and sew both ends to the center of the top edge on the WS, so the loop stands about 1.25 in (3.2 cm) above the bell.
Clapper
With Cream: Make a magic ring.
Round 1: Ch 1, 8 sc in the ring. Pull the ring nearly closed, leaving a small hole in the center. Join with a sl st to the first sc. (8 sc)
Round 2: Ch 1, 2 sc in each st around. Join with a sl st to the first sc. (16 sc)
Fasten off, leaving a 6 in (15.2 cm) tail. The clapper is 0.75 in (1.9 cm) across. Center it below the bottom edge so the top third sits behind the border and the rest hangs about 0.5 in (1.3 cm) below the bell. Sew it on from the WS.
Final Blocking
- Weave in all remaining ends through stitches of the same color.
- Mist the ornament lightly with water until it is damp, not soaked.
- Lay it RS up on a blocking mat.
- Pin the bottom edge straight at 4 in (10.2 cm), with one pin in each flared corner point.
- Pin the top corners so the band is about 2.5 in (6.4 cm) wide and the body is 3.5 in (8.9 cm) tall.
- Pin each chain arch into a smooth curve and open each shell into an even fan.
- Optional: brush on diluted starch for a stiffer ornament.
- Let it dry completely before you unpin it, usually 6–8 hours.
Final Quality-Control Checklist
- The bell body is 4 in (10.2 cm) wide x 3.5 in (8.9 cm) tall.
- The bottom row has 3 shells, the middle row 3 shells and the top row 2 shells.
- The middle shells sit directly above the bottom shells, and the top shells sit between the middle shells.
- All arches are even and curve upward.
- The top plum band is 4 sc rows deep with 13 sts.
- Border Round 1 has 88 sc and Round 2 has 88 rev sc.
- The sides are straight lines, not wavy.
- The loop is centered and firmly attached.
- The clapper is centered and its center hole is visible.
- No tails show on the RS.
Troubleshooting
Shells curl or cup: Your dc are too tight. Go up one hook size for the cream rows only.
Arches sag below the shells: Your chains are too loose. Use one fewer chain, or work the chains with a smaller hook.
Sides ripple after the border: There are too many sc on the sides. Work 1 fewer sc at Rows 4 and 2 on each side.
Sides pull inward: There are too few sc. Add 1 sc at Rows 5 and 6 on each side.
Top band is wider than 2 in (5.1 cm): Check that Row 8 has exactly 13 sc and that you did not work 2 sc in the end sc.
Rev sc edge looks loose: Keep the loops short and snug, because rev sc tends to grow if worked loosely.
Color tails show through the lace: Weave each tail only through stitches of its own color.
Care
Hand wash in cool water with mild soap, press out the water in a towel and dry flat, pinned to shape. Re-starch if needed and store flat between sheets of tissue paper.
Final Notes
The measurements build in a short chain that is easy to track:
- Row 1 sets the width at 3.5 in (8.9 cm) with 25 sc.
- Rows 2–6 build three tiers of shells to about 2.25 in (5.7 cm) tall.
- Row 7 brings the height to 2.5 in (6.4 cm), and the 13-st plum band brings the body to 3 in (7.6 cm).
- The 88-st border adds 0.25 in (0.6 cm) on every edge, for a finished bell of 4 in (10.2 cm) x 3.5 in (8.9 cm).
- The loop and clapper complete an ornament 5.25 in (13.3 cm) tall.
Make one bell, check it against the checkpoints, then make a whole set for your tree or for gift toppers.
Happy crocheting!