

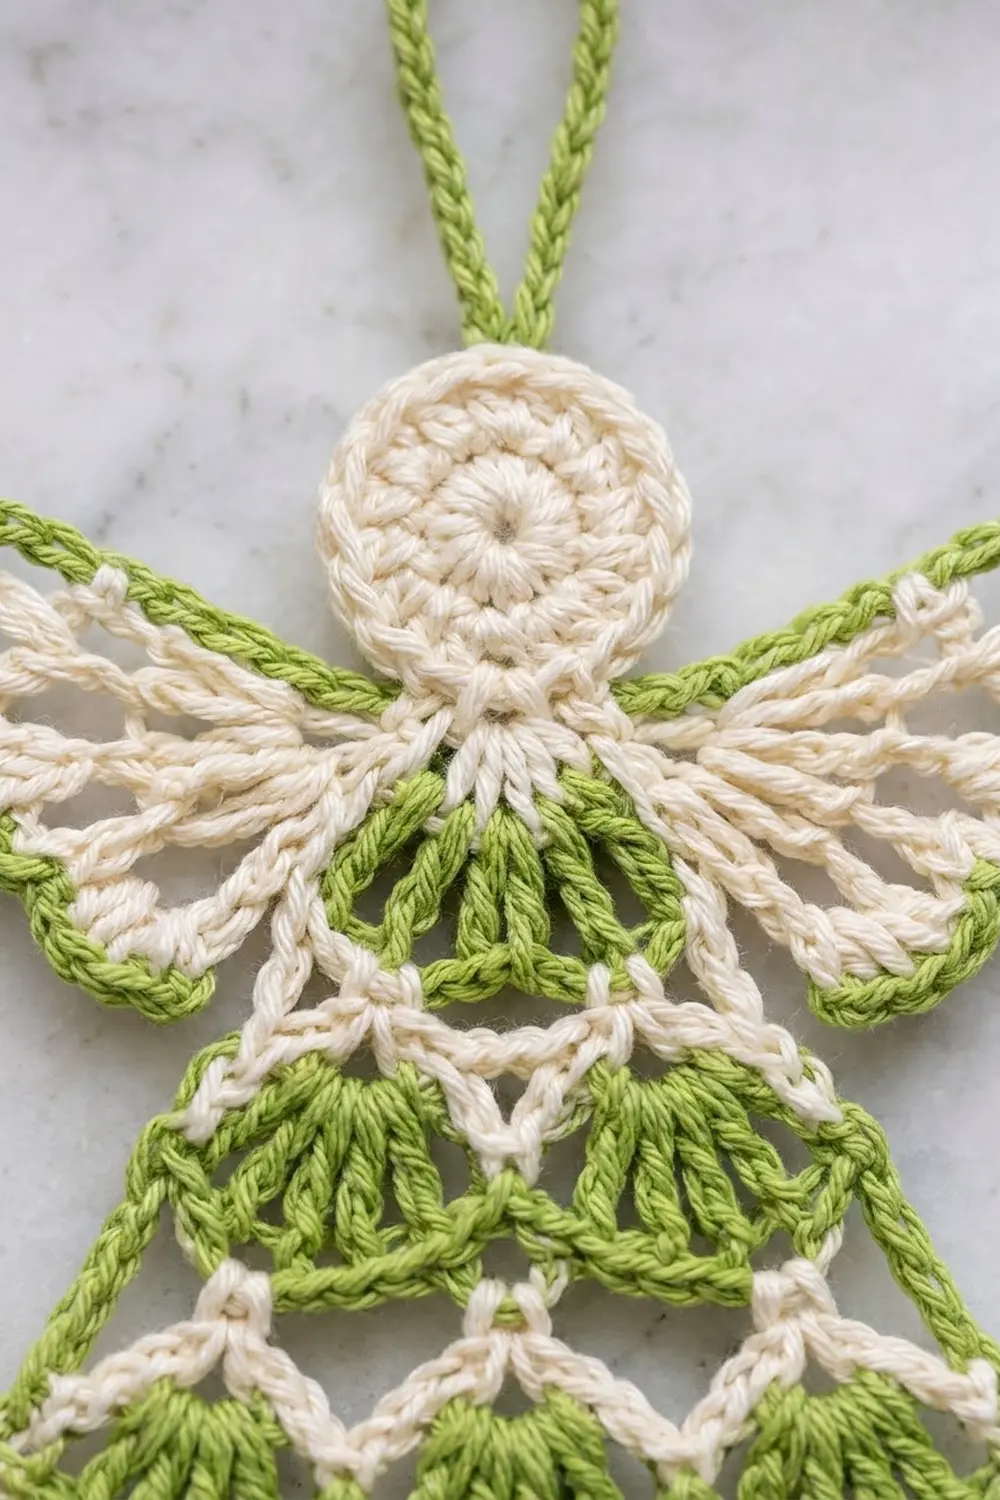
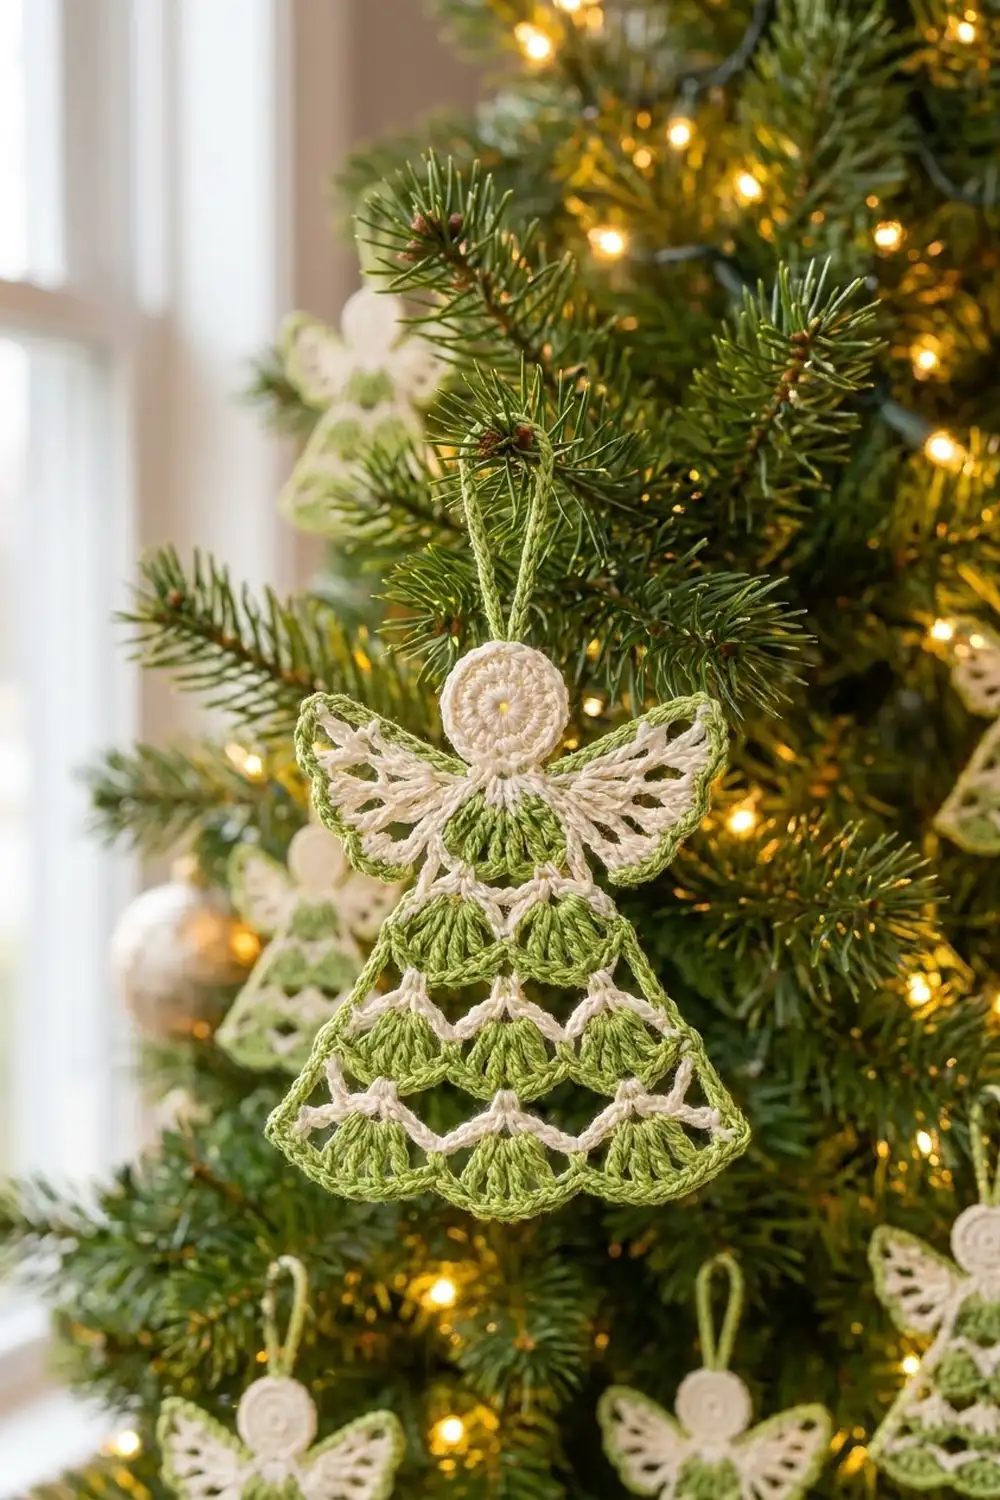
The Meadow Lace Angel is a flat, lacy tree ornament with a bell-shaped skirt and fan wings, finished with a tidy green outline. Green fan shells stack in tiers with airy cream arches between them, so the skirt looks layered and light. A solid cream head and a slim green loop finish the angel.
The palette is spring green and cream. It’s fresh and a little vintage, and it shows up well against dark pine branches. The yarn is smooth sport-weight cotton, which keeps the shells crisp and lets the ornament block perfectly flat.
This pattern uses US crochet terms. The finished angel measures 4.5 in (11.4 cm) wide and 4.75 in (12.1 cm) tall. The hanging loop adds 2 in (5.1 cm), for a total hanging length of 6.75 in (17.1 cm).
You start the body at a small cream neck ring and work down in single-row color stripes, always with the right side facing. The wings are worked into chain arches at the shoulders, and a green border goes around everything. Last, you make a separate round head and a chain loop and sew them in place.
Finished Size and Construction
- Finished size: 4.5 in (11.4 cm) wide × 4.75 in (12.1 cm) tall, plus a 2 in (5.1 cm) loop
- Skill level: Easy-Intermediate
- Terminology: US
- Yarn weight: Sport (#2), cotton
- Hook: 3.0 mm (US C/2 or D/3)
- Number of pieces: 3 (body with wings, head, hanging loop), assembled into 1 ornament
- Layout: Head centered over the neck ring, loop at the top of the head
- Body size before border: 4.25 in (10.8 cm) wide × 4.25 in (10.8 cm) tall
- Head size: 1.5 in (3.8 cm) across
- Border depth: 0.125 in (0.3 cm), one round of sc
Materials
Choose a smooth, mercerized or combed sport-weight cotton of about 3 m per gram (about 150 m per 50 g). Cotton holds the fan shapes and blocks cleanly. Acrylic also works, but the lace will look softer.
- Color A, Spring Green: 6 g (18 m)
- Color B, Cream: 5 g (15 m)
Tools:
- 3.0 mm crochet hook
- Tapestry needle
- Scissors
- Stitch marker
- Blocking mat and rustproof pins
- Spray bottle with water
- Optional: fabric stiffener or starch
Quantities include about a 20% margin for gauge swatches and weaving in ends.
Abbreviations (US Terms)
- ch: chain
- sl st: slip stitch
- sc: single crochet
- dc: double crochet
- tr: treble crochet
- sp: space
- st(s): stitch(es)
- RS: right side
Shell: 7 dc worked into the same chain space. The 4th dc is the center of the shell.
Standing sc: With the slip knot on your hook, insert the hook into the stitch and work a sc as usual. A sl st join followed by ch 1 and sc works too.
Gauge and Checkpoints
Gauge: 1 shell = 1 in (2.5 cm) wide at its widest point, and 1 dc row = 0.5 in (1.3 cm) tall.
Make the head first as your gauge test. It’s small and quick, and you need it anyway. After Round 2, it should measure 1.5 in (3.8 cm) across.
Checkpoints for the body, measured flat and unstretched:
- Neck ring: 0.75 in (1.9 cm) across
- After Row G1: 1.25 in (3.2 cm) wide
- After Row G2: 2.25 in (5.7 cm) wide
- After Row G3: 3.25 in (8.3 cm) wide
- After Row G4: 4.25 in (10.8 cm) wide and 4.25 in (10.8 cm) tall from the top of the ring
- After the border: 4.5 in (11.4 cm) wide
If your piece is too big, go down 0.25 mm in hook size. If it’s too small, go up 0.25 mm. Shells that come out wide on short rows usually mean loose dc, so snug the yarn before each yarn over.
Body
Work every body row with the RS facing, from right to left, and don’t turn (left-handed crocheters work left to right). Fasten off at the end of each row and join the next color as directed.
Color changes: Because each stripe is a single row, you don’t carry the yarn up the sides. Leave 4 in (10.2 cm) tails at every join and fasten-off, and lay them along the side edges. The green border covers them later, which saves a lot of weaving. Working from the RS on every row also keeps the front of every shell on the same side, so the tiers look identical.
Neck Ring and Yoke
Neck ring (Color B): Ch 14 and sl st in the first ch to form a ring.
Yoke row (Color B): Work this row into the lower half of the ring only. Ch 1, sc in ring, ch 9 (right wing arch), sc in ring, ch 5 (center arch), sc in ring, ch 9 (left wing arch), sc in ring. Fasten off.
Count: 4 sc, 2 ch-9 wing arches, 1 ch-5 center arch. Space the 4 sc evenly across the bottom half of the ring so the center arch hangs straight down.
Skirt
Row G1 (Color A): Join with a sl st in the 2nd sc of the yoke (right of the center arch). Ch 3 (counts as dc), shell in the ch-5 center arch, dc in the 3rd sc. Fasten off.
Count: 9 dc (1 shell + 2 edge dc).
Row C1 (Color B): Join with a standing sc in the top of the beginning ch-3. Ch 5, sc in the center dc of the shell, ch 5, sc in the last dc. Fasten off.
Count: 3 sc, 2 ch-5 arches.
Row G2 (Color A): Join with a sl st in the first sc. Ch 3 (counts as dc), shell in each ch-5 arch across, dc in the last sc. Fasten off.
Count: 16 dc (2 shells + 2 edge dc). You skip the middle sc of Row C1, so the two shells sit side by side with a bit of cream showing between them.
Row C2 (Color B): Join with a standing sc in the top of the beginning ch-3. [Ch 5, sc in the center dc of the next shell] twice, ch 5, sc in the last dc. Fasten off.
Count: 4 sc, 3 ch-5 arches.
Row G3 (Color A): Repeat Row G2.
Count: 23 dc (3 shells + 2 edge dc).
Row C3 (Color B): Join with a standing sc in the top of the beginning ch-3. [Ch 5, sc in the center dc of the next shell] 3 times, ch 5, sc in the last dc. Fasten off.
Count: 5 sc, 4 ch-5 arches.
Row G4 (Color A): Repeat Row G2. This row forms the scalloped hem.
Count: 30 dc (4 shells + 2 edge dc).
Why the skirt flares: A cream row over a green row of k shells makes k + 1 arches, and the next green row puts one shell in each arch. Each green tier is therefore one shell wider than the one above it, which gives the skirt its triangle shape.
Wings
Work both wings with the RS facing.
Wing Row 1 (Color B): Join with a sl st in the right ch-9 wing arch, close to the ring. Ch 4 (counts as tr), [ch 2, tr in the same arch] 6 times. Fasten off.
Count: 7 tr, 6 ch-2 sp. Spread the tr evenly along the arch so they fan outward.
Wing Row 2 (Color B): Join with a standing sc in the last tr worked. [Ch 4, sc in the next tr] 6 times. Fasten off.
Count: 7 sc, 6 ch-4 loops.
Repeat Wing Rows 1 and 2 in the left ch-9 wing arch. Each wing should reach about 1 in (2.5 cm) out from its arch.
Border
Border gauge: about 7 sc = 1 in (2.5 cm) along a straight edge.
Border round (Color A): Work all the way around the body and wings, crocheting over the cream tails as you go.
- Hem: Join with a standing sc in the beginning ch-3 of Row G4 (bottom right corner), then work 2 more sc in that st. Sc in each of the next 28 dc, then 3 sc in the last dc. That’s 34 sc (30 worked 1 per dc + 4 extra at the corners).
- Left skirt side: Working up the row ends, work 2 sc around each green dc row-end post (4 rows = 8 sc) and 1 sc in each cream row end (3 rows = 3 sc). That’s 11 sc.
- Left wing: On the lower edge, work 3 sc around the end tr of Wing Row 1 and 1 sc in the end of Wing Row 2 (4 sc). On the outer edge, sc in each sc and work 4 sc in each ch-4 loop (7 + 24 = 31 sc). On the upper edge, work 1 sc in the Wing Row 2 end and 3 sc around the tr post (4 sc). That’s 39 sc.
- Neck: Work 6 sc into the upper half of the neck ring. That’s 6 sc.
- Right wing: Work as for the left wing. That’s 39 sc.
- Right skirt side: Work as for the left side, going down. That’s 11 sc.
Sl st in the first sc to join, then fasten off.
Total: 34 + 11 + 39 + 6 + 39 + 11 = 140 sc.
Why the math works:
– On the hem, 1 sc in each dc follows the scallops without cupping, and the 2 extra sc at each corner let the border turn without pulling.
– A dc row end is about as tall as 2 sc and a cream sc row end is about as tall as 1 sc, so the sides stay flat.
– Four sc in each ch-4 loop matches the chain length, so the wing edges neither ruffle nor draw in.
Head
Round 1 (Color B): Make a magic ring. Ch 3 (counts as dc), 11 dc in the ring, sl st in the top of the ch-3. Pull the ring partly closed, leaving a small opening in the center.
Count: 12 dc. Diameter: 0.75 in (1.9 cm).
Round 2: Ch 3 (counts as dc), dc in the same st, 2 dc in each st around, sl st in the top of the ch-3.
Count: 24 dc. Diameter: 1.5 in (3.8 cm).
Round 3 (trim): Sl st loosely in each st around.
Count: 24 sl st (24 worked 1 per st + 0 extra). Fasten off, leaving a 12 in (30.5 cm) tail for sewing.
Hanging Loop
Color A: Ch 30, about 4 in (10.2 cm) long, then sl st in the first ch to form a loop. Fasten off, leaving a 6 in (15.2 cm) tail. Folded flat, the loop stands 2 in (5.1 cm) tall.
Assembly
- Center the head over the neck ring so it covers the ring and the 6 neck sc. Its lower edge should just touch Row G1.
- Using the head tail, whipstitch around the back of Round 2. Catch only the back loops of the ring so the stitches don’t show on the front.
- Sew the joined point of the hanging loop to the back of the head at the top. Wrap the tail 3 times around the base of the loop and secure it.
- Weave in all remaining ends on the wrong side.
Final Blocking
- Mist the ornament with water until it’s damp but not dripping.
- Lay it RS up on the blocking mat.
- Pin the two bottom corners 4.5 in (11.4 cm) apart.
- Pin the bottom of each of the 4 hem scallops so they curve evenly.
- Open each cream arch row into even V shapes, pinning the center of each arch if needed.
- Pin each wing tip so the wingspan measures 4.5 in (11.4 cm).
- Check that the height is 4.75 in (12.1 cm) from the hem to the top of the head.
- If you’re using stiffener, brush it on lightly now.
- Let the ornament dry completely, at least 6 hours, before you unpin it.
Final Quality-Control Checklist
- [ ] The skirt tiers have 1, 2, 3, and 4 shells from top to bottom.
- [ ] Each cream sc sits in the center (4th) dc of its shell.
- [ ] The border has 140 sc: 34 on the hem, 11 on each side, 39 on each wing, and 6 at the neck.
- [ ] The hem and the wingspan each measure 4.5 in (11.4 cm).
- [ ] The ornament is 4.75 in (12.1 cm) tall, plus a 2 in (5.1 cm) loop.
- [ ] The head is centered and lies flat.
- [ ] No tails or sewing stitches show on the front.
- [ ] The ornament hangs straight from its loop.
Troubleshooting
The skirt cups or ruffles. Your shells are too tight or too loose for the arches. Check your gauge, and keep each ch-5 arch relaxed but not loopy.
The shells lean to one side. Make sure each cream sc goes into the 4th dc of its shell, not the 3rd or 5th.
The cream arches sag. Work the ch-5 chains a little tighter, or block with a pin at the center of each arch.
The edges pull in. Add a few border sc along the sides, keeping the same number on both sides.
The wings flop. Pin them firmly when blocking, or use a light coat of stiffener.
The head puckers. Round 2 may be too tight. Redo it at a looser tension, or go up 0.25 mm in hook size for the head only.
There are too many ends to weave in. Crochet over the tails in the next row and in the border instead of weaving each one separately.
Care
Hand-wash in cool water, roll the ornament in a towel to press out the water, and reblock it flat to dry. If you used stiffener, stiffen it again after washing.
Final Notes
The measurements build in a simple chain. A 1 in (2.5 cm) shell gauge gives a 4.25 in (10.8 cm) body. The border brings the width to 4.5 in (11.4 cm), and the head brings the height to 4.75 in (12.1 cm). The loop makes the total hanging length 6.75 in (17.1 cm). Check each stage as you go, and every angel you make will match.
Happy crocheting!