
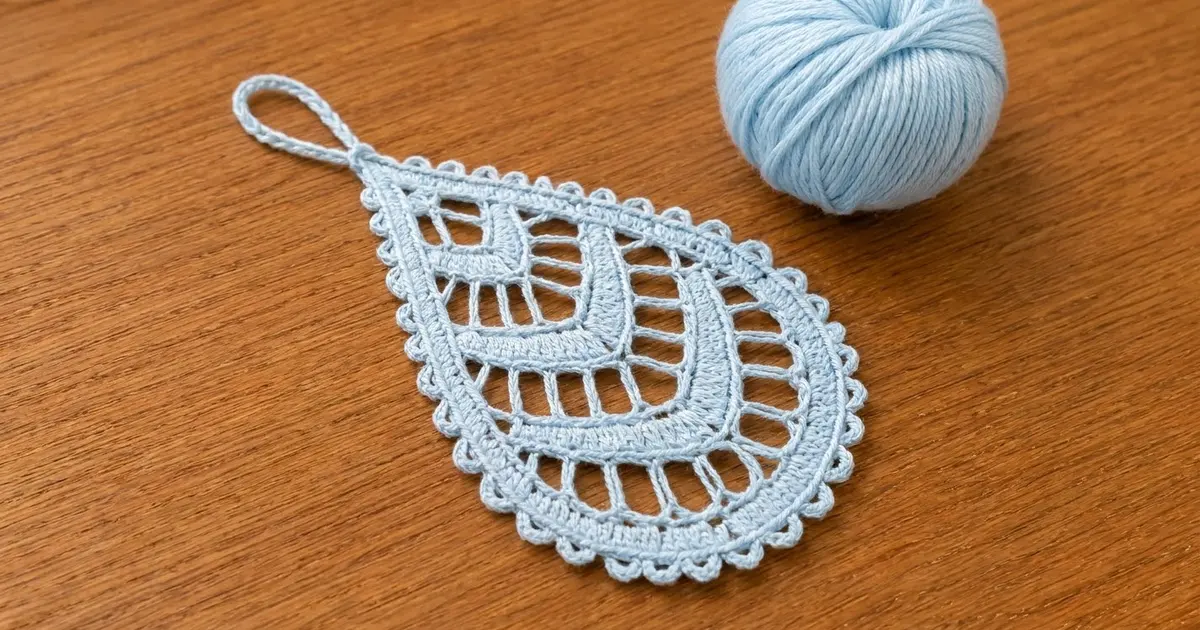
The Frost Drop is a lacy teardrop ornament in pale ice blue. It has a pointed top, a rounded bottom and a crisp picot edge all the way around. Inside, three solid V-shaped chevron bands alternate with rows of open bars. A fan of open spokes fills the curve at the bottom.
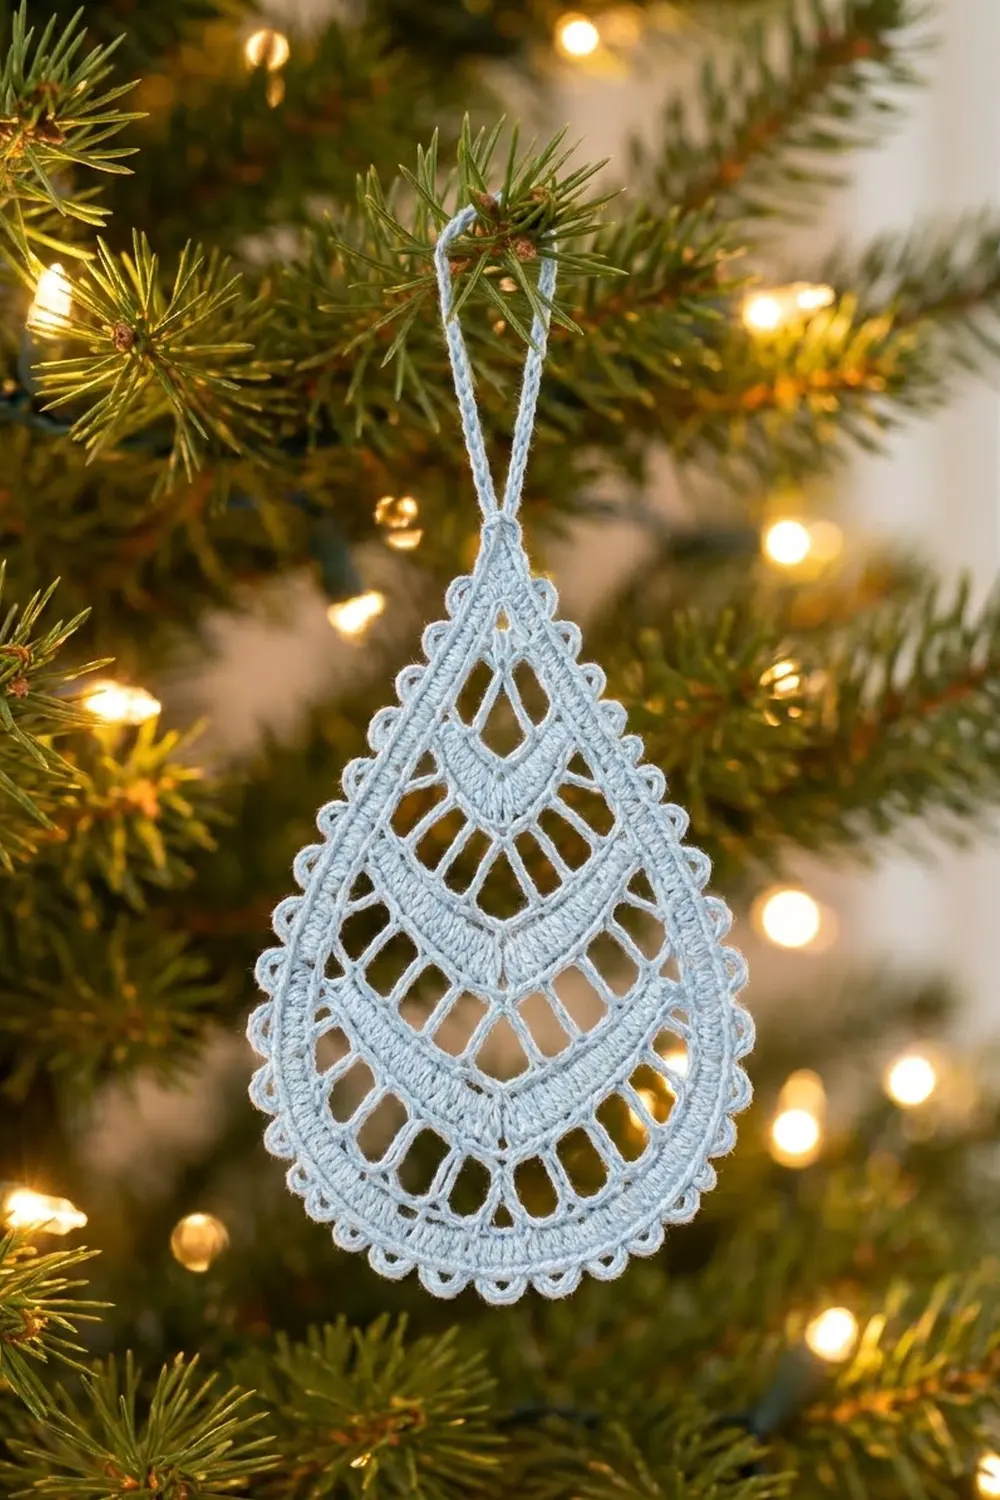
It is one single piece in one color. You can hang it from its chain loop on a tree branch, in a window or on a gift. It looks like a snowflake but keeps the clean outline of a raindrop.
This pattern uses US crochet terms. The blocked ornament measures 3.75 in (9.5 cm) wide by 4.75 in (12.1 cm) tall, not counting the hanging loop. The loop adds 1.5 in (3.8 cm), for a total hanging length of 6.25 in (15.9 cm).
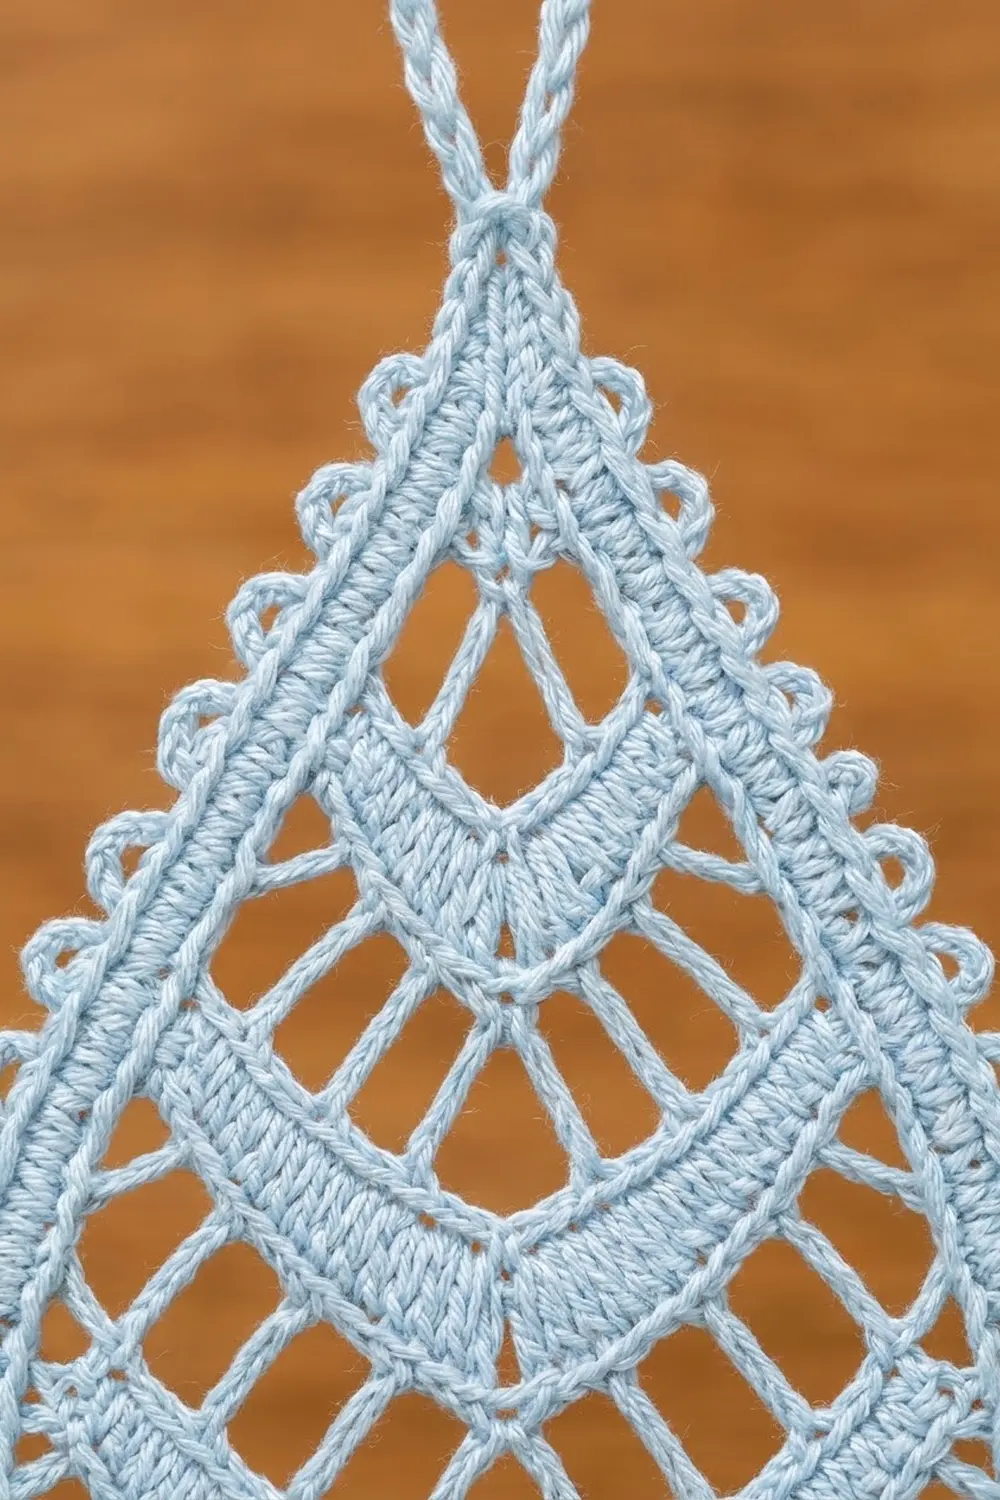
You work the body flat in rows from the top point down. An increase at the center spine turns each row into a V, which creates the chevrons. One row of spokes in graded heights and a sc frame round off the bottom. Two border rounds add the picot edging and the hanging loop.
Finished Size and Construction
- Finished size: 3.75 in (9.5 cm) wide x 4.75 in (12.1 cm) tall, plus a 1.5 in (3.8 cm) loop
- Skill level: Intermediate
- Terminology: US crochet terms
- Yarn weight: Size 3 cotton crochet thread (Lace, CYC 0)
- Hook: 1.75 mm steel hook
- Number of pieces: 1
- Layout: One teardrop, point up, with V-shaped chevrons pointing down
- Piece size before border (after Row 13): 3.25 in (8.3 cm) wide x 4.25 in (10.8 cm) tall
- Border depth: 0.25 in (0.6 cm) on every edge, including the picots
Materials
Use a mercerized cotton thread. It keeps the chevron lines sharp, takes starch well and has a soft, frosty sheen. Avoid fuzzy or acrylic thread: the open bars will blur and the piece won’t block flat.
- Pale ice blue, size 3 cotton thread: 8 g (about 14 m / 15 yd)
This amount includes extra for a gauge swatch and for weaving in the ends. One standard ball of thread is enough for a whole set of ornaments.
Tools:
- 1.75 mm steel crochet hook
- Tapestry needle
- Small sharp scissors
- Blocking board or foam mat
- Rustproof pins
- Spray starch or diluted fabric stiffener (optional)
- Ruler or tape measure
Abbreviations (US Terms)
- ch – chain
- sl st – slip stitch
- sc – single crochet
- hdc – half double crochet
- dc – double crochet
- tr – treble crochet
- dtr – double treble crochet (yarn over 3 times, then work the loops off in pairs)
- dc2tog – double crochet 2 together
- sk – skip
- sp – space
- st(s) – stitch(es)
- rep – repeat
Spine sp: the ch-2 space at the center point of each row. All increases happen here.
Picot-sc: sc in the next st, ch 3, sl st in the 3rd ch from the hook.
Stitch counting: In mesh rows, each ch-1 space counts as 1 st. Counts are given per half (one side of the spine) and as a total. The spine space is never counted.
Gauge and Checkpoints
Gauge: 9 dc = 1 in (2.5 cm) and 4 dc rows = 1 in (2.5 cm), worked in rows.
To make a separate swatch, ch 20, work 6 rows of dc and measure across the center of the swatch.
Since this is a single piece, your first ornament is also your test piece. Measure it at every checkpoint instead of waiting until the end.
- After Row 5: 1.5 in (3.8 cm) wide x 1.5 in (3.8 cm) tall
- After Row 8: 2.25 in (5.7 cm) wide
- After Row 11: 3 in (7.6 cm) wide x 3.5 in (8.9 cm) tall, from tip to spine
- After Row 13: 3.25 in (8.3 cm) wide x 4.25 in (10.8 cm) tall
- After Round 15, blocked: 3.75 in (9.5 cm) x 4.75 in (12.1 cm)
Measure the width straight across the widest row. Measure the height from the tip down to the bottom center.
If the piece is too big: switch to a 1.5 mm hook, or tighten your tension on the tr and dtr rows.
If the piece is too small: switch to a 2.0 mm hook. The stitch counts stay the same at any size; only the measurements change.
Body Pattern
Turn at the end of every row. The turning ch counts as the first st unless the row says otherwise.
Row 1: Ch 4. In the 4th ch from the hook, work (dc, ch 2, 2 dc). The skipped ch-3 counts as the first dc. (2 per half, 4 total)
The ch you worked into becomes the tip of the teardrop.
Row 2 (solid): Ch 3, turn. Dc in the next dc, (2 dc, ch 2, 2 dc) in the spine sp, dc in the next dc, dc in the top of the turning ch. (4 per half, 8 total)
Row 3 (mesh): Ch 4 (counts as tr), turn. Tr in the next st, ch 1, sk next st, tr in next st; rep from * to the spine sp. Work (2 tr, ch 2, 2 tr) in the spine sp. Tr in next st, ch 1, sk next st; rep from ** until 2 sts remain, then tr in each of the last 2 sts. (6 per half, 12 total)*
These ch-1 gaps form the first line of open bars.
Row 4 (solid, edge decrease): Ch 2, turn, dc in the next st. The ch-2 and this dc together count as the first dc2tog. Dc in each st and ch-1 sp up to the spine sp, (2 dc, ch 2, 2 dc) in the spine sp, dc in each st until 2 sts remain, dc2tog over the last 2 sts. (7 per half, 14 total)
Row 5 (solid, edge decrease): Rep Row 4. (8 per half, 16 total)
Rows 4 and 5 form the first solid chevron band. Each edge decrease removes 1 st per half, and the spine adds 2 per half. That net gain of 1 st per half per row keeps the top point narrow while the V stays shallow.
Checkpoint: 1.5 in (3.8 cm) x 1.5 in (3.8 cm).
Row 6 (mesh): Rep Row 3. (10 per half, 20 total)
Row 7 (solid): Rep Row 4. (11 per half, 22 total)
Row 8 (solid): Rep Row 4. (12 per half, 24 total)
Checkpoint: 2.25 in (5.7 cm) wide.
Row 9 (mesh): Rep Row 3. (14 per half, 28 total)
Row 10 (solid): Rep Row 4. (15 per half, 30 total)
Row 11 (solid): Rep Row 4. (16 per half, 32 total)
You now have three solid chevron bands with an open-bar row between each pair. Each mesh row is worked over an even half count (4, 8 and 12), so the bars line up evenly on both sides of the spine.
Checkpoint: 3 in (7.6 cm) wide x 3.5 in (8.9 cm) tall.
Rounding the Bottom
Row 12 (spokes): Ch 2 (counts as hdc), turn.
First half: Ch 2, sk next st, dc in next st, ch 2, sk next st, tr in next st, ch 2, sk next st, tr in next st, ch 2, sk next st, dtr in next st. [Ch 2, sk next st, dtr in next st] 3 times. Ch 2, sk the last st before the spine.
Spine: (Dtr, ch 3, dtr) in the spine sp.
Second half: Ch 2, sk next st, dtr in next st. [Ch 2, sk next st, dtr in next st] 3 times. Ch 2, sk next st, tr in next st, ch 2, sk next st, tr in next st, ch 2, sk next st, dc in next st, ch 2, sk next st, hdc in the top of the turning ch.
Count: 9 spokes and 8 ch-2 spaces per half. In total that is 18 spokes (2 hdc, 2 dc, 4 tr, 10 dtr), 16 ch-2 spaces and 1 ch-3 space.
The spokes are short at the side corners and grow longer toward the bottom, which pushes the lower edge into a curve.
Row 13 (frame): Ch 1, turn. Sc in the first hdc, then [3 sc in next ch-2 sp, sc in next spoke] 8 times, which brings you to the spine dtr. Work 5 sc in the ch-3 sp. Sc in the next dtr, then [3 sc in next ch-2 sp, sc in next spoke] 8 times, ending in the hdc at the turning ch.
Count: (1 + 8 x 4) = 33 per half, plus 5 at the center = 71 sc.
Checkpoint: 3.25 in (8.3 cm) wide x 4.25 in (10.8 cm) tall.
Don’t fasten off.
Border
Border gauge: Along the row ends, work 2 sc per dc row, 3 sc per tr row, 2 sc per hdc end and 1 sc per sc row. That is about 9 sc per 1 in (2.5 cm), the same as the body gauge, so the edges stay flat.
Round 14: Don’t turn. Ch 1 and work up the row ends of the first side toward the tip:
- Row 13 (sc): 1 sc
- Row 12 (hdc end): 2 sc
- Rows 11, 10, 8, 7, 5, 4, 2, 1 (dc): 2 sc each = 16 sc
- Rows 9, 6, 3 (tr): 3 sc each = 9 sc
That gives 28 sc for the first side. Work 3 sc in the tip ch. Work 28 sc down the second side, following the same counts in reverse order. Then sc in each of the 71 sts of Row 13. Join with a sl st to the first sc.
Count: 28 + 3 + 28 + 71 = 130 sc. Fasten off.
Round 15 (picots and loop): Call the center sc of the tip st 1, and number the rest in the same direction you worked Round 14. Join the thread in st 1.
- Ch 1, sc in st 1. Ch 30, then sl st in the same sc to make the hanging loop.
- Sc in st 2, then picot-sc in st 3.
- *Sc in each of the next 2 sts, picot-sc in the next st; rep from * 42 times, ending with a picot in st 129.
- Sc in st 130. Join with a sl st to the first sc and fasten off.
Count: 130 sc and 43 picots. Each straight side gets 10 picots, and the bottom curve between the side corners gets 23.
Why the math works: After the picot in st 3, sts 4–129 remain. That is 126 sts, and 126 ÷ 3 = 42 full repeats. Picots land on st 3 and on every 3rd st after it, through st 129. One of them is st 66, which is exactly 65 sts (half of 130) from the tip. So one picot sits at the bottom center and the rest mirror each other on both sides. Sts 130, 1 and 2 stay plain around the loop, so the gap at the tip is only one stitch wider than the others.
Final Blocking
- Weave in all ends inside the sc frame, never through the open bars.
- Soak the ornament in cool water for 5 minutes, then roll it in a towel to remove extra water.
- Pin the tip and the bottom center 4.75 in (12.1 cm) apart.
- Pin the two widest points 3.75 in (9.5 cm) apart.
- Ease the bottom into a smooth, round curve. The ch-2 spaces in Row 12 leave enough slack to round off the V point.
- Straighten the spine with a vertical line of pins so each chevron is symmetrical.
- Pin each picot outward along the edge.
- Spray with starch if you want a stiff ornament. Let it dry completely, at least 4 hours, before you remove the pins.
Final Quality-Control Checklist
- The size is 3.75 in (9.5 cm) x 4.75 in (12.1 cm), not counting the loop.
- There are three solid chevron bands, all pointing down and centered on the spine.
- The open-bar rows mirror each other on both sides of the spine.
- There are 18 spokes around the bottom, short at the corners and long at the center.
- There are 43 picots, with one at the bottom center and none at the tip.
- The loop is 1.5 in (3.8 cm) long and sits exactly at the tip.
- The piece lies flat, with no cupping or ruffling.
Troubleshooting
The top cups forward. Your spine increases are too tight. Work the spine stitches more loosely, and check that you are working the full (2 dc, ch 2, 2 dc) group.
The side edges ruffle. You’ve missed some edge decreases. Rows 4–5, 7–8 and 10–11 each need a dc2tog at both ends.
The mesh bars are lopsided. Recount the half before the mesh row. It must be an even number (4, 8 or 12).
The row counts drift. Put a stitch marker in the spine space of every row, and count each half separately before you turn. Most mistakes show up as one half being 1 st longer than the other.
The spokes look uneven. Pull each loop up to the same height before you yarn over, and keep the yarn-overs loose on the hook.
The bottom stays pointed. Check that your dtr spokes are full height, then re-block with more pins along the curve.
The picots miss the bottom center. Recount Round 14. It must have exactly 130 sc.
The loop twists. Block the loop flat, or replace the ch 30 with 30 sc worked over a chain.
Care
Hand wash in cool water, press flat in a towel and re-block if needed. Store the ornament flat in tissue paper so the picots and spokes don’t get crushed.
Final Notes
Here is the full measurement chain:
- Gauge: 9 dc = 1 in (2.5 cm)
- Row 5: 1.5 in (3.8 cm) square
- Row 11: 3 in x 3.5 in (7.6 cm x 8.9 cm)
- Row 13: 3.25 in x 4.25 in (8.3 cm x 10.8 cm)
- Border: adds 0.25 in (0.6 cm) on every edge, for 3.75 in x 4.75 in (9.5 cm x 12.1 cm)
The loop adds 1.5 in (3.8 cm). If each checkpoint matches, the next one will too. The first time you make it, jot down your own measurements on a sticky note so you have a reference for every ornament after that. Make one Frost Drop, then make a whole flurry of them for the tree.
Happy crocheting!