

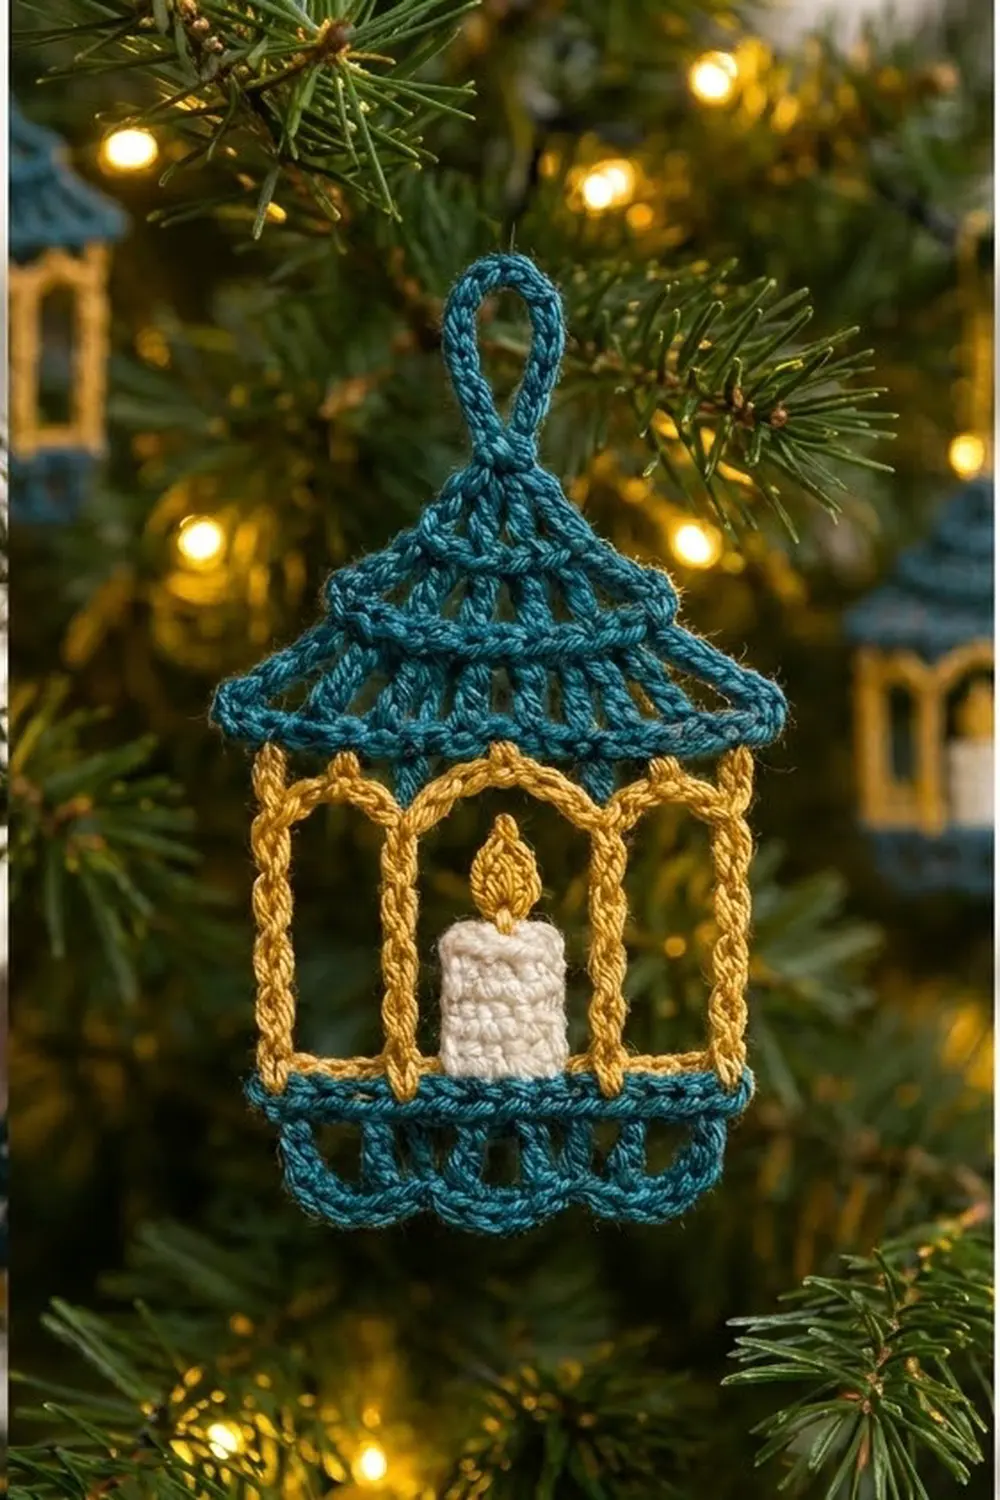
This little lantern looks lit from inside. It has a teal pagoda roof, a gold frame with three arched windows, and a cream candle with a gold flame glowing in the center window. Because the windows are open, branch greenery and fairy lights show through when it hangs on a tree.
The palette is deep teal, mustard gold, and cream. Teal is used for the roof, base, scalloped edge, and hanging loop. Gold is used for the frame and flame, and cream for the candle. The style is a flat, lacy ornament with a stained-glass feel.
All instructions use US crochet terms. The finished lantern is about 3.5 in (8.9 cm) wide at the base, 4.2 in (10.7 cm) wide across the roof eaves, and 5 in (12.7 cm) tall including the loop.
You make the whole lantern as one flat piece, worked bottom to top. First come the base band and the gold rail. Next you add slip-stitch posts and chain arches, then decrease a meshed roof to a point, finishing with the loop. Last, you work a scalloped edge along the bottom and sew the candle and flame into the center window.
Finished Size and Construction
- Finished size: 3.5 in (8.9 cm) wide at the base, 4.2 in (10.7 cm) wide at the eaves, 4.25 in (10.8 cm) tall without the loop, 5 in (12.7 cm) tall with the loop
- Skill level: Easy-intermediate
- Terminology: US
- Yarn weight: Sport-weight (#2 fine) mercerized cotton
- Hook: 2.75 mm (US C-2)
- Number of pieces: 1 main lantern, plus 1 candle and 1 flame appliqué
- Layout: Single ornament; no joining
- Piece size before border: 3.5 in (8.9 cm) wide × 4 in (10.2 cm) tall
- Border depth: 0.25 in (0.6 cm) scalloped edge on the bottom only
Materials
Choose a smooth mercerized cotton. It gives the crisp stitch definition and slight sheen you see in the photos, and it holds its shape after blocking.
- Teal: 6 g, about 17 m
- Mustard gold: 4 g, about 11 m
- Cream: 2 g, about 6 m
These quantities include a margin for swatching and tails.
Tools:
– 2.75 mm (US C-2) crochet hook
– Tapestry needle
– Scissors
– Blocking mat and rust-proof pins
– Spray bottle, plus spray starch (optional)
Abbreviations (US Terms)
- ch – chain
- sl st – slip stitch
- sc – single crochet
- hdc – half double crochet
- dc – double crochet
- tr – treble crochet
- sp – space
- st(s) – stitch(es)
- RS – right side
Special stitch: scXtog (single crochet X together). Insert hook in the next st or sp, yarn over and pull up a loop. Repeat that in each of the next X − 1 sts or sps, so you have X + 1 loops on the hook. Yarn over and draw through all loops. Each scXtog uses X sts and makes 1 st. This pattern uses sc3tog, sc4tog, and sc5tog.
Post (slip-stitch cord): Ch 12, sl st in 2nd ch from hook and in each of next 10 ch (11 sl sts), sl st in the same base st where the post began. The unworked top ch is the tip. Working sl sts back along the chain doubles the strand, so the post looks twisted and stays upright.
Gauge and Checkpoints
Gauge: 6 sc and 7 sc rows = 1 in (2.5 cm).
Before starting, make a 12-st × 14-row sc swatch. It should measure 2 in (5.1 cm) square.
Work one lantern first and check it against these points:
- After Row 2: base band is 3.5 in (8.9 cm) wide and about 0.3 in (0.8 cm) tall.
- After Row 4: each post is 1.75 in (4.4 cm) tall from rail to tip.
- After Row 6: eave row is about 4.2 in (10.7 cm) wide.
- After Row 13: body is 4 in (10.2 cm) tall.
- After border: 4.25 in (10.8 cm) tall, or 5 in (12.7 cm) with the loop.
Too big? Go down to a 2.5 mm hook, or crochet a little tighter. Too small? Go up to a 3 mm hook. If only the posts are off, keep your hook and change the post chain by 1 ch, making the same change on all four posts.
Lantern Body
Base Band (Teal)
Foundation: With teal, ch 22.
Row 1 (RS): Sc in 2nd ch from hook and in each ch across. (21 sc)
Row 2: Ch 1, turn. Sc in each st across. (21 sc) On the last sc, change to gold. Cut teal, leaving a 6 in (15.2 cm) tail.
Checkpoint: 3.5 in (8.9 cm) wide.
Gold Rail and Posts
Row 3: With gold, ch 1, turn. Sc in each st across. (21 sc)
Row 4: Ch 1, turn (does not count as a st). Sl st in first sc and make a Post. Sl st in each of next 6 sc, Post. Sl st in each of next 8 sc, Post. Sl st in each of next 6 sc, Post. (4 posts, 21 sl sts along the rail) Fasten off.
The posts stand on rail sts 1, 7, 15, and 21. Each side window spans 5 sts, about 0.8 in (2.0 cm). The center window spans 7 sts, about 1.2 in (3.0 cm), and holds the candle.
Window Arches (Gold)
Row 5: With RS facing, join gold with a sl st in the tip of the post on st 21. Ch 7, sl st in tip of the post on st 15. Ch 10, sl st in tip of the post on st 7. Ch 7, sl st in tip of the post on st 1. (3 chain arches: 7, 10, 7) Fasten off gold.
The chains have a little slack so they can bow upward into arches.
Eave Row (Teal)
Row 6: Join teal with a sl st in the tip of the post on st 1. Ch 4 (counts as first tr).
– First side arch (ch-7 sp): Dc, hdc, 2 sc, hdc, dc. (6 sts)
– Tr in tip of post on st 7.
– Center arch (ch-10 sp): Dc, hdc, 5 sc, hdc, dc. (9 sts)
– Tr in tip of post on st 15.
– Second side arch (ch-7 sp): Dc, hdc, 2 sc, hdc, dc. (6 sts)
– Tr in tip of post on st 21.
Count: 4 tr + 6 + 9 + 6 = 25 sts.
Tall stitches at the post tips and short ones at the middle of each arch push the chains up into curves, while the top of the row stays straight. The extra stitches let the eave overhang the 21-st body slightly on each side.
Checkpoint: about 4.2 in (10.7 cm) wide.
Pagoda Roof (Teal)
Each roof tier is an open mesh row followed by a solid sc row that decreases at both ends.
Row 7 (mesh): Ch 4, turn (counts as dc + ch 1). Skip next st. Dc in next st, ch 1, skip next st, and repeat from * 10 more times (11 repeats). Dc in last st. (13 dc, 12 ch-1 sps = 25 sts)
Row 8: Ch 1, turn. Sc5tog over the first 5 sts (dc, sp, dc, sp, dc). Sc in each of the next 15 sts and sps. Sc5tog over the last 5 sts, working the last one into the 3rd ch of the turning ch. (1 + 15 + 1 = 17 sts)
Row 9 (mesh): Ch 4, turn. Skip next st. Dc in next st, ch 1, skip next st, and repeat from * 6 more times (7 repeats). Dc in last st. (9 dc, 8 ch-1 sps = 17 sts)
Row 10: Ch 1, turn. Sc5tog, sc in each of next 7 sts and sps, sc5tog. (1 + 7 + 1 = 9 sts)
Row 11 (mesh): Ch 4, turn. Skip next st. Dc in next st, ch 1, skip next st, and repeat from * 2 more times (3 repeats). Dc in last st. (5 dc, 4 ch-1 sps = 9 sts)
Row 12: Ch 1, turn. Sc4tog, sc in next st, sc4tog. (1 + 1 + 1 = 3 sts)
Row 13: Ch 1, turn. Sc3tog. (1 st, the roof peak)
Hanging loop: Ch 10, sl st in top of the sc3tog. Fasten off, leaving a 6 in (15.2 cm) tail. Weave the tail back through the loop chains to make it stronger.
Checkpoint: the body measures 4 in (10.2 cm) from the bottom of Row 1 to the peak. The loop adds about 0.75 in (1.9 cm).
Candle and Flame Appliqué
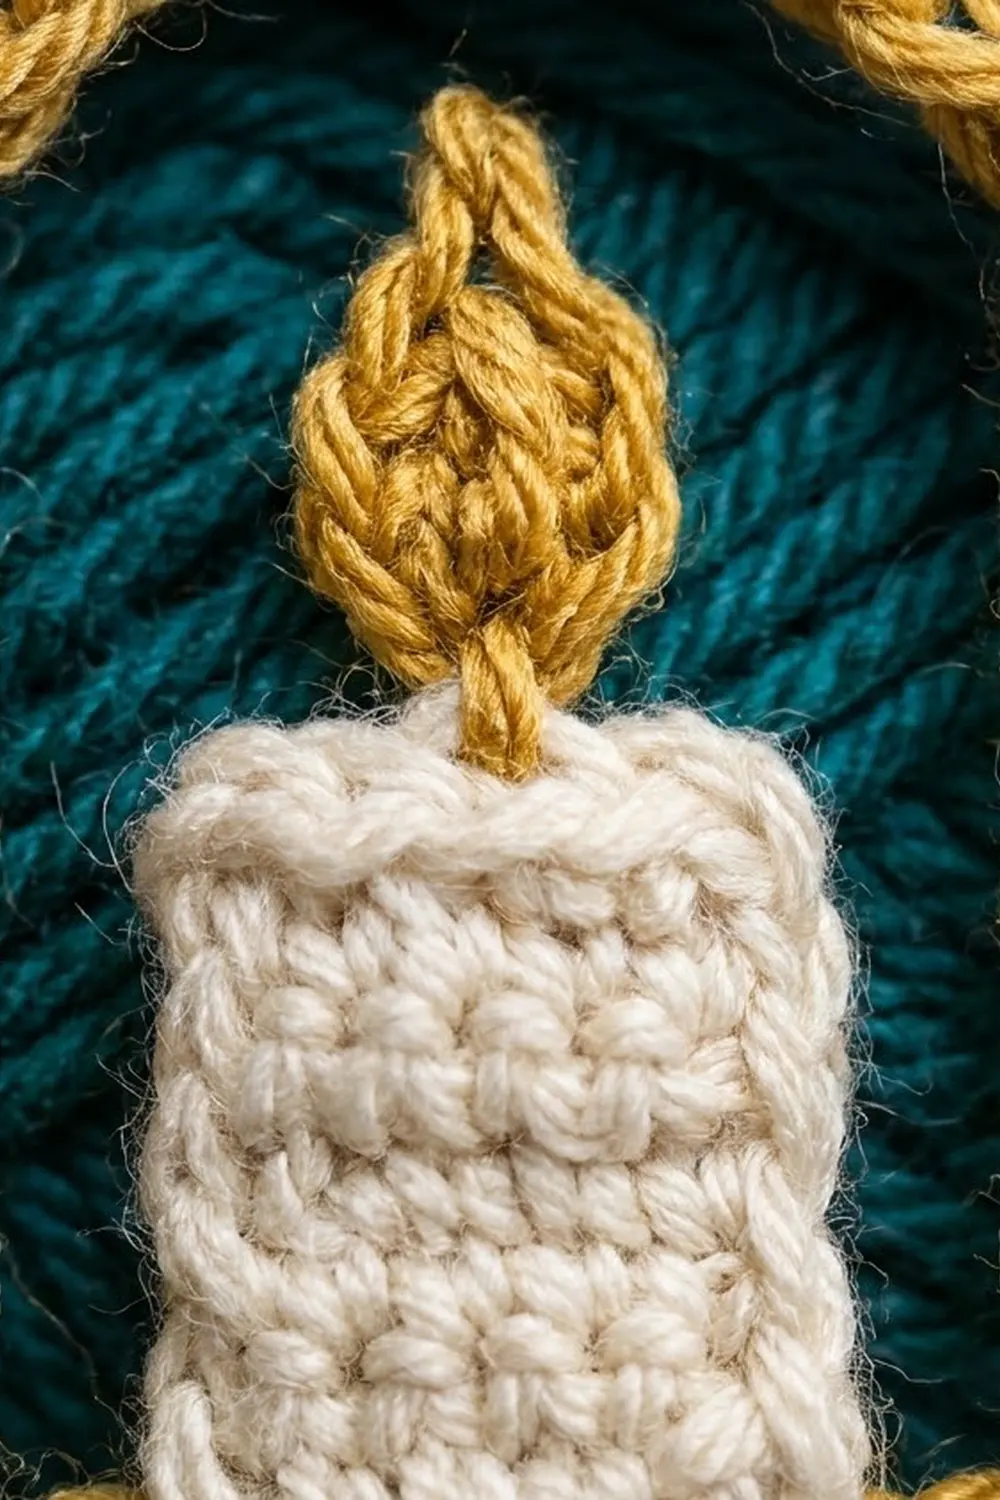
Candle (Cream)
Foundation: Ch 5.
Row 1: Sc in 2nd ch from hook and in each ch across. (4 sc)
Rows 2–7: Ch 1, turn. Sc in each st. (4 sc)
Fasten off, leaving an 8 in (20.3 cm) tail for sewing. The candle measures about 0.7 in (1.8 cm) wide × 1 in (2.5 cm) tall.
Flame (Gold)
Foundation: Ch 4.
Round 1: Working in 2nd ch from hook, sc. Hdc in next ch. In the last ch, work (dc, ch 2, sl st in 2nd ch from hook, dc). This makes the pointed tip. Working along the other side of the foundation, hdc in the next ch, then sc in the next ch. Sl st in the first sc. (6 sts plus the picot tip)
Fasten off, leaving a 6 in (15.2 cm) tail. The flame is a small teardrop about 0.4 in (1.0 cm) tall.
Attaching
- Center the candle in the middle window, over rail sts 9–13, with its bottom edge sitting on the gold rail (Row 3).
- With the cream tail, whipstitch the bottom 4 sts of the candle to the rail, going through both loops. Then tack each lower side corner to the rail.
- Place the flame with its rounded base touching the center of the candle top and its tip pointing up. Sew the base to the candle’s top edge with the gold tail.
- Weave in all tails behind the candle.
Border: Scalloped Bottom Edge
The border is worked only along the bottom, into the free loops of the foundation chain on the underside of Row 1.
Border gauge: 6 sts per inch, so the 21 free loops measure 3.5 in (8.9 cm). This matches the base band, so the edge lies flat.
Border Row 1: With RS facing and the lantern upside down, join teal with a sl st in the first free loop at the right corner. Ch 1. Sc in the same loop. Ch 4, skip next 3 loops, sc in next loop, and repeat from * 4 more times. (6 sc, 5 ch-4 loops)
Why the math works: the first sc uses 1 loop, and each of the 5 repeats uses 4 loops (3 skipped + 1 sc). 1 + (5 × 4) = 21, which ends exactly on the last free loop at the left corner.
Border Row 2: Ch 1, turn. Sc in the first sc. 6 sc in next ch-4 loop, sc in next sc, and repeat from * 4 more times. (6 sc on the Row 1 sc + 30 sc in the loops = 36 sts)
Six sc over each 4-st span rounds every loop into a scallop with an open center. Fasten off and weave in.
Checkpoint: the border adds 0.25 in (0.6 cm), bringing the lantern to 4.25 in (10.8 cm) tall.
Final Blocking
- Lightly mist the lantern until it’s damp, then lay it RS up on the blocking mat.
- Pin the base band straight at 3.5 in (8.9 cm) wide.
- Pin each post straight and vertical, with all four at 1.75 in (4.4 cm).
- Using a pin tip, nudge each gold arch upward into an even curve. Pin the eave ends at 4.2 in (10.7 cm) wide.
- Pin the roof sides into clean steps, and pin the peak centered over the middle window.
- Pin each scallop into a matching curve.
- For a stiffer ornament, spray lightly with starch.
- Let it dry completely before unpinning.
Final Quality-Control Checklist
- Rows 1–3 each have 21 sts.
- All four posts are the same height, standing on rail sts 1, 7, 15, and 21.
- The arches use ch 7, ch 10, and ch 7.
- Row 6 has 25 sts.
- Roof counts read 25, 17, 17, 9, 9, 3, 1.
- The border has 5 even scallops with 36 sts in Row 2.
- The candle is centered and level, with the flame upright.
- Size: 3.5 in (8.9 cm) × 4.25 in (10.8 cm), or 5 in (12.7 cm) with the loop.
- All tails are woven in and hidden.
Troubleshooting
Posts lean or curl. Your sl sts are uneven. Rework them with snug, steady tension, and pin the posts straight while blocking.
Arches pull flat. The arch chains are too tight. Rework Row 5 with a looser chain, or add 1 ch to each arch while keeping the Row 6 stitches the same.
Roof ruffles or leans. Check that each mesh row skips exactly 1 st each time, and that both ends of each sc row use the same scXtog.
Scallops cup. Use 5 sc per loop instead of 6. That gives 31 sts in Border Row 2.
Candle droops. Tack its top corners to the rail behind it, or starch it.
Care
Hand wash in cool water with mild soap, press out the water in a towel, and reshape it flat to dry. Store it flat or hanging so the posts and arches keep their shape.
Final Notes
Each stage of this lantern builds on the one before. The 6-st-per-inch gauge gives a 21-st base of 3.5 in (8.9 cm). That base holds 1.75 in (4.4 cm) posts on sts 1, 7, 15, and 21. The posts carry a 25-st eave of about 4.2 in (10.7 cm). The roof then tapers 25 → 17 → 9 → 3 → 1 to a body height of 4 in (10.2 cm). The scalloped border adds 0.25 in (0.6 cm), and the loop brings the total to 5 in (12.7 cm). If each checkpoint matches, the finished lantern will match too.
Happy crocheting!