
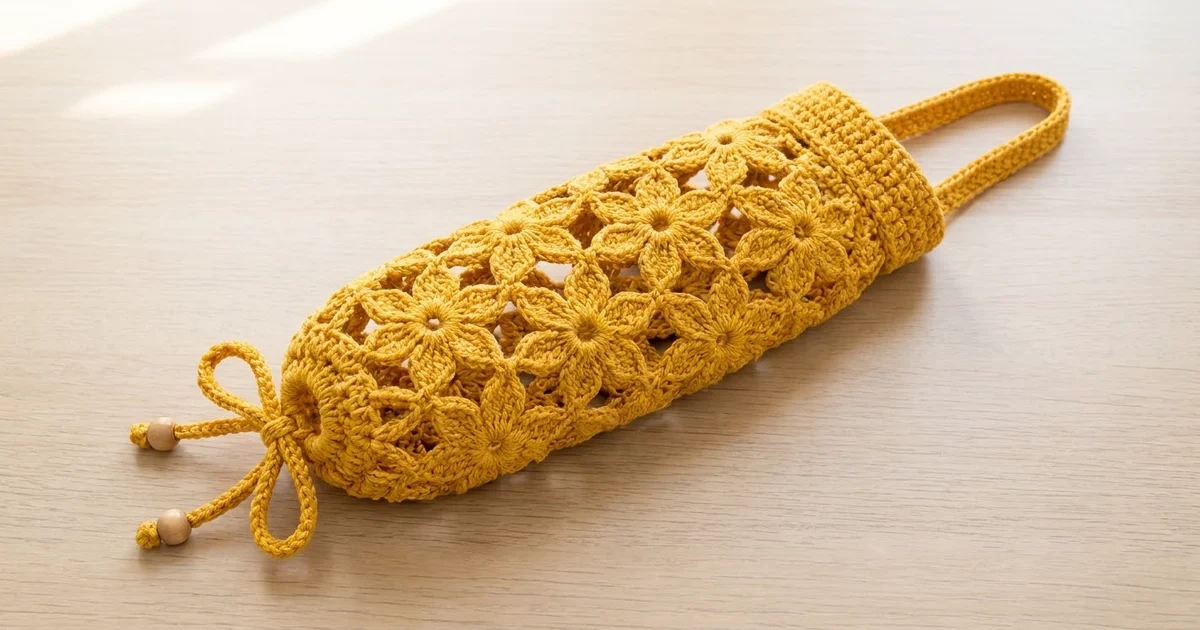
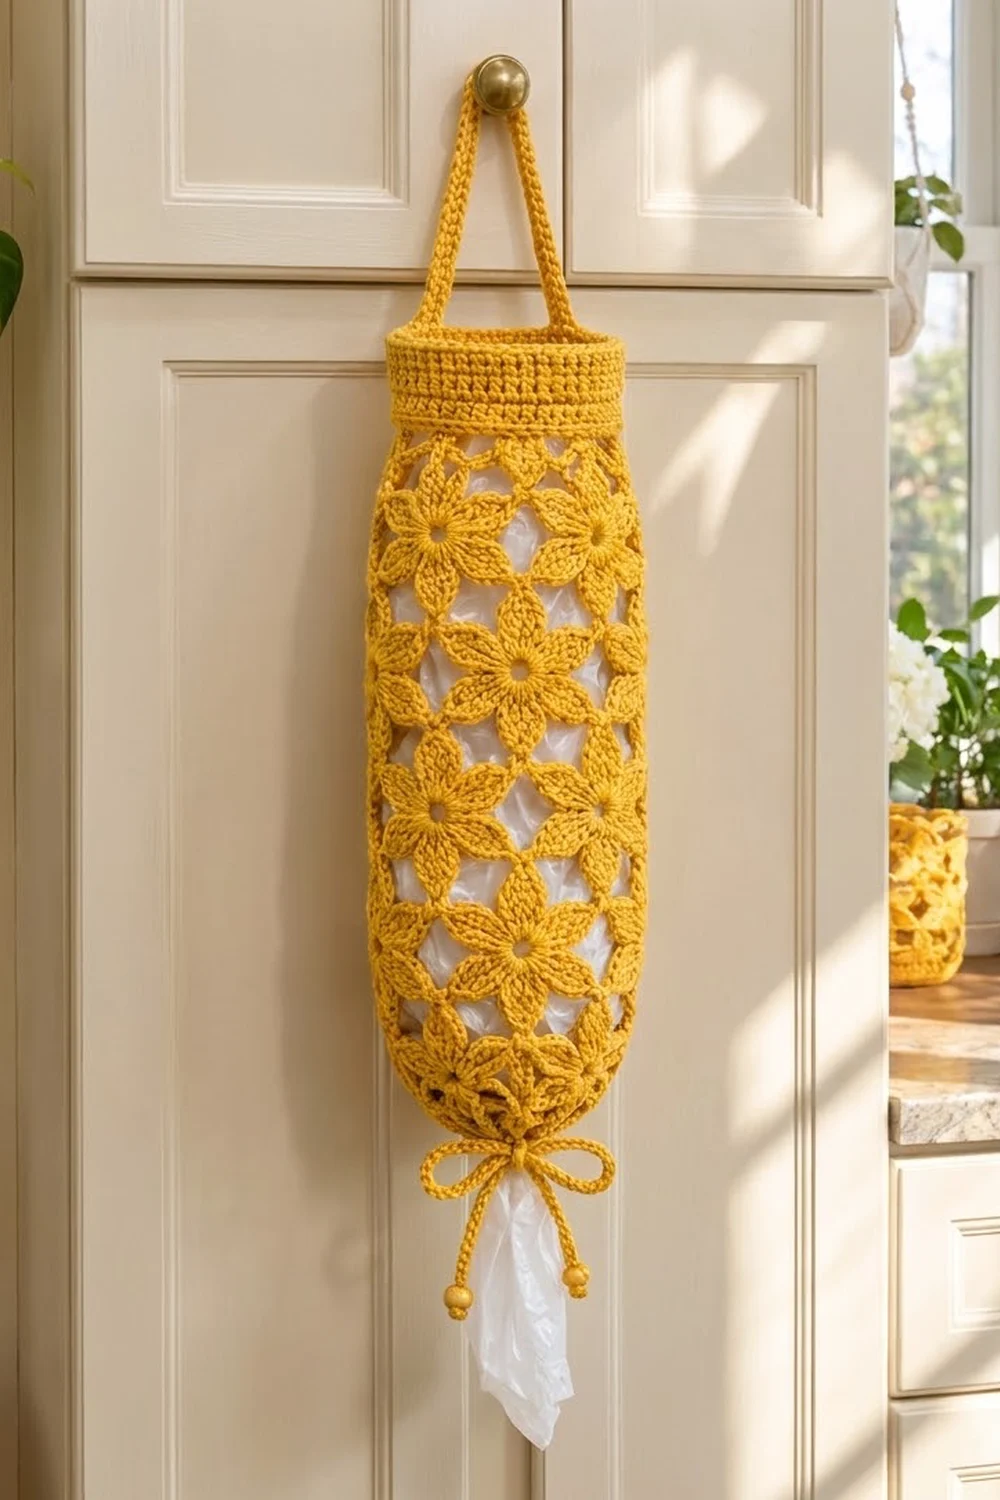
This bag holder turns a kitchen chore into something cheerful. It’s a long, open lace tube covered in staggered six-petal flowers, finished with a solid top band, a slim hanging strap and a bow that closes the bottom. You push bags in at the top and pull them out at the bottom.
The sample is worked in a warm mustard yellow cotton. A denim blue version looks just as good, and so does any solid color that stands out against white or clear bags. The lace is light but strong, and the flowers show up well when the holder is full.
The pattern uses US crochet terms. The finished holder measures 6 in (15.2 cm) wide when flat (12 in / 30.5 cm around) and 14 1/4 in (36.2 cm) tall. The strap loop adds about 3 3/4 in (9.5 cm).
You make it in one piece, starting at the bottom. You work a small solid ring and an eyelet round, increase once, then build a row of half-flowers. Five tiers of full flowers come next, each tier taking two rounds. A leveling round and a solid band finish the top, and you work the strap straight off the band. The drawstring is made separately and laced through the eyelets.
Finished Size and Construction
- Finished size: 6 in (15.2 cm) wide flat × 14 1/4 in (36.2 cm) tall
- Skill level: Intermediate
- Terminology: US
- Yarn weight: Worsted (#4) cotton
- Hook: 5.0 mm (H-8)
- Number of pieces: 1 body (with an attached strap) + 1 drawstring cord
- Layout: Tube worked in the round; 6 flower repeats around, 5 full flower tiers
- Repeat size: 2 in (5.1 cm) wide × 2 in (5.1 cm) tall per tier
- Size before border: 12 3/4 in (32.4 cm) tall after Rnd 16
- Border (top band) depth: 1 1/2 in (3.8 cm)
Materials
Use a smooth worsted-weight cotton or a cotton blend. Cotton keeps its shape when the holder is full, and the stitches stay crisp. Avoid fuzzy or very stretchy acrylic, because the lace can sag lengthwise.
- Mustard yellow (MC): 120 g, about 190 m (208 yd)
- Optional colorway: Denim blue, same amount
These amounts include a margin of about 15% for your gauge swatch and small differences in tension.
Tools:
– 5.0 mm (H-8) crochet hook
– Stitch marker
– Tapestry needle
– Scissors
– Measuring tape
– Rustproof pins and a blocking mat
Abbreviations (US Terms)
- ch – chain
- sl st – slip stitch
- sc – single crochet
- hdc – half double crochet
- dc – double crochet
- tr – treble crochet
- rev sc – reverse single crochet (crab stitch)
- sp – space
- st(s) – stitch(es)
- rnd – round
Special stitches:
- Petal cluster (pc): [Yo twice, insert hook in the st or sp, pull up a loop, (yo, draw through 2 loops) twice] 2 times in the same place, then yo and draw through all 3 loops on the hook.
- Beginning petal (bpc): Ch 4, then work 1 tr in the same place. This counts as 1 pc.
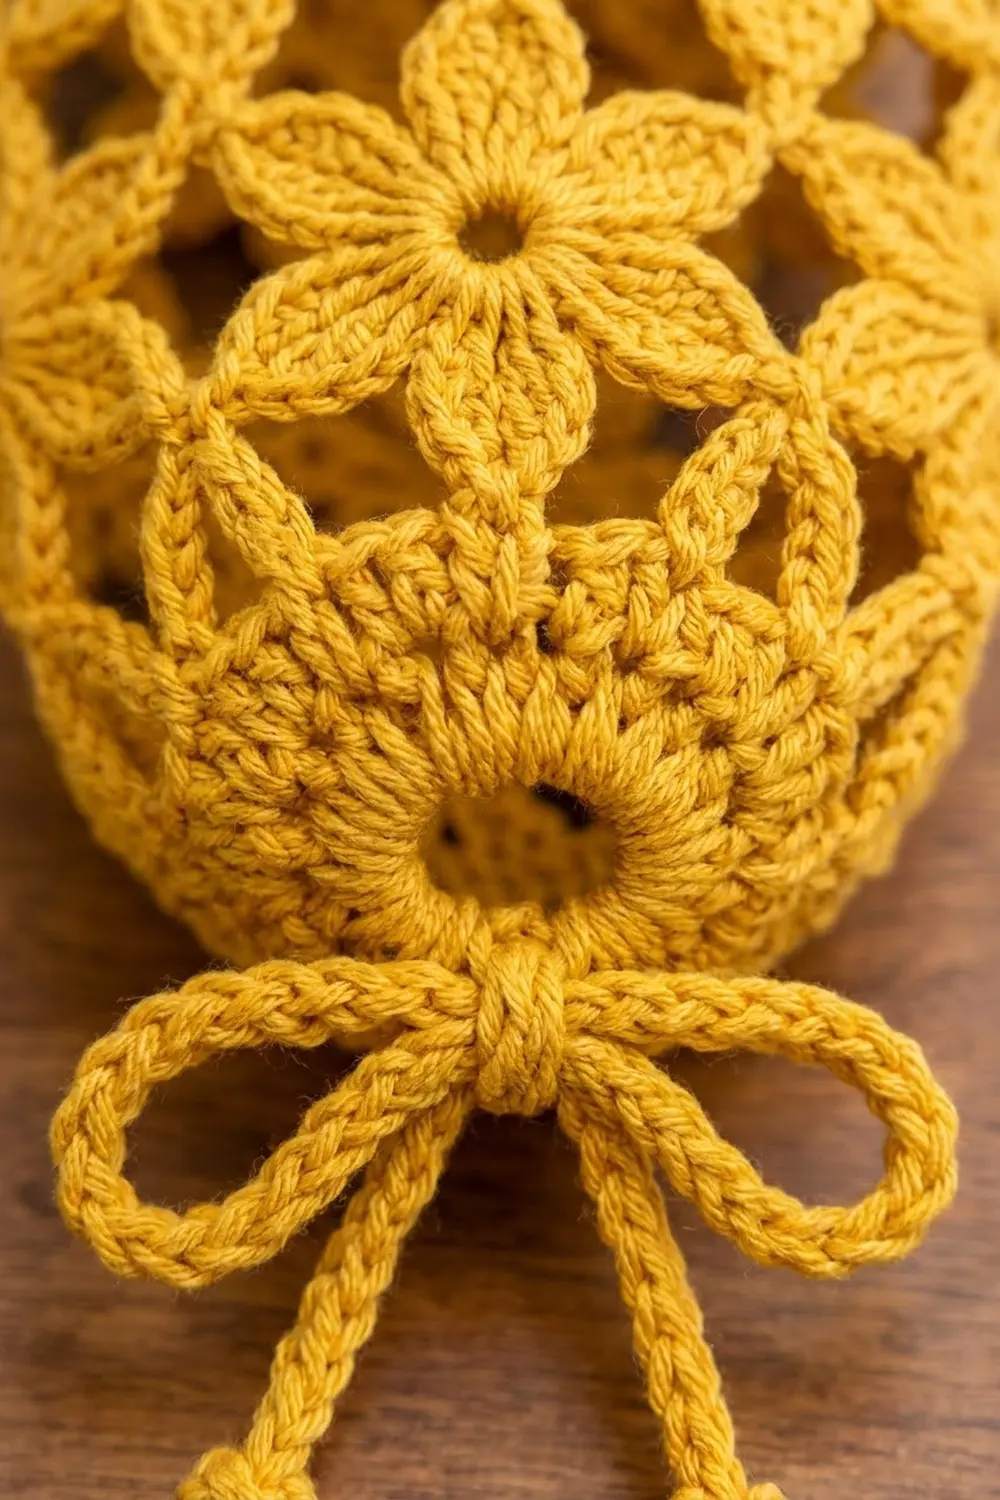
- Flower base cluster (fbc): Work 2 tr “legs” in each of the next 3 sps. For each leg: yo twice, insert hook, pull up a loop, (yo, draw through 2) twice. That gives 6 legs and leaves 7 loops on the hook. Yo, draw through all 7 loops, then ch 1 tightly. That ch-1 is the flower center. The fbc forms the three lower petals of a flower.
- Popcorn bead: Ch 3, then work 5 dc in the 3rd ch from the hook. Drop the loop, insert the hook in the top of the first dc, pick up the dropped loop and pull it through.
Gauge and Checkpoints
- Solid gauge: 16 sc × 18 rnds = 4 in (10.2 cm) square
- Lace gauge: 1 repeat = 2 in (5.1 cm) wide; 1 flower tier (2 rnds) = 2 in (5.1 cm) tall
Test first. Work Rnds 1–7 as your test piece, which gives you the base, the half-flower row and one full tier. Flatten it and measure before going on. If it measures correctly, just keep going.
Checkpoints:
– After Rnd 1: 8 in (20.3 cm) around, about 2 1/2 in (6.4 cm) across.
– After Rnd 4: 12 in (30.5 cm) around, 6 in (15.2 cm) flat; 1 1/4 in (3.2 cm) tall.
– After Rnd 7: 4 1/4 in (10.8 cm) tall.
– After Rnd 15: 12 1/4 in (31.1 cm) tall.
– After Rnd 16: 12 3/4 in (32.4 cm) tall.
– After Rnd 23: 14 1/4 in (36.2 cm) tall.
Too big? Go down half a hook size, to 4.5 mm. Too small? Go up to 5.5 mm (I-9). If only the lace is too tall, tighten your tr stitches by pulling each first loop to the height of a dc instead of letting it stretch long.
Body
Base
Rnd 1: Ch 32, then sl st in the first ch to form a ring, taking care not to twist the chain. Ch 1, sc in each ch around, then sl st in the first sc. (32 sc)
Rnd 2 (eyelets): Ch 4 (counts as dc + ch 1). Skip 1 st, dc in the next st, ch 1; repeat from * 14 more times. Skip the last st and sl st in the 3rd ch of the beginning ch-4. (16 dc + 16 ch-1 sps = 32 sts)
Rnd 3 (conversion): Ch 1. Sc in the next dc, 2 sc in the next ch-1 sp; repeat around and sl st in the first sc. (32 worked 1 per existing st + 16 extra = 48 sc)
Rnd 4: Ch 1, sc in each st around, then sl st in the first sc. (48 sc)
Checkpoint: the piece should be 12 in (30.5 cm) around and 1 1/4 in (3.2 cm) tall.
Half-Flower Row
Rnd 5: Work a bpc in the same st as the join. Then ch 3, pc in the same st, ch 3, pc in the same st. That is the first fan. Ch 5 and skip 7 sts. In the next st work (pc, ch 3, pc, ch 3, pc), ch 5, skip 7 sts; repeat from * 4 more times. Sl st in the top of the bpc.
(6 fans: 18 pc, 12 ch-3 sps, 6 ch-5 sps)
Each fan uses 1 st and skips 7, so 6 repeats × 8 sts = 48, which matches Rnd 4. The fans are the upper halves of the first flowers.
To set up for the next round: Sl st in each of the next 3 ch, then sl st in the top of the next pc (the middle petal).
Flower Tiers
Rnd 6 (lower petals): Ch 1, sc in the same st. Ch 4, then work an fbc with its legs in: the next ch-3 sp, the next ch-5 sp, and the first ch-3 sp of the next fan. Ch 4, then sc in the top of the next middle pc. Repeat from * around. On the last repeat, skip the final sc and sl st in the first sc instead.
(6 sc, 6 fbc with 6 flower centers, 12 ch-4 sps)
Each new flower sits over a ch-5 sp from the round below. This puts it halfway between the previous flowers, which gives the staggered layout.
To set up: Sl st in each of the next 4 ch, then sl st in the next flower center.
Rnd 7 (upper petals): Work a bpc in the same center, then (ch 3, pc) twice in the same center. Ch 5. In the next flower center work (pc, ch 3, pc, ch 3, pc); repeat from * 4 more times. Ch 5 and sl st in the top of the bpc.
(18 pc, 12 ch-3 sps, 6 ch-5 sps)
The ch-5 passes over each sc from Rnd 6. Each flower now has 3 lower petals from the fbc and 3 upper petals from the fan around a round eye, which makes 6 petals.
To set up: Sl st in each of the next 3 ch, then sl st in the top of the middle pc.
Checkpoint: the piece should be 4 1/4 in (10.8 cm) tall.
Rnds 8–15: Repeat Rnds 6–7 four more times. That gives 5 full flower tiers in total. Stitch counts match Rnds 6 and 7 on every repeat.
Checkpoint: the piece should be 12 1/4 in (31.1 cm) tall.
Leveling Round
Rnd 16: Ch 1. Sc in the top of the middle pc, hdc in the next ch-3 sp, hdc in the top of the next pc, 3 dc in the next ch-5 sp, hdc in the top of the next pc, hdc in the next ch-3 sp; repeat around and sl st in the first sc.
(Per repeat: 1 + 1 + 1 + 3 + 1 + 1 = 8 sts; 6 repeats = 48 sts)
The dc stitches fill the low spots between fans, and the sc sits on each fan’s high point, so the top edge comes out straight.
Checkpoint: the piece should be 12 3/4 in (32.4 cm) tall and 12 in (30.5 cm) around.
Top Band (Border)
This band is the “border” of the piece. When you flatten the tube, it has 24 sts across the front and 24 across the back. There are no corners, so no corner stitches are added.
Border gauge: 16 sc = 4 in (10.2 cm), so 48 sc = 12 in (30.5 cm). That matches the lace body exactly.
Rnds 17–22: Ch 1, sc in each st around, then sl st in the first sc. (48 sc: 24 front + 24 back)
Rnd 23: Ch 1, rev sc in each st around, then sl st in the first st. Fasten off. (48 rev sc: 24 front + 24 back)
Why the math works: Rnd 4, Rnd 16 and every band round all have 48 sts. The holder therefore stays the same width from bottom to top, and the band doesn’t flare or pull in. Six sc rounds plus the rev sc edge come to 1 1/2 in (3.8 cm), and 12 3/4 in + 1 1/2 in = 14 1/4 in (32.4 cm + 3.8 cm = 36.2 cm).
Strap
Flatten the holder so the round join sits at the left fold. Count stitches 1–24 across the front and 25–48 across the back.
Row 1: Join yarn in st 31 of Rnd 23. Ch 1, then sc in sts 31, 32 and 33. (3 sc)
Rows 2–44: Ch 1, turn, sc in each st across. (3 sc)
The strap should be about 9 3/4 in (24.8 cm) long and 3/4 in (1.9 cm) wide.
Make sure the strap isn’t twisted. Place Row 44 against the inside of sts 40–42, which leaves a 6-st gap. Sl st through both layers 3 times and fasten off. The two ends are 2 1/4 in (5.7 cm) apart, and the loop rises about 3 3/4 in (9.5 cm) above the band.
Drawstring
Cord: Ch 91. Sl st in the back bump of the 2nd ch from the hook and in each ch across. (90 sl st, about 20 in / 50.8 cm) Fasten off.
Beads: Join yarn at one end of the cord and make a popcorn bead, then fasten off. Repeat at the other end.
Lacing: Starting at the center front, weave the cord over and under through all 16 ch-1 sps of Rnd 2. Both ends should come out of neighboring sps at the center front. Pull the cord until the opening is about 1 1/2 in (3.8 cm) across. Tie a bow with loops about 1 1/2 in (3.8 cm) long and tails about 3 in (7.6 cm) long.
Final Blocking
- Untie the bow and loosen the drawstring.
- Soak the holder in cool water for 10 minutes, then press the water out gently. Don’t wring it.
- Roll it in a towel to remove extra moisture.
- Slide a rolled towel or a 4 in (10.2 cm) wide tube inside it, then flatten it to 6 in (15.2 cm) wide.
- Pin it to 14 1/4 in (36.2 cm) tall.
- Open each flower center with your fingertip and smooth the petals into a star shape.
- Pin the strap straight and let everything dry completely.
- Lace the cord again and retie the bow.
Final Quality-Control Checklist
- Rnds 4, 16 and 17–23 each have 48 sts.
- Every flower has 6 petals and an open center.
- The flowers alternate from tier to tier with no columns stacked directly on top of each other.
- Flat width is 6 in (15.2 cm) along the whole length.
- Height is 14 1/4 in (36.2 cm).
- The strap is untwisted and its ends are 2 1/4 in (5.7 cm) apart.
- The drawstring closes the bottom to about 1 1/2 in (3.8 cm).
- All yarn ends are woven in securely.
Troubleshooting
- Flowers look squashed: Your tr stitches are too short. Pull up each first loop a little taller.
- Body flares at the top: Rnd 16 probably has extra sts. Recount it to 8 per repeat.
- Body narrows at the top: You may have worked fewer than 3 dc in a ch-5 sp. Check that each one has 3.
- The fbc won’t close neatly: Count 7 loops before you yo, then make the ch-1 snug.
- Gaps at the round joins: Join in the top of the bpc, not in the ch-4.
- Bags fall out of the bottom: Pull the cord tighter or tie a double bow.
- Strap stretches: Use firm tension, or work it with a hook half a size smaller.
Care
Hand wash in cool water, or machine wash on a gentle cycle in a laundry bag. Reshape it and lay it flat to dry.
Final Notes
The measurement chain is simple: 48 sts make 12 in (30.5 cm) around and 6 in (15.2 cm) flat. That width holds from Rnd 4 through the half-flower row and all 5 flower tiers. Rnd 16 brings the piece to 12 3/4 in (32.4 cm), and the band adds 1 1/2 in (3.8 cm) for a total of 14 1/4 in (36.2 cm). Check each checkpoint, block gently, and fill your holder with bags.
Happy crocheting!