
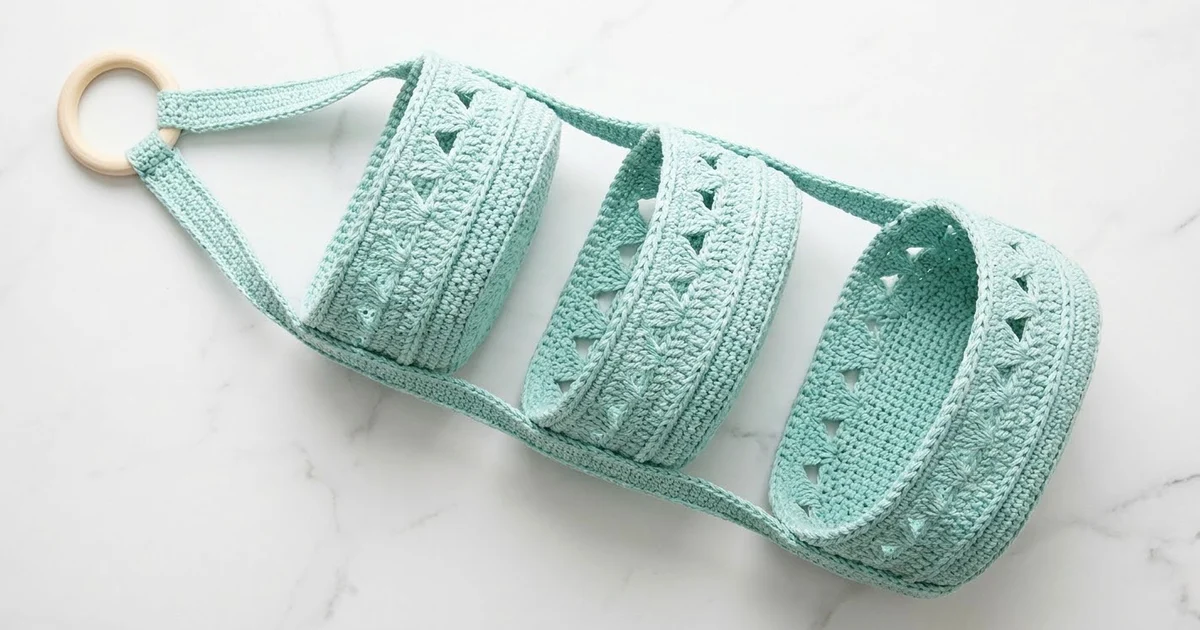
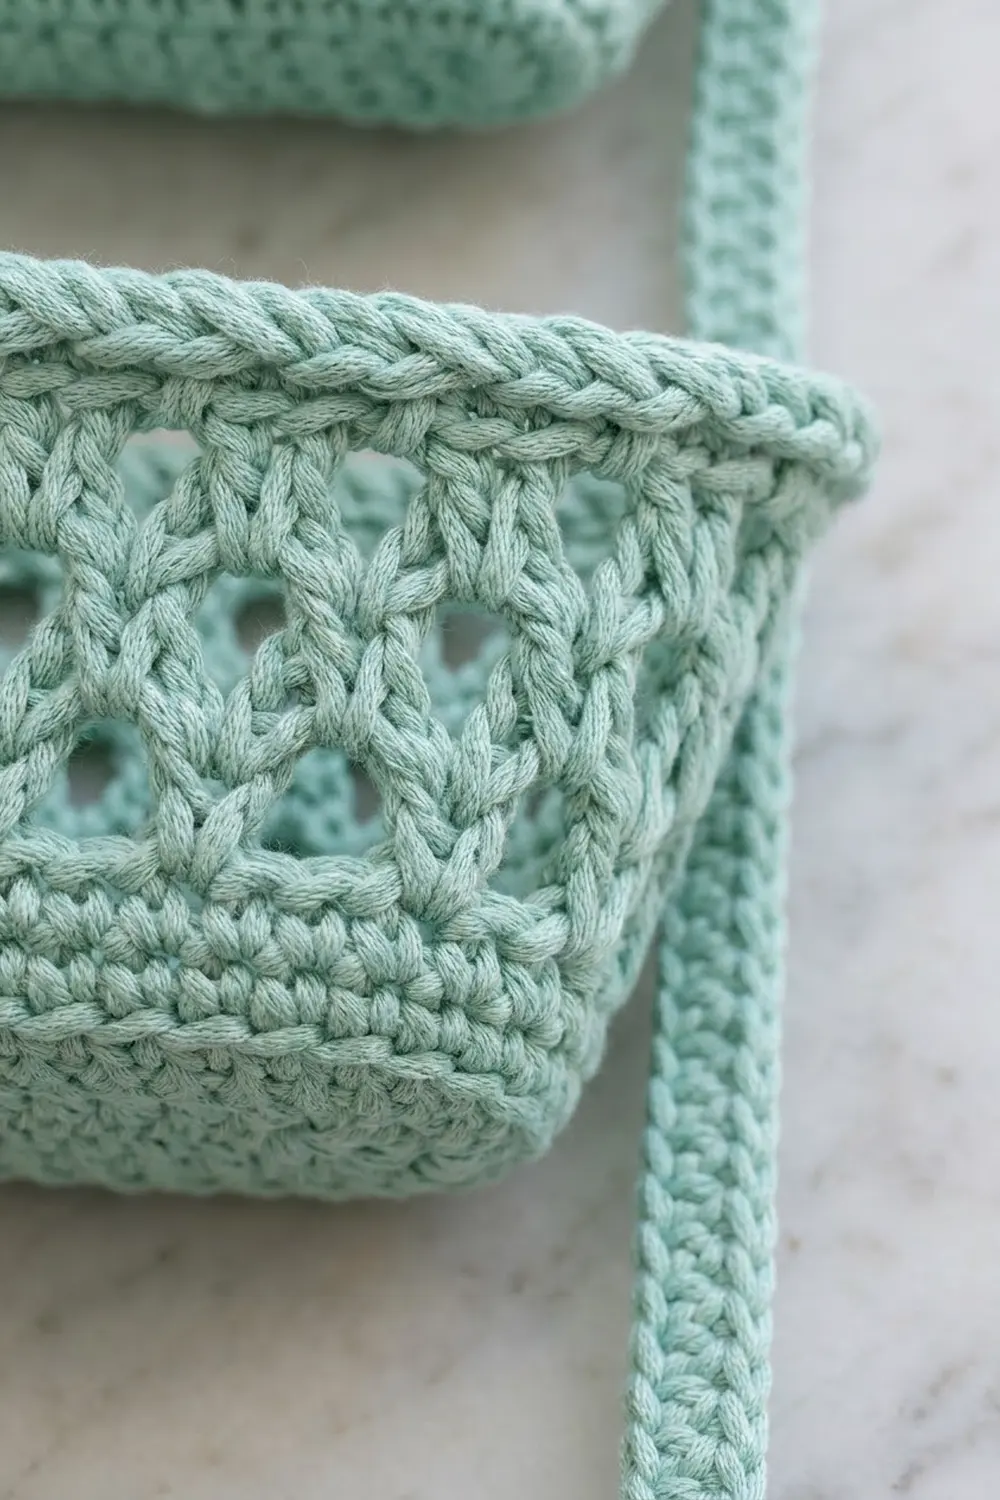
This hanging organizer has three oval baskets stacked one above the other. Two flat straps hold them in place and meet at a natural wooden ring at the top. Each basket has a solid single crochet base, airy walls of staggered V-stitch openings, and a raised rope-look rim. The whole piece uses one soft seafoam mint, so it looks clean and fresh on a bathroom or laundry room wall.
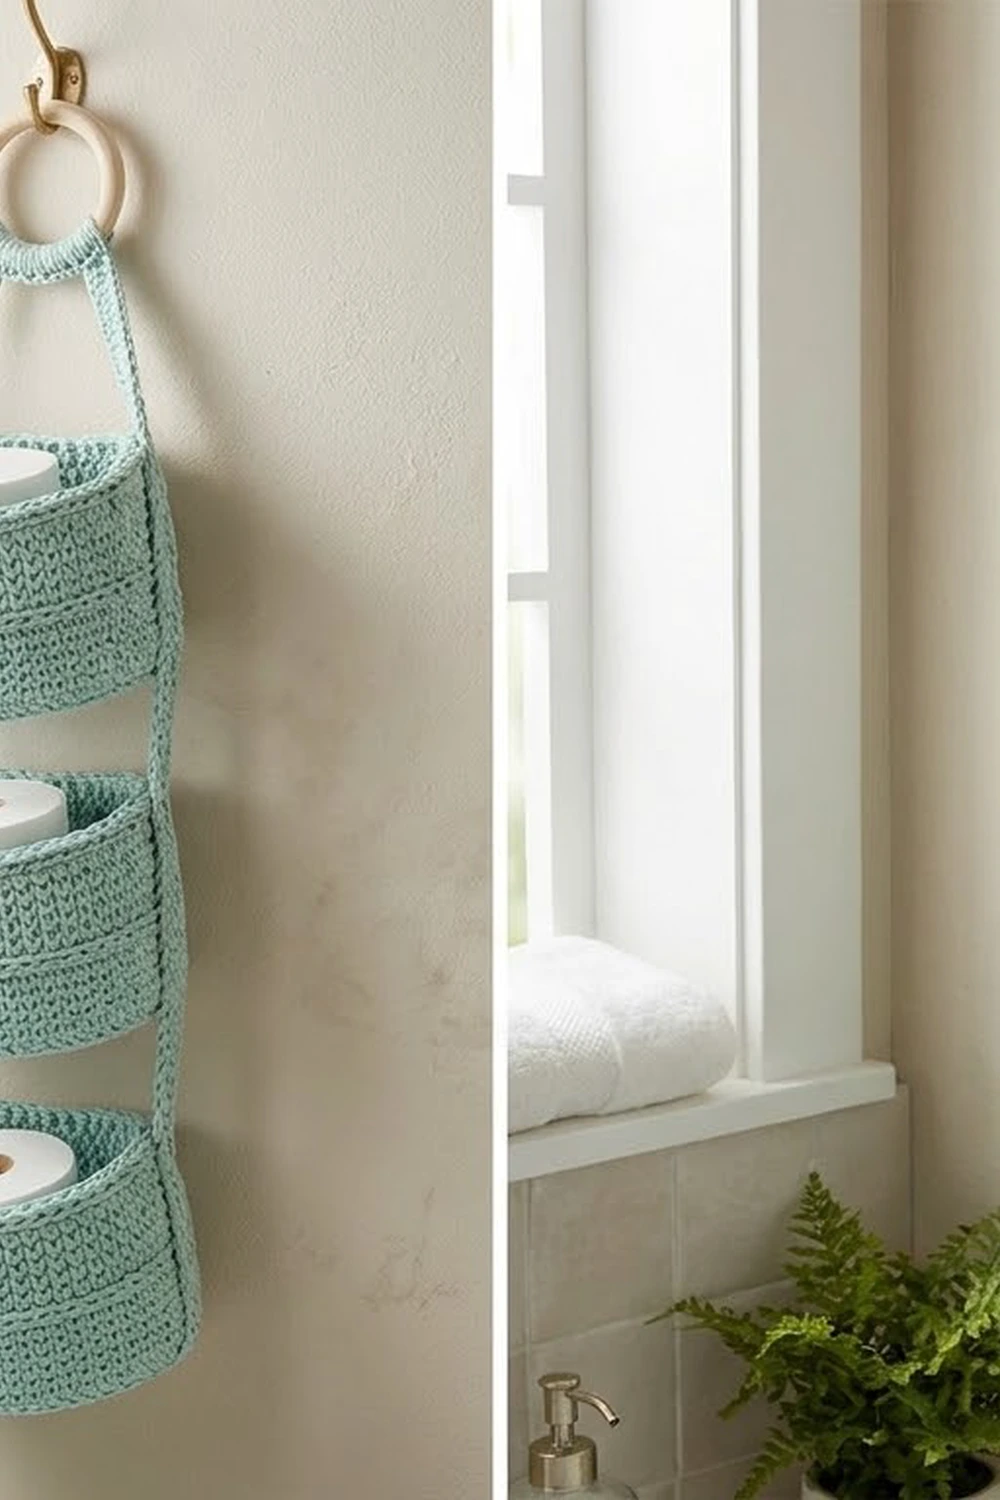
Each basket holds a standard toilet paper roll, which makes this a great spare-roll holder. It also works for washcloths, hair ties, small toys, or fruit. The pattern uses US crochet terms throughout.
The finished hanger is about 29.6 in (75.2 cm) tall from the top of the ring to the bottom of the lowest basket. It is about 9 in (22.9 cm) wide at the basket rims, and each basket is 4 in (10.2 cm) tall.
The construction is simple. Each oval base is worked in joined rounds. A back-loop round turns up the wall, then V-stitch rounds alternate with single crochet rounds that flare slightly toward the rim. A reverse single crochet round finishes the rim. Then you make two flat straps, fold them over the ring, and whipstitch them to the ends of the baskets.
Finished Size and Construction
- Finished size: 29.6 in (75.2 cm) tall x 9 in (22.9 cm) wide
- Skill level: Easy-intermediate
- Terminology: US crochet terms
- Yarn weight: Worsted / #4 medium cotton
- Hook: 5 mm (H-8)
- Number of pieces: 5 crocheted pieces (3 baskets, 2 straps), plus 1 wooden ring
- Layout: 3 baskets stacked vertically, 2.6 in (6.6 cm) apart
- Basket base: 7.5 x 4.75 in (19.1 x 12.1 cm)
- Basket rim: about 9 x 6 in (22.9 x 15.2 cm), 90 sts around
- Basket height: 4 in (10.2 cm)
- Strap size before edging: 28.6 x 0.75 in (72.6 x 1.9 cm)
- Strap edging depth: 0.25 in (0.6 cm) per side, for a finished strap of 29.1 x 1.25 in (73.9 x 3.2 cm)
Materials
Choose a smooth worsted-weight cotton or cotton blend with about 170 m per 100 g. Cotton gives firm walls that hold their shape. Acrylic makes a softer basket that may sag when full.
- Seafoam mint, worsted cotton: 260 g, about 445 m
- Each basket: about 60 g / 100 m
- Each strap: about 20 g / 35 m
These totals include a margin of roughly 15% for your gauge check, sewing, and weaving in ends.
Tools:
- 5 mm (H-8) crochet hook
- 1 wooden ring, 3 in (7.6 cm) outer diameter
- Tapestry needle
- 4 stitch markers
- Scissors and measuring tape
- Sewing clips or pins
- A small towel or a container about 4.5 in (11.4 cm) wide, for blocking
Abbreviations (US Terms)
- ch – chain
- sl st – slip stitch
- sc – single crochet
- dc – double crochet
- BLO – back loop only
- st(s) – stitch(es)
- sp – space
- sk – skip
- rep – repeat
- rnd – round
- V-st – (dc, ch 1, dc) in the same st
- rev sc (reverse single crochet / crab stitch) – Work from left to right (right-handed). Insert the hook into the next st to the right, yarn over, and pull up a loop. Yarn over and pull through both loops.
Gauge and Checkpoints
Gauge: 14 sc and 16 rows = 4 in (10.2 cm) in sc.
Finish one whole basket before you start the others. It acts as your real gauge swatch and shows you the size, firmness, and yarn use.
- Checkpoint 1 (after Rnd 9): The base measures 7.5 x 4.75 in (19.1 x 12.1 cm) and lies flat.
- Checkpoint 2 (after Rnd 10): A clean ridge shows where the wall turns up.
- Checkpoint 3 (after Rnd 20): The basket is 4 in (10.2 cm) tall and the rim is about 9 x 6 in (22.9 x 15.2 cm).
- Checkpoint 4 (strap after Row 3): The strip is 28.6 in (72.6 cm) long.
If your pieces come out too big, go down one hook size. If they are too small, go up one size. A base that ruffles is usually crocheted too loosely, and a base that cups is usually too tight. Fix this before you go further, because a 4.75 in (12.1 cm) base is what lets a roll fit.
Basket (Make 3)
Base
Ch 12.
Rnd 1: 3 sc in 2nd ch from hook, sc in next 9 ch, 3 sc in last ch. Rotate to work along the other side of the chain, then sc in next 9 ch. Join with sl st to first sc. (24 sts)
From now on, start each rnd with ch 1 (it does not count as a st) and join with sl st to the first sc. Each curved end gains 3 sts per rnd. Each straight side stays at 9 sts.
Rnd 2: 2 sc in each of next 3 sts, sc in next 9, 2 sc in each of next 3 sts, sc in next 9. (30 sts)
Rnd 3: (sc in next st, 2 sc in next st) 3 times, sc in next 9, (sc in next st, 2 sc in next st) 3 times, sc in next 9. (36 sts)
Rnd 4: (sc in next 2 sts, 2 sc in next st) 3 times, sc in next 9, rep the bracket once more, sc in next 9. (42 sts)
Rnd 5: Work like Rnd 4, with 3 sc before each increase. (48 sts)
Rnd 6: Work like Rnd 4, with 4 sc before each increase. (54 sts)
Rnd 7: Work like Rnd 4, with 5 sc before each increase. (60 sts)
Rnd 8: Work like Rnd 4, with 6 sc before each increase. (66 sts)
Rnd 9: Work like Rnd 4, with 7 sc before each increase. (72 sts)
Each curved end now has 27 sts and each straight side has 9: 27 + 9 + 27 + 9 = 72. Go to Checkpoint 1.
Wall
Rnd 10: Ch 1, sc in BLO of each st around. Join. (72 sts)
This round makes the ridge where the wall stands up from the base. Check Checkpoint 2.
Rnd 11 (V-round): Ch 4 (counts as dc and ch 1), dc in same st as join. *Sk 2 sts, V-st in next st; rep from * 22 more times, sk last 2 sts. Join with sl st to 3rd ch of beg ch-4. (24 V-sts)
Rnd 12 (sc round): Ch 1, sc in each dc and each ch-1 sp around, but work 2 sc in the ch-1 sp of V-sts 4, 8, 12, 16, 20, and 24. Join. (72 + 6 = 78 sts)
Rnd 13 (V-round): Sl st in next st. Ch 4, dc in same st. *Sk 2 sts, V-st in next st; rep from * 24 more times, sk the last st and the joining st. Join to 3rd ch of beg ch-4. (26 V-sts)
The sl st moves your starting point, so the new V-sts sit between the V-sts below. That is what staggers the triangular openings into a trellis.
Rnd 14: Work like Rnd 12, with 2 sc in the ch-1 sp of V-sts 4, 8, 12, 16, 20, and 24. (78 + 6 = 84 sts)
Rnd 15: Work like Rnd 13, for 28 V-sts in total. (28 V-sts)
Rnd 16: Work like Rnd 12, with 2 sc in the ch-1 sp of V-sts 4, 8, 12, 16, 20, and 24. (84 + 6 = 90 sts)
Rnd 17: Work like Rnd 13, for 30 V-sts in total. (30 V-sts)
Rnd 18: Ch 1, sc in each dc and each ch-1 sp, with no increases. Join. (90 sts)
Rnd 19: Ch 1, sc in each st around. Join. (90 sts)
Each V-round starts from a count that divides evenly by 3 (72, 78, 84, 90), so the V-sts always come out even with no stitches left over. The 6 extra sts in each sc round make the gentle flare. The rim (Rnd 20) is in the Border section.
Strap (Make 2)
Ch 101.
Row 1: Sc in 2nd ch from hook and in each ch across. Turn. (100 sts)
Rows 2–3: Ch 1, sc in each st across. Turn. (100 sts)
Go to Checkpoint 4. Don’t fasten off. Go straight on to the strap edging in the Border section.
Make All Pieces
All pieces are seafoam mint.
- Baskets: 3, about 60 g / 100 m each
- Straps: 2, about 20 g / 35 m each
- Wooden ring: 1
Layout (front view):
            ( O )          <- 3 in (7.6 cm) ring
           /     \
          /       \        <- 9.4 in (23.9 cm) of strap
         |         |
      [  BASKET 1   ]      <- 4 in (10.2 cm)
         |         |       <- 2.6 in (6.6 cm) gap
      [  BASKET 2   ]
         |         |       <- 2.6 in (6.6 cm) gap
      [  BASKET 3   ]
Joining
Each strap is 100 sts long, and every section of the hanger is set as a whole number of strap sts:
- Fold over ring: 7 sts = 2.0 in (5.1 cm)
- Ring to top basket: 33 sts = 9.4 in (23.9 cm)
- Each basket: 14 sts = 4.0 in (10.2 cm)
- Each gap: 9 sts = 2.6 in (6.6 cm)
7 + 33 + 14 + 9 + 14 + 9 + 14 = 100 sts. Mark these points along the edge of each strap with clips before you sew.
1. Attach the ring. Fold the top 7 sts of each strap over the bottom of the ring and toward the back. Put the two straps side by side on the ring. Whipstitch the folded end across the strap width, then sew down both long edges of the 7-st overlap.
2. Find the basket centers. Flatten each basket so the two curved ends line up. Mark the center of each curved end.
3. Sew the baskets. Center a strap on the outside of each curved end. Line up the top of the 14-st section with the rim. Whipstitch each long edge of the strap to the wall, working from the rim down to the base ridge. Work stitch to stitch:
– 1 strap st to each sc round (Rnds 10, 12, 14, 16, 18, 19), which makes 6
– 2 strap sts to each V-round (Rnds 11, 13, 15, 17), which makes 8
That gives 6 + 8 = 14 strap sts per basket. Wrap twice through the top strap st and over the rope rim to anchor it. Leave the 9-st gap free, then sew the next basket the same way.
Tension: Keep your stitches snug but don’t pull. If the seam is tight, the wall puckers and the basket tips forward.
Size checkpoint: Hang the piece. It should measure 29.6 in (75.2 cm) from the top of the ring to the bottom of Basket 3, with 2.6 in (6.6 cm) between baskets. The bottom edging of each strap, 0.25 in (0.6 cm), tucks just under the lowest base.
Border
The “border” here means the rope rim on each basket and the edging on each strap. Both use the main gauge of 3.5 sts per inch (1.4 sts per cm).
Basket Rim
Rnd 20: Ch 1, rev sc in each st around. Join and fasten off. (90 sts: 45 across the front half and 45 across the back half)
Rev sc twists each stitch, so the rim looks like thick rope and sits just above the wall. You work it 1 st into each st, so the rim size stays the same. Go to Checkpoint 3.
Strap Edging
Edging round: Ch 1. Work around all 4 sides of the strip:
- Long side 1 (along Row 3): 3 sc in first st, sc in next 98 sts, 3 sc in last st. (104 sts, including both 3-sc corners)
- Short end 1: 1 sc in the end of each row. (3 sts)
- Long side 2 (along the foundation chain): 3 sc in first ch, sc in next 98 ch, 3 sc in last ch. (104 sts, including both 3-sc corners)
- Short end 2: 1 sc in the end of each row. (3 sts)
Join and fasten off. (104 + 3 + 104 + 3 = 214 sts)
Why the math works: The corners belong to the long sides only, so no corner is counted twice. Each long side has 100 sts, and each 3-sc corner adds 2, so each side has 100 + 4 = 104. The short ends get 1 sc per row, so they lie flat. The edging adds 0.25 in (0.6 cm) on every side, which makes a 1.25 in (3.2 cm) wide, 29.1 in (73.9 cm) long strap. Edge the straps before you join, so that the long-edge sts are the ones you sew through.
Final Blocking
- Weave in all ends along solid sc rounds so they stay hidden.
- Spray each basket with water until it is damp but not soaked.
- Fill each basket with a rolled towel or a 4.5 in (11.4 cm) wide container.
- Shape the rim into an even oval about 9 x 6 in (22.9 x 15.2 cm), and pinch the rope rim upright.
- Lay the straps flat, pin them to 1.25 in (3.2 cm) wide, and let them dry.
- Let everything dry completely before you join the pieces.
- After joining, hang the organizer for a day so the straps settle evenly.
Final Quality-Control Checklist
- Each base measures 7.5 x 4.75 in (19.1 x 12.1 cm) and lies flat
- Each basket has 90 sts at Rnd 19 and is 4 in (10.2 cm) tall
- The openings are staggered from one V-round to the next
- The rope rim is even all the way around
- Each strap has 214 edging sts and is 29.1 in (73.9 cm) long
- The baskets are level, and the gaps measure 2.6 in (6.6 cm)
- Both straps lie flat side by side on the ring
- No ends show on the outside
Troubleshooting
Base ruffles: You are crocheting too loosely or adding extra sts. Recount the curved ends: they should be 3 sts × the round number.
Base cups upward: Your tension is too tight. Go up one hook size.
V-sts don’t come out even: The previous sc round has the wrong count. It must divide by 3.
Openings line up in columns: You skipped the starting sl st in Rnds 13, 15, or 17.
Rim flares out: Your rev sc is too loose. Go down one hook size for Rnd 20 only.
Basket tips forward: The strap is sewn too tightly, or it sits off-center. Unpick the seam and center the strap on the curved end again.
Roll doesn’t fit: The base is under 4.75 in (12.1 cm) wide. Go up a hook size.
Care
Hand wash in cool water and press out the excess with a towel. Reshape the baskets and dry them flat, then hang the organizer again.
Final Notes
Every measurement depends on the one before it. A gauge of 14 sc = 4 in (10.2 cm) gives a 72-st base of 7.5 x 4.75 in (19.1 x 12.1 cm). The walls flare through 78, 84, and 90 sts to a 4 in (10.2 cm) tall basket. Each 100-st strap splits into exact sections that place the baskets 2.6 in (6.6 cm) apart, for a 29.6 in (75.2 cm) hanger. If you check each stage, the finished organizer will hang straight and hold its rolls well.
Happy crocheting!