

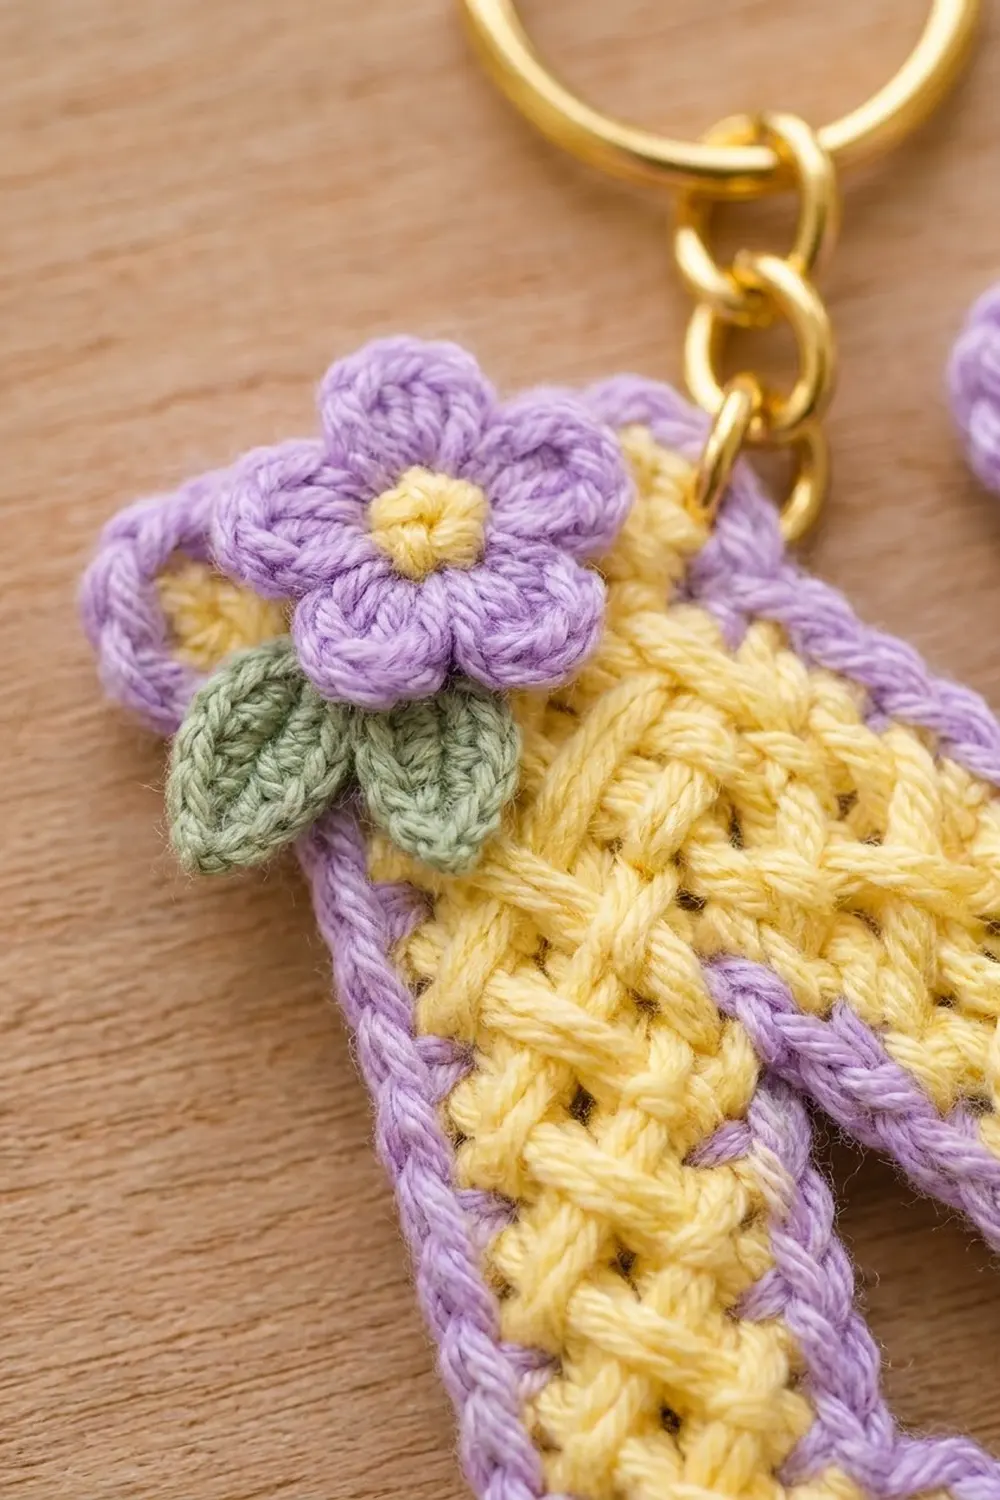
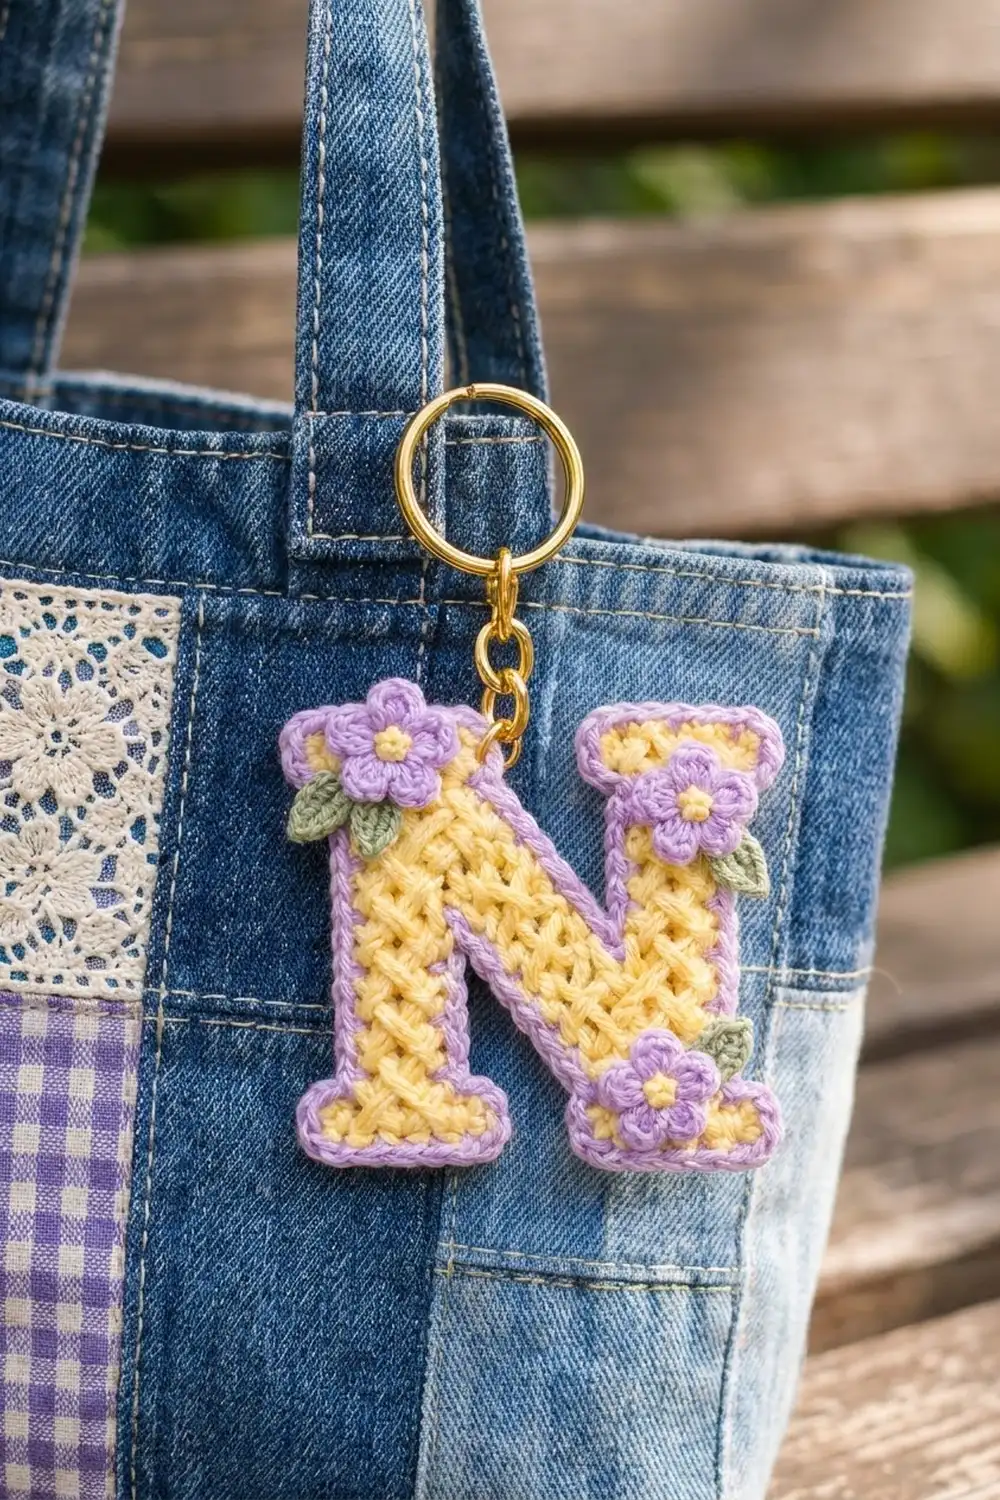
This little keychain is a soft, flat letter N in pale butter yellow, outlined with a lavender rope border. Three tiny lavender flowers with yellow centers and green leaves finish the front. A gold split ring on a short chain makes it ready to clip onto a tote, backpack, or set of keys.
The yellow fabric has a woven, lattice-like texture made with crossed single crochet, so it looks far more detailed than its size suggests. The serif letter shape, rope edge, and scattered flowers give it a sweet cottage style.
The pattern is written in US crochet terms. The finished letter measures 3.6 in (9.1 cm) tall and 3.6 in (9.1 cm) wide, not counting the ring hardware.
The letter is one single piece, worked bottom to top in rows in three connected parts. Part 1 is the left stem base. Part 2 is the right stem with the lower half of the diagonal. Part 3 is a bridge that joins them and forms the upper diagonal and the top-left serif. Two lavender border rounds go around the whole outline. Then you sew on the flowers and leaves and attach the hardware.
Finished Size and Construction
- Finished size: 3.6 in x 3.6 in (9.1 cm x 9.1 cm)
- Skill level: Intermediate (shaping, plus one row worked across two parts)
- Terminology: US crochet terms
- Yarn weight: DK (light worsted, weight 3) cotton
- Hook: 3.5 mm (E-4) for the letter and border; 3.0 mm for flowers and leaves
- Number of pieces: 1 letter, plus 3 flowers and 4 leaves as appliqués
- Layout: a single letter N on a grid 16 stitches wide and 16 rows tall
- Letter size before border: 3.2 in x 3.2 in (8.1 cm x 8.1 cm)
- Border depth: 0.2 in (0.5 cm) on every edge, 2 rounds
Materials
Use a smooth mercerized or soft matte cotton in DK weight. Cotton keeps the stitch texture crisp and helps the letter stay flat on a keychain. Avoid fuzzy or very stretchy yarns, which blur the lattice and let the letter curl.
- Pale yellow (letter and flower centers): 5 g, about 12 m
- Lavender (border and petals): 6 g, about 15 m
- Sage green (leaves): 1 g, about 3 m
All quantities include a margin for a test piece and tails.
Tools:
- 3.5 mm (E-4) and 3.0 mm crochet hooks
- Tapestry needle and scissors
- Stitch markers (2)
- 1 in (2.5 cm) gold split ring with a short gold chain
- 8 mm (0.3 in / 0.8 cm) gold jump ring
- Two pairs of flat-nose pliers
- Pins, blocking mat, and spray bottle
Abbreviations (US Terms)
- ch – chain
- sl st – slip stitch
- sc – single crochet
- hdc – half double crochet
- dc – double crochet
- sc2tog – single crochet 2 together (makes 1 st from 2)
- rev sc – reverse single crochet (crab stitch), worked left to right
- st(s) – stitch(es)
- RS / WS – right side / wrong side
Special stitch – crossed single crochet (X-st): Skip the next st and sc in the following st. Then, working in front of the sc you just made, sc in the skipped st. One X-st uses 2 sts and makes 2 sts. RS rows of X-sts between plain sc rows create the woven lattice.
Texture rule: Odd rows are RS rows and carry the X-sts. Even rows are WS rows of plain sc. The ch 1 at the start of a row never counts as a stitch.
Gauge and Checkpoints
Gauge: 10 sts and 10 rows = 2 in (5.1 cm) in the X-st pattern with the 3.5 mm hook. Each stitch and each row is 0.2 in (0.5 cm) wide or tall. That is why the letter fits a square 16 x 16 grid.
Make Part 1 first and use it as your test piece. It has only 6 or 4 sts per row, so it’s quick to check and easy to redo.
Checkpoints:
- After Part 1, Row 2: the foot is 1.2 in (3.0 cm) wide.
- After Part 1, Row 8: the stem is 0.8 in (2.0 cm) wide and the part is 1.6 in (4.1 cm) tall.
- After Part 2, Row 8: the block is 1.6 in (4.1 cm) wide and 1.6 in (4.1 cm) tall.
- After Part 3: the letter is 3.2 in (8.1 cm) tall and 3.2 in (8.1 cm) wide.
- After the border: 3.6 in (9.1 cm) each way.
If Part 1 is too big, go down a hook size. If it’s too small, go up a hook size. Being off by 0.1 in (0.3 cm) on the stem is fine; more than that will show in the finished letter.
Pattern
Grid note: With the RS facing you, columns are numbered 1 (left) to 16 (right) and rows 1 (bottom) to 16 (top). Odd rows travel right to left and even rows travel left to right.
Part 1: Left Stem Base (Yellow, 3.5 mm Hook)
Foundation: Ch 7.
Row 1 (RS): Sc in 2nd ch from hook and in each ch across. (6 sts)
Row 2 (WS): Ch 1, turn, sc in each st across. (6 sts)
Row 3 (RS): Ch 1, turn, sc2tog, X-st, sc2tog. (4 sts) The decreases draw the foot in to form the curved serif.
Row 4 (WS): Ch 1, turn, sc in each st. (4 sts)
Row 5 (RS): Ch 1, turn, sc, X-st, sc. (4 sts)
Rows 6–8: Repeat Rows 4, 5, 4. (4 sts)
Fasten off with a 6 in (15.2 cm) tail. The stem sits in columns 2–5 and the foot in columns 1–6.
Part 2: Right Foot, Lower Diagonal, and Right Stem
Foundation: Ch 7.
Row 1 (RS): Sc in 2nd ch from hook and in each ch across. (6 sts, columns 16–11)
Row 2 (WS): Ch 1, turn, sc in each st. (6 sts)
Row 3 (RS): Ch 1, turn, sc2tog, X-st, sc, 2 sc in last st. (6 sts, columns 15–10) The right edge steps in for the serif while the left edge steps out to start the diagonal.
Row 4 (WS): Ch 1, turn, sc in each st. (6 sts)
Row 5 (RS): Ch 1, turn, sc, X-st, X-st, 2 sc in last st. (7 sts, columns 15–9)
Row 6 (WS): Ch 1, turn, sc in each st. (7 sts)
Row 7 (RS): Ch 1, turn, sc, X-st, X-st, sc, 2 sc in last st. (8 sts, columns 15–8)
Row 8 (WS): Ch 1, turn, sc in each st. (8 sts) Check: 1.6 in (4.1 cm) wide.
Row 9 (RS): Ch 1, turn, sc, X-st, sc. (4 sts, columns 15–12) Leave the other 4 sts unworked. Place a marker in the 3rd unworked st (column 9).
Row 10 (WS): Ch 1, turn, sc in each st. (4 sts)
Rows 11–14: Work (sc, X-st, sc) on RS rows and plain sc on WS rows. (4 sts)
Row 15 (RS): Ch 1, turn, 2 sc in first st, X-st, 2 sc in last st. (6 sts, columns 16–11)
Row 16 (WS): Ch 1, turn, sc in each st. (6 sts)
Fasten off with a 6 in (15.2 cm) tail.
Part 3: Bridge, Upper Diagonal, and Top-Left Serif
Lay Part 1 to the left of Part 2, both RS up, with the bottoms level. There will be a 2-column gap between the top of Part 1 (column 5) and the marked st (column 9).
Row 9 (RS): Join yellow in the marked st of Part 2. Ch 1, sc in same st, sc in next st (column 8), ch 2 across the gap, then sc in each of the 4 sts of Part 1 Row 8. (8 sts: 2 sc + 2 ch + 4 sc)
Row 10 (WS): Ch 1, turn, sc in 4 sts, sc in each of 2 ch, sc in 2 sts. (8 sts, columns 2–9)
Row 11 (RS): Ch 1, turn, sc2tog, X-st, X-st, sc, sc. (7 sts, columns 8–2)
Row 12 (WS): Ch 1, turn, sc in each st. (7 sts)
Row 13 (RS): Ch 1, turn, sc2tog, X-st, X-st, sc. (6 sts, columns 7–2)
Row 14 (WS): Ch 1, turn, sc in each st. (6 sts)
Row 15 (RS): Ch 1, turn, sc2tog, X-st, sc, 2 sc in last st. (6 sts, columns 6–1)
Row 16 (WS): Ch 1, turn, sc in each st. (6 sts)
Fasten off. Each sc2tog on the right edge moves the upper diagonal one column to the left, which makes the slanted inner edge. The final 2 sc forms the top-left serif. The 2 free sts of Part 2 Row 8 (columns 10–11) and the ch-2 stay open. They become the floors of the two triangular openings.
Weave in all yellow tails now. Work them on the WS along stitch rows so they can’t show through the lattice. Checkpoint: the letter is 3.2 in (8.1 cm) square overall.
Border
Border gauge: Work 1 sc per stitch along top and bottom edges and 1 sc per row-end along side edges. A stitch and a row are both 0.2 in (0.5 cm), so this matches the fabric exactly on every edge.
Work clockwise with the RS facing, using lavender yarn and the 3.5 mm hook.
Round 1: Join lavender in the first st of the top-left serif (column 1, Row 16). Then work:
- Top of left serif: 3 sc in first st, sc in next 4 sts, 3 sc in last st. (10 sc)
- Down the inner edge of the upper diagonal: 1 sc in each row-end, Rows 16–9. (8 sc)
- Floor of the upper opening: sc in each of the 2 free sts of Part 2 Row 8. (2 sc)
- Up the inner edge of the right stem: 1 sc in each row-end, Rows 9–16. (8 sc)
- Top of right serif: 3 sc in first st, sc in next 4 sts, 3 sc in last st. (10 sc)
- Down the outer right side: 1 sc in each row-end, Rows 16–1. (16 sc)
- Bottom of right foot, into the foundation ch: 3 sc in first, sc in next 4, 3 sc in last. (10 sc)
- Up the inner edge of the lower diagonal: 1 sc in each row-end, Rows 1–8. (8 sc)
- Underside of the bridge: sc in each of the 2 ch. (2 sc)
- Down the right edge of the left stem: 1 sc in each row-end, Rows 8–1. (8 sc)
- Bottom of left foot: 3 sc in first, sc in next 4, 3 sc in last. (10 sc)
- Up the outer left side: 1 sc in each row-end, Rows 1–16. (16 sc)
Sl st to first sc. Total: 108 sc.
Round 2: Ch 1, rev sc in each st around. (108 sts) Sl st to first st, fasten off, and weave in.
Why the math works: The outline has 92 edge units:
- four serif edges of 6 sts (24)
- two outer sides of 16 row-ends (32)
- four inner edges of 8 row-ends (32)
- two opening floors of 2 sts (4)
Each of the 8 outer serif corners gains 2 extra sc (16), so 92 + 16 = 108. The inner corners get no extra stitches, so the openings stay crisp instead of rippling. Round 2 is worked 1 into 1, so it adds no stitches. The rev sc twists into the rope-like edge.
Flowers and Leaves
Flower (make 3): With the 3.0 mm hook and yellow, make a magic ring. Work 5 sc in the ring, pull it closed, and sl st to the first sc, changing to lavender. Fasten off yellow.
Petal round: In each sc, work (sl st, ch 2, 2 dc, ch 2, sl st). (5 petals) Fasten off with an 8 in (20.3 cm) tail. Each flower is about 0.9 in (2.3 cm) across.
Leaf (make 4): With the 3.0 mm hook and green, ch 4. Sc in 2nd ch from hook, hdc in next ch, sc in last ch, ch 1. Then, working along the other side of the chain: sc, hdc, sc. Sl st to first sc and fasten off with a tail. Each leaf is about 0.5 in (1.3 cm) long.
Placement:
- Top left: Sew one flower over the top-left corner of the left serif, with 2 leaves tucked beneath it on the lower left.
- Top right: Sew one flower on the top-right serif, with 1 leaf peeking out to its right.
- Lower right: Sew the last flower where the diagonal meets the right foot, with 1 leaf above it to the right.
Stitch through the center and the base of each petal so the flowers stay flat.
Final Blocking
- Spray the letter evenly with water until it’s damp but not soaking.
- Lay it RS up on the blocking mat.
- Pin the four serif corners first, keeping the size at 3.6 in (9.1 cm) each way.
- Pin the stems straight and shape both openings into clean triangles.
- Let it dry completely, for at least 6 hours.
- Attach the hardware last. Open the 8 mm jump ring with two pliers and thread it through the border at the top-right corner of the left serif. Add the chain end and close the ring fully.
Final Quality-Control Checklist
- The letter measures 3.6 in (9.1 cm) tall and wide.
- Both stems are 0.8 in (2.0 cm) wide before the border.
- Border Round 1 has 108 sc.
- Serif corners are square and flat, and inner corners are sharp, not wavy.
- The lattice texture shows on the front only.
- There are no gaps where Part 3 joins Parts 1 and 2.
- The flowers are secure and flat, and the jump ring is fully closed.
Troubleshooting
The diagonal looks steep or stubby: Check that each sc2tog in Part 3 is at the start of the RS row, on the right edge.
The lattice texture is faint: Make sure you work the second sc of each X-st in front of the first, not behind it.
The border ruffles: Your border tension is loose. Use a 3.0 mm hook for Round 1.
The border cups or pulls: Check that you have 3 sc at each of the 8 outer corners.
There’s a hole at the bridge: Close it with the yellow tail when weaving in.
The letter curls: Re-block with more water and pin it firmly.
Care
Hand wash in cool water with mild soap and lay flat to dry. Take off the metal hardware first if you plan to soak the piece.
Final Notes
The whole design rests on one measurement chain. One stitch and one row each equal 0.2 in (0.5 cm), so the 16 x 16 grid gives a 3.2 in (8.1 cm) letter. The two border rounds add 0.2 in (0.5 cm) per edge, for a finished 3.6 in (9.1 cm) square. Check Part 1 first and count your 108 border stitches, and the rest falls into place.
Happy crocheting!