
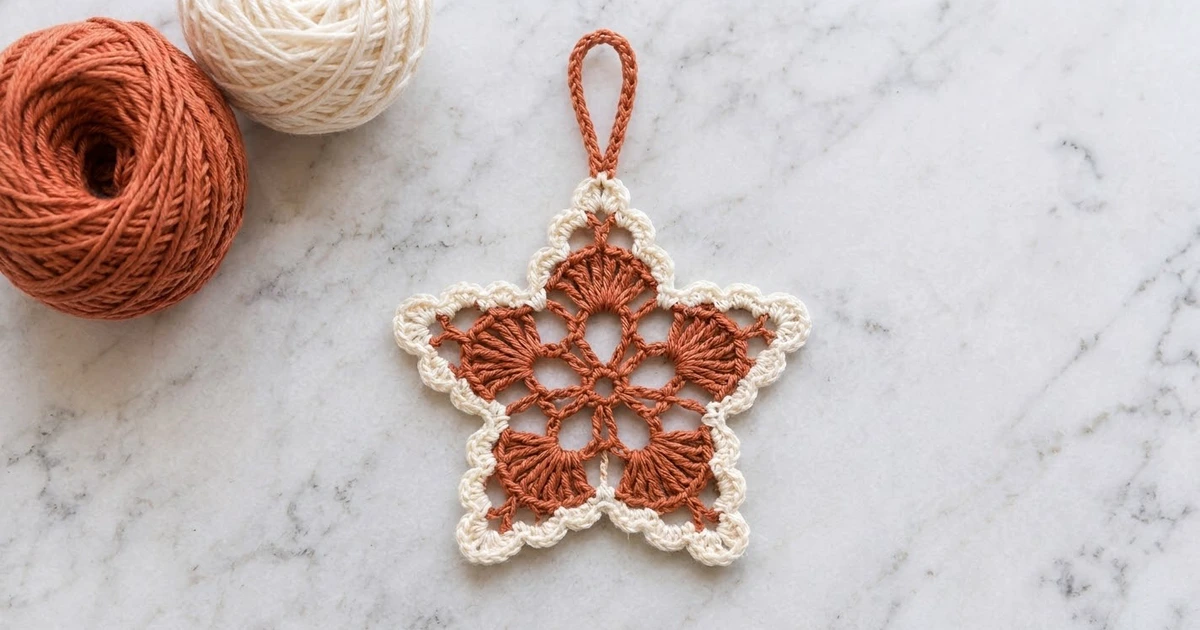
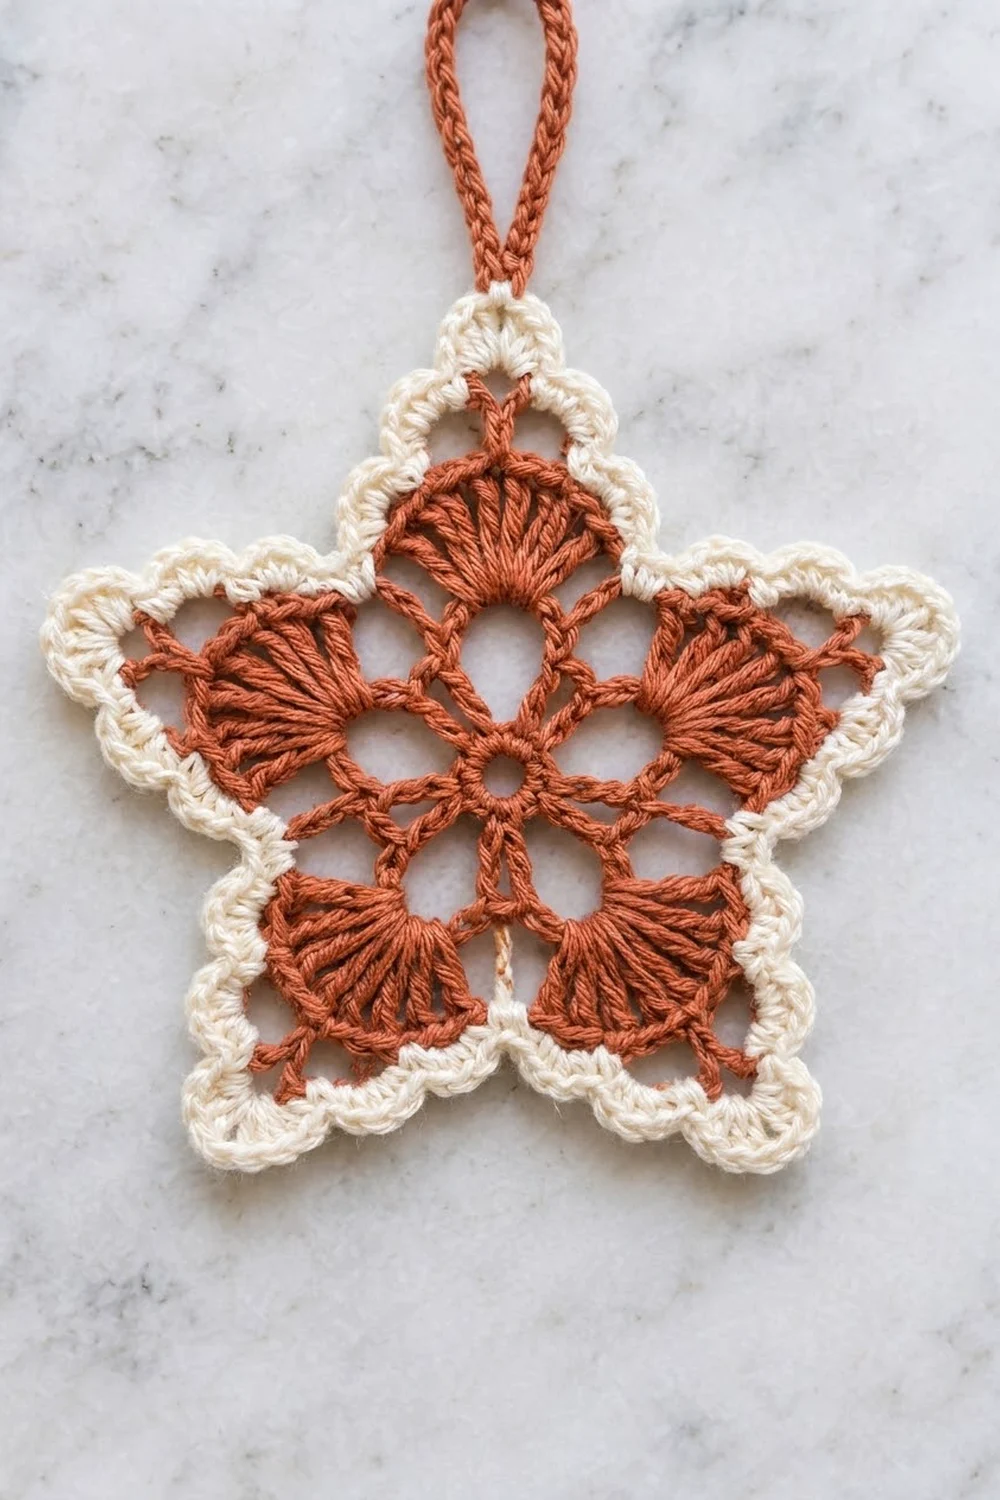
The Ember Lace Star is a small, lacy Christmas ornament with a warm, vintage look. The center is a ring of five teardrop openings. Above each opening, a solid fan of double crochet forms one star point. A crisp cream border with tiny scalloped loops frames the star, and a sturdy rust loop at the top lets you hang it straight from a branch.
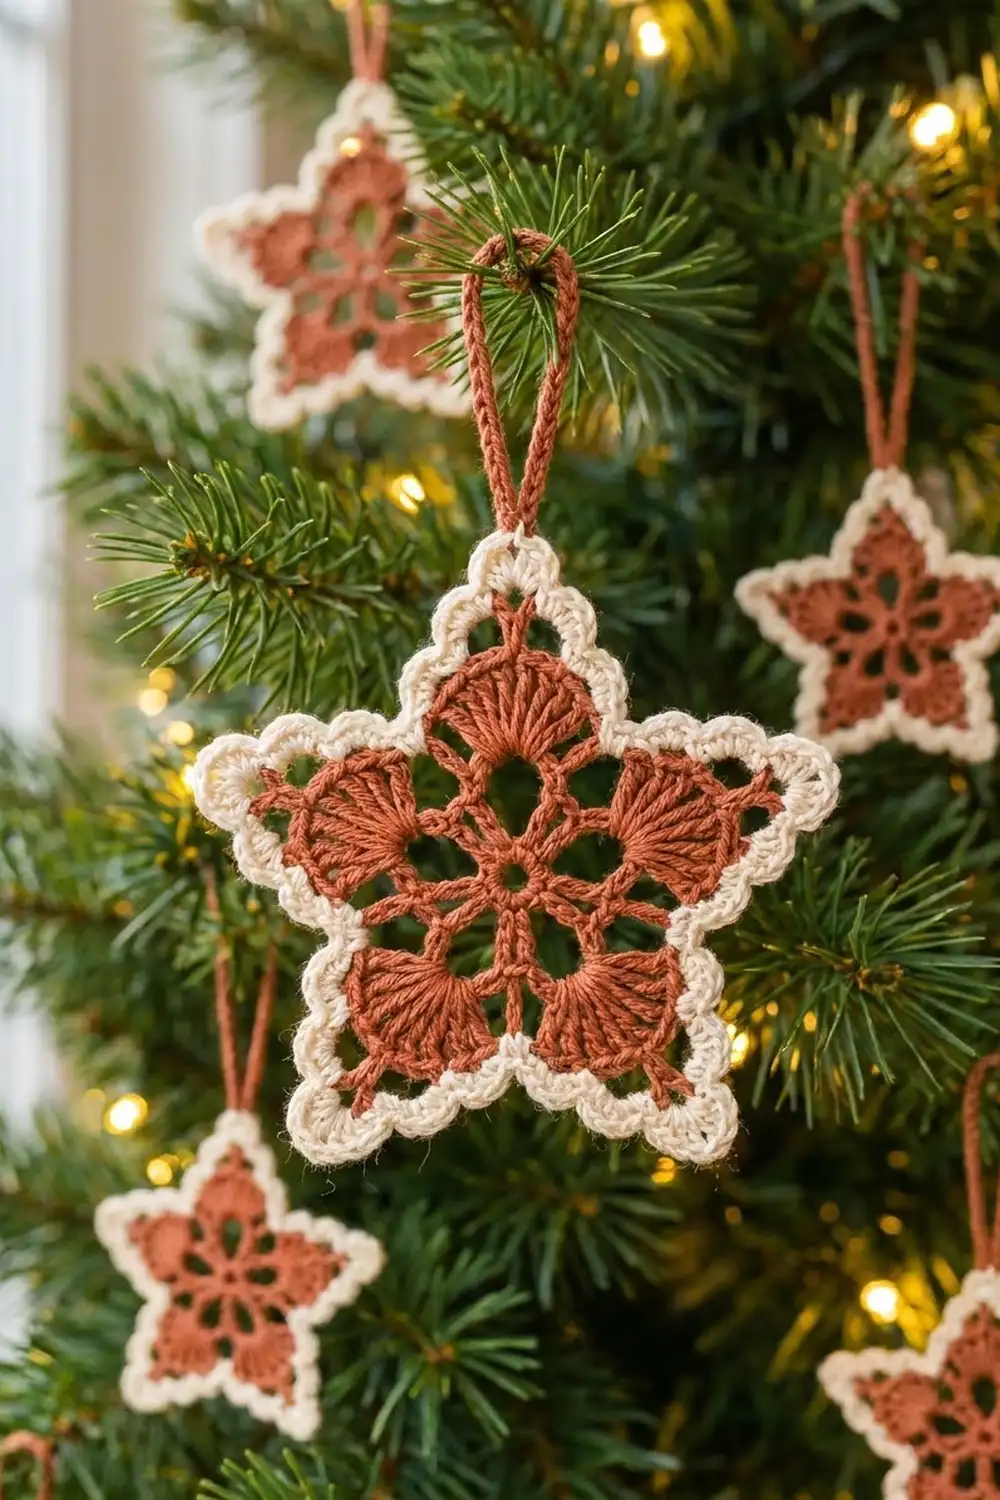
The palette is just two colors: a deep rust (terracotta) for the lace body and a soft cream for the border. Together they look cozy and a little Scandinavian. The colors work on a green tree, in a gift tag bundle, or tied to a wreath.
This pattern uses US crochet terms. The finished star measures 4.5 in (11.4 cm) from point to point and about 4.25 in (10.8 cm) tall, including the border but not the hanging loop.
Construction is simple and fully in the round. You work four rust rounds: a center ring, a round of chain loops, a round of fans, and a shaping round that forms the sharp tips. Then you add two cream border rounds and a slip-stitch hanging loop. There are no seams and no separate pieces.
Finished Size and Construction
- Finished size: 4.5 in (11.4 cm) point to point; 4.25 in (10.8 cm) tall
- Skill level: Easy-intermediate
- Terminology: US crochet terms
- Yarn weight: Sport weight (#2) cotton or cotton blend
- Hook: 2.75 mm (US C-2)
- Number of pieces: 1 (single motif)
- Layout: One five-pointed star worked in the round
- Piece size: 4.5 in (11.4 cm) point to point after blocking
- Size before border (after Rnd 4): 3.75 in (9.5 cm) point to point
- Border depth: about 3/8 in (1.0 cm) per side (2 rounds)
- Hanging loop: 2.75 in (7.0 cm) long
Materials
Yarn: Use a smooth, mercerized or matte sport-weight cotton with good stitch definition. Cotton blocks crisply and holds the star points well. Avoid fuzzy or very stretchy yarns, because they blur the lace openings.
- Color A – Rust/Terracotta: 6 g (about 20 m), for Rnds 1–4 and the hanging loop
- Color B – Cream: 3 g (about 10 m), for Rnds 5–6
These quantities include a margin for swatching and weaving in ends. One star uses very little yarn, so a single 50 g ball of each color will make a full set of ornaments.
Tools:
– 2.75 mm (US C-2) crochet hook
– Tapestry needle
– Scissors
– Stitch marker (optional, for marking a fan tip)
– Rustproof pins and a foam blocking mat
– Spray bottle with water, or a light spray starch for a stiffer star
Abbreviations (US Terms)
- ch – chain
- sl st – slip stitch
- sc – single crochet
- hdc – half double crochet
- dc – double crochet
- sp(s) – space(s)
- st(s) – stitch(es)
- rnd(s) – round(s)
- standing sc – with a slip knot on the hook, insert the hook in the indicated place, yarn over, pull up a loop, yarn over, and pull through both loops. This joins the new color and makes the first sc in one step.
Fan: 9 dc worked into the same chain space.
Gauge and Checkpoints
Exact gauge isn’t critical for an ornament. Still, the star points depend on tension, so make one test star through Rnd 3 first and compare it with these checkpoints:
- After Rnd 1: 0.75 in (1.9 cm) across
- After Rnd 2: 1.5 in (3.8 cm) across, measured loop to loop
- After Rnd 3: 3.25 in (8.3 cm) across, measured from the top of one fan to the widest point opposite
- After Rnd 4: 3.75 in (9.5 cm) point to point
- After Rnd 6 and blocking: 4.5 in (11.4 cm) point to point
If your star is too big: go down to a 2.5 mm hook, or keep the chain loops in Rnds 2 and 4 snugger. Loose chains are the most common cause of an oversized star.
If your star is too small: go up to a 3.0 mm hook. If the fans in Rnd 3 cup or ruffle, the hook is too small for your yarn.
Pattern
Rnd 1 – Center Ring (Color A)
Make a magic ring.
Ch 3 (counts as first dc), work 14 dc into the ring. Pull the ring closed tightly. Sl st to the top of the beginning ch-3 to join.
Stitch count: 15 dc.
Checkpoint: a solid disc 0.75 in (1.9 cm) across.
Rnd 2 – Petal Loops (Color A)
Ch 1, sc in the same st as the join, ch 5, skip next 2 dc, sc in next dc, ch 5, skip next 2 dc; repeat from * to * 3 more times. Sl st to the first sc to join.
Stitch count: 5 sc and 5 ch-5 sps.
Math check: each repeat uses 3 dc (1 sc + 2 skipped), and 5 × 3 = 15 dc. These five loops become the teardrop openings around the center.
Checkpoint: 1.5 in (3.8 cm) across, measured loop to loop.
Rnd 3 – Fans (Color A)
Sl st into the first ch-5 sp. Ch 3 (counts as first dc), 8 dc in the same ch-5 sp (first fan made). Ch 2, sc in next sc, ch 2.
Work a fan (9 dc) in the next ch-5 sp, ch 2, sc in next sc, ch 2; repeat from * to * 3 more times. Sl st to the top of the beginning ch-3 to join.
Stitch count: 45 dc (5 fans of 9 dc), 5 sc, and 10 ch-2 sps.
The fans sit on the outer side of the Rnd 2 loops, so the space under each loop stays open as a teardrop. The ch-2 legs on either side of each sc create the open triangles in the valleys between points.
Checkpoint: 3.25 in (8.3 cm) across. The fans should lie flat, not cup.
Rnd 4 – Point Shaping (Color A)
This round turns the rounded fans into pointed star tips. Graduated stitch heights build each side up to a chain tip at the center dc of each fan.
Ch 1. Over the first fan, work: sc in the same st as the join (first dc of the fan), hdc in next dc, dc in next 2 dc, (dc, ch 2, dc) in next dc (the 5th, center dc), dc in next 2 dc, hdc in next dc, sc in next dc (the 9th dc). Ch 3, skip the ch-2 sp, sc in the valley sc, ch 3, skip the next ch-2 sp.
Over the next fan, work: sc in first dc, hdc in next dc, dc in next 2 dc, (dc, ch 2, dc) in center dc, dc in next 2 dc, hdc in next dc, sc in last dc. Ch 3, sc in valley sc, ch 3; repeat from * to * 3 more times. Sl st to the first sc to join. Fasten off Color A and weave in the end.
Stitch count per point:
– 10 sts over the fan: 2 sc, 2 hdc, and 6 dc
– 1 ch-2 tip sp
– 1 valley sc and 2 ch-3 sps
Total: 55 sts (50 fan sts + 5 valley sc), 5 ch-2 tip sps, and 10 ch-3 sps.
This is a trim round. The 9 dc of each fan become 10 sts: 9 worked one per existing dc, plus 1 extra dc from the doubled center stitch. Each side of a point now has 5 sts (sc, hdc, dc, dc, dc) climbing to the tip.
Checkpoint: 3.75 in (9.5 cm) point to point. Each point should show a clear peak at the ch-2 sp.
Rnd 5 – Border Base (Color B)
Find any ch-3 sp that comes right after a valley sc, just before a fan begins. Join Color B with a standing sc in that ch-3 sp. Work 2 more sc in the same sp, then sc in next 5 sts, (sc, ch 2, sc) in the tip ch-2 sp, sc in next 5 sts, 3 sc in next ch-3 sp. Skip the valley sc.
3 sc in next ch-3 sp, sc in next 5 sts, (sc, ch 2, sc) in tip ch-2 sp, sc in next 5 sts, 3 sc in next ch-3 sp, skip valley sc; repeat from * to * 3 more times. Sl st to the first sc to join.
Stitch count: 90 sc and 5 ch-2 tip sps.
Skipping the valley sc pulls the inner corners in, so the valleys stay sharp instead of rounding out.
Rnd 6 – Scallop Edge (Color B)
Ch 1, sc in the first sc (same st as the join).
(Ch 3, skip next sc, sc in next sc) 4 times. You should now be at the last sc before the tip.
(Sc, ch 4, sc) in the tip ch-2 sp.
Sc in next sc, then (ch 3, skip next sc, sc in next sc) 4 times. You should now be at the last sc before the valley.
Sc in next sc (first sc of the next edge).
Repeat from * to * 4 more times. On the last repeat, omit the final sc. Sl st to the first sc to join. Fasten off and weave in the end.
Stitch count per point: 12 sc, 8 ch-3 loops, and 1 ch-4 tip loop.
Total: 60 sc, 40 ch-3 loops, and 5 ch-4 tip loops.
Hanging Loop (Color A)
Join Color A with a sl st in the ch-4 tip loop of the top point. Ch 22, then sl st in the same ch-4 loop. Turn, and sl st in the back bump of each of the 22 ch. Sl st in the ch-4 loop again. Fasten off, leaving a 6 in (15.2 cm) tail, and weave it securely into the back of the top point.
The slip-stitch pass makes the loop round and sturdy, so it won’t stretch under the ornament’s weight. The finished loop is 2.75 in (7.0 cm) long.
Border
Border Gauge
The two cream rounds add about 3/8 in (1.0 cm) to each side. They bring the star from 3.75 in (9.5 cm) to 4.5 in (11.4 cm) point to point. If your border makes the edges ripple, your sc are too loose; redo Rnd 5 with a 2.5 mm hook. If the points curl forward, your sc are too tight; go up half a size.
Counts Per Edge
A five-pointed star has 10 straight edges, two per point. In Rnd 5, each edge holds exactly 9 sc:
- Edge running up to a tip: 3 sc in the ch-3 sp + 5 sc in the Rnd 4 sts + 1 sc of the tip pair = 9 sc
- Edge running down to a valley: 1 sc of the tip pair + 5 sc in the Rnd 4 sts + 3 sc in the ch-3 sp = 9 sc
10 edges × 9 sc = 90 sc, which matches the Rnd 5 total. The tip ch-2 sp sits between the two edges and isn’t counted as a stitch.
In Rnd 6, each 9-sc edge is worked as 1 sc + 4 × (ch 3, skip 1, sc 1). That uses 1 + 8 = 9 sts and leaves 5 sc and 4 ch-3 scallops per edge. Each tip adds 2 sc around 1 ch-4 loop. Per point: 5 + 5 + 2 = 12 sc, and 12 × 5 = 60 sc. The scallops total 4 × 10 edges = 40 ch-3 loops.
Why the Math Works
An odd count of 9 per edge is exactly what a “sc, then (ch 3, skip 1, sc) pairs” repeat needs. Each edge begins and ends on a real sc. The two sc that meet at each valley sit side by side with no chain between them, which forms a clean V-shaped dip. At each tip, the ch-4 loop is slightly longer than the ch-3 scallops, so the point stays crisp and visible.
Final Blocking
- Weave in all ends along stitches of the same color, so no rust shows through the cream.
- Spray the star evenly with water, or with light spray starch for a stiffer ornament, until it is damp but not dripping.
- Lay it right side up on the blocking mat.
- Pin the five ch-4 tip loops first, spacing them evenly on a 4.5 in (11.4 cm) point-to-point measurement.
- Pin each valley inward so it forms a clean V.
- Pin the five teardrop openings in the center open with one pin each, and spread each fan into a smooth half-circle.
- Leave it to dry completely, usually 4–6 hours.
- Unpin it and check the size against the finished measurements.
Final Quality-Control Checklist
- Center ring is closed tight, with no hole larger than about 1/4 in (0.6 cm)
- Five even teardrop openings around the center
- Five fans of 9 dc, all lying flat
- Five sharp rust tips, each with a ch-2 peak
- Rnd 5 has 90 sc (9 per edge) and 5 ch-2 tips
- Rnd 6 has 4 ch-3 scallops per edge and a ch-4 loop at every tip
- Valleys are sharp and pulled in
- Hanging loop is centered on the top point and firmly secured
- Star measures 4.5 in (11.4 cm) point to point and 4.25 in (10.8 cm) tall
- All ends are woven in and invisible from the front
Troubleshooting
Fans cup or ruffle: The ch-5 loops in Rnd 2 are too short or too tight. Chain more loosely, or go up a hook size for Rnd 2 only.
Points look rounded: Check that you worked (dc, ch 2, dc) in the center dc, the 5th of 9, in Rnd 4. Pin the tips firmly when blocking.
Valleys bulge outward: You probably worked into the valley sc in Rnd 5. Skip it as written.
Scallops don’t come out even: Count 9 sc per edge in Rnd 5 before starting Rnd 6. One extra or missing sc pushes the scallop repeat off.
Star twists when hanging: The loop is off-center. Attach it in the exact ch-4 loop of the top tip.
Rust shows through the cream border: Weave the rust tails into rust stitches only, before you start Color B.
Care
Hand wash in cool water with mild soap, press out the water in a towel, and re-block flat to dry. Store the ornaments flat between tissue paper so the points keep their shape.
Final Notes
The measurement chain for this ornament is short:
- Rnd 1: 0.75 in (1.9 cm)
- Rnd 2: 1.5 in (3.8 cm)
- Rnd 3: 3.25 in (8.3 cm) of fans
- Rnd 4: 3.75 in (9.5 cm) point to point
- Border: about 3/8 in (1.0 cm) per side, bringing the blocked star to 4.5 in (11.4 cm)
The stitch counts along the way are 15, then 5 loops, then 45 dc, then 55 sts, then 90 sc, then 60 sc with 40 scallops. If each round matches its count, the star will come out the right shape. Once you have one finished, it’s easy to make a whole set for the tree.
Happy crocheting!