

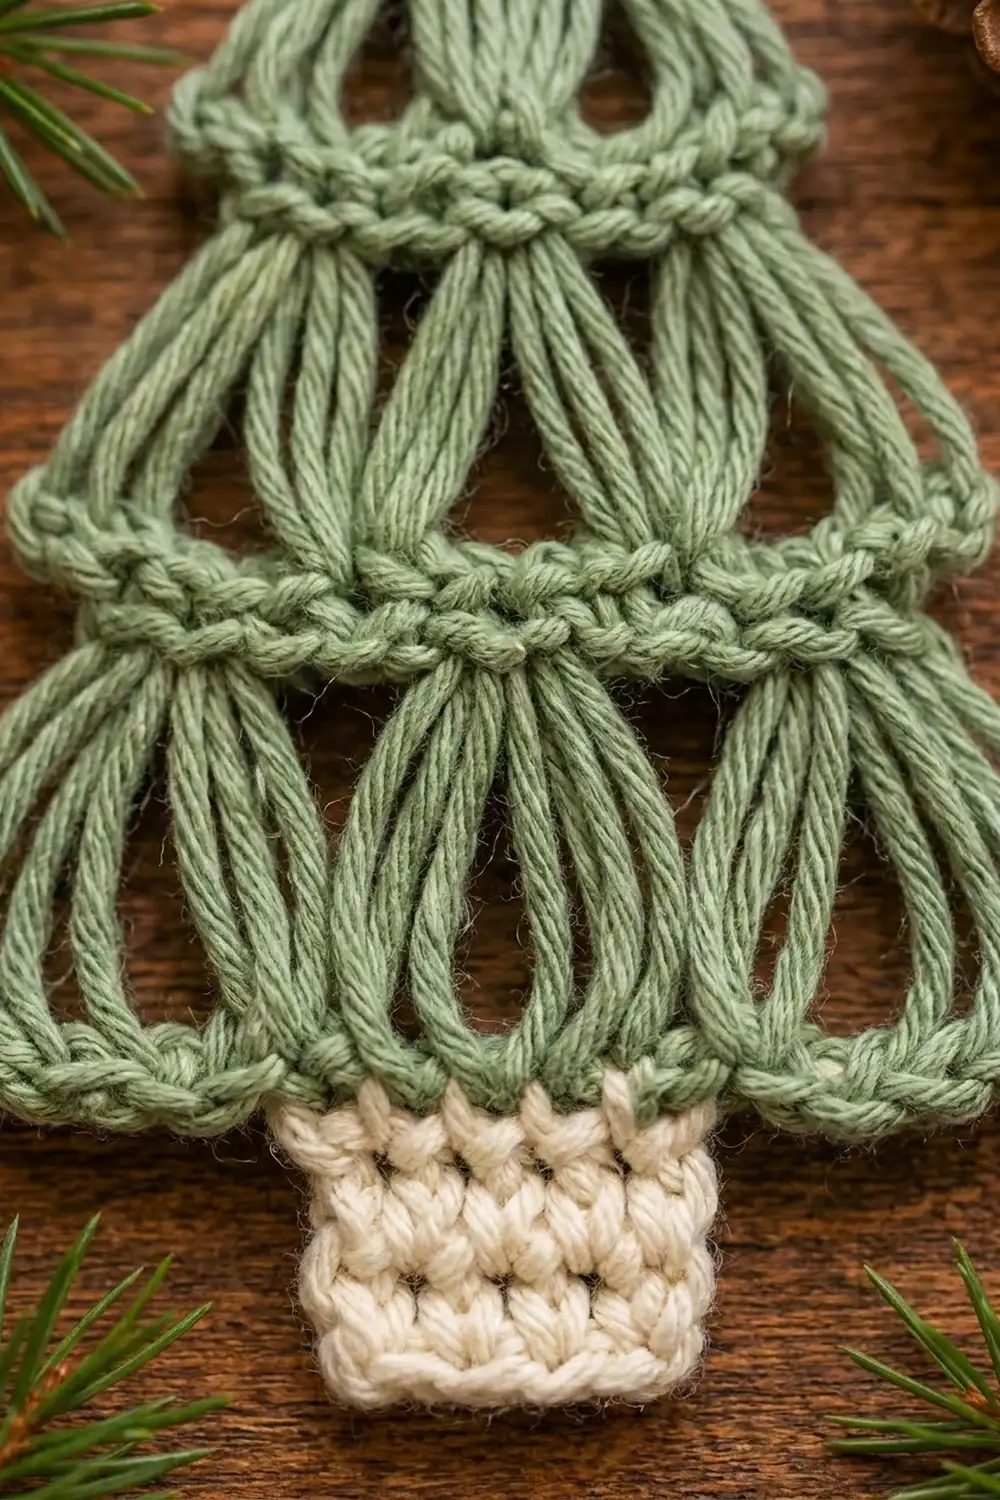
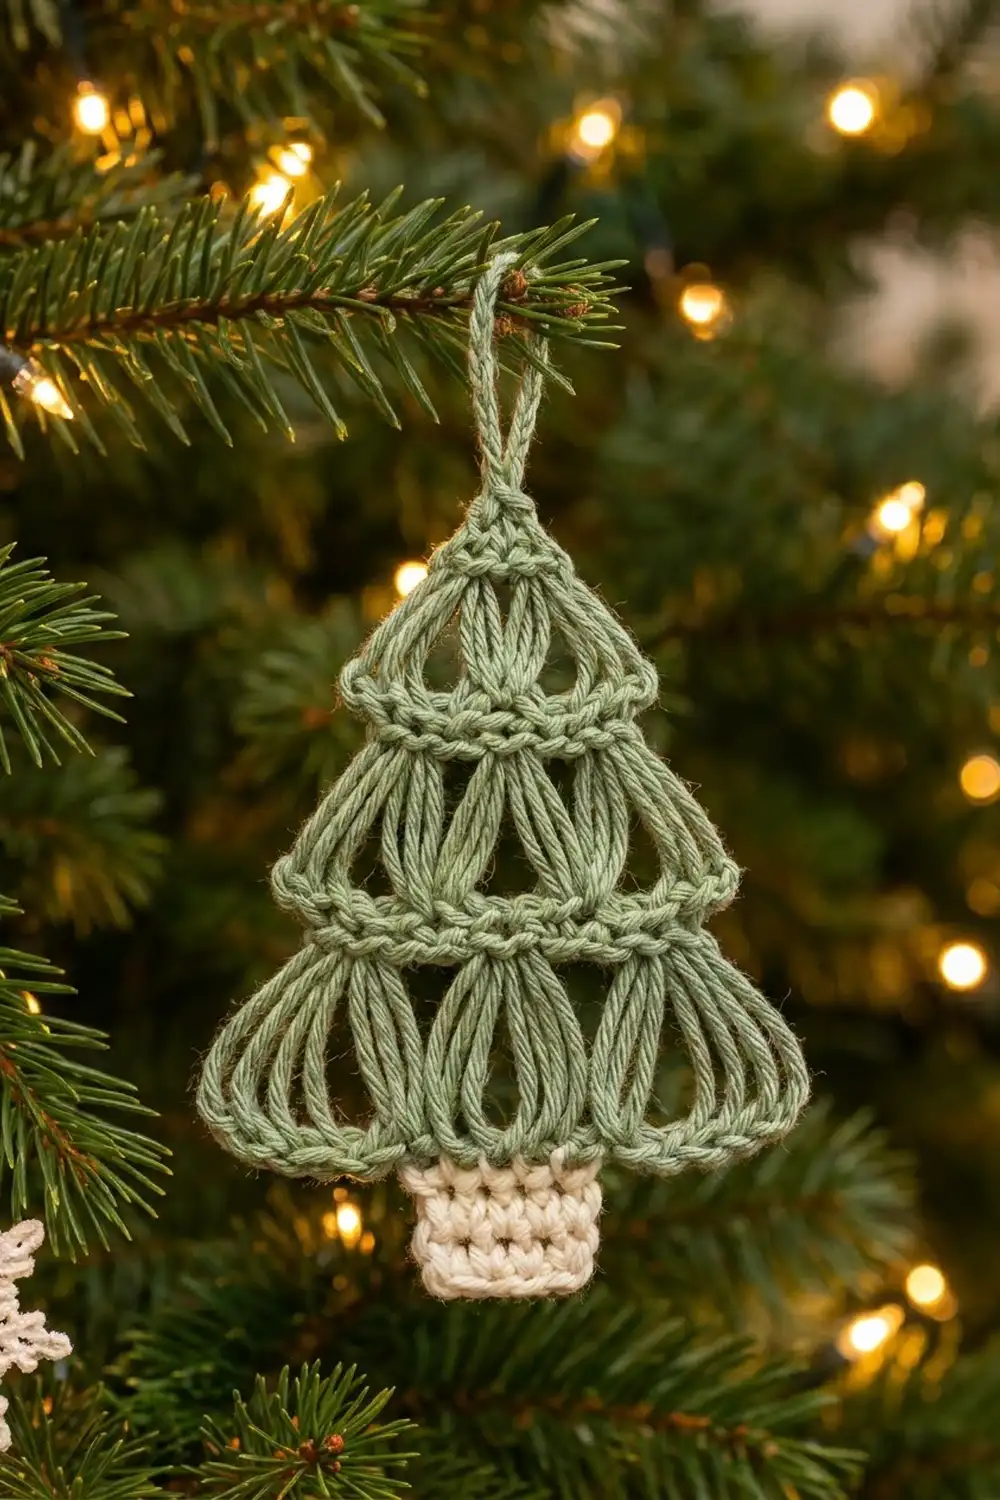
This small tree ornament has three tiers of soft broomstick lace loops in sage green, sitting on a small cream trunk. Each tier is a row of long loops gathered into bundles. A firm band of single crochet sits between the tiers. The tree looks light and airy, like a simple pine, and the bottom of every tier flares out in scallops.
The colors are calm and Scandinavian: muted sage green for the branches and warm cream for the trunk. It looks lovely on a real tree, on a gift tag or hung in a window. Once you get used to making the loops, it takes well under an hour.
This pattern uses US crochet terms. The finished ornament is about 4.4 in (11.2 cm) wide at the base and 5.2 in (13.2 cm) tall from the bottom of the trunk to the tip. The hanging loop adds about 1.25 in (3.2 cm).
The construction is simple. You work the tree from the bottom up in rows. First comes a single crochet foundation, then three broomstick tiers with 4, 3 and 2 loop bundles, each followed by a band that narrows the tree. You work the trunk directly into the base of the foundation chain. A single crochet edging runs up one side, forms the hanging loop at the top and comes down the other side.
Finished Size and Construction
- Finished size: about 4.4 in (11.2 cm) wide x 5.2 in (13.2 cm) tall, plus a 1.25 in (3.2 cm) hanging loop
- Skill level: Easy / advanced beginner (fine for your first broomstick lace)
- Terminology: US crochet terms
- Yarn weight: DK / light worsted (category 3) cotton
- Hook: 3.5 mm (US E-4)
- Number of pieces: 1 (you crochet the trunk onto the tree instead of sewing it on)
- Layout: one standalone ornament, three stacked tiers on a trunk
- Piece size: 4 in (10.2 cm) wide at the foundation before edging
- Size before border: 4 in (10.2 cm) wide x 5.2 in (13.2 cm) tall, including the trunk
- Border depth: 1 row of single crochet along each side, about 0.2 in (0.5 cm)
Materials
Choose a smooth DK-weight cotton, either mercerized or matte. Cotton keeps the long loops open and crisp, while a fuzzy acrylic will blur the lace. Any brand works as long as you match the gauge below.
- Sage green (branches): 10 g, about 21 m (23 yd)
- Cream (trunk): 2 g, about 4 m (4.5 yd)
Tools:
- 3.5 mm (US E-4) crochet hook
- A stiff cardboard or plastic strip 3/4 in (1.9 cm) wide and about 6 in (15.2 cm) long, for Tiers 1 and 2
- A second strip 5/8 in (1.6 cm) wide, for Tier 3
- Tapestry needle
- Scissors
- Ruler or tape measure
- Pins and a blocking mat or folded towel
- Spray bottle with water
The yarn amounts include a safety margin of about 20 percent, so you’ll have enough even if your loops run a little long.
Abbreviations (US Terms)
- ch – chain
- sc – single crochet
- sc2tog – single crochet 2 together (insert hook in next st, pull up a loop, insert hook in following st, pull up a loop, yo and draw through all 3 loops)
- sl st – slip stitch
- st(s) – stitch(es)
- yo – yarn over
- RS / WS – right side / wrong side
Special stitch – Broomstick loop row (BL row): Don’t turn. Make the loop on your hook longer and slip it onto the strip; this is loop 1. Then work back across the row from left to right: insert the hook in the next sc, pull up a loop and slip it onto the strip. Repeat in every sc. Each sc gives you one loop.
Special stitch – Bundle close: Insert the hook under the first 5 loops on the strip together and slide them off. Yo, pull through and ch 1 (the ch 1 does not count as a stitch). Then work 4 sc into the center of that bundle. For each following bundle, insert the hook under the next 5 loops, slide them off and work 4 sc into the center of the bundle. Each 5-loop bundle becomes 4 sc.
These directions are for right-handed crocheters. If you’re left-handed, follow the same steps mirrored.
Gauge and Checkpoints
Gauge: 20 sc and 20 rows = 4 in (10.2 cm) in single crochet with a 3.5 mm hook. That’s 5 sc and 5 rows per 1 in (2.5 cm).
Because this is one small piece, the ornament itself is your gauge test. Work the foundation row and measure it before you start the loops.
Checkpoints:
- Foundation row: 20 sc = 4 in (10.2 cm) wide.
- After Tier 1 and its band: the band is 15 sc = 3 in (7.6 cm) wide. Total height is 1.6 in (4.1 cm).
- After Tier 2 and its band: the band is 10 sc = 2 in (5.1 cm) wide. Total height is 3 in (7.6 cm).
- After Tier 3 and the top rows: total height is 4.4 in (11.2 cm).
- After the trunk: total height is 5.2 in (13.2 cm).
If the foundation is too wide (over 4.25 in / 10.8 cm), change to a 3.25 mm hook. If it’s too narrow (under 3.75 in / 9.5 cm), change to a 3.75 mm hook. The strip width sets the tier height, not your hook. If your tiers come out short, keep the loops snug against the strip and don’t pull up on them while you close the bundles.
Tree
Foundation
With sage green, ch 21.
Row 1 (RS): Sc in 2nd ch from hook and in each ch across. (20 sc)
Don’t turn. Measure: the row should be 4 in (10.2 cm) wide.
Tier 1 – Four Bundles
Use the 3/4 in (1.9 cm) strip.
Row 2 (BL row): Work a broomstick loop row across all 20 sc. (20 loops on strip)
Row 3 (RS, bundle close): Close the loops in 4 bundles of 5 loops, working 4 sc in each bundle. (16 sc)
Each bundle’s 5 loops start 5 stitches apart at the bottom and come together into 4 sc at the top. That pull gives the tier its flared, scalloped lower edge. Including the closing sc, the tier is about 1 in (2.5 cm) tall.
Band 1
Row 4 (WS): Ch 1, turn. Sc in first 7 sts, sc2tog, sc in last 7 sts. (15 sc)
Row 5 (RS): Ch 1, turn. Sc in each st across. (15 sc)
Don’t turn. Checkpoint: 3 in (7.6 cm) wide and 1.6 in (4.1 cm) tall from the bottom of Row 1.
Tier 2 – Three Bundles
Use the 3/4 in (1.9 cm) strip again.
Row 6 (BL row): Work a broomstick loop row across all 15 sc. (15 loops on strip)
Row 7 (RS, bundle close): Close the loops in 3 bundles of 5, working 4 sc in each bundle. (12 sc)
Band 2
Row 8 (WS): Ch 1, turn. Sc2tog, sc in next 8 sts, sc2tog. (10 sc)
Row 9 (RS): Ch 1, turn. Sc in each st across. (10 sc)
Don’t turn. Checkpoint: 2 in (5.1 cm) wide and 3 in (7.6 cm) tall.
Tier 3 – Two Bundles
Change to the 5/8 in (1.6 cm) strip so the top tier comes out a little shorter.
Row 10 (BL row): Work a broomstick loop row across all 10 sc. (10 loops on strip)
Row 11 (RS, bundle close): Close the loops in 2 bundles of 5, working 4 sc in each bundle. (8 sc)
This tier is about 0.8 in (2.0 cm) tall.
Top Point
Row 12 (WS): Ch 1, turn. Sc2tog 4 times. (4 sc)
Row 13 (RS): Ch 1, turn. Sc2tog twice. (2 sc)
Row 14 (WS): Ch 1, turn. Sc2tog. (1 sc)
Fasten off and weave in the end. Checkpoint: 4.4 in (11.2 cm) tall from the bottom of Row 1. These three rows make the small solid triangle at the tip.
Trunk
Turn the tree upside down with the RS facing you, so the foundation edge is at the top. You’re now looking at the unused bottom loops of the starting chain. Count to the 8th chain loop from the right edge. This leaves 7 loops on each side of the 6 trunk stitches (7 + 6 + 7 = 20), so the trunk is centered.
Row 1: With cream, join with sc in the 8th chain loop, then sc in the next 5 chain loops. (6 sc)
Rows 2–4: Ch 1, turn. Sc in each st across. (6 sc)
Fasten off and weave in the ends. The trunk is 1.2 in (3.0 cm) wide x 0.8 in (2.0 cm) tall. Total height is now 5.2 in (13.2 cm).
Border and Hanging Loop
The edging is one row of sage green sc. It runs up the right side, around the tip and down the left side. Leave the bottom edge unworked so the Tier 1 scallops stay crisp.
Border gauge: 5 sc per 1 in (2.5 cm) along the side edge, the same as the body.
Where the stitches go on each side (22 sc):
- 1 sc in the side of the foundation row (Row 1)
- 5 sc along the side of Tier 1 (Rows 2–3)
- 2 sc in the sides of Band 1 (Rows 4–5)
- 5 sc along the side of Tier 2 (Rows 6–7)
- 2 sc in the sides of Band 2 (Rows 8–9)
- 4 sc along the side of Tier 3 (Rows 10–11)
- 3 sc in the sides of the top rows (Rows 12–14)
1 + 5 + 2 + 5 + 2 + 4 + 3 = 22 sc per side.
Edging row: With RS facing, join sage green with sc in the bottom right corner of the foundation row. Work up the right side for a total of 22 sc. In the single top st, work (sc, ch 20, sc) to make the hanging loop. Work down the left side, placing the stitches in the reverse order, for 22 sc, ending at the bottom left corner. Fasten off and weave in the ends.
Total: 22 + 1 + 1 + 22 = 46 sc, plus the 20-ch loop.
Why the math works: Each side of the tree runs about 4.4 in (11.2 cm) on the slant. That’s 0.2 in (0.5 cm) of foundation, 1 in (2.5 cm) of Tier 1, 0.4 in (1.0 cm) of band, 1 in (2.5 cm) of Tier 2, 0.4 in (1.0 cm) of band, 0.8 in (2.0 cm) of Tier 3 and 0.6 in (1.5 cm) of top. At 5 sc per inch, 4.4 in needs 22 sc, which matches the stitch placement list. Placing 5 sc along each 1 in (2.5 cm) tier holds the outer loops gently without bunching them. The edging adds about 0.2 in (0.5 cm) to each side, so the base grows from 4 in (10.2 cm) to 4.4 in (11.2 cm). The 20-ch loop folds in half and hangs about 1.25 in (3.2 cm).
Final Blocking
- Mist the ornament lightly with water until it’s damp, not soaked.
- Lay it RS up on the blocking mat or towel.
- Pin the base corners so the bottom of Tier 1 measures 4.4 in (11.2 cm) across.
- Pin the tip straight up so the height from the bottom of the trunk to the tip is 5.2 in (13.2 cm).
- Use your fingers to fan out the loops in each bundle so they spread evenly from the gathered top.
- Square the trunk to 1.2 in x 0.8 in (3.0 cm x 2.0 cm) and center it under the tree.
- Lay the hanging loop flat and straight above the tip.
- Let the ornament dry completely, at least a few hours, before you unpin it.
For a stiffer ornament, mist it with a light fabric stiffener instead of plain water.
Final Quality-Control Checklist
- Tier 1 has 4 bundles, Tier 2 has 3 bundles and Tier 3 has 2 bundles.
- Every bundle has 5 loops of even length.
- Stitch counts are 20, 16, 15, 15, 12, 10, 10, 8, 4, 2 and 1.
- Each band is two solid rows of sc.
- The trunk is centered, with 7 chain loops free on each side.
- The edging has 22 sc on each side and a 20-ch hanging loop at the tip.
- Finished size is about 4.4 in (11.2 cm) wide x 5.2 in (13.2 cm) tall.
- All ends are woven in securely and trimmed.
Troubleshooting
Loops are different lengths. Rest every loop on the strip with the same light tension. Don’t tug the working yarn while you pull up the next loop.
Bundles twist or lean. Insert the hook under all 5 loops from front to back, in the same direction every time.
A tier looks narrow and tight. You may be working the 4 sc into the bundle too tightly. Loosen your tension on the bundle-close row.
The sides of a tier curl inward. Check the count in the band above it, because a missing or extra decrease will distort the shape. Recount Rows 4 and 8.
The trunk is off-center. Pull out Row 1 of the trunk and recount the chain loops from the edge. Start in the 8th loop.
The edging ruffles. There are too many sc on that side. Take out stitches along the tier sections until you have 22 per side.
The edging pulls the loops in. You have too few sc or your tension is too tight. Recount to 22 per side and loosen slightly.
Care
Hand wash in cool water with mild soap. Press out the water in a towel, reshape the ornament and dry it flat. Store it flat or hanging so the loops stay open.
Final Notes
The whole ornament follows a simple chain of measurements. A 20 sc foundation sets the 4 in (10.2 cm) base. Each tier closes 5 loops into 4 sc, and each band removes the leftover stitches, so the width goes from 20 to 15 to 10. Tiers 1 and 2 are 1 in (2.5 cm) tall on the 3/4 in (1.9 cm) strip. Tier 3 is 0.8 in (2.0 cm) tall on the 5/8 in (1.6 cm) strip. Three decrease rows finish the tip at 4.4 in (11.2 cm). The 6 sc trunk adds 0.8 in (2.0 cm), for a total height of 5.2 in (13.2 cm). The edging, with 22 sc per side, brings the base to 4.4 in (11.2 cm).
Make one ornament and check it against these numbers. If it matches, every one after it will come out the same.
Happy crocheting!