

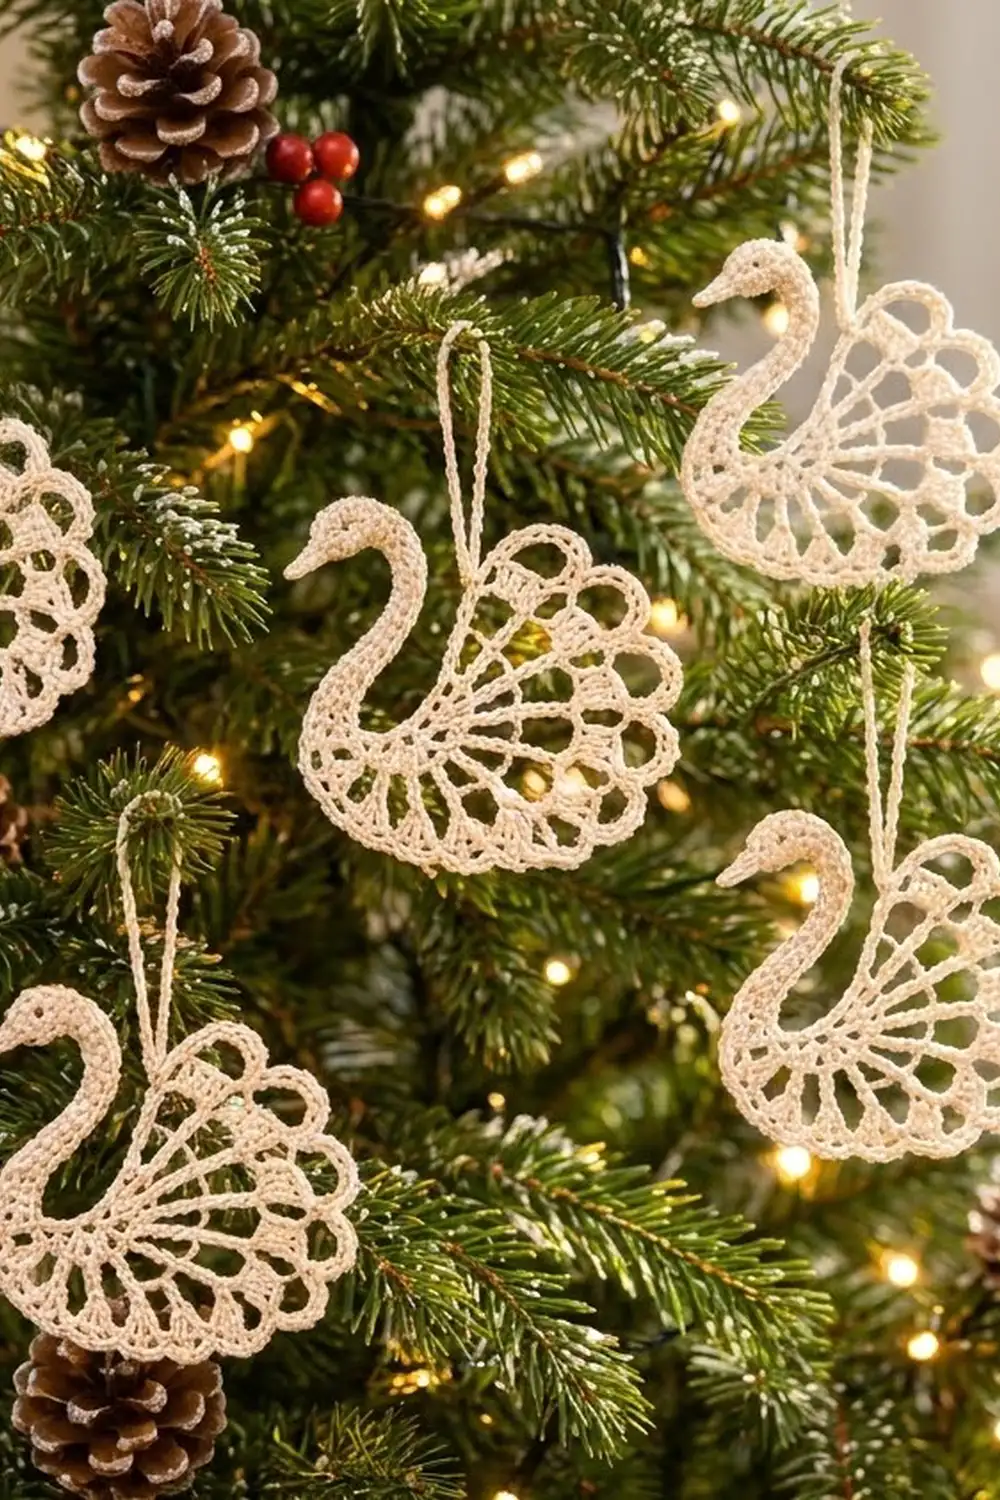
This little swan is a single flat lace ornament. A curved body band with open V-spokes forms the base, and a smooth S-shaped neck rises at one end. A fan wing with 6 scallops opens across the back.
It’s worked in one color, a soft cream or ivory cotton thread, so the stitch structure carries the whole design. The style is classic thread lace, light enough to hang on a tree branch and firm enough to hold its shape once starched.
The pattern uses US crochet terms. The finished swan measures 4 in (10.2 cm) wide by 3.5 in (8.9 cm) tall, not counting the hanging loop.
You work the body band first and continue straight into the neck and head. Then you add the wing on the top edge of the body, joining it as you go, so the swan stays one piece. A single edging round outlines the body and wing, and a chain loop finishes it.
Finished Size and Construction
- Finished size: 4 in (10.2 cm) wide x 3.5 in (8.9 cm) tall
- Hanging loop: adds 1.75 in (4.4 cm)
- Skill level: Intermediate (reading curved lace, joining as you go)
- Terminology: US crochet terms
- Yarn weight: Size 3 mercerized cotton crochet thread (CYC Lace / 0)
- Hook: 2.25 mm (US B-1)
- Number of pieces: 1 (single motif, worked continuously, no sewing between parts)
- Layout: body band at the bottom, neck rising from the left end, wing fan above the body
- Piece size: 4 in x 3.5 in (10.2 cm x 8.9 cm)
- Size before border: 3.75 in x 3.25 in (9.5 cm x 8.3 cm)
- Border depth: 1/8 in (0.3 cm) on each outer edge
Materials
Thread advice: Choose a tightly twisted, mercerized cotton thread in size 3. Mercerized cotton gives crisp stitch definition and blocks well with starch. Avoid fuzzy or acrylic blends, because they hide the spokes and won’t hold a starched shape.
- Cream / ivory, size 3 cotton thread: 8 g, about 22 m (24 yd)
One swan actually uses about 5 g (14 m). The amount listed includes a margin for your gauge swatch, the tails and the hanging loop. If you’re making a set of three, plan on 24 g (66 m).
Tools:
– 2.25 mm (US B-1) crochet hook
– Tapestry needle with a small eye
– Small sharp scissors
– 2 to 3 locking stitch markers
– Blocking board or foam mat
– Rustproof pins
– Spray starch or fabric stiffener
– Ruler or tape measure
Abbreviations (US Terms)
- ch – chain
- sl st – slip stitch
- sc – single crochet
- hdc – half double crochet
- dc – double crochet
- tr – treble crochet
- sp – space
- st(s) – stitch(es)
- RS / WS – right side / wrong side
- free loop – the unused loop on the underside of a foundation chain after a row has been worked into it
Special stitch:
– V-st (V-stitch): (tr, ch 1, tr) in the same stitch. Because both trebles come from one base stitch, they form a narrow point at the top and spread apart below. This creates the triangular spokes of the body band.
Gauge and Checkpoints
Base gauge: 7 sc = 1 in (2.5 cm), and 7 sc rows = 1 in (2.5 cm). One tr is about 3/8 in (1.0 cm) tall.
Test the body first. You don’t need a separate swatch. Row 1 of the body is your gauge test.
- After Row 1: 25 sc measure about 3.5 in (8.9 cm) laid straight.
- After body Row 3: the band is 0.75 in (1.9 cm) deep, and the lower edge measures 5.5 in (14.0 cm) along its curve.
- After the neck: the neck is 2.5 in (6.4 cm) long from body to head and about 0.3 in (0.8 cm) wide.
- Wing radius after W3: 0.8 in (2.0 cm), measured from the center point.
- Wing radius after W5: 1.5 in (3.8 cm).
- Before edging: 3.75 in x 3.25 in (9.5 cm x 8.3 cm).
- After edging and blocking: 4 in x 3.5 in (10.2 cm x 8.9 cm).
If Row 1 is longer than 3.75 in (9.5 cm): your tension is loose. Go down to a 2.0 mm hook and start again.
If Row 1 is shorter than 3.25 in (8.3 cm): your tension is tight. Go up to a 2.5 mm hook.
A small size difference only changes how big the ornament is. A tension change partway through will distort the wing fan, so keep it steady.
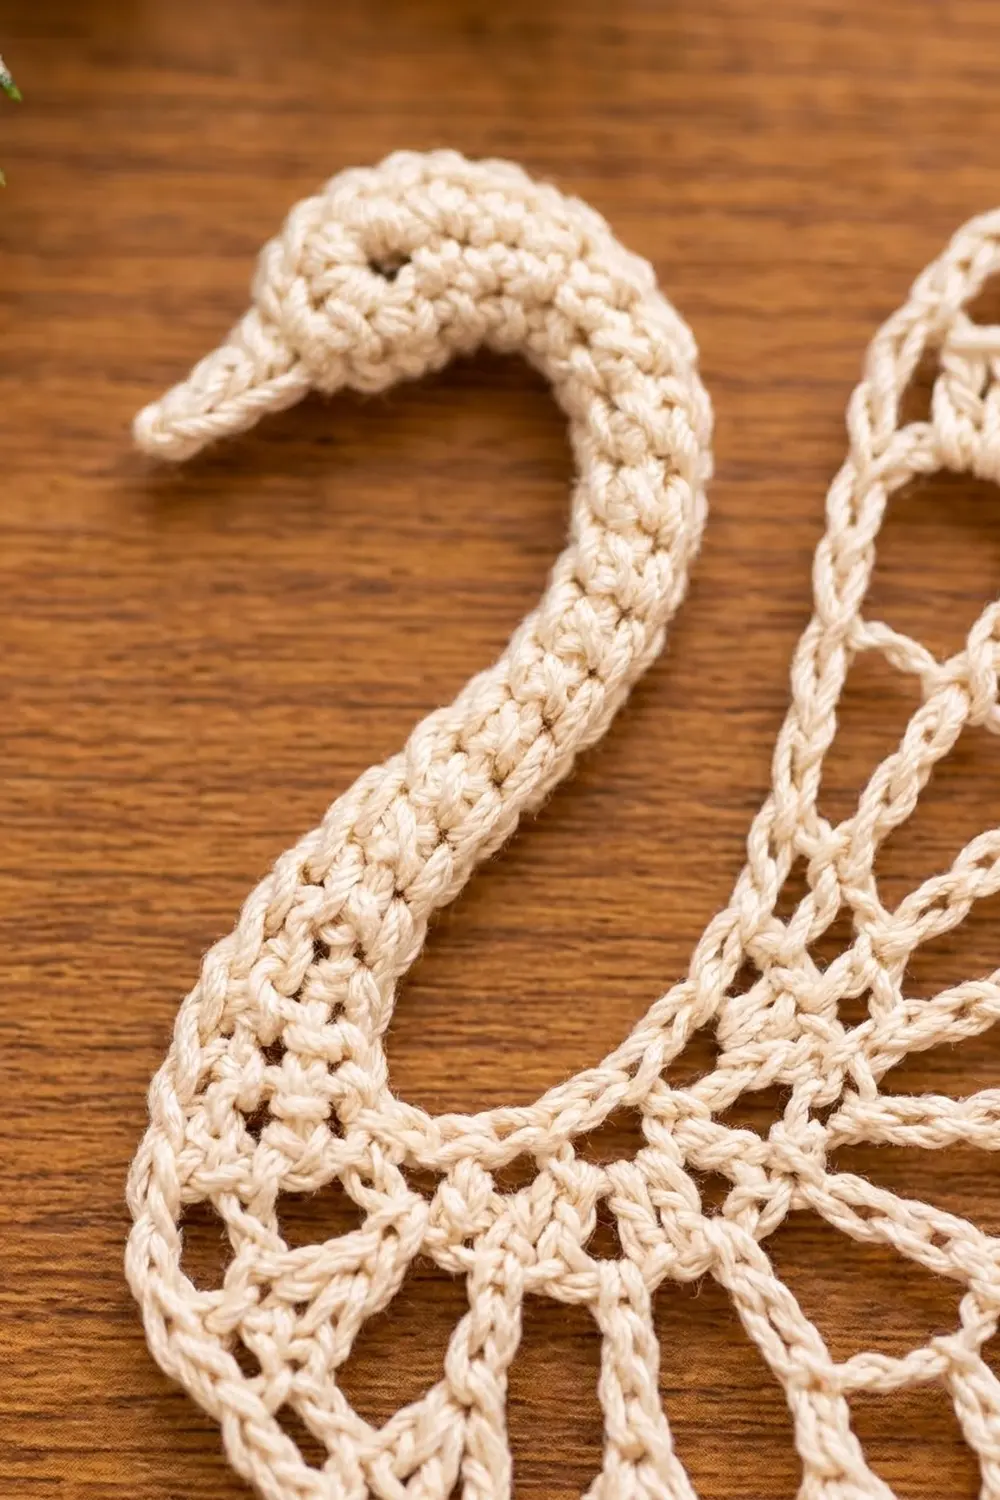
Body Band
The body is worked in rows. The end where you start Row 1 becomes the tail, and the slipknot end becomes the neck end.
Ch 26.
Row 1 (RS): Sc in 2nd ch from hook and in each ch across. Turn. (25 sc)
For the wing later, think of the foundation chain’s free loops as numbered 1 to 25, starting at the neck end. Loop 1 is the slipknot chain. Place a marker in free loop 11 now.
Row 2 (WS): Ch 4 (counts as tr). Ch 2, skip 2 sc, V-st in next sc. Repeat from * 6 more times. Ch 2, skip 2 sc, tr in last sc. Turn.
(7 V-sts plus 2 single tr = 16 tr, 7 ch-1 sps, 8 ch-2 sps)
Check: 1 + (7 x 3) + 3 = 25 sc used.
Row 3 (RS): Ch 1, sc in first tr. 2 sc in next ch-2 sp, sc in next tr, sc in next ch-1 sp, sc in next tr. Repeat from * 6 more times. 2 sc in last ch-2 sp, sc in top of turning ch-4. Don’t turn and don’t fasten off.
(39 sc)
Count: 1 + (7 x 5) + 2 + 1 = 39.
Row 3 has 39 sc against Row 1’s 25. This longer lower edge makes the band curve into a crescent, so the V-spokes splay outward like the triangles in the photo. You’re now at the neck end.
Checkpoint: The band should be 0.75 in (1.9 cm) deep and should naturally curve, with both ends lifting.
Neck and Head
You continue the neck directly from the last sc of Row 3.
Ch 25.
Row N1 (front of neck):
1. Sl st in 2nd ch from hook (beak tip).
2. Sc in next ch (beak).
3. 5 dc in next ch (front of head).
4. Hdc in next 2 ch.
5. Sc in next 19 ch.
6. Sl st in the same Row 3 sc where the chain began.
That’s 1 sl st, 1 sc, 5 dc, 2 hdc and 19 sc (28 sts), and 24 of the 25 chains are used.
Row N2 (back of neck): Don’t turn. Work up the free loops on the other side of the neck chain:
1. Sc in each of the next 19 free loops.
2. Hdc in next 2 free loops.
3. 3 dc in the free loop of the head chain (the same ch that holds the 5 dc).
4. Sl st in the free loop of the beak sc chain.
That’s 19 sc, 2 hdc, 3 dc and 1 sl st (25 sts). Fasten off and weave in the end.
The 5 dc and 3 dc groups surround a single chain, which makes a round head. The slight gap where they meet is the tiny “eye.” Working the neck on both sides of the chain gives a solid, padded cord that you can block into an S-curve.
Checkpoint: The neck is 2.5 in (6.4 cm) from body to the back of the head and about 0.3 in (0.8 cm) wide. The head is about 0.5 in (1.3 cm) across.
Wing Fan
The wing is a half-circle fan worked in turned rows from one center point (free loop 11). At the end of each row you slip stitch into the body’s foundation loops, which joins the wing’s straight sides to the body as you go. Hold the body with the foundation chain at the top and the RS facing.
Row W1 (RS):
1. Join thread with a sl st in marked free loop 11.
2. Ch 3 (counts as dc), then work 6 dc in the same loop. (7 dc)
3. Sl st in free loop 9, toward the neck end.
Row W2 (WS):
1. Turn. Ch 6 (counts as tr + ch 2) in the first dc.
2. Tr in next dc, ch 2. Repeat from * 4 more times.
3. Tr in top of beginning ch-3. (7 tr, 6 ch-2 sps)
4. Sl st in free loop 16, toward the tail.
The radius is now about 0.7 in (1.8 cm).
Row W3 (RS), the crossbar:
1. Turn. Ch 1, sc in first tr.
2. 2 sc in next ch-2 sp, sc in next tr. Repeat from * 5 more times. (19 sc)
3. Sl st in free loop 5.
Count: 1 + (6 x 3) = 19. Each tr has its own sc, so the spokes stay in line.
Checkpoint: The wing radius is 0.8 in (2.0 cm), and the fan lies flat.
Row W4 (WS), the outer spokes:
1. Turn. Ch 7 (counts as tr + ch 3) in the first sc.
2. Skip 2 sc, tr in next sc, ch 3. Repeat from * 4 more times.
3. Skip 2 sc, tr in last sc. (7 tr, 6 ch-3 sps)
4. Sl st in free loop 19.
The trebles land on sc 1, 4, 7, 10, 13, 16 and 19, which are directly above the Row W2 trebles. This makes 7 long, continuous spokes. The radius is now about 1.2 in (3.0 cm).
Row W5 (RS), the scallops:
1. Turn. Ch 1, sc in first tr.
2. 7 dc in next ch-3 sp, sc in next tr. Repeat from * 5 more times. (6 scallops, 49 sts)
3. Sl st in free loop 1.
4. Sl st in the 4th sc of neck Row N2 to tack the wing to the back of the neck.
5. Fasten off.
Count: 1 + 6 x (7 + 1) = 49.
Checkpoint: The wing radius is 1.5 in (3.8 cm), and the swan measures 3.75 in x 3.25 in (9.5 cm x 8.3 cm). Free loops 20 to 25 stay unworked and form the top of the curled tail.
Edging (Border)
Border gauge: 7 sc = 1 in (2.5 cm). This is the same as the base gauge, so the edging doesn’t change any edge length except where you add stitches on purpose.
Edging Round (RS): Join thread with a sl st in the last sc of body Row 3 at the neck end.
- Body lower edge: Ch 1, sc in the same st and in each sc along Row 3 to the tail. (39 sc)
- Tail tip: Work 4 sc evenly across the row ends: 1 sc in the end of Row 3, 2 sc in the side of the Row 2 tr, and 1 sc in the end of Row 1. (4 sc)
- Tail top: Sl st in free loops 25, 24, 23, 22, 21 and 20. (6 sl st)
- Wing: Sc in the first sc of Row W5. Then work 1 sc in each st across all 6 scallops, but put 2 sc in the 4th (center) dc of each scallop. (55 sc)
- Sl st in the side of neck Row N2 at the base. Fasten off.
The wing count is 49 sts + 6 extra sts = 55 sc, and the total round is 98 sc + 6 sl st.
Why the math works: The body edge gets exactly 1 sc per Row 3 stitch, so its 5.5 in (14.0 cm) curve stays the same length and doesn’t pucker. The tail-top slip stitches add almost no height, so the tail stays slim. On the wing, the outer edge is the longest curve, so one extra sc at each scallop peak (6 in total) gives enough ease to keep the scallops rounded instead of cupping. All other stitches are 1-to-1, which adds 1/8 in (0.3 cm) on each side and brings the size to 4 in x 3.5 in (10.2 cm x 8.9 cm).
Hanging Loop:
1. Join thread with a sl st in the edging sc at the top of the 3rd spoke from the neck side. This is the highest point of the wing when the swan sits upright.
2. Ch 30, then sl st in the same sc.
3. Fasten off, leaving a 6 in (15.2 cm) tail. Weave the tail into the spoke so the loop is secure.
The loop hangs about 1.75 in (4.4 cm) tall.
Final Blocking
- Weave in all remaining ends along solid stitches (the neck or the Row 3 edge), not through the open lace.
- Wet the swan in cool water and press out the excess in a towel. Don’t wring it.
- Pin the body band into a smooth crescent, with both ends curling up about 0.25 in (0.6 cm).
- Shape the neck into an S-curve: it bends back toward the wing near the base, then forward under the head. Pin the beak so it points away from the wing.
- Pin the wing center, then pin each of the 7 spokes straight, fanning out like the spokes of a wheel.
- Pin each scallop at its peak (the 2-sc point) and gently round it with your fingers.
- Check the size: 4 in (10.2 cm) wide x 3.5 in (8.9 cm) tall.
- Spray generously with starch or brush on stiffener. Let it dry completely, at least 8 hours, before you unpin.
Final Quality-Control Checklist
- Row 1 has 25 sc, Row 2 has 7 V-sts, and Row 3 has 39 sc.
- The neck has 28 sts on the front and 25 sts on the back, with a round head and a pointed beak.
- The wing has 7 straight spokes, a 19-sc crossbar and 6 scallops of 7 dc each.
- The wing is anchored at free loops 11, 9, 16, 5, 19 and 1, and tacked to the neck.
- The edging has 39 + 4 + 55 sc plus 6 sl st.
- The swan measures 4 in x 3.5 in (10.2 cm x 8.9 cm), and the loop is 1.75 in (4.4 cm).
- The ornament hangs level without twisting.
Troubleshooting
- The wing ruffles: Row W3 probably has too many sc. Recount it to 19, with exactly 2 sc per ch-2 sp.
- The wing cups: The tension is tight on Rows W4 and W5. Loosen the ch-3 spaces, or go up 0.25 mm for those rows only.
- The body curls into a circle: Row 3 is too tight. Rework it with a looser hand, or block the crescent flatter.
- The neck twists: Starch it while it’s pinned flat, and check that Row N2 went into the free loops and not the back bumps.
- There are gaps at the wing joins: Make each anchor sl st snug, and count the loops from the neck end again.
- The swan tilts on the tree: Move the hanging loop one spoke toward the neck or toward the tail.
Care
Hand-wash in cool water with mild soap, roll in a towel and re-block with starch. Store flat between tissue paper so the wing and neck keep their shape.
Final Notes
The measurement chain is simple to follow:
- Row 1 is 3.5 in (8.9 cm).
- The body band is 0.75 in (1.9 cm) deep.
- The neck is 2.5 in (6.4 cm).
- The wing reaches 0.8 in (2.0 cm) at the crossbar and 1.5 in (3.8 cm) at the scallops.
- The size before edging is 3.75 in x 3.25 in (9.5 cm x 8.3 cm).
- The edging adds 1/8 in (0.3 cm) on each side, for a finished 4 in x 3.5 in (10.2 cm x 8.9 cm).
If each checkpoint matches, the swan will block cleanly. Make a few swans to hang together on a tree.
Happy crocheting!