

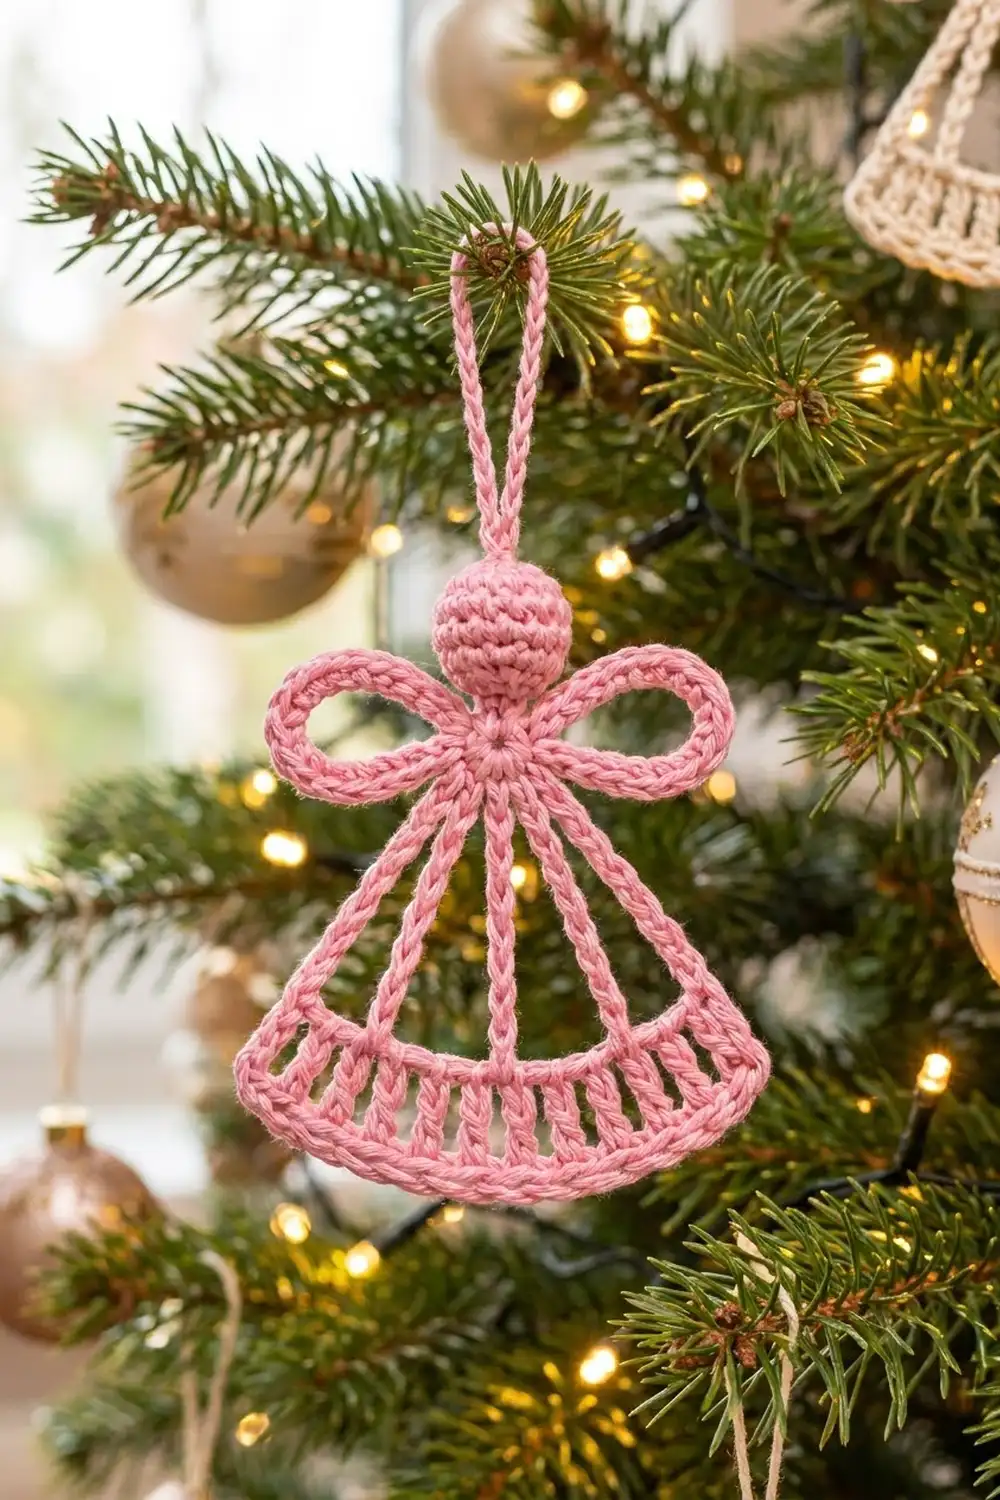
This little angel is light, airy and quick to make. A round stuffed head sits above two looped oval wings. Five corded rays fan out from a small neck ring and end on a lacy, arched hem band. Most of the skirt is open space framed by clean lines.
The sample is soft candy pink. The angel looks just as lovely in cream, lavender or mint, so you can stitch a whole set for the tree. Every line of the angel is a firm cord of single crochet or chain-plus-slip-stitch. This gives it a neat, graphic look and helps it keep its shape when it hangs.
The pattern uses US crochet terms. The finished angel is about 4.8 in (12.2 cm) wide at the hem and about 4 in (10.2 cm) tall from the top of the head to the hem. With the hanging loop it is about 6.5 in (16.5 cm) tall.
You will make five small parts: a head, two wings, the skirt body (hem band plus rays) and a hanging loop. Then you sew them together into one ornament and finish the hem with a single crochet border.
Finished Size and Construction
- Finished size: 4.8 in (12.2 cm) wide x 4 in (10.2 cm) tall; 6.5 in (16.5 cm) tall with the loop
- Skill level: Easy / advanced beginner
- Terminology: US crochet terms
- Yarn weight: Sport weight (#2) cotton
- Hook: 2.75 mm (C-2)
- Number of pieces: 1 finished ornament, made from 5 small parts (head, 2 wings, skirt body, hanging loop)
- Layout: Loop on top of the head, head above the neck ring, one wing on each side of the ring, rays fanning down to an arched hem band
- Piece sizes: head 1 in (2.5 cm) across; each wing 2 in (5.1 cm) long x 0.75 in (1.9 cm) high; hem top line 2.5 in (6.4 cm) wide
- Size before border: hem band 0.625 in (1.6 cm) deep, with a bottom edge about 4.5 in (11.4 cm) wide when gently spread
- Border depth: 0.125 in (0.3 cm), one row of single crochet, which brings the band to 0.75 in (1.9 cm)
Materials
Choose a smooth, mercerized sport-weight cotton. Cotton shows every stitch clearly and keeps the rays straight. Acrylic works too, but it is softer and may need a light stiffener.
- Main color (pink, or cream, lavender or mint): 15 g, about 47 m (51 yd), of sport-weight cotton
Quantities include a margin of about 25 percent for your test piece and tails. One ornament uses roughly 12 g.
Tools:
- 2.75 mm (C-2) crochet hook
- Small amount of polyester fiberfill
- Tapestry needle
- Stitch marker
- Scissors
- Blocking mat and rust-proof pins
- Optional: fabric stiffener or spray starch
Abbreviations (US Terms)
- ch – chain
- sl st – slip stitch
- sc – single crochet
- tr – treble crochet (yarn over twice)
- dec – single crochet decrease (sc2tog), worked as an invisible decrease through the front loops only
- MR – magic ring
- sp – space
- st(s) – stitch(es)
- rnd – round
Special technique – back bump slip stitch: Turn your chain over. On the back of each chain is a small horizontal bar, called the back bump. Insert your hook under that bar only and slip stitch. Slip stitching back along a chain this way turns a thin chain into a firm, rounded cord. All the rays and the hanging loop use this cord.
Gauge and Checkpoints
Gauge: 6 sc and 7 sc rows = 1 in (2.5 cm). 7 ch = 1 in (2.5 cm).
Make one wing first as your test piece. It is small and fast, and it checks your stitch gauge and chain gauge at the same time. A finished wing of 32 sc should flatten to an oval about 2 in (5.1 cm) long.
Checkpoints:
- Head: about 1 in (2.5 cm) across after stuffing.
- Wing: about 2 in (5.1 cm) long x 0.75 in (1.9 cm) high when flattened.
- Hem band Row 1: 15 sc = 2.5 in (6.4 cm).
- Hem band after Row 2: 0.625 in (1.6 cm) deep.
- Center ray: about 2.3 in (5.8 cm) long.
- Finished angel: 4.8 in (12.2 cm) wide x 4 in (10.2 cm) tall.
If your pieces are too big, go down to a 2.5 mm hook. If they are too small, go up to a 3 mm hook. Check a wing again before you start the skirt. The ray lengths are fixed chain counts, so chain gauge matters most for the skirt shape.
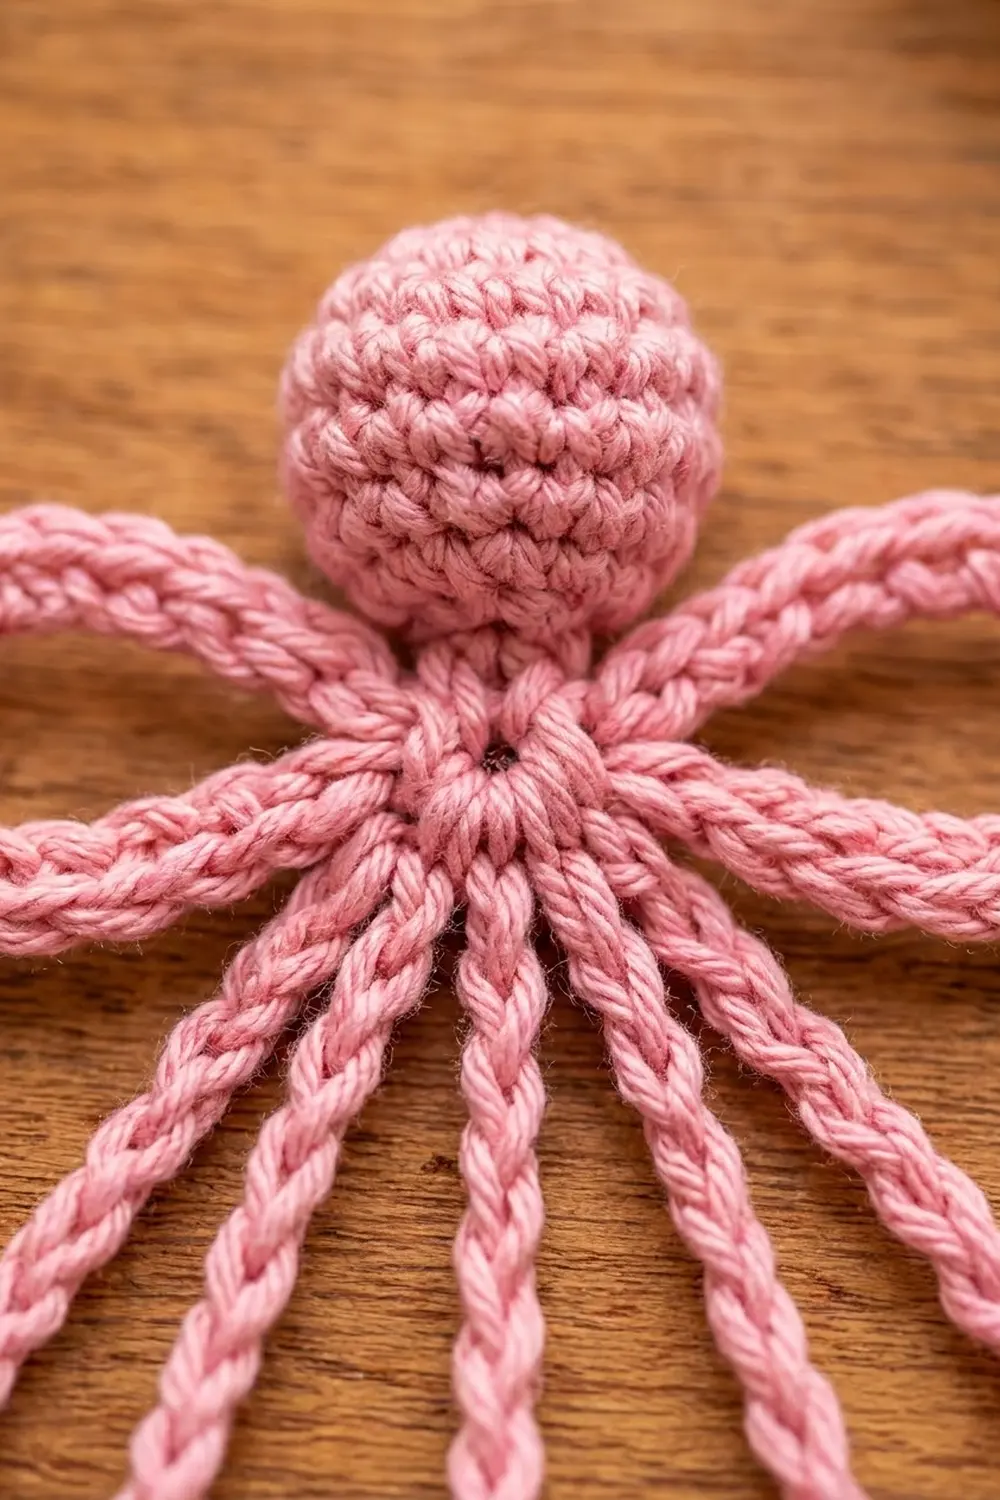
Head
Work in continuous rounds. Place a marker in the first stitch of each round and move it up as you go.
Rnd 1: Make a MR, 6 sc in ring. (6 sts)
Rnd 2: 2 sc in each st around. (12 sts)
Rnd 3: [Sc in next st, 2 sc in next st] 6 times. (18 sts)
Rnds 4–6: Sc in each st around. (18 sts in each round)
Rnd 7: [Sc in next st, dec] 6 times. (12 sts)
Stuff the head firmly but not hard. It should be round, not lumpy.
Rnd 8: Dec 6 times. (6 sts)
Fasten off, leaving a 10 in (25.4 cm) tail. Weave the tail through the front loops of the last 6 sts and pull it closed. Keep the tail for sewing. The head is about 1 in (2.5 cm) across.
Wings (Make 2)
Foundation: Ch 32. Sl st in the first ch to form a ring, taking care not to twist the chain.
Rnd 1: Ch 1, sc in each ch around. Join with a sl st to the first sc. (32 sc)
Fasten off, leaving an 8 in (20.3 cm) tail. Flatten the ring into an oval with the join at one narrow end. This end is the inner tip, which will sit behind the neck. Each wing is about 2 in (5.1 cm) long and 0.75 in (1.9 cm) high.
Skirt Hem Band
You work the hem band flat in three rows. Rows 1 and 2 are below. Row 3 is the border.
Row 1: Ch 16. Sc in the 2nd ch from the hook and in each ch across. Turn. (15 sc)
Check: Row 1 measures 2.5 in (6.4 cm). The free loops of the foundation chain form the top line of the hem band. With the top line facing up, number these loops 1 to 15 from left to right. You will need these positions for the rays.
Row 2: Ch 5 (counts as tr + ch 1), [tr in next sc, ch 1] 13 times, tr in last sc. Turn. (15 tr, 14 ch-1 sps)
Count check: 1 turning-chain post + 13 posts in the repeat + 1 final post = 15 tr. Each tr sits in one sc of Row 1, so all 15 sts are used. The ch-1 spaces push the bottoms of the posts apart, which starts the arched fan shape.
Do not fasten off. Put the live loop on a marker and set the band aside. The band is now 0.625 in (1.6 cm) deep.
Neck Ring and Rays
The rays connect the neck ring to the top line of the hem band. For each ray, you make a chain, anchor it in the band, then slip stitch back up along its back bumps to make a firm cord.
Neck ring: With a new strand of yarn, ch 6. Sl st in the first ch to form a ring, about 0.3 in (0.8 cm) across.
Hold the band so its top line faces up toward the ring and the Row 2 posts hang down.
Ray 1 (left outer): Ch 18, sl st into foundation loop 1. Sl st in the back bump of each of the 18 ch back up toward the ring, then sl st into the ring. (18 ch, 18 sl sts)
Ray 2 (left inner): Ch 17, sl st into foundation loop 4. Sl st in the back bump of each of the 17 ch, then sl st into the ring. (17 ch, 17 sl sts)
Ray 3 (center): Ch 16, sl st into foundation loop 8. Sl st in the back bump of each of the 16 ch, then sl st into the ring. (16 ch, 16 sl sts)
Ray 4 (right inner): Ch 17, sl st into foundation loop 12. Sl st in the back bump of each of the 17 ch, then sl st into the ring. (17 ch, 17 sl sts)
Ray 5 (right outer): Ch 18, sl st into foundation loop 15. Sl st in the back bump of each of the 18 ch, then sl st into the ring. (18 ch, 18 sl sts)
Fasten off and weave in the ends.
Why these lengths: At 7 ch per inch, the center ray is about 2.3 in (5.8 cm), the inner rays are about 2.4 in (6.1 cm), and the outer rays are about 2.6 in (6.6 cm). The anchor points are 3, 4, 4 and 3 loops apart, which is symmetrical around the center loop, loop 8. The longer outer rays reach the corners of the band, and the shorter center ray drops straight down. Together they make a clean triangle with the ring at the top.
Hanging Loop
Row 1: Ch 36. Sl st in the back bump of the 2nd ch from the hook and in each ch across. (35 sl sts)
Fasten off, leaving a 6 in (15.2 cm) tail. The cord is about 5 in (12.7 cm) long. Folded in half, it makes a loop about 2.5 in (6.4 cm) tall.
Assembly
- Head: Place the closed bottom of the head just above the neck ring. Use the head tail to sew it to the top of the ring with 4–5 small stitches, keeping the stitches inside the cord so they don’t show.
- Wings: Lay one wing on each side of the ring, with the inner tips overlapping slightly behind it. Sew each tip to the back of the ring with its own tail. Angle the wings slightly upward so their outer ends line up with the middle of the head. The wingspan is about 4.25 in (10.8 cm).
- Hanging loop: Fold the loop in half and sew both ends to the top center of the head. Hide the tails inside the head.
Border
The border is one row of single crochet along the bottom of the hem band. It firms the lower edge, matches the corded look of the rest of the angel and sets the final hem width.
Border gauge: 6 sc = 1 in (2.5 cm), worked over the posts and spaces.
Put the live loop from Row 2 back on your hook.
Row 3 (border): Ch 1, turn, sc in first tr, [sc in next ch-1 sp, sc in next tr] 14 times. (29 sc)
Count check: this is a conversion row. 15 sc (1 per tr) + 14 sc (1 per ch-1 sp) = 29 sc. Each end of the band is a tr post, so on each side the outer ray, the end post and the end border sc form one straight line.
Fasten off and weave in all ends.
Why the math works: The top line has 15 sts, which is 2.5 in (6.4 cm). The border has 29 sts, almost twice as many, which is about 4.8 in (12.2 cm) at border gauge. Because the bottom edge is almost twice as long as the top, the band can’t lie straight. It curves into the gentle arch you see on the finished angel. The border adds 0.125 in (0.3 cm) of depth, taking the band from 0.625 in (1.6 cm) to 0.75 in (1.9 cm).
Final Blocking
- Dampen. Soak the angel in cool water or mist it well. Press out extra water in a towel. Don’t wring it.
- Pin the hem. Pin the two bottom corners 4.8 in (12.2 cm) apart. Then pin the bottom center so the hem curves downward in a smooth arc.
- Pin the rays. Pin the neck ring so it is about 3 in (7.6 cm) from the bottom of the hem. Straighten each ray into a clean line from ring to band.
- Space the posts. Use a blunt needle to nudge the tr posts until the gaps between them are even.
- Shape the wings. Ease each wing into a smooth oval about 2 in (5.1 cm) long and pin the outer tip.
- Optional stiffening. For a crisp ornament, brush on diluted fabric stiffener or use spray starch.
- Dry fully. Leave it pinned until completely dry, usually 12–24 hours.
Final Quality-Control Checklist
- The head is round and evenly stuffed, about 1 in (2.5 cm) across.
- Both wings are the same size, about 2 in (5.1 cm) long, and sit level.
- The hem top line has 15 sc and measures 2.5 in (6.4 cm).
- Row 2 has 15 tr and 14 ch-1 sps.
- The border has 29 sc, and the hem is 4.8 in (12.2 cm) wide.
- All 5 rays are straight and anchored at loops 1, 4, 8, 12 and 15.
- The angel is about 4 in (10.2 cm) tall, or 6.5 in (16.5 cm) with the loop.
- The hanging loop is centered and the ornament hangs straight.
- All ends are woven in and can’t be seen from the front.
Troubleshooting
Rays are wavy or slack. Your chains are looser than 7 ch per inch. Use a smaller hook for the rays only, or take 1 ch off each ray.
Skirt pulls into a tight cone. The rays are too short or your chains are tight. Add 1 ch to each ray, keeping the 18-17-16-17-18 pattern.
Hem ruffles instead of arching. Your border is too loose. Redo Row 3 with a smaller hook so the 29 sc measure 4.8 in (12.2 cm).
Hem stays flat and straight. Check that you made a ch 1 between every tr in Row 2 and worked a sc into every ch-1 sp in Row 3.
Head is lopsided. Stuff in small pieces and roll the head between your palms before closing it.
Angel tips forward when hanging. The loop is sewn too far toward the front or back. Move it to the exact top of the head.
Care
Hand wash in cool water with mild soap, press dry in a towel, then reshape and pin flat to dry. Store the angel flat or hanging, away from heavier ornaments that could crush the head or rays.
Final Notes
Every size in this angel follows from one chain of measurements. A gauge of 6 sc = 1 in (2.5 cm) gives a 1 in (2.5 cm) head, 2 in (5.1 cm) wings and a 15-stitch top line of 2.5 in (6.4 cm). A chain gauge of 7 ch = 1 in (2.5 cm) makes the rays 2.3–2.6 in (5.8–6.6 cm) long. The 15 tr posts fan out, and the 29-stitch border sets the hem at 4.8 in (12.2 cm). The finished angel is about 4 in (10.2 cm) tall, or 6.5 in (16.5 cm) with the loop.
Make one in pink, then try cream, lavender and mint for a full set on your tree.
Happy crocheting!