
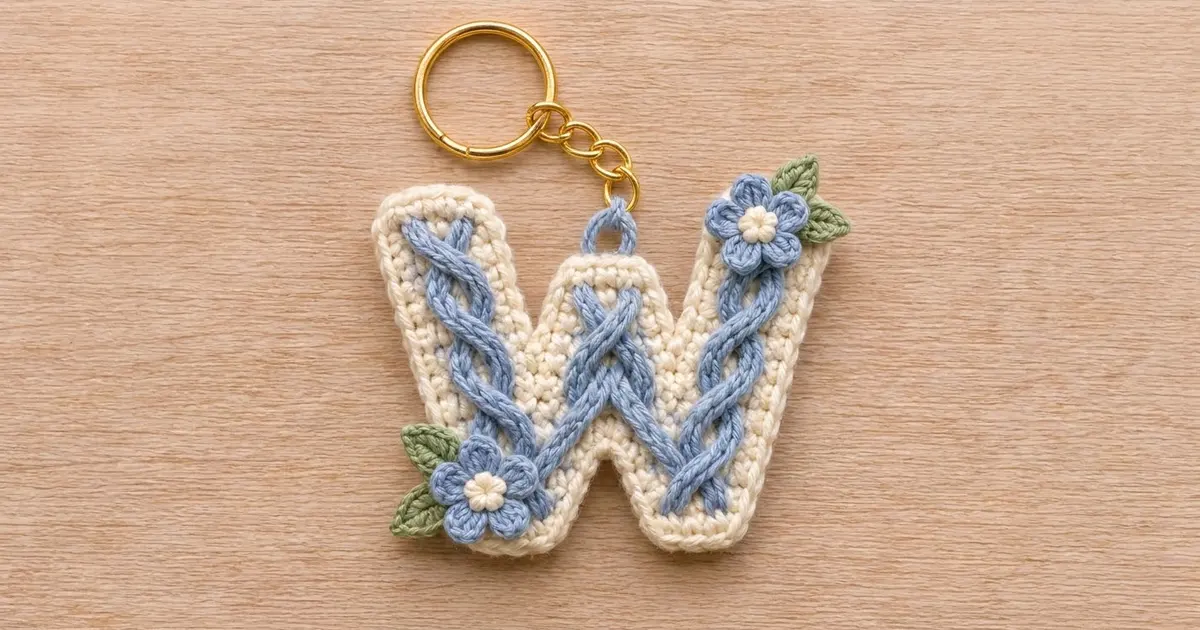
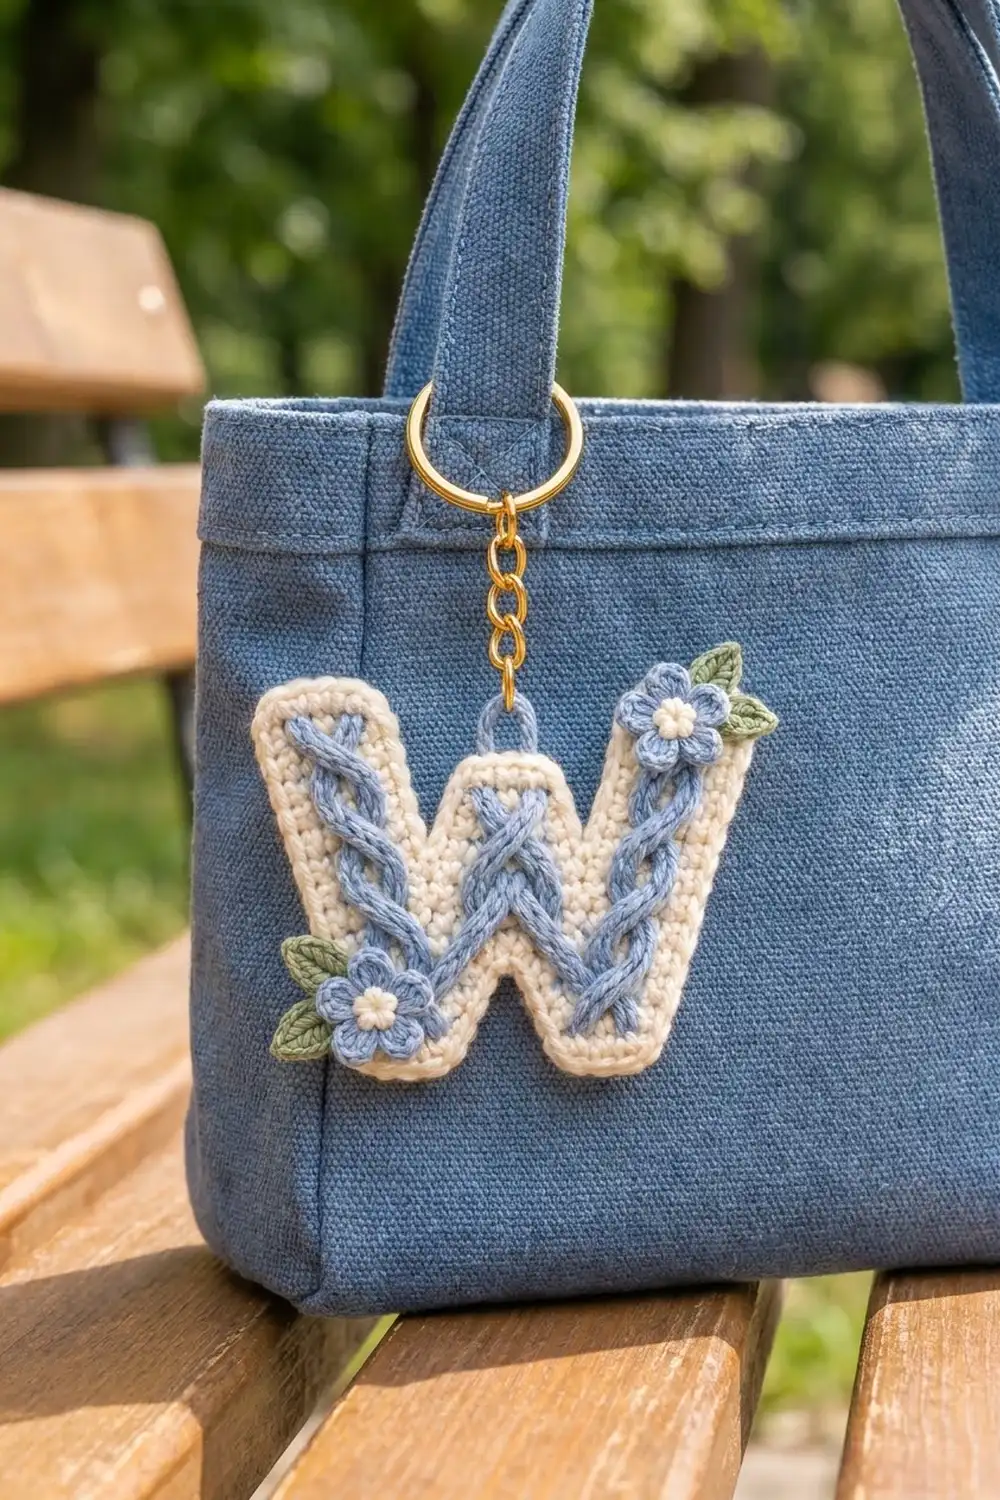
This little letter W keychain has a soft cream base, dusty-blue twisted cords running down every stroke, and two small blue flowers with sage-green leaves. It is quick to make, uses very little yarn and makes a lovely personal gift for anyone whose name starts with W.
The whole letter is crocheted as one chevron-style strip. You work single crochet rows along the zigzag path of the W. Increases at the two bottom points and a decrease under the middle peak bend the strip into shape. One round of cream single crochet then outlines the letter.
The finished keychain charm measures about 3.4 in (8.6 cm) wide by 2.6 in (6.6 cm) tall. The pattern uses US crochet terms.
Construction overview: crochet the W base in 4 rows, add a 1-round border and block the base. Then make 8 slip-stitch cords and sew them on in twisted pairs. Finish with 2 flowers, 4 leaves, a hanging loop and the keyring hardware.
Finished Size and Construction
- Finished size: 3.4 in (8.6 cm) wide x 2.6 in (6.6 cm) tall, not including hardware
- Skill level: Intermediate
- Terminology: US crochet terms
- Yarn weight: DK / light worsted (weight 3), cotton or cotton blend
- Hook: 3.5 mm (E-4)
- Number of pieces: 1 main letter piece, plus small sewn-on appliqués (8 cords, 2 flowers, 4 leaves)
- Layout: single motif, no joining
- Stroke width: 0.7 in (1.8 cm) before border, 0.9 in (2.3 cm) after border
- Size before border: 3.2 in (8.1 cm) x 2.4 in (6.1 cm)
- Border depth: 0.1 in (0.3 cm) on every edge
Materials
Choose a smooth, matte cotton or cotton blend in DK weight. Cotton keeps the letter crisp and holds its shape on a busy keyring. Avoid fuzzy yarns, because they blur the twisted cords.
- Cream (main color, MC): 6 g, about 14 m
- Dusty blue (CC1): 4 g, about 9 m
- Sage green (CC2): 1 g, about 2 m
The quantities include a safety margin of roughly 20 percent.
Tools:
– 3.5 mm (E-4) crochet hook
– Tapestry needle
– Scissors
– 4 locking stitch markers
– Gold split keyring, about 1 in (2.5 cm) across, with a short chain
– 1 gold jump ring and 2 pairs of flat-nose pliers
– Blocking mat, rustproof pins and a spray bottle or steam iron
Abbreviations (US Terms)
- ch – chain
- sl st – slip stitch
- sc – single crochet
- hdc – half double crochet
- dc – double crochet
- st(s) – stitch(es)
- sc3tog – single crochet 3 together
- MR – magic ring
- FO – fasten off
Special stitch, sc5tog (single crochet 5 together): [insert hook in next st, yarn over, pull up a loop] 5 times (6 loops on hook), yarn over, pull through all 6 loops. You work across 5 stitches and end with 1 stitch.
5-sc group: work 5 sc in the same stitch. The 3rd sc of the group is its center stitch.
Gauge and Checkpoints
Gauge: 20 sc and 22 rows = 4 in (10.2 cm) in sc worked flat. That is 5 sc per inch and 5.5 rows per inch.
Before you start, crochet one test W base (Rows 1–4). It takes only a few minutes and tells you more than a swatch would.
Checkpoints:
– After Row 2, the strip is about 0.35 in (0.9 cm) wide.
– After Row 4, the strip is about 0.7 in (1.8 cm) wide. The letter measures 3.2 in (8.1 cm) across and 2.4 in (6.1 cm) tall.
– After the border, the letter measures 3.4 in (8.6 cm) x 2.6 in (6.6 cm).
If your letter is too big, go down to a 3.25 mm (D-3) hook. If it is too small, go up to a 3.75 mm (F-5) hook. Avoid adding or removing rows. Changing the row count changes the angle of the strokes and the stitch counts in the border.

W Base (Cream)
The strip is worked in rows that follow the W. Row 1 runs along the inner (upper) outline of the letter, and each new row adds width toward the outer (lower) outline. Every row has the same layout:
- an outer arm section
- a 5-sc group at the left bottom point
- a middle-peak section
- sc5tog under the middle peak
- a middle-peak section
- a 5-sc group at the right bottom point
- an outer arm section
Each row adds 4 stitches in total: two 5-sc groups add 8 stitches, and the sc5tog removes 4.
Foundation: With MC, ch 34.
Row 1: Sc in 2nd ch from hook and in next 6 ch (7 sc), 5 sc in next ch, sc in next 6 ch, sc5tog over next 5 ch, sc in next 6 ch, 5 sc in next ch, sc in last 7 ch. Turn. (37 sts: 7 + 5 + 6 + 1 + 6 + 5 + 7)
You have used 33 chains (7 + 1 + 6 + 5 + 6 + 1 + 7), plus the 1 skipped chain.
Row 2: Ch 1 (does not count as a st here or in later rows). Sc in first 9 sts, 5 sc in next st (center of the 5-sc group), sc in next 6 sts, sc5tog over next 5 sts (center the decrease on the Row 1 sc5tog), sc in next 6 sts, 5 sc in next st (center of the group), sc in last 9 sts. Turn. (41 sts: 9 + 5 + 6 + 1 + 6 + 5 + 9)
Row 3: Ch 1, sc in first 11 sts, 5 sc in next st, sc in next 6 sts, sc5tog, sc in next 6 sts, 5 sc in next st, sc in last 11 sts. Turn. (45 sts: 11 + 5 + 6 + 1 + 6 + 5 + 11)
Row 4: Ch 1, sc in first 13 sts, 5 sc in next st, sc in next 6 sts, sc5tog, sc in next 6 sts, 5 sc in next st, sc in last 13 sts. Do not turn or fasten off. (49 sts: 13 + 5 + 6 + 1 + 6 + 5 + 13)
Why the counts stay consistent:
– The outer arm sections grow by 2 each row, because the 2 stitches before the center of the 5-sc group join the arm (7, 9, 11, 13).
– The middle-peak sections stay at 6. They gain 2 stitches from the group but give 2 stitches back into the next sc5tog.
– Totals go 37, 41, 45, 49, which is +4 each row.
Place markers in the center sc of both 5-sc groups and in the Row 4 sc5tog.
Border (Cream)
Border gauge: 5 sc per inch along the edges, matching the body. On straight edges, work 1 sc per stitch or row end. Add 2 stitches at outward (convex) corners and remove 2 at inward (concave) notches. This keeps every edge flat.
Rnd 1: Continue from the end of Row 4 and ch 1. Work in this order:
- First arm top: working down the row ends, sc in each of the 4 row ends. (4 sts)
- Upper edge: working in the free loops of the foundation chain (33 loops):
- 3 sc in the first loop (corner)
- sc in the next 15 loops
- 3 sc in the next loop (the center of the 5 loops under the sc5tog, which is the top of the middle peak)
- sc in the next 15 loops
- 3 sc in the last loop (corner)
- Upper edge: 3 + 15 + 3 + 15 + 3 = 39 sts
The two loops that hold the 5-sc groups sit at the inner bottom notches and get just 1 sc each. They are already gathered, so they need no decrease.
3. Second arm top: working up the row ends, sc in each of the 4 row ends. (4 sts)
4. Lower edge: working across Row 4 (49 sts):
– 3 sc in the first st (corner)
– sc in the next 14 sts
– 3 sc in the next st (marked center, right bottom point)
– sc in the next 7 sts
– sc3tog over the next 3 sts (the marked sc5tog and 1 st on each side; this is the notch under the middle peak)
– sc in the next 7 sts
– 3 sc in the next st (marked center, left bottom point)
– sc in the next 14 sts
– 3 sc in the last st (corner)
– Lower edge: 3 + 14 + 3 + 7 + 1 + 7 + 3 + 14 + 3 = 55 sts
Join with a sl st to the first sc. Total: 4 + 39 + 4 + 55 = 102 sts.
Why the math works:
– The lower edge uses all 49 Row 4 stitches once.
– It adds +2 at each of 4 points (2 corners and 2 bottom points), for +8.
– It removes −2 at the middle notch.
– 49 + 8 − 2 = 55.
– The upper edge uses all 33 loops once and adds +2 at 3 points: 33 + 6 = 39.
FO, leaving an 8 in (20.3 cm) tail to weave in.
Size checkpoint: 3.4 in (8.6 cm) x 2.6 in (6.6 cm), with the strokes 0.9 in (2.3 cm) wide.
Hanging Loop (Blue)
With the right side facing, join CC1 with a sl st in the center sc of the 3-sc corner at the top of the middle peak.
- Ch 8 and sl st in the same st to form a loop.
- Work 12 sc into the loop and sl st to the first sc.
FO and weave in the ends on the back. The loop measures about 0.5 in (1.3 cm).
Twisted Cords (Blue)
Each stroke carries 2 cords twisted together.
Long cords (make 4, for the outer arms): With CC1, ch 15. Sl st in the back bump of the 2nd ch from hook and in each ch across. (14 sl sts) FO, leaving a 6 in (15.2 cm) tail. Each cord is about 2.2 in (5.6 cm) long.
Short cords (make 4, for the middle-peak strokes): With CC1, ch 12. Sl st in the back bump of the 2nd ch from hook and in each ch across. (11 sl sts) FO, leaving a 6 in (15.2 cm) tail. Each cord is about 1.7 in (4.3 cm) long.
Attaching the cords:
1. Lay 2 long cords along the center of the left arm. Run them from 0.2 in (0.5 cm) below the top edge down to the bottom point.
2. Cross the cords over each other 3 times, spaced evenly. Once twisted, the pair lies about 2.0 in (5.1 cm) long.
3. Using the tails, tack the pair down at each crossing and at both ends, going through the base only, not to the back edge.
4. Repeat on the right arm.
5. Place the short pairs on the two middle strokes, about 1.5 in (3.8 cm) long when twisted. Cross them twice each, and let the two pairs overlap in an X just under the middle peak. Tack the X at its center.
6. Tuck the cord ends under the neighboring pair at the bottom points so no cut ends show.
Flowers (make 2)
Rnd 1 (cream): MR, 5 sc in ring, sl st to first sc. (5 sts) FO.
Rnd 2 (blue): Join CC1 in any sc. [(Sc, dc, dc, dc, sc) in the same st, sl st in the next st] 5 times, working the last sl st into the joining st. (5 petals of 5 sts each, plus 5 sl sts)
FO, leaving a 10 in tail for sewing. Each flower measures about 0.8 in (2.0 cm) across.
Leaves (make 4)
With CC2, ch 6.
- Working in back bumps, starting in the 2nd ch from hook: sc, hdc, dc, hdc. (4 sts)
- Work 3 sc in the last ch to form the tip. (3 sts)
- Working along the opposite side of the chain: hdc, dc, hdc, sc. (4 sts)
- Sl st to the first sc. (11 sts)
FO, leaving a tail. Each leaf is about 0.6 in (1.5 cm) long.
Placement:
– Top flower: sew one flower on the top of the right arm, overlapping the outer corner. Tuck 2 leaves behind it, one pointing up and to the right and one pointing to the right.
– Bottom flower: sew the second flower on the lower left bottom point. Tuck its 2 leaves behind it, pointing up-left and down-left.
– Sew leaves first, then flowers, stitching through the flower centers and petal bases only.
Final Blocking
- Block the base after the border and before adding any appliqués.
- Mist the base lightly or hover a steam iron over it. Do not press.
- Pin the base onto the mat at 3.4 in (8.6 cm) x 2.6 in (6.6 cm). Pin each bottom point and the middle peak first, then the four arm-top corners.
- Straighten the strokes so they all measure 0.9 in (2.3 cm) wide.
- Leave to dry completely.
- Add the cords, flowers and leaves.
- Steam the finished piece lightly from the back and let it dry flat.
- Attach the jump ring through the blue loop and the keyring chain, then close it fully with pliers.
Final Quality-Control Checklist
- Letter measures 3.4 in (8.6 cm) x 2.6 in (6.6 cm)
- Border has 102 sc and no gaps at the corners
- Both bottom points are rounded, and the middle notch lies flat
- Each twisted pair is centered on its stroke, with the X under the middle peak
- No cord tails or cut ends visible on the front
- Flowers and leaves are stitched firmly, with no loose petals
- Jump ring is fully closed with no gap
Troubleshooting
Strip curls into a ring: Your sc5tog is too tight or off-center. Center it on the previous decrease.
Bottom points ruffle: Check that the 5-sc group goes into the center stitch only. If needed, go down a hook size.
Border waves: You probably worked more than 1 sc per row end. Each arm top takes exactly 4 sc.
Cords look flat: Twist them more firmly, and tack them only at the crossings so they stay raised.
Letter twists on the keyring: Center the hanging loop on the middle peak.
Care
Hand wash in cool water, press out the water in a towel and dry flat. Reshape the cords and petals while the piece is damp.
Final Notes
The measurement chain is simple to follow:
– Work 4 rows at 5 sc and 5.5 rows per inch.
– This gives a base of 3.2 in (8.1 cm) x 2.4 in (6.1 cm).
– The 102-stitch border adds 0.1 in (0.3 cm) on every edge.
– The finished letter measures 3.4 in (8.6 cm) x 2.6 in (6.6 cm).
If your counts match at each checkpoint, your W will match too. Happy crocheting!