

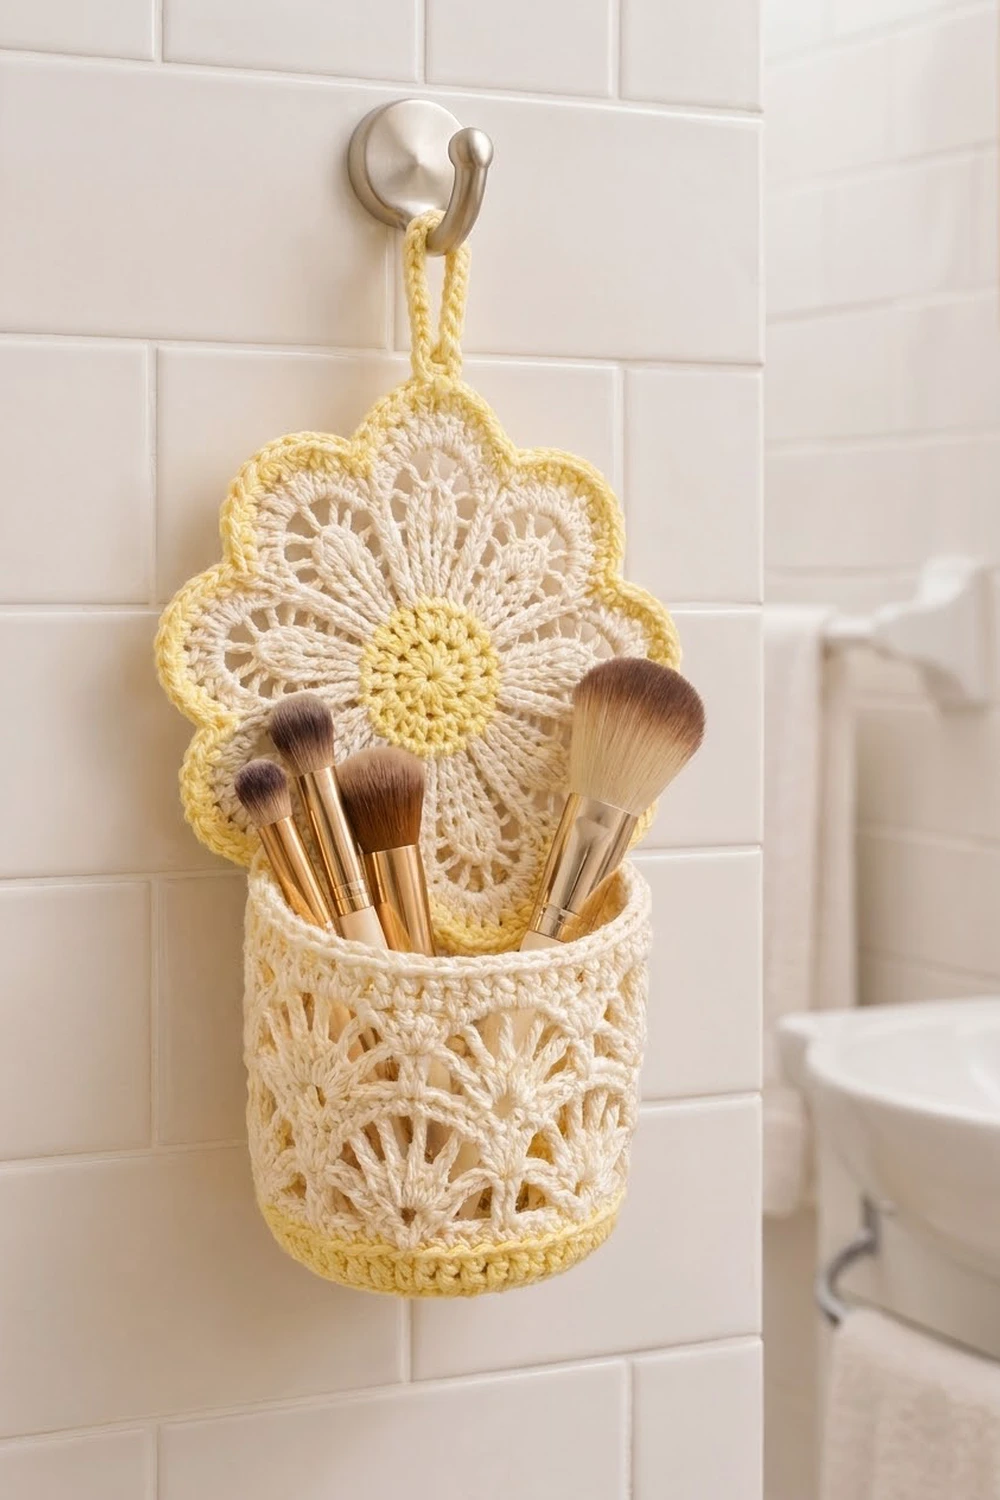
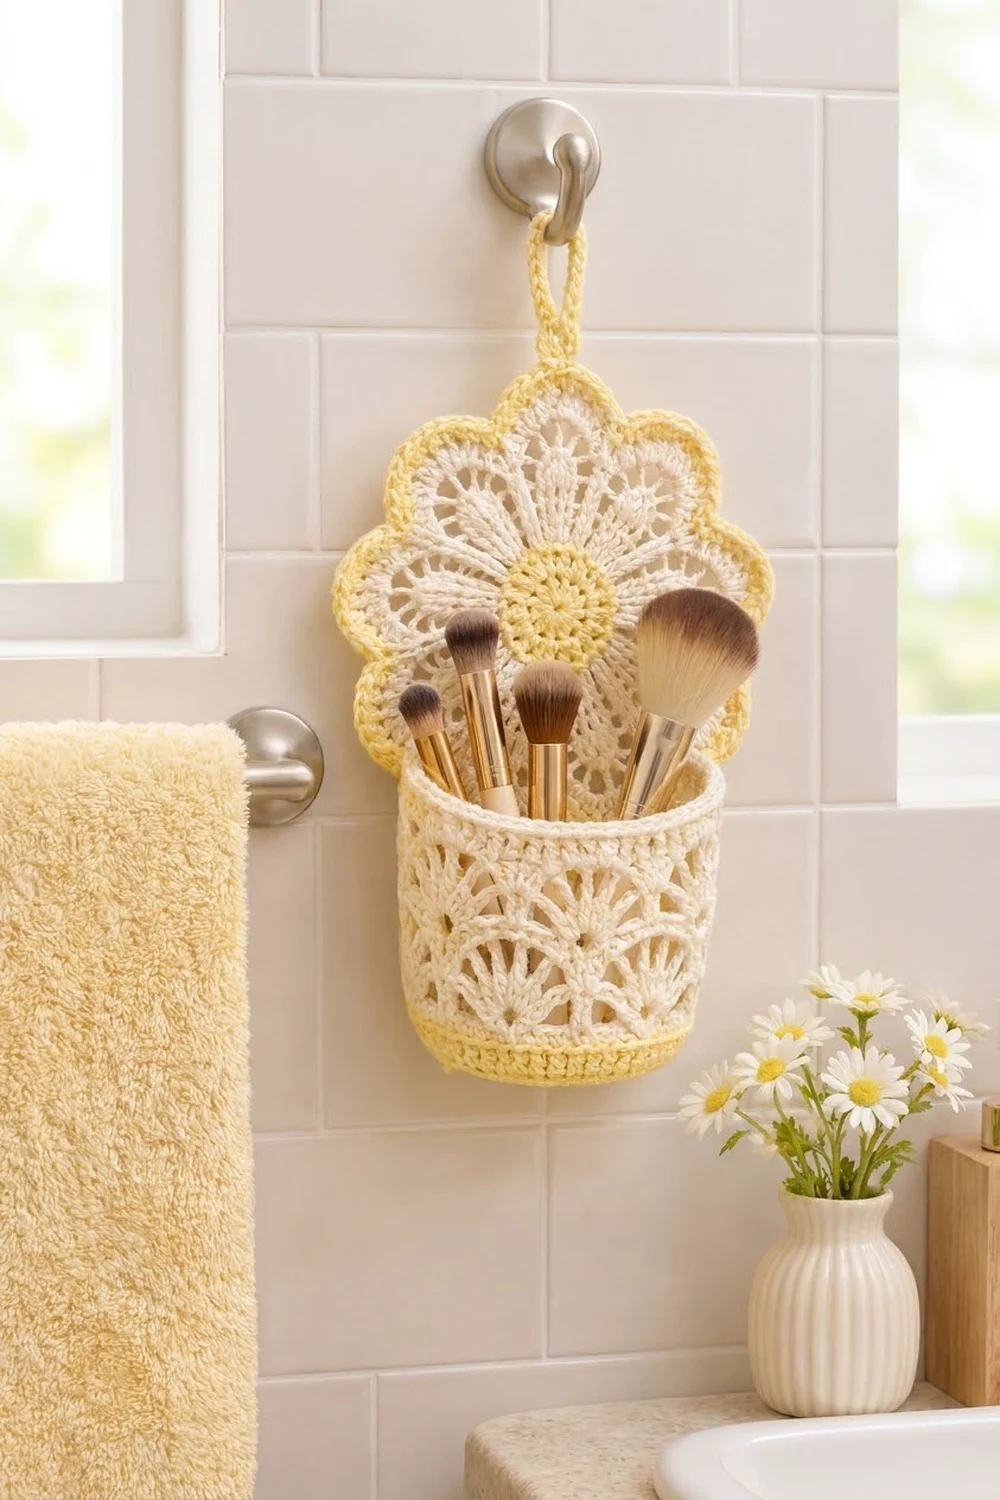
This organizer is a flat daisy with a lace pocket on the front, and it hangs from a hook. The backplate has ten scalloped cream petals around a sunny yellow center, finished with a raised yellow crab-stitch edge. The pocket is a round cup with a yellow base, tiers of open fans, and a neat cream rim.
The palette is soft and fresh: butter yellow and natural cream. Worsted cotton keeps the stitches crisp and helps the cup hold its shape. Use it for makeup brushes, toothbrushes, pens, or small hair tools.
This pattern uses US crochet terms. The finished backplate measures 7.75 in (19.7 cm) across the petal tips. The cup is 5 in (12.7 cm) across and 3.75 in (9.5 cm) tall. The total hanging height, loop included, is about 10.75 in (27.3 cm).
Construction is simple. Work the backplate in the round from the center out, then add the border and a sc-covered hanging loop. Next, work the cup from a flat base straight up into its walls. Finally, sew the cup to the lower front of the backplate.
Finished Size and Construction
- Finished size: backplate 7.75 in (19.7 cm) across; cup 5 in (12.7 cm) diameter × 3.75 in (9.5 cm) tall
- Skill level: Intermediate
- Terminology: US
- Yarn weight: Worsted (#4) cotton
- Hook: 4.0 mm (G-6)
- Number of pieces: 2 (backplate with attached loop, cup)
- Layout: cup sewn to the lower front of the backplate, hanging 1 in (2.5 cm) below the lowest petal tip
- Backplate size before border: 6.75 in (17.1 cm)
- Border depth: 0.5 in (1.3 cm) on each side
- Hanging loop height: 2 in (5.1 cm)
Materials
Pick a smooth, mercerized or combed worsted cotton. Cotton does not stretch much, so the cup keeps its shape when it is full. Avoid acrylic here, because the cup walls would sag.
- Butter yellow: 40 g, about 68 m (74 yd), for the center, border, loop, base, and bottom band
- Cream: 50 g, about 85 m (93 yd), for the petals and cup walls
The quantities include a margin of about 20% for your gauge swatch and weaving in ends.
Tools:
– 4.0 mm (G-6) crochet hook
– Tapestry needle
– 4 locking stitch markers
– Rust-proof pins and a blocking mat
– Spray bottle
– Ruler or tape measure
Abbreviations (US Terms)
- ch – chain
- sl st – slip stitch
- sc – single crochet
- hdc – half double crochet
- dc – double crochet
- sc2tog – single crochet 2 together
- BLO – back loop only
- sp – space
- st(s) – stitch(es)
- RS – right side
Special stitches
- Fan: In the same st, work (dc, ch 1) 4 times, then dc. That gives 5 dc and 4 ch-1 sps.
- Crab stitch (reverse sc): Work sc from left to right (right to left if you are left-handed). Insert the hook into the next st to the right, yarn over, pull up a loop, then yarn over and pull through both loops.
Gauge and Checkpoints
Gauge: 16 sc and 16 rounds = 4 in (10.2 cm) in sc worked in the round.
Make the backplate center first, because it is your test piece. Measure at every checkpoint below before you continue.
- After Round 3 (center): 2 in (5.1 cm) across
- After Round 4: 2.75 in (7.0 cm)
- After Round 6: 4.75 in (12.1 cm)
- After Round 8 (before border): 6.75 in (17.1 cm) across the petal tips
- After Round 10 (border): 7.75 in (19.7 cm)
- Cup base after Round 10: 5 in (12.7 cm)
- Cup finished height: 3.75 in (9.5 cm)
If your center is larger than 2 in (5.1 cm), go down to a 3.75 mm hook. If it is smaller, go up to a 4.5 mm hook. If the petals ruffle at Round 7 or 8, your dc are probably too tight. Loosen your yarn-overs rather than changing the stitch counts.
Backplate
Work in joined rounds with the RS facing. Don’t turn. A beginning ch 2 or ch 3 counts as a st unless noted.
Center (yellow)
Round 1: Make a magic ring. Ch 2, then work 9 hdc into the ring and join to the top of the ch-2. (10 hdc)
Round 2: Ch 2, hdc in the same st, 2 hdc in each st around, and join. (20 hdc)
Round 3: Ch 2, 2 hdc in the next st, hdc in the next st, 2 hdc in the next st. Repeat from * around and join. (30 hdc)
Fasten off yellow. Checkpoint: 2 in (5.1 cm).
Petals (cream)
Round 4: Join cream in any st. Ch 1, sc in the same st, ch 3, skip 2 sts, sc in the next st, ch 3, skip 2 sts. Repeat from * 8 more times, then join to the first sc. (10 sc, 10 ch-3 sps)
Round 5: Sl st into the next ch-3 sp. Ch 3, 3 dc in the same sp, ch 1, 4 dc in the next ch-3 sp, ch 1. Repeat from * around and join. (40 dc in 10 groups, 10 ch-1 sps)
Round 6: Ch 3, dc in the same st, dc in the next 2 sts, 2 dc in the next st, ch 1, skip the ch-1 sp. 2 dc in the next st, dc in the next 2 sts, 2 dc in the next st, ch 1, skip the ch-1 sp. Repeat from * around and join. (60 dc in 10 groups of 6, 10 ch-1 sps)
Checkpoint: 4.75 in (12.1 cm).
Round 7: Ch 4 (this counts as dc and ch 1). (Dc in the next dc, ch 1) 4 times, dc in the next dc, then sc in the next ch-1 sp, which is the valley. (Dc in the next dc, ch 1) 5 times, dc in the next dc, sc in the next ch-1 sp. Repeat from * 8 more times, then join to the 3rd ch of the beginning ch-4. Each petal has 6 dc and 5 ch-1 sps. (60 dc, 50 ch-1 sps, 10 valley sc)
The petals now separate, and the valley sc pulls each gap inward. That is what makes the scalloped outline.
Round 8: Ch 1 and sc in the same st. (2 dc in the next ch-1 sp) 5 times, then sc in the last dc of the petal and skip the valley sc. Sc in the first dc of the next petal, (2 dc in the next ch-1 sp) 5 times, sc in the last dc of the petal, skip the valley sc. Repeat from * around and join. (12 sts per petal: 10 dc + 2 sc; 120 sts total)
Each valley now has 2 sc side by side. Checkpoint: 6.75 in (17.1 cm) across the petal tips.
Border
Border gauge: about 4.5 sts per in (2.5 cm) along the scalloped edge. This is slightly denser than the body, so the edge stays firm and doesn’t flare.
Round 9 (conversion round, yellow): Join yellow in the first dc of any petal. Ch 1. Sc in the next 4 dc, 2 sc in each of the next 2 dc, sc in the next 4 dc, sc2tog over the 2 valley sc. Repeat from * around and join. Your last sc2tog uses the last sc of petal 10 and the first sc of petal 1.
Count: (100 dc worked 1 per st + 10 sc2tog made from the 20 valley sc = 110) + 20 increase sts = 130 sts, or 13 per petal.
Round 10 (yellow): Ch 1, then work crab stitch in each st around and join. (130 sts)
Why the math works: Each petal goes from 12 sts to 13. The 2 tip increases let the border curve around the rounded petal top. The valley sc2tog pinches each gap so the scallops stay deep. Nothing gets added between petals, so all 10 petals stay identical. Checkpoint: 7.75 in (19.7 cm).
Hanging loop (yellow): Choose the top petal. Its 13 border sts run: 4 plain sts, 4 increase-area sts (sts 5–8), 4 plain sts, then the valley st. Join yellow with a sl st in st 5 and ch 20. Sl st in st 8 to make a loop, then turn. Ch 1 and work 30 sc over the ch-20 loop. Sl st into st 5 and fasten off. The loop stands 2 in (5.1 cm) tall.
Cup
Base (yellow)
Round 1: Make a magic ring. Ch 1, work 6 sc into the ring, and join. (6)
Round 2: 2 sc in each st. (12)
Rounds 3–10: Increase 6 sts evenly in each round, staggering the increases so the base stays round. (18, 24, 30, 36, 42, 48, 54, 60)
Checkpoint: 5 in (12.7 cm) across and lying flat.
Walls
Round 11: Ch 1, then sc in the BLO of each st and join. (60) This round makes the crisp bottom edge where the walls turn upward.
Rounds 12–13: Ch 1, sc in each st, and join. (60 each round) The yellow band now measures 0.75 in (1.9 cm). Fasten off yellow.
Round 14: Join cream. Ch 1, sc in each st, and join. (60)
Round 15: Ch 1, sc in the first st, skip 2 sts, Fan in the next st, skip 2 sts, sc in the next st. Repeat from * 8 more times. Then skip 2 sts, Fan in the next st, skip 2 sts, and join to the first sc. (10 sc, 10 Fans)
Round 16: Sl st into the 1st dc, the next ch-1 sp, the 2nd dc, the next ch-1 sp, and the 3rd (center) dc. Ch 1 and sc in the same dc. Fan in the next sc, sc in the center dc of the next Fan. Repeat from * 8 more times. Then Fan in the last sc and join. (10 sc, 10 Fans)
Round 17: Repeat Round 16. The Fans now sit above the Round 15 Fans again, which gives the stacked tiers.
Round 18 (conversion round): Ch 3 in the joining sc. Hdc in the 1st dc of the Fan, sc in the 2nd, 3rd, and 4th dc, hdc in the 5th dc, dc in the next sc. Repeat from * around, leaving off the final dc, and join to the top of the ch-3. Skip all ch-1 sps. Count: (50 Fan dc + 10 sc, each worked 1 per st) + 0 extra = 60 sts. The tall sts fill the dips between Fans, so the top edge comes out level.
Rounds 19–20: Ch 1, sc in each st, and join. (60 each round) Fasten off and leave a 24 in (61.0 cm) tail.
Checkpoint: the cup stands 3.75 in (9.5 cm) tall.
Make All Pieces
- Backplate: 1, using yellow for Rounds 1–3, cream for Rounds 4–8, and yellow for Rounds 9–10 and the loop
- Cup: 1, using yellow for Rounds 1–13 and cream for Rounds 14–20
Layout (front view):
        [ loop ]
   [   backplate    ]
   [  yellow center ]
   [ cup rim ------ ]
   [ cup walls      ]
   [ cup base band  ]
     (cup extends 1 in / 2.5 cm below plate)
Joining
Method: Whipstitch with the cream tail, working through the back loops of the cup and the stitches of the backplate.
Stitch-to-stitch logic: The back third of the cup sits flat against the plate. That is 20 of the 60 rim sts, which span 5 in (12.7 cm) at 4 sts per in. The front 40 sts curve out to form a D-shaped pocket about 3 in (7.6 cm) deep.
- Lay the backplate RS up with the loop at the top.
- Place the cup so its yellow bottom edge sits 1 in (2.5 cm) below the lowest petal tip. The rim should land just under the yellow center.
- Mark the 20 back rim sts with markers at each end. Center them under the yellow center and pin them in a straight horizontal line.
- Whipstitch each rim st to the plate, 1 stitch per rim st.
- Mark the matching 20 back sts of Round 11 on the cup bottom and whipstitch them to the plate in the same way.
- Join the ends of the two seams with a vertical line of stitches on each side.
Tension advice: Keep the sewing snug, but don’t let it pucker the petals. Check the front after every 5 stitches.
Size checkpoint: The total height from the top of the loop to the bottom of the cup is 10.75 in (27.3 cm).
Final Blocking
- Weave in all ends except the ones you used for seams. Weave those in last.
- Mist both sides until the piece is damp, but not soaked.
- Pin the backplate to 7.75 in (19.7 cm), with one pin at each petal tip and each valley.
- Stuff the cup with a small towel so it dries round.
- Open each Fan gently with your fingertips.
- Let it dry completely, for at least 12 hours.
Final Quality-Control Checklist
- 10 petals, all the same size
- 130 sts in the border, 13 per petal
- Backplate measures 7.75 in (19.7 cm)
- Loop is centered on the top petal
- Cup has 60 sts in every solid round
- Cup rim is level, with no Fan dips
- Cup is centered and its rim sits horizontal
- All ends are secure and hidden
Troubleshooting
- Petals ruffle: Your dc are too tight. Loosen your tension, or go up 0.25 mm for Rounds 5–8.
- Plate cups up: Your ch-3 arches in Round 4 are too short. Make looser chains.
- Valleys are shallow: Pull each sc2tog in Round 9 snug.
- Cup flares at the top: Work Rounds 19–20 with a 3.75 mm hook.
- Cup leans forward: Add a few extra tacking stitches along the side seams.
- Fan count is off: Recount the 60 sts in Round 14 before you start Round 15.
Care
Hand wash in cool water with mild soap. Press out the water in a towel, then reshape and dry flat with the cup stuffed.
Final Notes
The measurement chain is short. A 2 in (5.1 cm) center leads to a 6.75 in (17.1 cm) plate before the border. The border brings it to 7.75 in (19.7 cm). A 5 in (12.7 cm) base becomes a 3.75 in (9.5 cm) cup. Check each step and the pieces will fit together without any guesswork.
Happy crocheting!