
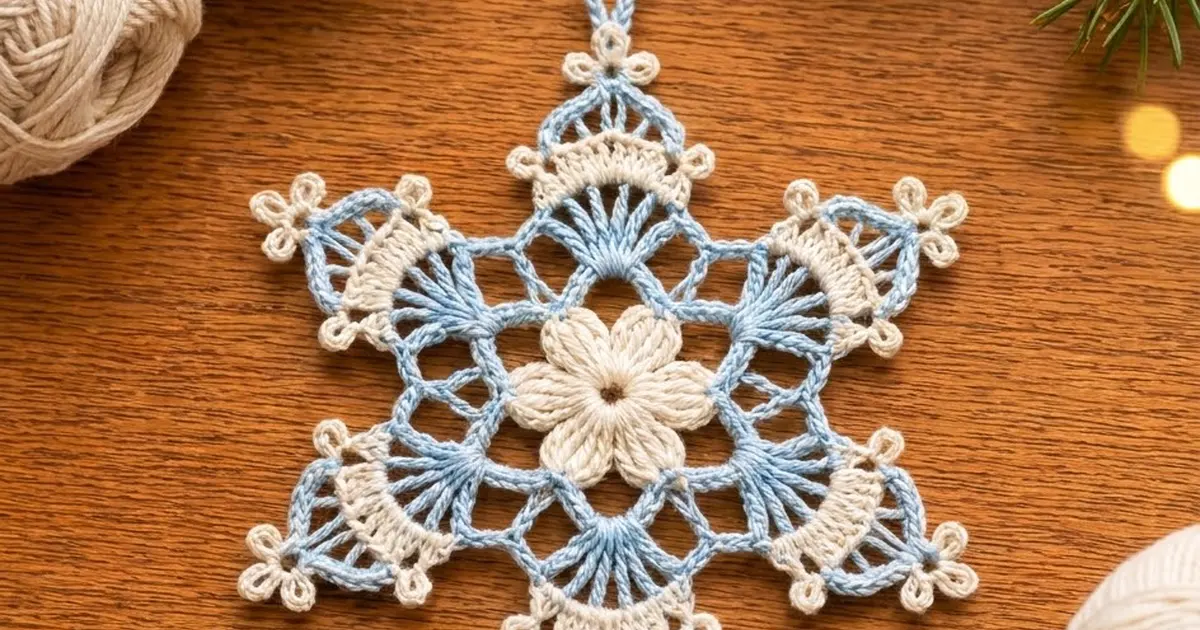
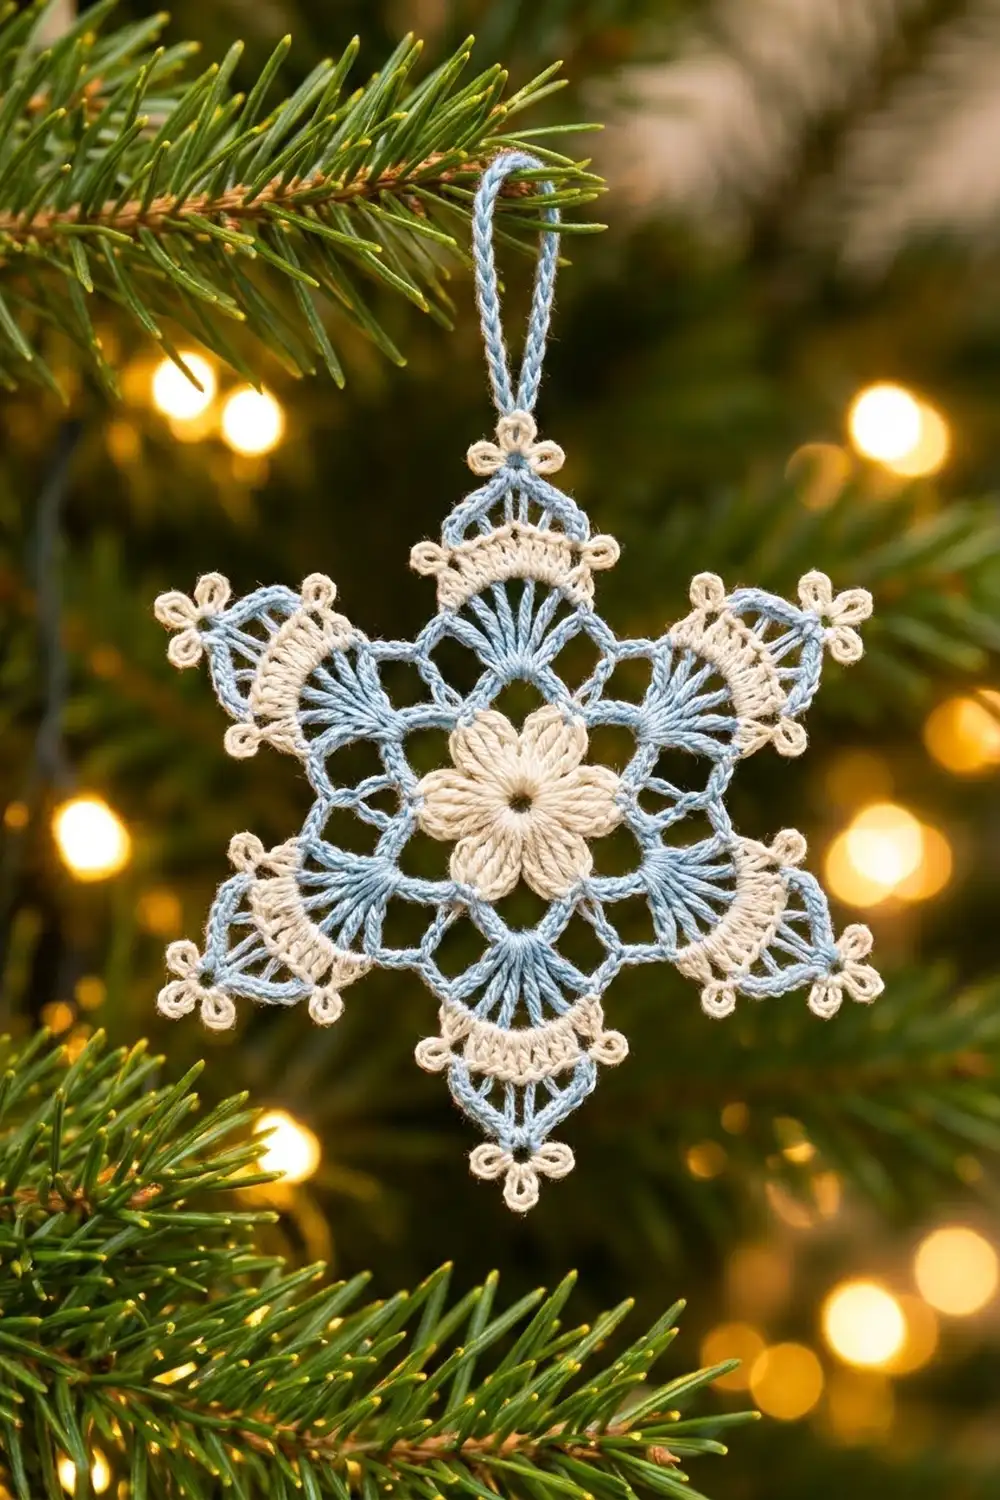
The Frosted Bloom Snowflake is a lacy ornament with six points built around a small cream flower. A light blue chain frame circles the flower, and blue fans open toward each point. A cream shell band crosses every arm. A slim blue triangle finishes each point, tipped with a tiny cream three-loop picot cluster.
The palette is deliberately soft: only light blue and cream. The blue does the structural work (frame, fans, triangles and hanging loop). The cream highlights the center and the outer edge, so the snowflake stands out clearly against dark green branches.
This pattern uses US crochet terms. After blocking, the ornament measures 5 in (12.7 cm) from point to opposite point. It measures about 4.5 in (11.4 cm) from flat side to flat side.
Construction is simple. It is one single piece worked in the round from the center out: seven rounds with four color changes. You make the flower and add the blue frame and fans. Then you work the cream band and build the points and the picot edge. A chained hanging loop is added last.
Finished Size and Construction
- Finished size: 5 in (12.7 cm) point to point; 4.5 in (11.4 cm) flat side to flat side
- Skill level: Intermediate
- Terminology: US crochet terms
- Yarn weight: Fingering (#1) mercerized cotton, or size 3 crochet thread
- Hook: 2.25 mm (US B-1)
- Number of pieces: 1 (a single snowflake motif, no joining)
- Layout: Six points radiating from a six-petal center
- Piece size: 5 in (12.7 cm) point to point
- Size before border: 3.5 in (8.9 cm) across after Round 5
- Border depth: 0.75 in (1.9 cm) on each side (Rounds 6–7, the points and picot edge)
Materials
Choose a smooth, mercerized cotton. It gives crisp stitch definition, takes starch well, and will not fuzz on the tree. Avoid acrylic and soft blends, because the points will droop.
- Color A – Cream: 3 g, about 10 m (11 yd)
- Color B – Light Blue: 5 g, about 17 m (19 yd), including the hanging loop
The quantities include a margin of roughly 25% for tails and a test swatch.
Tools:
- 2.25 mm (US B-1) crochet hook
- Tapestry needle with a small eye
- Scissors
- Blocking board or foam mat
- Rustproof pins (at least 18)
- Spray starch or fabric stiffener
- Ruler or tape measure
Abbreviations (US Terms)
- ch – chain
- sl st – slip stitch
- sc – single crochet
- hdc – half double crochet
- dc – double crochet
- tr – treble crochet
- dtr – double treble crochet (yo 3 times, insert hook, pull up a loop, [yo, pull through 2] 4 times)
- sp(s) – space(s)
- MR – magic ring
- st(s) – stitch(es)
- rep – repeat
Special stitches:
- Standing sc: With a slipknot on the hook, insert the hook into the stitch, yo, pull up a loop, yo, pull through both loops.
- Standing dc: With a slipknot on the hook, yo, insert the hook, and complete a dc as usual.
- Picot: Ch 3, sl st in 3rd ch from hook.
- Trefoil picot (tref): Ch 4, sl st in 4th ch from hook (first loop made). [Ch 3, sl st into that same ch] twice. You now have three tiny loops clustered on one base.
Picots and trefoils are counted separately. They are not included in the stitch totals.
Gauge and Checkpoints
Exact gauge matters less here than for a garment, but it decides whether the points stay sharp. Work Rounds 1–2 as a test first.
- Gauge: Rounds 1–2 (the flower) = 1.25 in (3.2 cm) across.
Checkpoints (lightly pressed flat, before blocking):
- After Round 1: 0.75 in (1.9 cm) across
- After Round 2: 1.25 in (3.2 cm) across
- After Round 3: 1.75 in (4.4 cm) across
- After Round 4: 2.75 in (7.0 cm) across
- After Round 5: 3.5 in (8.9 cm) across
- After Round 7 and blocking: 5 in (12.7 cm) point to point
If the flower is too big: Go down to a 2 mm hook, or pull the ring tighter.
If the flower is too small: Go up to a 2.5 mm hook.
Measure again after Round 4. If you are within 0.25 in (0.6 cm) of the checkpoint, continue. Blocking will absorb the difference.
Color-change tip: Every color change in this pattern is a fresh join with a standing stitch. Leave 6 in (15.2 cm) tails. Weave them in along the stitches of the same color so no blue shows on cream and no cream shows on blue.
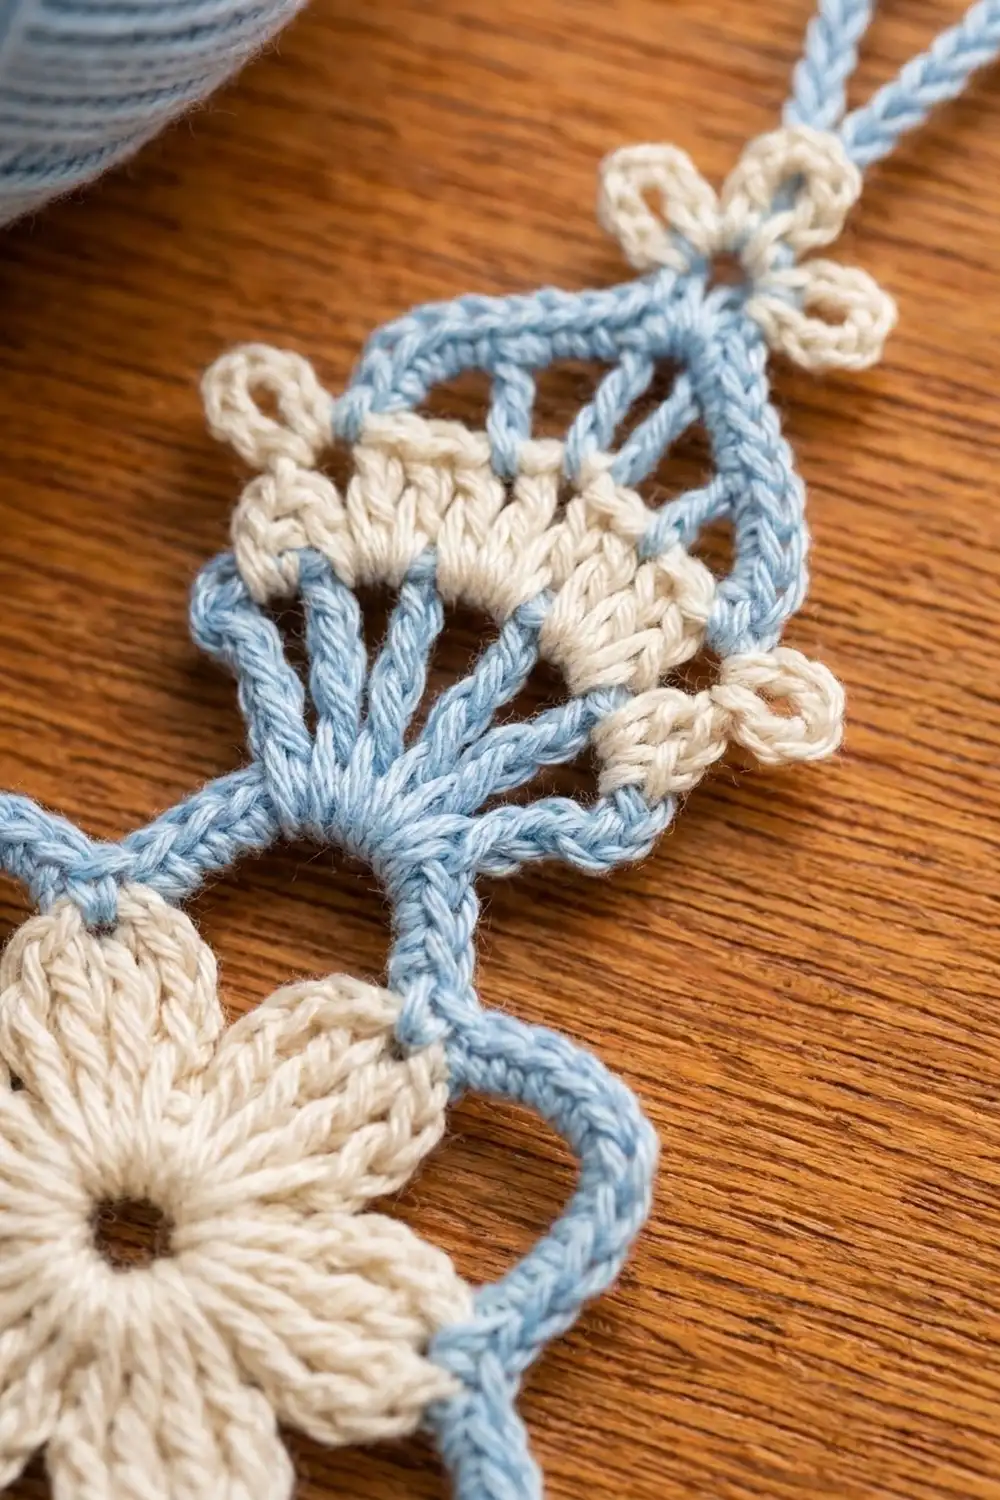
Center Flower (Color A – Cream)
Round 1: Make a MR. Ch 3 (counts as dc), then work 11 dc in the ring. Pull the ring closed, leaving a small hole about 0.25 in (0.6 cm) wide. Sl st in the top of the beginning ch-3. (12 dc)
Round 2: Ch 1. Sc in next st, (hdc, 3 dc, hdc) in next st; rep from * 5 more times. Sl st in first sc. (36 sts: 6 sc + 6 petals of 5 sts each)*
You now have six rounded petals separated by single-sc valleys. Fasten off and weave the cream tail in through the back of the petals.
Blue Frame and Fans (Color B – Light Blue)
Round 3: Join Color B with a standing sc in any sc between two petals. Ch 7. Sc in the next sc between petals, ch 7; rep from * 4 more times. Sl st in first sc. (48 sts: 6 sc + 6 ch-7 loops)*
Each ch-7 loop arcs around the back edge of one petal, forming the scalloped blue outline around the flower. Keep the chains relaxed so the loops sit just outside the petal tips.
Round 4: Sl st into the first ch-7 loop. Ch 4 (counts as tr), [ch 1, tr] 4 times in the same loop, ch 3. [Tr, ch 1] 4 times in the next ch-7 loop, tr in the same loop, ch 3; rep from * 4 more times. Sl st in the 4th ch of the beginning ch-4. (72 sts: 30 tr + 24 ch-1 sps + 6 ch-3 sps)*
Each repeat is 12 sts (5 tr + 4 ch + 3 ch). The five-tr fans sit directly over the petals and become the blue spokes at the base of each point. The ch-3 sps sit over the petal valleys and become the inner corners between the arms.
Fasten off Color B.
Cream Shell Band (Color A – Cream)
Round 5: Join Color A with a standing dc in the first ch-1 sp of any fan. Dc in the same sp, then 2 dc in each of the next 3 ch-1 sps. Ch 3, sc in next ch-3 sp, ch 3. 2 dc in each of next 4 ch-1 sps, ch 3, sc in next ch-3 sp, ch 3; rep from * 4 more times. Sl st in top of first dc. (90 sts: 48 dc + 6 sc + 12 ch-3 sps)*
Each repeat is 15 sts. That is an 8-dc cream band (2 dc in each of the 4 ch-1 sps) plus a 7-st valley (ch 3, sc, ch 3). The band forms the cream arc across each arm.
Checkpoint: the piece should measure 3.5 in (8.9 cm) across. Fasten off.
Border: Points and Picot Edge
The two border rounds turn the hexagon into a star. Round 6 builds a blue triangle on each 8-dc band. Round 7 covers the edge in cream sc with picots.
Border gauge: 5 sc worked into a ch-5 sp = 0.5 in (1.3 cm) along the triangle side. Each point adds 0.75 in (1.9 cm) of depth beyond the Round 5 edge.
Round 6 (Color B): Join Color B with a standing sc in the first dc of any 8-dc band.
Arm: Ch 5, skip next 2 dc, dtr in next dc (dc 4), ch 3, dtr in next dc (dc 5). Ch 5, skip next 2 dc, sc in last dc of band (dc 8).
Valley: Ch 1, sc in next ch-3 sp, ch 3, sc in following ch-3 sp, ch 1.
Next arms: *Sc in first dc of next band, then work the Arm (beginning with ch 5) and the Valley; rep from * 4 more times. Sl st in first sc.
Per arm: 1 sc + 5 ch + 1 dtr + 3 ch + 1 dtr + 5 ch + 1 sc = 17 sts.
Per valley: 1 ch + 1 sc + 3 ch + 1 sc + 1 ch = 7 sts.
Total: 6 × 24 = 144 sts.
The two dtrs rise from the center of the band and lean together, forming the blue spokes that meet at the tip. The ch-5 lengths form the triangle sides, and the ch-3 between the dtrs becomes the tip space. Fasten off.
Round 7 (Color A): Join Color A with a standing sc in the first ch-5 sp of any arm.
Arm: 4 more sc in the same ch-5 sp (5 sc in total). Work (sc, tref, sc) in the ch-3 tip sp, then 5 sc in the next ch-5 sp.
Valley: (Sc, picot) in next ch-1 sp, 3 sc in ch-3 sp, (picot, sc) in next ch-1 sp.
Next arms: *5 sc in first ch-5 sp of next arm, (sc, tref, sc) in tip sp, 5 sc in next ch-5 sp, then work the Valley; rep from * 4 more times. Sl st in first sc.
Throughout this round, skip the sc stitches of Round 6 and work only into the spaces.
Per arm: 5 + 2 + 5 = 12 sc, plus 1 trefoil.
Per valley: 1 + 3 + 1 = 5 sc, plus 2 single picots.
Total: 6 × 17 = 102 sc, plus 6 trefoils and 12 single picots.
The trefoils sit at the six tips. The single picots sit at the outer corners of each cream band, where the arm meets the valley.
Why the math works: Each 8-dc band is split symmetrically: 1 sc + 2 skipped + 1 dtr | 1 dtr + 2 skipped + 1 sc = 8 sts. That puts the tip exactly at the center of the band. In Round 7, every ch-5 side gets exactly 5 sc (one per chain), so the triangle sides lie flat without ruffling or cupping. Each valley gets 5 sc over its 5 ch (1 + 3 + 1), which keeps the inner corners crisp. Fasten off, leaving a 6 in (15.2 cm) tail.
Hanging Loop (Color B)
Join Color B with a sl st into the base sc under any trefoil. Ch 30, about 3 in (7.6 cm) long, and sl st into the same sc. Fasten off and weave the tail back through the chain. The folded loop stands about 1.5 in (3.8 cm) above the tip.
Weave in all remaining tails before blocking. Follow the stitch paths so no strands show through the lace.
Final Blocking
- Soak the snowflake in cool water for 5 minutes. Press out the water in a towel; do not wring.
- Lay it right side up on a blocking mat.
- Pin the center flower first, with one pin at each of the 6 petal tips, so the center is 1.25 in (3.2 cm) across.
- Pull each tip trefoil outward and pin it. Opposite tips should be 5 in (12.7 cm) apart; check all three tip-to-tip measurements.
- Pin the ch-3 sp of each valley inward so the valleys form clean V shapes. Opposite valleys should measure 4.5 in (11.4 cm) apart, flat side to flat side.
- Pin the single picots at the band corners outward so each cream band lies in a smooth arc.
- Open each trefoil with the tip of a pin so all three loops show.
- Spray generously with starch or brush on stiffener. Let it dry completely, at least 12 hours.
- Unpin and check that the ornament lies flat and holds its points.
Final Quality-Control Checklist
- The center has six even cream petals around a small, closed hole.
- Six blue ch-7 loops outline the flower with no twists.
- Six blue 5-tr fans sit directly over the petals.
- Each cream band has exactly 8 dc.
- Each blue triangle has two dtr spokes meeting at the tip.
- There are six trefoil picots at the tips and 12 single picots at the band corners.
- Point to point measures 5 in (12.7 cm) in all three directions.
- Flat side to flat side measures 4.5 in (11.4 cm).
- The hanging loop is secured at a tip and stands about 1.5 in (3.8 cm) tall.
- No tails are visible from the front.
Troubleshooting
The flower cups upward. The MR or Round 1 is too tight. Rework Round 1 more loosely and check that you have exactly 12 dc.
The ch-7 loops pull the petals forward. The chains are too tight. Use a slightly larger hook for Round 3 only.
Round 5 ruffles. Check that you worked 2 dc in each ch-1 sp and did not put any dc into the tr stitches themselves.
The points are blunt. Make sure the two dtrs go into dc 4 and dc 5, not into the same st. Starch more heavily and re-pin the tips.
The triangle sides wave. You worked more than 5 sc into a ch-5 sp. Count back and rework.
The ornament measures under 5 in (12.7 cm). Block more firmly; cotton stretches about 0.25 in (0.6 cm). If it is still short, make it again with a 2.5 mm hook.
The trefoils collapse. Work all three loops into the same ch, and open them during blocking.
Care
Hand wash in cool water with mild soap, press dry in a towel, and re-block with starch. Store flat between sheets of tissue paper so the points stay crisp.
Final Notes
The measurement chain is short and easy to track. The cream flower measures 1.25 in (3.2 cm), and the blue frame grows it to 1.75 in (4.4 cm). The fans bring it to 2.75 in (7.0 cm), and the cream band reaches 3.5 in (8.9 cm). The border adds 0.75 in (1.9 cm) on each side, for a blocked snowflake of 5 in (12.7 cm). If each checkpoint matches, the points will finish evenly every time.
You can make one in an evening. Then try a reversed version with blue and cream swapped. Happy crocheting!