
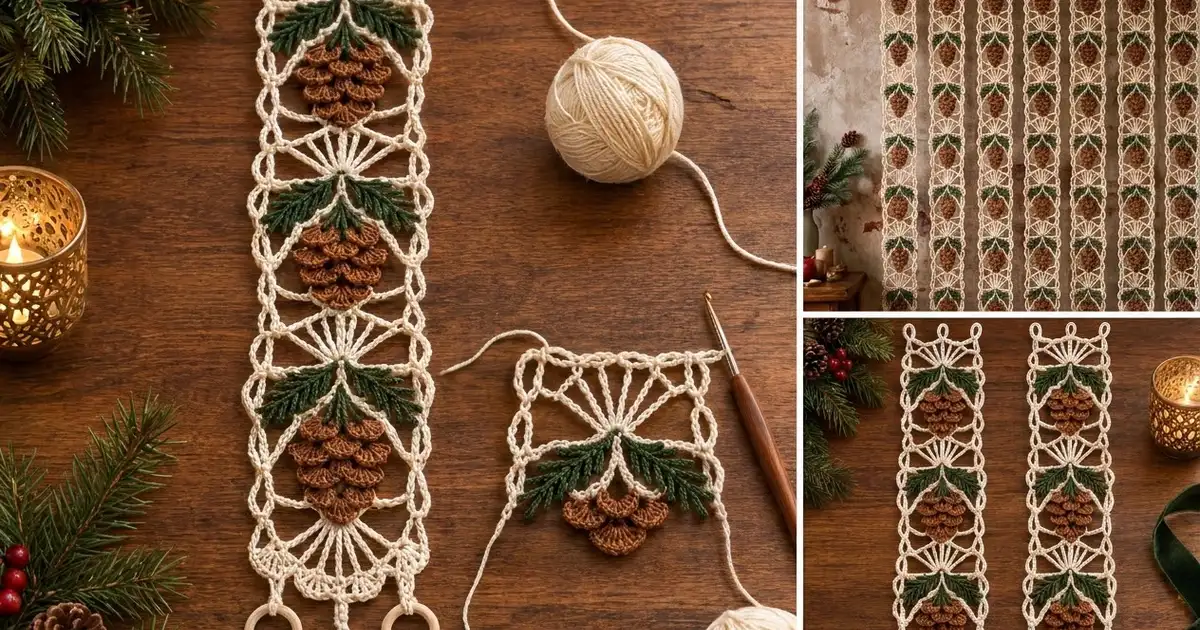
This lace strip is made of three tall cream motifs joined end to end. Each motif has a sunburst of long spokes at the top and an open mesh field below it. On the mesh sits a layered chestnut-brown pine cone, with three forest-green sprigs of needles fanning out from the point of the sunburst.
The colors are cream, deep forest green and warm chestnut brown. The style falls somewhere between vintage filet lace and rustic holiday decor. The strip looks good laid along a mantel or table, hung in a window, or tucked behind a wreath.
The pattern uses US crochet terms. The bordered strip measures 5 in x 19.5 in (12.7 cm x 49.5 cm), not counting the hanging rings. The rings add about 0.75 in (1.9 cm).
Construction is simple:
- Crochet three identical motifs in rows, and give each one an edge round of single crochet.
- Sew a pine cone and three sprigs onto each motif.
- Join the motifs along their short edges.
- Finish with a two-round border that adds three hanging rings at the top and five shell scallops at the bottom.
Finished Size and Construction
- Finished size: 5 in x 19.5 in (12.7 cm x 49.5 cm), or 20.25 in (51.4 cm) long including the rings
- Skill level: Intermediate
- Terminology: US
- Yarn weight: DK (#3) cotton
- Hook: 3.5 mm (E-4)
- Number of pieces: 3 cream motifs, plus 3 pine cones and 9 sprigs sewn on as appliqués
- Layout: 1 column of 3 motifs, stacked vertically
- Size of one motif (after its edge round): 4 in x 6 in (10.2 cm x 15.2 cm)
- Size before the border: 4 in x 18 in (10.2 cm x 45.7 cm)
- Border depth: 0.5 in (1.3 cm) on the sides and top, and 1 in (2.5 cm) at the bottom scallops
Materials
Choose a smooth mercerized cotton or cotton blend in DK weight. It gives crisp stitches and keeps the lace open. Avoid fuzzy or brushed yarns, which blur the spokes and soften the edges of the scales. Use the same yarn brand for all three colors so the stitches are the same height.
- Cream (main color): 60 g / 138 m
- Chestnut brown (pine cones): 25 g / 58 m
- Forest green (sprigs): 20 g / 46 m
Tools:
- 3.5 mm (E-4) crochet hook
- Tapestry needle
- Scissors
- Stitch markers
- Rust-proof pins and a blocking mat
- Spray bottle
These quantities include a margin of about 20 percent to cover the test motif, tails and weaving in ends.
Abbreviations (US Terms)
- ch: chain
- sl st: slip stitch
- sc: single crochet
- dc: double crochet
- dtr: double treble crochet. Yarn over 3 times, insert the hook, pull up a loop, then (yarn over, pull through 2 loops) 4 times.
- sk: skip
- sp: space
- st(s): stitch(es)
- RS / WS: right side / wrong side
Special stitches:
- Ring: Ch 12, then sl st in the first ch of the ch-12. This closes a ring that stands up from the edge.
- Needle: Ch 4, then sl st in the 2nd, 3rd and 4th ch from the hook.
Gauge and Checkpoints
Gauge:
- 20 sc = 4 in (10.2 cm).
- 5 mesh rows = 2 in (5.1 cm), so each mesh row is 0.4 in (1.0 cm) tall.
Make one complete motif, including its edge round, before you start the others. It is your gauge swatch, and it also becomes one of the three motifs in the strip.
Checkpoints:
- After Row 1: 19 sc measure 3.8 in (9.7 cm) wide.
- After Row 12: the motif is 4.6 in (11.7 cm) tall.
- After Row 14: the motif is 5.6 in (14.2 cm) tall.
- After the edge round: the motif measures 4 in x 6 in (10.2 cm x 15.2 cm).
If your motif is too big, go down 0.25 mm in hook size. If it is too small, go up 0.25 mm. Match the width first. If the width is right but the mesh rows come out short, pull up the first loop of each dc a little taller.
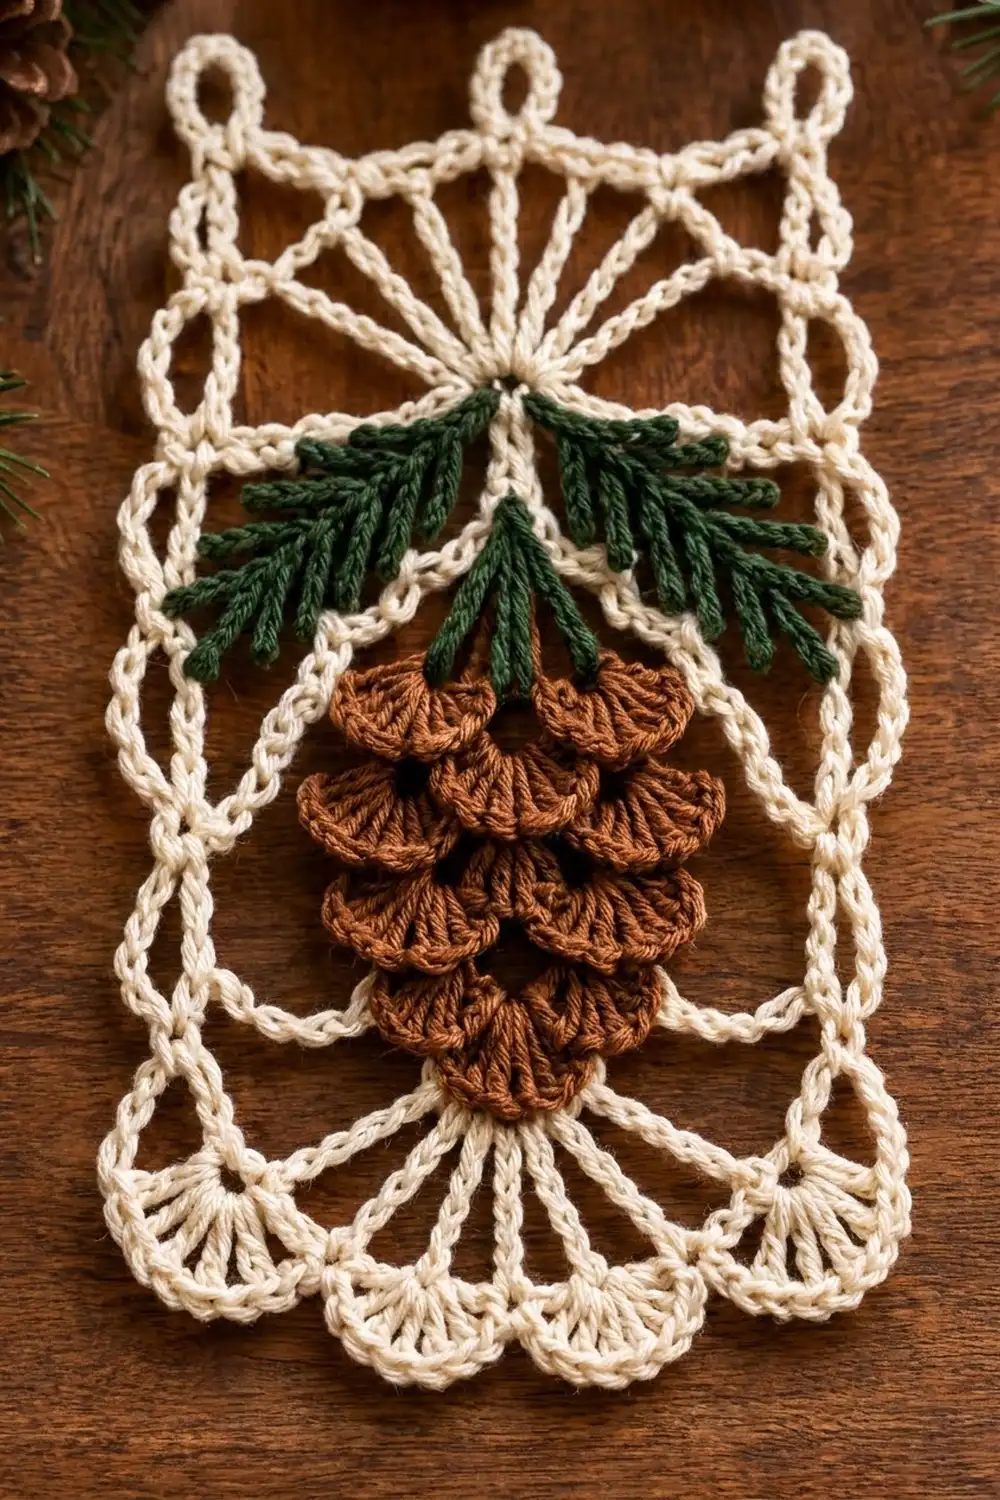
Motif (Make 3, Cream)
Work the motif from the bottom up. Every row has 19 sts, and chain spaces count as stitches.
Row 1 (RS): Ch 20. Sc in the 2nd ch from the hook and in each ch across. Turn. (19 sc)
Row 2: Ch 4 (counts as 1 dc + ch 1). Sk the next st and dc in the following st. Ch 1, sk the next st, dc in the following st. Repeat from * to the end. Turn. (10 dc + 9 ch-1 sps = 19 sts)
Rows 3–12: Ch 4 (counts as 1 dc + ch 1), then dc in the next dc. Ch 1, dc in the next dc. Repeat from * across, working the last dc into the 3rd ch of the turning ch. Turn. (19 sts in each row)
You now have 11 mesh rows. This is the open background the pine cone sits on.
Row 13 (sunburst):
- Ch 5 (counts as the first dtr). Ch 3, then sk the next 8 sts.
- In the center st (st 10), work (dtr, ch 1) 6 times, then 1 more dtr.
- Ch 3, sk the next 8 sts, and dtr in the 3rd ch of the turning ch. Turn.
You now have 7 spokes rising from one point. The ch-3 on each side leaves an open triangle beside the fan. Place a marker in the center st (st 10 of Row 12) to mark the spot where the appliqués will be attached. (2 edge dtr + 2 ch-3 sps + 7 fan dtr + 6 ch-1 sps)
Row 14: Ch 1. Work 1 sc in the first dtr, 2 sc in the ch-3 sp, 1 sc in each of the 7 dtr and 6 ch-1 sps, 2 sc in the next ch-3 sp, and 1 sc in the top of the turning ch. Turn. (1 + 2 + 13 + 2 + 1 = 19 sc)
Edge round (trim round): Ch 1, then work around all four sides:
- Top: 3 sc in the first st (corner), 1 sc in each of the next 17 sts, and 3 sc in the last st (corner).
- First side: 5 sc over the end of Row 13, then 2 sc over the end of each row from Row 12 down to Row 2 (22 sc).
- Bottom: working into the other side of the foundation ch, 3 sc in the first ch (corner), 1 sc in each of the next 17 ch, and 3 sc in the last ch (corner).
- Second side: 2 sc over the end of each row from Row 2 up to Row 12 (22 sc), then 5 sc over the end of Row 13.
Sl st to the first sc and fasten off.
Edge round count:
- Top and bottom: 19 sts worked 1 per existing st + 4 extra corner sc = 23 sts each
- Each side: 27 sc worked over row ends
- Total: 23 + 23 + 27 + 27 = 100 sc
Per-side counts: These include both corner sts, which are the middle sc of each 3-sc corner group.
- Short sides: 1 corner + 1 + 17 + 1 + 1 corner = 21
- Long sides: 1 corner + 1 + 27 + 1 + 1 corner = 31
Check: 2 x (21 + 31) − 4 shared corners = 100.
Pine Cone Appliqué (Make 3, Brown)
Each cone is made from 5 separate tiers. Each tier is a straight chain base with scales hanging down from it.
To make a tier with n scales: Ch (4 x n) + 1. Sc in the 2nd ch from the hook. Sk 1 ch, 7 dc in the next ch, sk 1 ch, sc in the next ch. Repeat from * n times in total. Fasten off, leaving a 10 in (25.4 cm) tail for sewing.
- 3-scale tier: ch 13. Make 3.
- 2-scale tier: ch 9. Make 1.
- 1-scale tier: ch 5. Make 1.
That gives 12 scales per cone.
Stacking:
- Center the 1-scale tier about 0.25 in (0.6 cm) above the bottom of the mesh. Sew it down along its chain base.
- Sew the 2-scale tier above it, so its shells cover the chain base of the first tier by about half.
- Add the three 3-scale tiers one at a time in the same way.
Sew only along the chain bases, so the scales stay loose and lift slightly. The top tier should sit just below the marked center st. The finished cone measures about 2.25 in x 3 in (5.7 cm x 7.6 cm).
Pine Sprigs (Make 9, Green)
Side sprig (make 2 per motif, 6 in total): Ch 15. The chain is the stem.
- Starting in the 2nd ch from the hook: make 1 needle, then sl st in each of the next 2 stem ch. Repeat from * 7 times in total.
- Turn the sprig and work along the other side of the stem the same way, 7 times.
That gives 14 needles. The sprig is about 2.5 in (6.4 cm) long.
Center sprig (make 1 per motif, 3 in total): Ch 9. Work as for the side sprig, but repeat 4 times on each side, for 8 needles in total. The sprig is about 1.5 in (3.8 cm) long.
Attaching the sprigs: Sew the base of each sprig to the marked center st.
- Angle the two side sprigs down and outward over the top tier of the cone.
- Point the center sprig straight down.
- Tack each stem to the mesh in 2 or 3 places so it can’t twist.
Make All Pieces
- Cream: 3 motifs, each with an edge round of 100 sc
- Brown: 3 cones, which is 9 three-scale tiers, 3 two-scale tiers and 3 one-scale tiers
- Green: 6 side sprigs and 3 center sprigs
Finish all the appliqués on each motif before joining. Flat pieces are much easier to sew on.
Layout grid, with every sunburst at the top of its motif:
[ Motif 3 ]  top: gets the hanging rings
[ Motif 2 ]  middle
[ Motif 1 ]  bottom: gets the shell scallops
Joining
- Hold Motif 1 and Motif 2 with wrong sides together, lining up the top edge of Motif 1 with the bottom edge of Motif 2.
- With cream, work through both layers. Sl st through the back loops of each pair of matching sts, from corner to corner. That is 21 sl sts, one for each of the 21 sts on a short side.
- Join Motif 2 to Motif 3 the same way.
Keep your sl sts as loose as the edge sc. A tight seam will pucker the strip. If yours draws in, go up one hook size for the joins only. The joins add no stitches to the edges.
Checkpoint: The joined strip measures 4 in x 18 in (10.2 cm x 45.7 cm).
Border
Border gauge: Rounds 1 and 2 together add 0.5 in (1.3 cm) to the sides and top. The shells add 1 in (2.5 cm) at the bottom.
Starting counts:
- Long sides: 3 motifs x 31 = 93 sts each
- Short sides: 1 motif x 21 = 21 sts each
- Total: 2 x (93 + 21) − 4 shared corners = 224 sts
Round 1: With the RS facing, join cream in any corner st.
- In each of the 4 corner sts, work (sc, ch 3, sc).
- Along each side between corners, work ch 3, sk 1 st, sc in the next st. Repeat from * to the next corner st.
Sl st to the first sc.
This gives 46 ch-3 loops on each long side and 10 on each short side. In total: 116 sc and 116 ch-3 loops (92 + 20 + 4 corner loops).
Round 2:
Top edge:
- In the corner loop, work (2 sc, ring, 2 sc).
- Work 3 sc in each of the next 5 loops.
- Make 1 ring. It sits over the center st.
- Work 3 sc in each of the next 5 loops.
- In the corner loop, work (2 sc, ring, 2 sc).
(38 sc + 3 rings)
Each long side: In each of the 46 loops, work (sc, ch 4). (46 sc + 46 ch-4 loops)
Bottom edge:
- Work 3 sc in the corner loop.
- Sc in the next loop, 7 dc in the next sc, sc in the next loop, sk the next sc. Repeat from * 4 times.
- Sc in the next loop, 7 dc in the next sc, sc in the next loop.
- Work 3 sc in the corner loop.
(5 shells: 35 dc + 10 sc + 6 corner sc)
Sl st to the first sc and fasten off.
Why the math works:
- Each side has an odd number of sts. Take away the first corner st and the rest divides evenly by 2: (93 − 1) ÷ 2 = 46 and (21 − 1) ÷ 2 = 10. So every side starts and ends on a corner sc.
- The 10 bottom loops pair up evenly into 5 shells.
- There are 5 loops on each side of the center ring, so the ring sits exactly over st 11, the middle of 21.
Final Blocking
- Weave in all ends, running each one through stitches of the same color.
- Pin the strip out to 5 in x 19.5 in (12.7 cm x 49.5 cm), with the rings pinned straight up.
- Pin out every shell scallop and every side loop.
- Open each sunburst so its spokes fan out evenly.
- Mist the lace until it is damp. Keep the appliqués as dry as you can.
- Gently lift each pine-cone scale so it keeps its curve.
- Let the strip dry completely before you unpin it.
Final Quality-Control Checklist
- Every motif row has 19 sts, and each edge round has 100 sts.
- All 3 sunbursts have 7 spokes and point upward.
- Each cone has 12 scales, in tiers of 3, 3, 3, 2 and 1 from top to bottom.
- Each motif has 3 sprigs sewn at the center st.
- Both seams have 21 sl sts and lie flat.
- Border Round 1 has 46 loops on each long side and 10 on each short side.
- There are 3 rings along the top and 5 shells along the bottom.
- The blocked strip measures 5 in x 19.5 in (12.7 cm x 49.5 cm).
Troubleshooting
- The spokes pull the top inward: Make your dtr a little taller, or go up one hook size for Row 13 only.
- The mesh leans to one side: Check that the last dc of every row goes into the turning ch.
- The edge round ruffles: Go down one hook size for the edge round. Keep the counts at 21 and 31 so the joins still line up.
- The scales lie flat: Sew only along the chain base of each tier, never through the shells.
- A seam puckers: Pull it out and rework it with looser tension.
- The strip comes out too long: Block it more firmly, or check your mesh-row height against the gauge.
Care
Hand wash in cool water with mild soap, then roll the strip in a towel to press out the water. Dry it flat and pin it back to size.
Final Notes
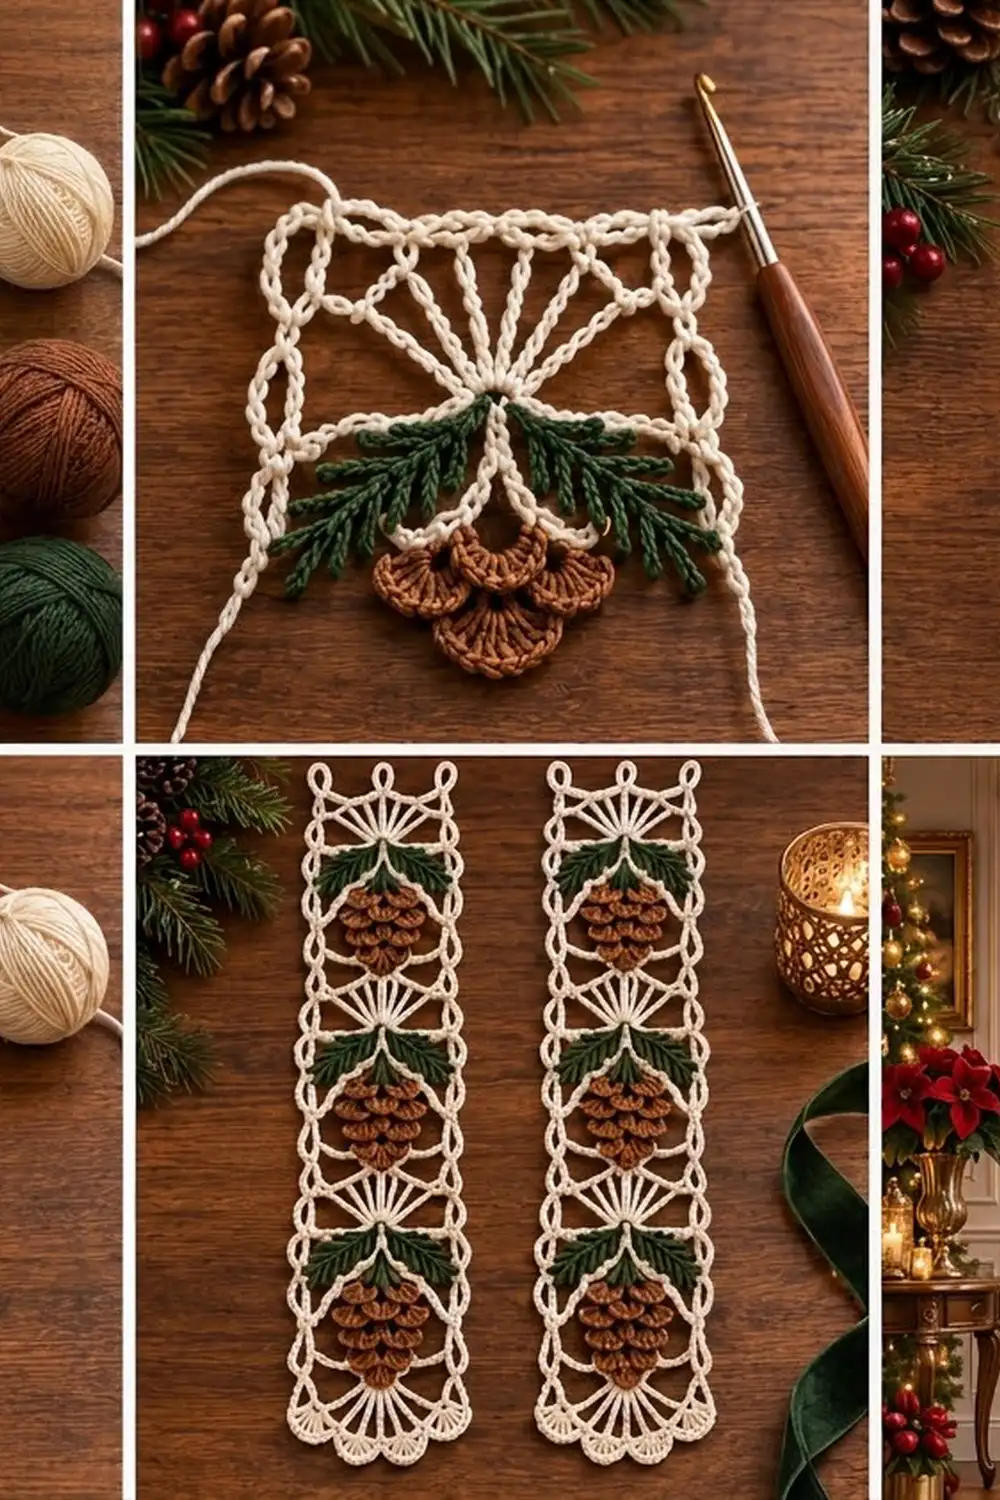
Each measurement builds on the one before. Row 1 gives a width of 3.8 in (9.7 cm). The edge round brings each motif to 4 in x 6 in (10.2 cm x 15.2 cm). Three motifs joined make 4 in x 18 in (10.2 cm x 45.7 cm). The border finishes the strip at 5 in x 19.5 in (12.7 cm x 49.5 cm). Check each measurement before you move on and the finished strip will come out the right size.
Happy crocheting!