

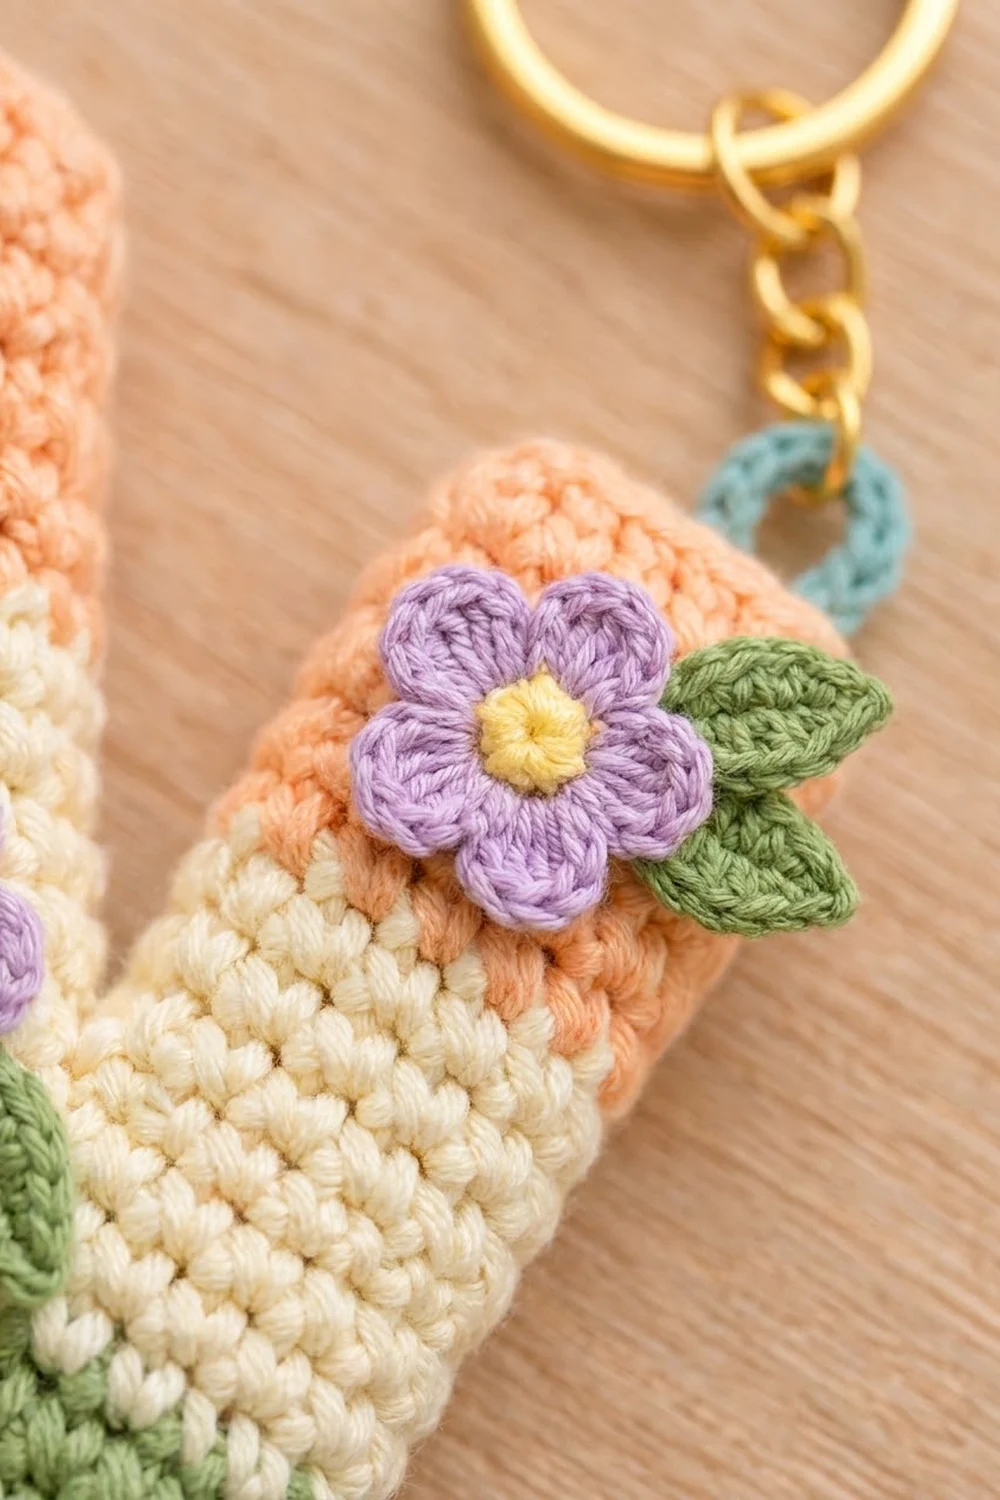
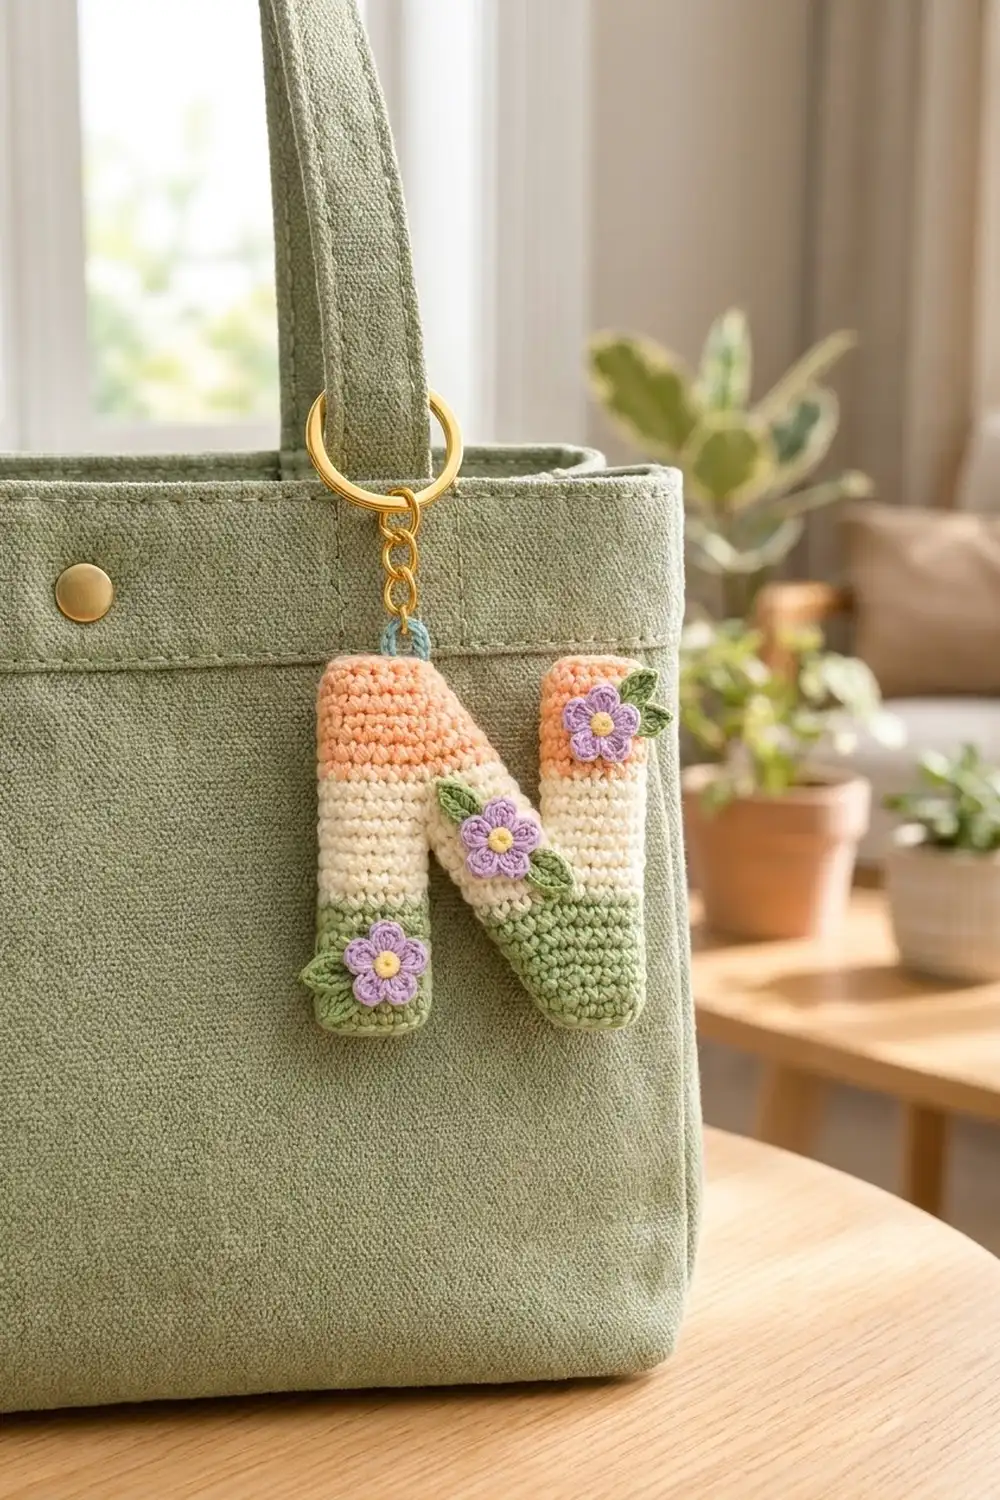
This little letter N is a soft, puffy keychain in three calm stripes: peach at the top, cream through the middle and sage green at the base. Three tiny lilac flowers with yellow centers and fresh green leaves are scattered across the letter, so it looks like a small spring garden.
The finished keychain measures about 3.5 in (8.9 cm) wide and 4 in (10.2 cm) tall. It’s lightly stuffed, so it feels squishy without getting bulky on a bag strap. This pattern uses US crochet terms throughout.
Construction is simple and flat. You make two identical N panels in rows of single crochet, building each one from two lower sections that merge into two upper sections. Then you stack the panels, stuff them lightly and close them with one round of single crochet worked through both layers. That round is your join and your edging. Finally, you add the flowers, leaves, an aqua hanging loop and the keyring hardware.
Because each panel is built on a stitch grid, every edge count is fixed. That makes the border round predictable and keeps the letter crisp.
Finished Size and Construction
- Finished size: 3.5 in (8.9 cm) wide x 4 in (10.2 cm) tall, plus the hanging loop
- Skill level: Easy-intermediate
- Terminology: US
- Yarn weight: Sport weight (2) cotton
- Hook: 2.5 mm
- Number of pieces: 2 letter panels (front and back), 3 flowers, 6 leaves and 1 hanging loop, all assembled into one keychain
- Layout: Panels stacked, same face toward you, outlines matching
- Panel size: 19 sts x 22 rows = 3.17 in (8.1 cm) x 3.67 in (9.3 cm)
- Size before border: 3.17 in (8.1 cm) x 3.67 in (9.3 cm)
- Border depth: 1 sc, about 0.17 in (0.4 cm) on every edge
Materials
Use a smooth mercerized or combed cotton in sport weight, about 170 m per 50 g. Cotton gives clean stitch definition and holds the letter shape. Avoid fuzzy yarns because they blur the narrow notches.
- Peach: 5 g (17 m)
- Cream: 5 g (17 m)
- Sage green: 5 g (17 m)
- Lilac: 2 g (7 m), for petals
- Butter yellow: 1 g (3 m), for flower centers
- Leaf green: 2 g (7 m), for leaves
- Aqua: 1 g (3 m), for the hanging loop
Tools:
– 2.5 mm crochet hook
– Tapestry needle
– A small handful of polyester fiberfill
– A chopstick or blunt pencil for stuffing
– Gold split keyring, 1 in (2.5 cm), with a short chain and jump ring
– Locking stitch markers
– Pins and a ruler
All quantities include a margin of about 30% for swatching and color changes.
Abbreviations (US Terms)
- ch: chain
- sl st: slip stitch
- sc: single crochet
- hdc: half double crochet
- dc: double crochet
- sc2tog: single crochet 2 together
- st(s): stitch(es)
- MR: magic ring
Special stitch: edge increase. Work 2 sc in the stitch at the diagonal edge of the row.
Special stitch: edge decrease. Sc2tog over the 2 stitches at the diagonal edge.
Color change: Work the last sc of the old color until 2 loops remain. Then yarn over with the new color and pull through.
Gauge and Checkpoints
Gauge: 24 sc x 24 rows = 4 in (10.2 cm), or 6 sts and 6 rows per 1 in (2.5 cm). Work firmly. The fabric should be dense enough that stuffing doesn’t show through.
Test one piece first. Make the left leg lower section (below) and measure it before you continue.
- Left leg, Row 1: 5 sts = 0.83 in (2.1 cm) wide
- Left leg, Row 12: 2 in (5.1 cm) tall
- Right block, Row 1: 8 sts = 1.33 in (3.4 cm) wide
- Right block, Row 12: 13 sts = 2.17 in (5.5 cm) wide
- Full panel: 3.17 in (8.1 cm) x 3.67 in (9.3 cm)
- After border: 3.5 in (8.9 cm) x 4 in (10.2 cm)
Too big? Go down 0.25 mm in hook size. Too small? Go up 0.25 mm. If only the height is off, adjust how tightly you draw up your loops rather than changing the hook. Row height matters because the border puts 1 sc in every row end.
Panel Grid Overview
Each panel is 19 columns wide and 22 rows tall.
- Left leg: columns 1–5
- Right leg: columns 15–19
- Diagonal band: 8 sts wide, shifting 1 column every 2 rows
In Rows 1–12, the band is attached to the right leg (the “right block”), and the left leg stands alone. In Rows 13–22, the band is attached to the left leg (the “left block”), and the right leg stands alone. No row ever has more than 2 sections.
Stripes (same on every section):
– Rows 1–7: sage green
– Rows 8–15: cream
– Rows 16–22: peach
Ch 1 at the start of each row does not count as a stitch.
Panel (Make 2)
Part 1: Left Leg Lower Section
With sage green, ch 6.
Row 1: Sc in 2nd ch from hook and in each ch across. Turn. (5 sts)
Rows 2–7: Ch 1, sc in each st across. Turn. (5 sts) Change to cream at the end of Row 7.
Rows 8–12: Ch 1, sc in each st across. Turn. (5 sts)
Fasten off. Checkpoint: 0.83 in (2.1 cm) x 2 in (5.1 cm).
Part 2: Right Block (Right Leg + Lower Diagonal)
With sage green, ch 9.
Row 1: Sc in 2nd ch from hook and in each ch across. Turn. (8 sts)
Pick one short edge as the diagonal edge and mark it. All shaping happens on that edge.
Row 2: Ch 1, sc across. Turn. (8 sts)
Row 3: Ch 1, sc across, with an edge increase at the diagonal edge. Turn. (9 sts)
Row 4: Ch 1, sc across. Turn. (9 sts)
Row 5: Repeat Row 3. (10 sts)
Row 6: Ch 1, sc across. Turn. (10 sts)
Row 7: Repeat Row 3. (11 sts) Change to cream.
Row 8: Ch 1, sc across. Turn. (11 sts)
Row 9: Repeat Row 3. (12 sts)
Row 10: Ch 1, sc across. Turn. (12 sts)
Row 11: Repeat Row 3. (13 sts)
Row 12: Ch 1, sc across. (13 sts)
Fasten off. Checkpoint: 2.17 in (5.5 cm) wide at Row 12. The diagonal edge should show a gentle staircase.
Part 3: Left Block (Upper Diagonal + Left Leg)
Lay both lower sections flat, foundation edges at the bottom and the same face toward you. Put the left leg on the left and the right block on the right, with its diagonal edge facing the left leg. There is a 1-stitch gap at the top (column 6) and a 6-stitch gap at the bottom.
Row 13: Join cream with a sl st in the 7th st of the right block’s Row 12, counting from the diagonal edge. Then:
– Ch 1, sc in the same st and in the next 6 sts toward the diagonal edge (7 sc).
– Ch 1 to bridge the gap.
– Sc in each of the 5 sts of the left leg.
Turn. (7 sc + 1 ch + 5 sc = 13 sts)
Row 14: Ch 1, sc in each st across, including 1 sc into the bridging ch. Turn. (13 sts)
Row 15: Ch 1, sc across, with an edge decrease at the diagonal (right) edge. Turn. (12 sts) Change to peach.
Row 16: Ch 1, sc across. Turn. (12 sts)
Row 17: Repeat Row 15. (11 sts)
Row 18: Ch 1, sc across. Turn. (11 sts)
Row 19: Repeat Row 15. (10 sts)
Row 20: Ch 1, sc across. Turn. (10 sts)
Row 21: Repeat Row 15. (9 sts)
Row 22: Ch 1, sc across. (9 sts)
Fasten off. Checkpoint: the top edge is 9 sts = 1.5 in (3.8 cm).
Part 4: Right Leg Upper Section
Six sts of the right block’s Row 12 are still unworked. The innermost one (column 14) stays empty and becomes the bottom of the upper notch.
Row 13: Join cream with a sl st in the outer corner st of the right block. Ch 1, sc in the same st and in the next 4 sts. Leave the last st (column 14) unworked. Turn. (5 sts)
Rows 14–15: Ch 1, sc across. Turn. (5 sts) Change to peach at the end of Row 15.
Rows 16–22: Ch 1, sc across. Turn. (5 sts)
Fasten off.
Panel checkpoint: 19 sts across Row 13 (13 + 1 empty + 5) = 3.17 in (8.1 cm). Height is 22 rows = 3.67 in (9.3 cm). The bottom notch is 6 sts = 1 in (2.5 cm) wide. The top notch is 5 sts = 0.83 in (2.1 cm) wide at Row 22.
Panel stitch total: 60 (left leg) + 126 (right block) + 110 (left block) + 50 (right leg) = 346 sts. By color, that’s 100 green, 139 cream and 107 peach.
Weave in all ends on the face you’ll turn inside.
Make All Pieces
- Letter panels: 2 (sage green, cream, peach)
- Flowers: 3 (yellow centers, lilac petals)
- Leaves: 6 (leaf green)
- Hanging loop: 1 (aqua, worked after the border)
Flower: With yellow, MR, 5 sc in ring. Pull closed, join with a sl st and fasten off. Join lilac in any sc. Work (ch 2, 2 dc, ch 2, sl st) in the same st and in each of the remaining 4 sts. That makes 5 petals. Fasten off and leave a 6 in (15.2 cm) tail. Diameter is about 0.75 in (1.9 cm).
Leaf: With leaf green, ch 5.
– Working into the chain from the 2nd ch from hook: sc, hdc, hdc, then (sc, ch 1, sc) in the last ch.
– Rotate and work along the other side of the chain: hdc, hdc, sc, sl st.
Fasten off and leave a tail. Length is about 0.6 in (1.5 cm).
Layout (front view):
[ left block top: peach ]      [ right leg: peach + flower ]
[ left leg ][ diagonal: cream + flower ]  [ right leg ]
[ left leg: green + flower ]      [ right block: green ]
Joining
Stack the two panels with the same face toward you so their outlines match exactly. The back panel’s outward face is its reverse side. Single crochet looks nearly the same on both faces, so this doesn’t show.
Stitch-to-stitch logic: Every edge stitch or row end on the front lines up with the same stitch or row end on the back. Each border sc goes through both layers at one matching point, so the two layers can’t shift. Pin at the 8 outer corners and at both notch tops before you start.
Tension: Keep it even and slightly relaxed. If you pull too tight, the long edges pucker and the letter loses height. If you work too loosely, stuffing peeks through.
Checkpoint: The pinned, unstuffed stack should measure 3.17 in (8.1 cm) x 3.67 in (9.3 cm).
Border (Joining Round)
Border gauge: 1 sc per stitch and 1 sc per row end. At 6 sts and 6 rows per inch, this sits flat on every straight edge. The border adds 1 stitch-height (0.17 in, 0.4 cm) all around.
The counts below are base counts: 1 sc per edge point. At each of the 8 outer corners, work 2 extra sc into the same place as the corner’s base sc, for 3 sc in that spot. The extras aren’t included in any side count, so nothing is counted twice. At the 4 inner corners (where each notch meets the leg and the diagonal), work a single plain sc and snug it.
Match the stripe colors as you go. Change color at each stripe line and carry the unused color inside the layers.
Join peach through both layers at the top-right corner of the right leg. Ch 1 and work in this order:
- A. Top of right leg: 5 sc (peach)
- B. Inner edge of right leg, Rows 22 to 13: 10 sc (7 peach, 3 cream)
- C. Bottom of top notch (column 14): 1 sc (cream)
- D. Upper diagonal edge, Rows 13 to 22: 10 sc (3 cream, 7 peach)
- E. Top of left block: 9 sc (peach)
- F. Left outer edge, Rows 22 to 1: 22 sc (7 peach, 8 cream, 7 green)
- G. Bottom of left leg: 5 sc (green)
- H. Inner edge of left leg, Rows 1 to 12: 12 sc (7 green, 5 cream)
- I. Top of bottom notch (underside of bridging ch): 1 sc (cream)
- J. Lower diagonal edge, Rows 12 to 1: 12 sc (5 cream, 7 green)
- K. Bottom of right block: 8 sc (green)
Stuff now. Push in small tufts of fiberfill through the open right edge with a chopstick. Fill the legs first, then the diagonal, to a soft depth of about 0.6 in (1.5 cm). Keep the filling light so the notches stay defined.
- L. Right outer edge, Rows 1 to 22: 22 sc (7 green, 8 cream, 7 peach)
Join with a sl st to the first sc and fasten off.
Total: 117 base sc + 16 corner extras (8 corners x 2) = 133 sc.
Why the math works:
– The top edges (5 + 9) plus the gap widths (5 + 1 bridging) add up to 20 of the 19 columns. The extra 1 is the notch-bottom stitch, which sits one row lower.
– Each vertical side gets 22 sc, matching its 22 rows.
– Two border sc on each side bring 19 sts to 21 sts = 3.5 in (8.9 cm) and 22 rows to 24 = 4 in (10.2 cm).
Hanging loop: Join aqua in a border sc at the top of the left block, above column 3. Ch 8, sl st in the same st and fasten off. The loop is about 0.5 in (1.3 cm). Thread a jump ring through it, then attach the gold chain and keyring.
Final Blocking
- Lightly mist the keychain with water. Don’t soak it, or the stuffing gets wet.
- Pinch each outer corner into a sharp point.
- Press each notch open with a fingertip so it’s a clean rectangle.
- Lay the keychain flat and check that it measures 3.5 in (8.9 cm) x 4 in (10.2 cm).
- Steam the flowers and leaves flat separately and let them dry.
- Sew the flowers on with their lilac tails:
- Flower 1: top of the right leg, on peach
- Flower 2: center of the diagonal, on cream
- Flower 3: bottom of the left leg, on green
- Tuck 2 leaves under each flower, angled outward, and stitch them down at the base and tip. Sew through the front layer only.
- Let everything dry fully before adding the keyring.
Final Quality-Control Checklist
- The keychain measures 3.5 in (8.9 cm) x 4 in (10.2 cm).
- The stripe lines meet straight across all four sections.
- Both notches are open and visible, about 1 in (2.5 cm) at the bottom and 0.83 in (2.1 cm) at the top.
- The border has 133 sc, and all 8 corners are pointed.
- The border colors match the stripe beside them.
- The stuffing is even, with no lumps and no fiberfill showing.
- The 3 flowers and 6 leaves are secure and lie flat.
- The hanging loop is firmly anchored, and the hardware is closed.
Troubleshooting
- Diagonal looks stepped: Make sure the edge increases and decreases are worked in the very last stitch, not one stitch in.
- Stripes don’t line up: Count the rows in each section. Color changes always fall at the end of Rows 7 and 15.
- Panels don’t match in the border: One panel was flipped. Re-stack them with the same face toward you.
- Edges ripple: You’ve added extra sc on straight edges. Stick to 1 per row end.
- Edges cup: Your border tension is too tight. Go up 0.25 mm for the border round only.
- Notches closed up: You’ve overstuffed. Remove a little fiberfill before working side L.
Care
Hand wash in cool water with mild soap, press out the water in a towel and dry flat. Remove the metal keyring before washing.
Final Notes
The measurement chain is:
1. Gauge of 6 sts and 6 rows per inch.
2. Panel of 19 sts x 22 rows = 3.17 in (8.1 cm) x 3.67 in (9.3 cm).
3. Border of 133 sc, adding 0.17 in (0.4 cm) on every edge.
4. Finished keychain of 3.5 in (8.9 cm) x 4 in (10.2 cm).
If your gauge is right, every later count falls into place. Once you’re comfortable with the grid method, you can adapt the same approach to other letters.
Happy crocheting!