
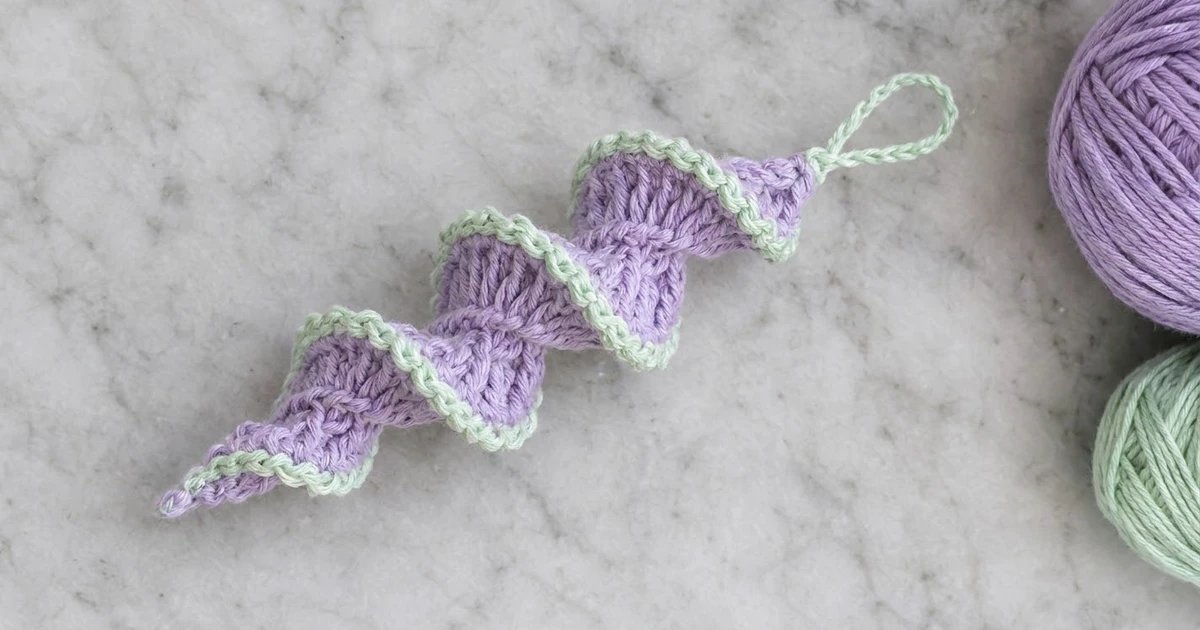
The Lavender Swirl is a light, twisting Christmas ornament that turns as it hangs. A lavender spiral body wraps around itself from a fine bottom point to a softly tapered top. A mint green rope edge follows every curve, and a slim mint chain loop sits at the top for hanging.
The colors give a pastel, frosted look that stands out from classic red and green. On a tree with warm lights, the mint edge catches the light and shows off the spiral shape. You can make a whole batch in one evening, and each one uses only a few grams of yarn.
This pattern uses US crochet terms. The finished ornament is about 6 in (15.2 cm) long and 1.75 in (4.4 cm) wide at its widest point. The hanging loop adds about 1.25 in (3.2 cm), so the total hanging length is about 7.25 in (18.4 cm).
Construction is simple. You crochet one short foundation chain, then work 2 or 3 stitches into every chain, changing stitch height along the way. All those extra stitches have nowhere to go, so the strip coils into a corkscrew. Next you add a mint edge of single crochet followed by reverse single crochet, and finish with a chain loop. There is no sewing and no joining.
Finished Size and Construction
- Finished size: about 6 in (15.2 cm) long × 1.75 in (4.4 cm) wide at the widest point
- Hanging loop: about 1.25 in (3.2 cm) tall
- Skill level: Easy
- Terminology: US crochet terms
- Yarn weight: DK / light worsted (#3)
- Hook: 3.5 mm (E-4)
- Number of pieces: 1 (a single spiral strip)
- Layout: one continuous strip that coils around its own foundation chain
- Piece size before edging: about 6 in (15.2 cm) long × 1.5 in (3.8 cm) wide
- Edging (border) depth: about 0.125 in (0.3 cm) added on each side of the outer edge, which brings the width to 1.75 in (4.4 cm)
Materials
Yarn: Use a smooth DK or light worsted cotton or cotton blend. Cotton holds the spiral shape well and shows the stitch texture clearly. Acrylic also works, but the coil will be softer and may need light starching.
- Lavender (main color, MC): 8 g, about 19 m
- Mint green (contrast color, CC): 4 g, about 10 m
These amounts are for one ornament and include a safety margin for tails and a gauge swatch. A 50 g ball of each color makes several ornaments.
Tools:
– 3.5 mm (E-4) crochet hook
– Tapestry needle
– Scissors
– Measuring tape or ruler
– Optional: spray starch or a 1:1 mix of white glue and water
– Optional: a wooden skewer or knitting needle to help shape the coil while it dries
Abbreviations (US Terms)
- ch – chain
- sl st – slip stitch
- st(s) – stitch(es)
- sc – single crochet
- hdc – half double crochet
- dc – double crochet
- tr – treble crochet (yarn over twice, insert hook, pull up a loop, [yarn over, pull through 2 loops] 3 times)
- rev sc – reverse single crochet
- MC / CC – main color / contrast color
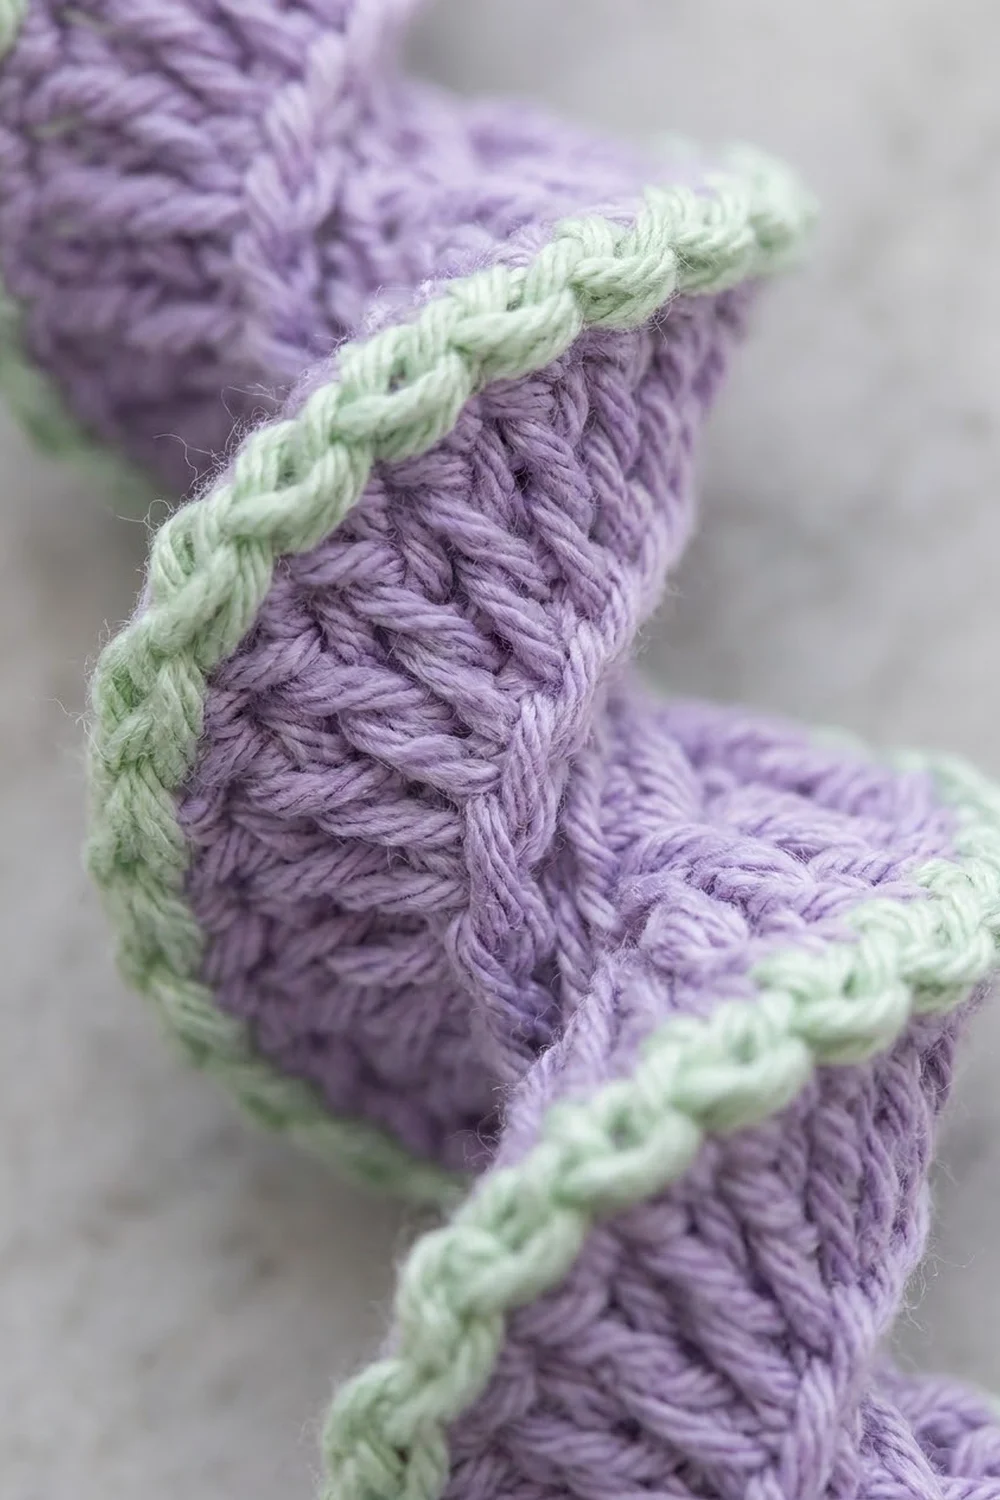
Special stitch – reverse single crochet (rev sc / crab stitch): Work from left to right (right to left if you crochet left-handed). Insert the hook into the next stitch to the right, yarn over, pull up a loop, yarn over and pull through both loops. Each rev sc makes a small twisted knot, which together form the rope-like edge.
Gauge and Checkpoints
Gauge is not critical for an ornament, but it controls both the size and how tightly the spiral coils. Make one test ornament first and check it against the measurements below.
- Chain gauge: 5 ch = 1 in (2.5 cm)
- Checkpoint 1 – foundation chain: 37 ch measure about 7.4 in (18.8 cm). The 36 working chains measure about 7.2 in (18.3 cm) unstretched.
- Checkpoint 2 – after Row 1: the strip coils into a spiral about 6 in (15.2 cm) long and 1.5 in (3.8 cm) wide at the widest point.
- Checkpoint 3 – after the edging: widest point is about 1.75 in (4.4 cm). Length stays about 6 in (15.2 cm).
- Checkpoint 4 – hanging loop: about 1.25 in (3.2 cm) tall.
If your spiral is too big: go down to a 3.25 mm (D-3) hook. Check that your chains are not loose, because a loose chain gives a long, lazy spiral.
If your spiral is too small or coils too tightly to open: go up to a 3.75 mm (F-5) hook, or work your chains slightly looser than your other stitches.
Spiral Body (Lavender)
The body is one row worked into the back bumps of the foundation chain. Working in the back bumps leaves a neat chain “spine” running down the middle of the spiral.
The row starts at the bottom tip and ends at the top.
Foundation: With MC, ch 37. Leave a 6 in (15.2 cm) starting tail.
Row 1: Work into the back bump of each chain, starting in the 2nd ch from the hook. The skipped chain does not count as a stitch.
- Bottom point (6 ch): 2 sc in each of the next 6 ch. (12 sc)
- Lower shoulder (4 ch): 3 hdc in each of the next 4 ch. (12 hdc)
- Lower body (6 ch): 3 dc in each of the next 6 ch. (18 dc)
- Center (8 ch): 3 tr in each of the next 8 ch. (24 tr)
- Upper body (6 ch): 3 dc in each of the next 6 ch. (18 dc)
- Upper shoulder (4 ch): 3 hdc in each of the next 4 ch. (12 hdc)
- Top taper (2 ch): 2 sc in each of the last 2 ch. (4 sc)
Row 1 stitch count: 100 sts total (12 + 12 + 18 + 24 + 18 + 12 + 4 = 100).
Chain check: 6 + 4 + 6 + 8 + 6 + 4 + 2 = 36 chains worked, plus the 1 skipped chain = 37 ch. This matches the foundation.
Fasten off MC, leaving a 6 in (15.2 cm) tail at the top.
Why it twists: Every chain holds 2 or 3 stitches, so the outer edge is about 2.8 times longer than the spine (100 stitches against 36 chains). The extra length pushes the strip into a corkscrew. Because the tr in the center stand tallest, the middle of the spiral is widest. The short sc at each end give the tapered tips. The bottom point is longer than the top (6 chains of sc against 2), so the bottom ends in a fine point and the top ends in a short, rounded taper.
Shaping: Hold the strip by both ends and gently twist it in the direction it already curls. Keep twisting until the edge wraps evenly around the spine in tight, even turns. Check Checkpoint 2 now: about 6 in (15.2 cm) long and 1.5 in (3.8 cm) wide.
Mint Rope Edging (Border)
On this ornament, the border is the mint edge along the outer curl of the spiral. The spine (the foundation chain) is not edged.
Border gauge: 1 edging stitch per Row 1 stitch. The edging adds about 0.125 in (0.3 cm) of depth along the outer edge.
Row 2 (sc): Join CC with a sl st in the last st of Row 1 (the last sc at the top). Ch 1. Work 1 sc in the same st, then 1 sc in each st along the outer edge down to the bottom point. (100 sc)
Section count check for Row 2: 4 + 12 + 18 + 24 + 18 + 12 + 12 = 100 sc, worked in reverse order from top to bottom.
Row 3 (rev sc): Do not turn. Ch 1. Work 1 rev sc in each sc of Row 2, moving back up toward the top. (100 rev sc)
You finish Row 3 at the top of the ornament. Do not fasten off.
Why the math works: Row 2 is worked 1-to-1 into Row 1, so it has exactly 100 stitches. Row 3 is worked 1-to-1 into Row 2, so it also has 100 stitches. Because neither row adds or skips stitches, the edging lies flat along the curl. It does not ruffle or pull the spiral tighter. If you add stitches, the edge will flare. If you skip stitches, the coil will close up and lose its shape.
Hanging Loop (Mint)
Loop: At the top of the ornament, ch 13 with CC. Sl st into the top of the first chain of the foundation (the slip-knot end of the spine) to close the loop.
The loop should stand about 1.25 in (3.2 cm) tall. Check Checkpoint 4. If you want a longer loop for thicker branches, add chains in pairs.
Fasten off, leaving a 6 in (15.2 cm) tail.
Weaving in: Weave the MC starting tail and the CC tail into the top of the spine. Pull them firm so the top taper closes neatly around the base of the loop. Weave the remaining MC tail into the bottom point, running it along the spine so it sharpens the tip. Weave the CC tail at the bottom point the same way.
Final Blocking
- Twist again. Give the ornament a final gentle twist so the turns are even from top to bottom.
- Check the spacing. You should see about 4 to 5 full turns of the mint edge along the 6 in (15.2 cm) length. Nudge any turn that is crowded or stretched.
- Dampen. Lightly mist the ornament with water, or with spray starch for a firmer shape.
- Optional firm finish. For a very crisp spiral, dip the ornament in a 1:1 glue-and-water mix, squeeze out the excess, and reshape.
- Support while drying. Slide a skewer through the center of the coil if it wants to collapse, or hang it by the loop.
- Dry fully. Leave it to dry for at least 6 to 8 hours before taking out the skewer.
- Measure. Check the final size: 6 in (15.2 cm) long, 1.75 in (4.4 cm) wide, with a 1.25 in (3.2 cm) loop.
Final Quality-Control Checklist
- Foundation was 37 ch, with 36 chains worked in Row 1
- Row 1 has exactly 100 sts in the 12 / 12 / 18 / 24 / 18 / 12 / 4 sequence
- Row 2 has 100 sc and Row 3 has 100 rev sc
- The mint edge follows the outer curl without ruffling
- The spine shows a neat chain line running down the center
- The bottom ends in a fine point and the top ends in a short taper
- The ornament is about 6 in (15.2 cm) long and 1.75 in (4.4 cm) wide
- The loop is about 1.25 in (3.2 cm) tall and firmly attached
- All tails are woven in along the spine with no loose ends showing
Troubleshooting
The strip lies flat or only gently waves. Your chains are probably too loose. Work the foundation chain tighter, or use a hook 0.25 mm smaller for the chain only.
The spiral is lopsided, with one end fatter than the other. Recount each section of Row 1. A missing tr group in the center or an extra dc group is the usual cause.
The mint edge ruffles. You added stitches in Row 2 or Row 3. Rip back and work exactly 1 st into each st.
The coil closes up and looks tight. You skipped stitches in the edging, or your rev sc is too tight. Rework the edging with a slightly looser tension.
The rev sc edge looks flat instead of corded. Pull up a slightly taller loop on each rev sc so each knot twists over the edge.
The ornament will not hold its twist. Use starch or the glue mix, and let it dry on a skewer.
The top looks open around the loop. Pull the MC starting tail firmly through the top 2 or 3 chains of the spine to cinch it closed.
Care
Spot clean with cool water and mild soap, then reshape and let it dry flat or hanging. If you stiffened the ornament with glue, do not soak it. Store it flat in a box so the spiral is not crushed.

Final Notes
The size of this ornament comes from one simple chain of measurements. The 37-ch foundation (36 working chains, about 7.2 in / 18.3 cm) holds 100 stitches in Row 1. These coil into a spiral about 6 in (15.2 cm) long and 1.5 in (3.8 cm) wide. Two rows of 100-stitch mint edging bring the width to 1.75 in (4.4 cm), and a 13-ch loop adds 1.25 in (3.2 cm) at the top. If each checkpoint matches, the finished ornament will match too.
Once you have made one, try other color pairs, such as white with silver, gold with cream, or red with white for a candy-cane look. Hang a few at different heights for a shimmering cluster on your tree.
Happy crocheting!