
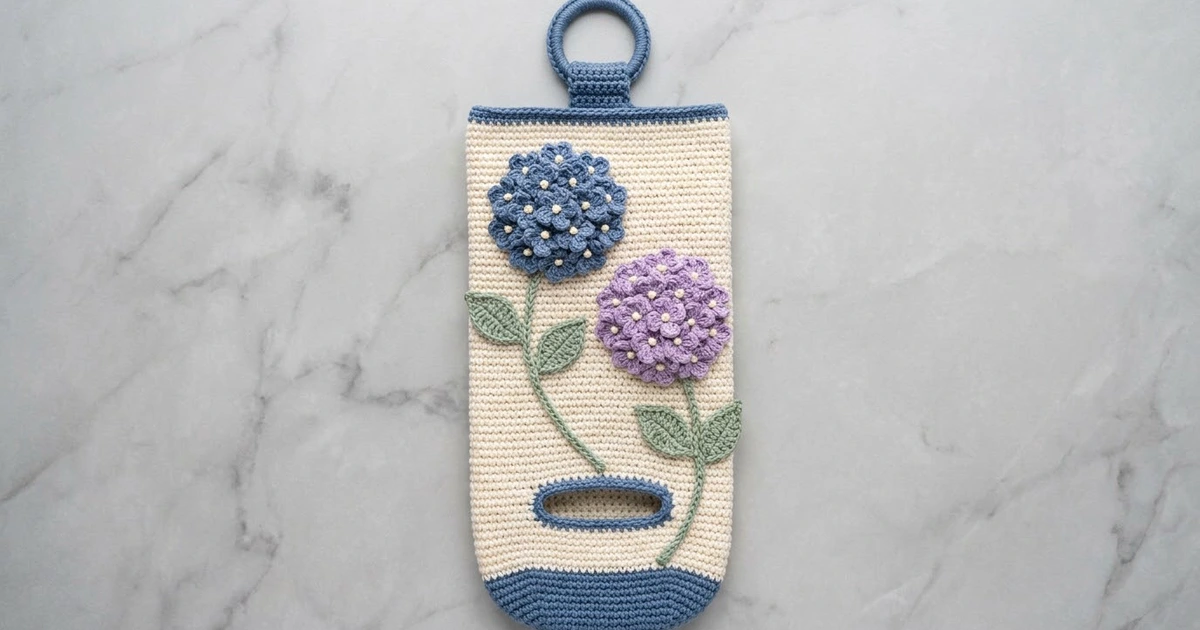
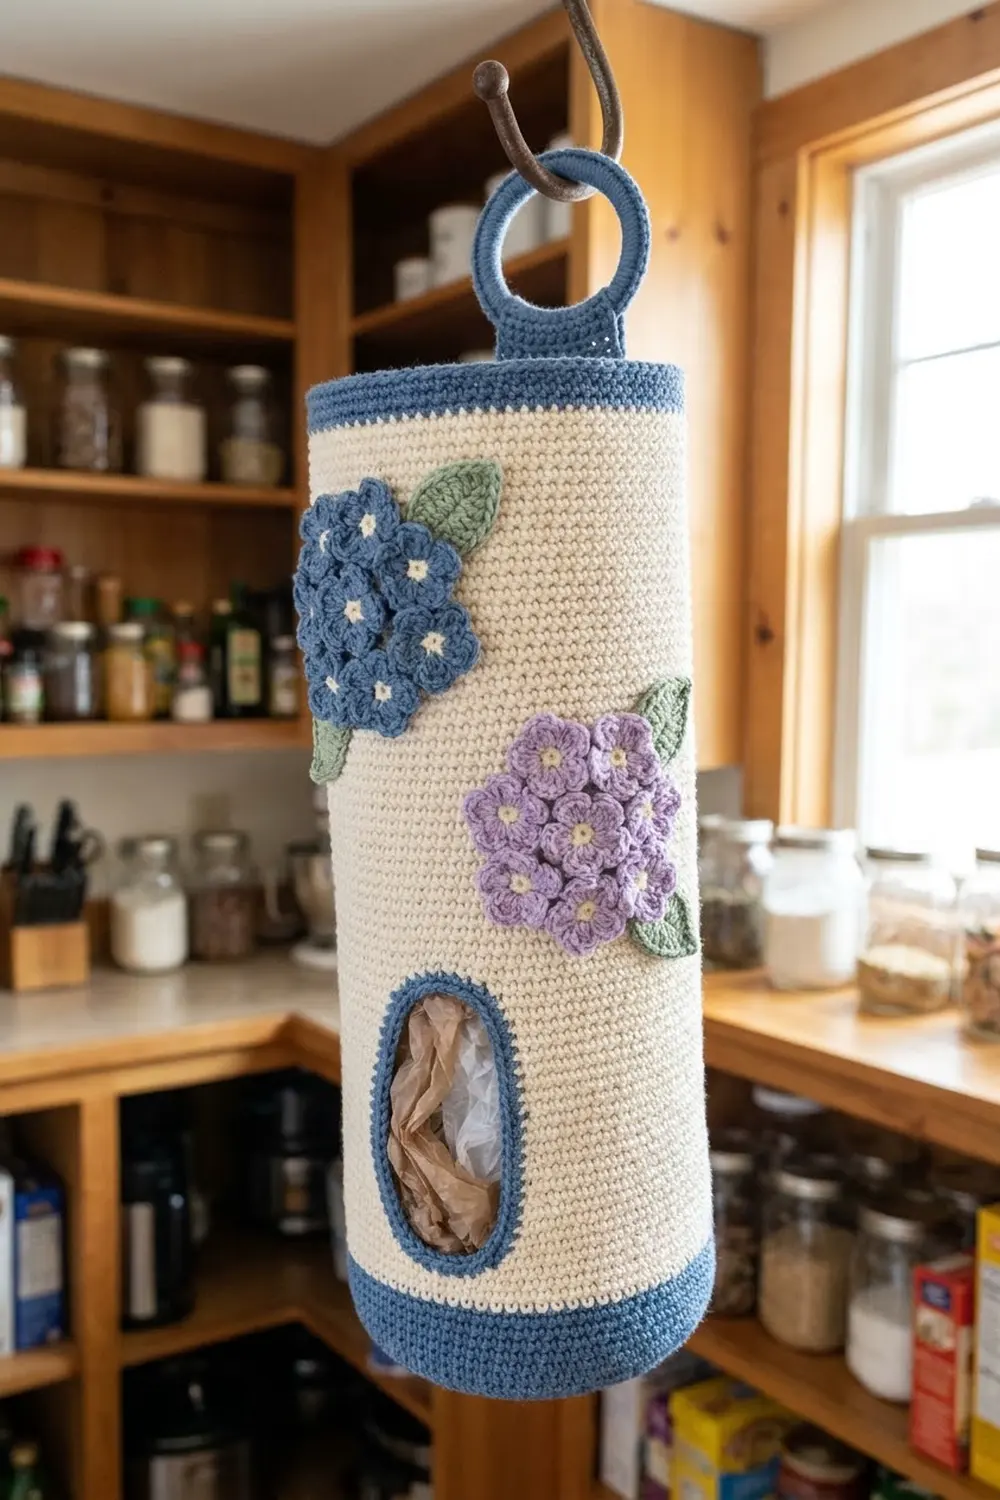
This hanging plastic bag holder brings a little cottage garden into the kitchen. It’s a tall cream tube with a rounded denim-blue base, a blue top rim, and an oval dispensing slot with a blue edge near the bottom. Two raised hydrangea clusters sit on the front, one denim blue and one soft lavender, with green leaves and curving stems.
The style is calm and classic. It uses solid single crochet fabric, clean blocks of color, and raised flowers made from tiny five-petal florets with cream French-knot centers. The holder hangs from a blue-covered ring attached by a short blue tab.
The pattern uses US crochet terms. The finished body measures 5 in (12.7 cm) wide when flat and 14.9 in (37.8 cm) tall. The ring and tab add about 4 in (10.2 cm), for a total hanging length of about 18.9 in (48.0 cm).
Construction is simple:
– Crochet an oval base.
– Work the tube upward in joined rounds.
– Open the slot over a few turned rows.
– Add the blue rim, slot edging, and tab.
The ring is covered separately. The flowers, leaves, and stems are sewn on last.
Finished Size and Construction
- Finished size: 5 in (12.7 cm) wide flat x 14.9 in (37.8 cm) tall; about 18.9 in (48.0 cm) hanging length
- Skill level: Intermediate
- Terminology: US
- Yarn weight: Worsted (#4) cotton
- Hook: 4.5 mm (US 7)
- Number of pieces: 1 body (the tab is worked onto it), 1 covered ring, 2 cluster bases, 24 florets, 5 leaves, 2 stems
- Layout: One tube with the slot centered on the front, the blue cluster upper left, and the lavender cluster lower right
- Piece size: Body circumference 10 in (25.4 cm); oval base about 4.25 x 1.75 in (10.8 x 4.4 cm)
- Size before border: 14.2 in (36.1 cm) tall after Rnd 68
- Border depth: Top rim 0.7 in (1.8 cm)
Materials
Choose a smooth worsted-weight cotton or cotton blend with about 85 m per 50 g. Cotton holds its shape, doesn’t stretch much under the weight of the bags, and gives the florets crisp stitch definition.
- Cream (main body, floret centers): 130 g / 220 m
- Denim blue (base, rim, slot edging, tab, ring, blue cluster): 60 g / 100 m
- Lavender (second cluster): 15 g / 25 m
- Sage green (leaves, stems): 15 g / 25 m
These quantities include a margin of about 15 percent for swatching and tails.
Tools:
- 4.5 mm (US 7) crochet hook
- One 2.5 in (6.4 cm) plastic or metal ring
- Tapestry needle
- Stitch markers (at least 6)
- Pins and a measuring tape
- Spray bottle and a rolled towel for blocking
Abbreviations (US Terms)
- ch: chain
- sl st: slip stitch
- sc: single crochet
- hdc: half double crochet
- dc: double crochet
- st(s): stitch(es)
- MR: magic ring
- RS / WS: right side / wrong side
Special stitches:
- Floret petal: ch 2, dc in ring, ch 2, sl st in ring.
- French knot: Bring the needle up, wrap the yarn twice around the needle, insert it back down next to where it came out, and pull through.
- Surface sl st: Hold the yarn behind the leaf. Insert the hook from the front, pull up a loop, and draw it through the loop on the hook.
Pattern notes: Join body rounds with a sl st to the first sc. The ch 1 at the start of each round does not count as a stitch. To change color, work the final sl st join of the round with the new color.
Gauge and Checkpoints
Gauge: 16 sc and 18 rounds = 4 in (10.2 cm), in sc worked in joined rounds.
Test the body first. Work Rnds 1–8 and measure before going further. This small cup shows your base size and your round height together.
Checkpoints:
- After Rnd 4: the base measures about 4.25 x 1.75 in (10.8 x 4.4 cm) and has 40 sts.
- After Rnd 14: the side wall is about 2.25 in (5.7 cm) tall from the base edge.
- After Rnd 20: the side wall is about 3.5 in (8.9 cm) tall and the slot is 3 in (7.6 cm) wide.
- After Rnd 68: the body is 14.2 in (36.1 cm) tall.
- After Rnd 71: the body is 14.9 in (37.8 cm) tall and 5 in (12.7 cm) wide flat.
If too big: go down one hook size, to 4.0 mm. If too small: go up one hook size, to 5.0 mm. Don’t change the stitch counts, because the round and slot math depends on 40 sts.
Body
Oval Base (Blue)
Rnd 1: Ch 11. Sc in 2nd ch from hook, sc in next 8 ch, 3 sc in last ch. Working along the other side of the chain, sc in next 8 ch, 2 sc in last ch (the same ch as the first sc). Join. (22 sts)
Rnd 2: Ch 1, 2 sc in first st, sc in next 8 sts, 2 sc in each of next 3 sts, sc in next 8 sts, 2 sc in each of last 2 sts. Join. (28 sts)
Rnd 3: Ch 1, sc in first st, 2 sc in next st, sc in next 8 sts, [sc in next st, 2 sc in next st] 3 times, sc in next 8 sts, [sc in next st, 2 sc in next st] 2 times. Join. (34 sts)
Rnd 4: Ch 1, sc in next 2 sts, 2 sc in next st, sc in next 8 sts, [sc in next 2 sts, 2 sc in next st] 3 times, sc in next 8 sts, [sc in next 2 sts, 2 sc in next st] 2 times. Join. (40 sts)
Each round adds 6 sts, 3 at each curved end, while the two 8-st straight sides stay the same. The base should lie flat.
Lower Wall
Rnds 5–8 (blue): Ch 1, sc in each st around. Join. (40 sts) Change to cream on the final join of Rnd 8.
Working even with no increases lets the base curve gently upward into the rounded bottom.
Rnds 9–14 (cream): Ch 1, sc in each st around. Join. (40 sts) Fasten off after Rnd 14.
Flatten the tube so the round join sits at one fold. Sts 1–20 are the front and sts 21–40 are the back. Place markers in front sts 5 and 16. Sts 5–16 are the 12 slot sts.
Dispensing Slot
Row 15 (RS): Join cream with a sc in st 17, then sc in next 27 sts, ending in st 4. Turn. (28 sts) Leave sts 5–16 unworked.
Rows 16–19: Ch 1, sc in each st across. Turn at the end of Rows 16–18 only. (28 sts)
Keep the first and last sc of each row snug. Loose edge stitches make the slot corners gape.
At the end of Row 19 (a RS row), don’t turn. Ch 12, then sl st to the first sc of Row 19 to close the gap.
Rnd 20: Ch 1, sc in same st as join and in next 27 sc, then sc in each of the 12 ch. Join. (28 + 12 = 40 sts)
The slot is now 12 sts wide, or 3 in (7.6 cm), and 5 rows tall, or 1.1 in (2.8 cm). The round join now sits right beside the slot, and the stem appliqué will cover it.
Upper Wall
Rnds 21–68 (cream): Ch 1, sc in each st around. Join. (40 sts) Change to blue on the final join of Rnd 68.
Smooth the tube flat every 10 rounds and check that the slot stays centered. If the join drifts, the first sc of a round probably went into the wrong stitch. The body should now measure 14.2 in (36.1 cm). Add or remove cream rounds here if needed.
Covered Ring
Join blue to the ring with a sl st. Work sc tightly around the ring, pushing the stitches together as you go, until no ring shows. This takes about 60 sc. Join to the first sc, fasten off, and weave in the tail.
Appliqués
Cluster Base (make 1 blue, 1 lavender)
Rnd 1: 6 sc in MR. Join. (6 sts)
Rnd 2: Ch 1, 2 sc in each st around. Join. (12 sts)
Rnd 3: Ch 1, [sc in next st, 2 sc in next st] 6 times. Join. (18 sts)
The base measures 1.5 in (3.8 cm). Fasten off with a 12 in (30.5 cm) tail.
Florets (make 12 blue, 12 lavender)
Make a MR and work 5 floret petals into it. Pull the ring closed and sl st into the base of the first petal. (5 petals) Fasten off with an 8 in (20.3 cm) tail.
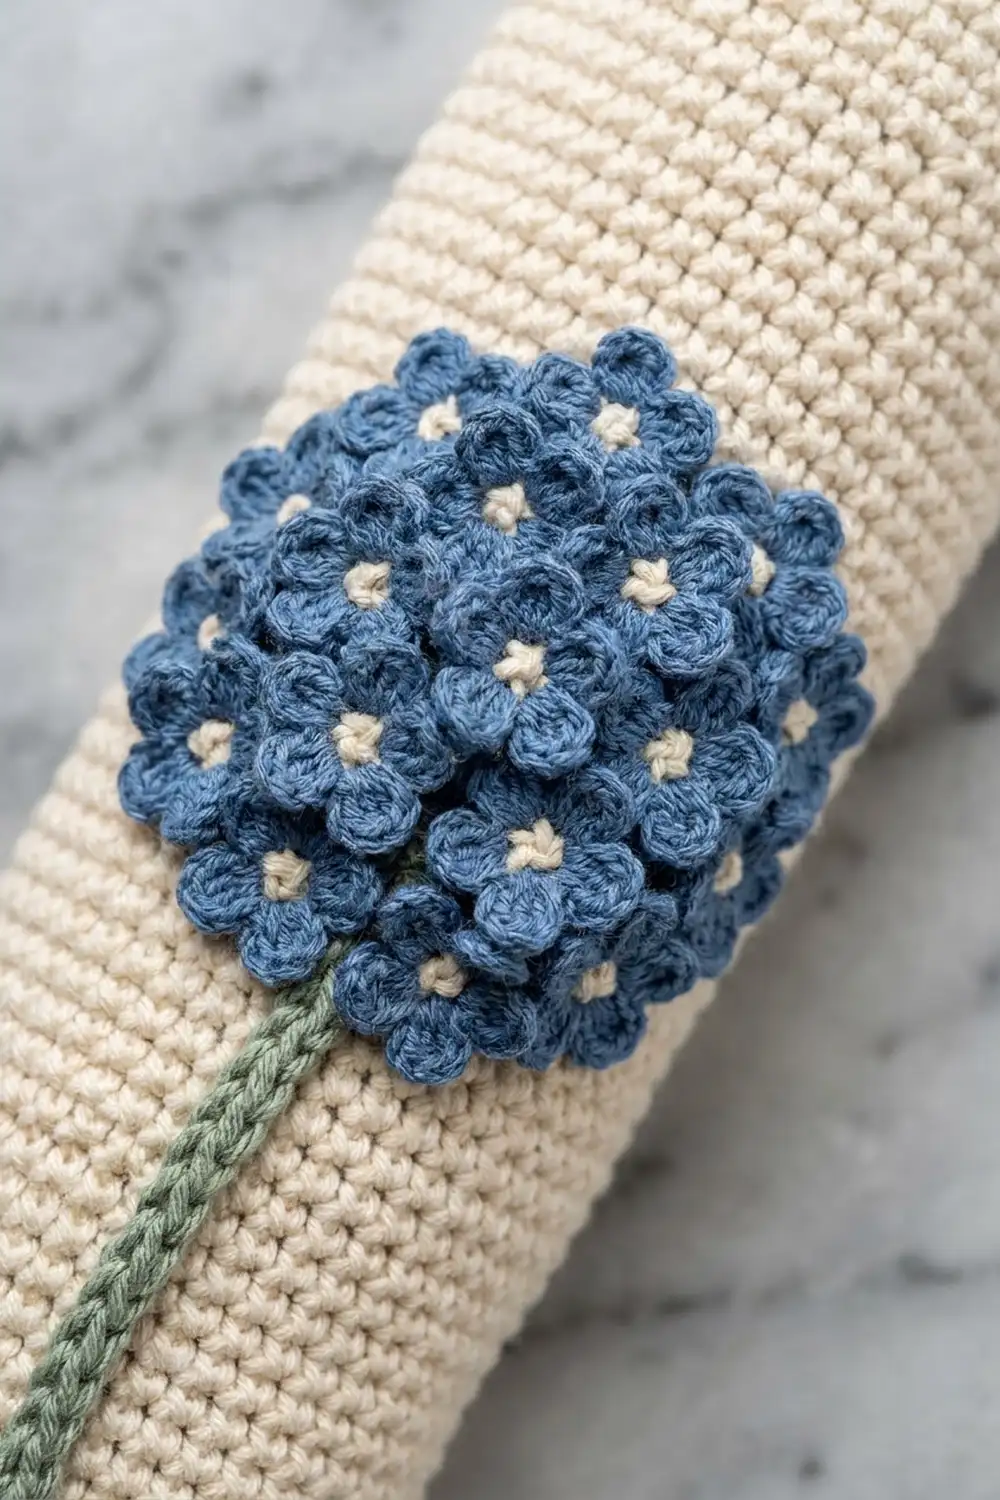
Each floret measures 0.75 in (1.9 cm). With cream, work one French knot in the center of each floret.
Leaves (make 5, green)
Ch 9. Sl st in 2nd ch from hook, sc in next ch, hdc in next ch, dc in next 2 ch, hdc in next ch, sc in next ch, then (sc, ch 2, sc) in last ch for the tip. Working along the other side of the chain: sc in next ch, hdc in next ch, dc in next 2 ch, hdc in next ch, sc in next ch, sl st in last ch. Fasten off.
Work a line of surface sl sts down the center to make the vein. Each leaf is about 2 in (5.1 cm) long.
Stems (green)
Long stem: Ch 26, then sl st in 2nd ch from hook and in each ch across. (25 sl sts) It measures about 5 in (12.7 cm).
Short stem: Ch 11, then sl st in 2nd ch from hook and in each ch across. (10 sl sts) It measures about 2 in (5.1 cm).
Building the Clusters
- Sew 7 florets around the outer edge of each cluster base so the petals overhang slightly.
- Sew 4 florets in an inner ring, overlapping the first layer.
- Sew the last floret on top in the center. (12 florets per cluster)
Use the floret tails to sew, and stitch only through the center of each floret so the petals stay free and lifted. Each finished cluster is about 2.25 in (5.7 cm) across and gently domed.
Border: Top Rim and Slot Edging
The border uses the same gauge as the body: 16 sc = 4 in (10.2 cm).
Top Rim (Blue)
Rnds 69–71: Ch 1, sc in each st around. Join. (40 sts; 20 per flattened side) Fasten off after Rnd 71 and weave in the end.
Each flattened side holds 20 sts, including the fold stitches. At 4 sts per inch, 20 sts = 5 in (12.7 cm), which is exactly the body width. The rim adds 3 rounds, or 0.7 in (1.8 cm), without flaring or pulling in.
Slot Edging (Blue)
Join blue at the lower right corner of the slot.
Rnd 1: Ch 1, then work:
– sc in each of the 12 unworked sts of Rnd 14
– 5 sc along the row ends
– sc in each of the 12 free loops of the ch
– 5 sc along the other row ends
Join. (12 + 5 + 12 + 5 = 34 sts) Fasten off.
Here’s why this works. The 5 rows measure 1.1 in (2.8 cm), and 5 sc measure 1.25 in (3.2 cm). That small extra eases around the corners and rounds the slot into an oval. The finished opening is about 2.6 x 0.7 in (6.6 x 1.8 cm).
Hanging Tab (Blue)
Flatten the holder with the slot centered on the front. Mark the 5 center sts of the back on Rnd 71.
Row 1: Join blue with a sc in the first marked st, then sc in next 4 sts. Turn. (5 sts)
Rows 2–18: Ch 1, sc in each st across. Turn. (5 sts)
The tab measures 1.25 x 4 in (3.2 x 10.2 cm). Fasten off with a 12 in (30.5 cm) tail.
Slide the covered ring onto the tab. Fold the tab end to the inside of the back and whipstitch Row 18 along Rnd 69. About 1.5 in (3.8 cm) of tab shows above the rim.
Final Blocking
- Weave in all body ends.
- Roll a towel to fill the tube and slide it inside.
- Shape the slot into a smooth oval with your fingers.
- Mist the body evenly until it’s damp but not soaked.
- Pat the rim straight and press the base into its rounded shape.
- Pin the leaves flat on a towel, open the tips, and mist them.
- Let everything dry completely, for at least 12 hours.
- Pin the clusters, stems, and leaves to the front, check the layout, then sew them on.
Place the appliqués like this:
– Blue cluster: center it 3 in (7.6 cm) below the rim and 1.75 in (4.4 cm) from the left fold.
– Lavender cluster: center it 6 in (15.2 cm) below the rim and 1.75 in (4.4 cm) from the right fold.
– Stems: curve the long stem from the lavender cluster down toward the slot, then join the short stem from the blue cluster to it.
– Leaves: add 2 leaves at the blue cluster and 3 along the long stem.
Sew each leaf down along its center vein only, leaving the edges slightly free. Tack the stems down every 0.5 in (1.3 cm).
Final Quality-Control Checklist
- Every body round has 40 sts.
- The body is 5 in (12.7 cm) wide flat and 14.9 in (37.8 cm) tall.
- The slot is centered on the front with 4 sts on each side.
- The slot edging has 34 sts and lies flat.
- The top rim doesn’t flare or pull in.
- The tab is centered on the back and securely sewn.
- No ring shows through the cover.
- Each cluster has 12 florets with cream knots.
- All appliqués are firmly sewn, with no loose edges catching.
Troubleshooting
- Base cups or ruffles: Recount Rnds 2–4. Each should add exactly 6 sts.
- Join line leans: Always work the first sc into the same st as the join.
- Slot too narrow: Check that Rows 15–19 skip exactly 12 sts and that the chain has 12 ch.
- Slot corners gape: Work the row-end sc into the outer edge of each row and pull them snug.
- Rim flares: Go down one hook size for Rnds 69–71 only.
- Ring cover twists: Keep the top edge of every sc on the outside of the ring, and line them up before joining.
- Florets lie flat: Pull the magic ring tighter and sew only the floret centers.
- Holder stretches too long: Use 100 percent cotton and crochet more tightly.
Care
Hand wash in cool water with mild soap, roll it in a towel to press out the water, and lay it flat to dry with a towel roll inside. If the ring is metal and might rust, remove it first.
Final Notes
Every size in this pattern comes from one chain of measurements:
– A gauge of 16 sc = 4 in (10.2 cm) gives 40 sts = 10 in (25.4 cm) around, or 5 in (12.7 cm) flat.
– The 12-st slot is 3 in (7.6 cm) wide.
– 64 side rounds and rows reach 14.2 in (36.1 cm).
– The 0.7 in (1.8 cm) rim brings the body to 14.9 in (37.8 cm).
– The ring and tab bring the hanging length to about 18.9 in (48.0 cm).
Check each measurement as you go, and your holder will come out the right size.
Happy crocheting!