
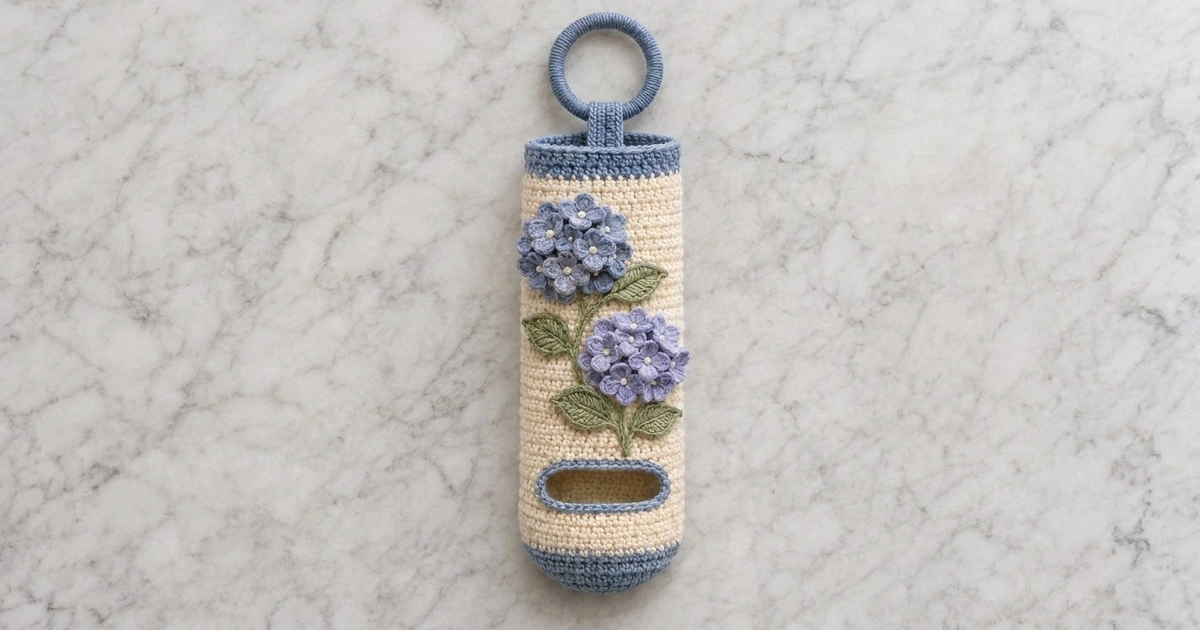
This hanging plastic bag holder brings a little garden to your kitchen door. It’s a tall cream tube with a rounded denim-blue base, a blue top rim, and an oval dispensing slot near the bottom, also edged in blue. A blue-covered ring on a short tab lets it hang from a cabinet knob or hook.
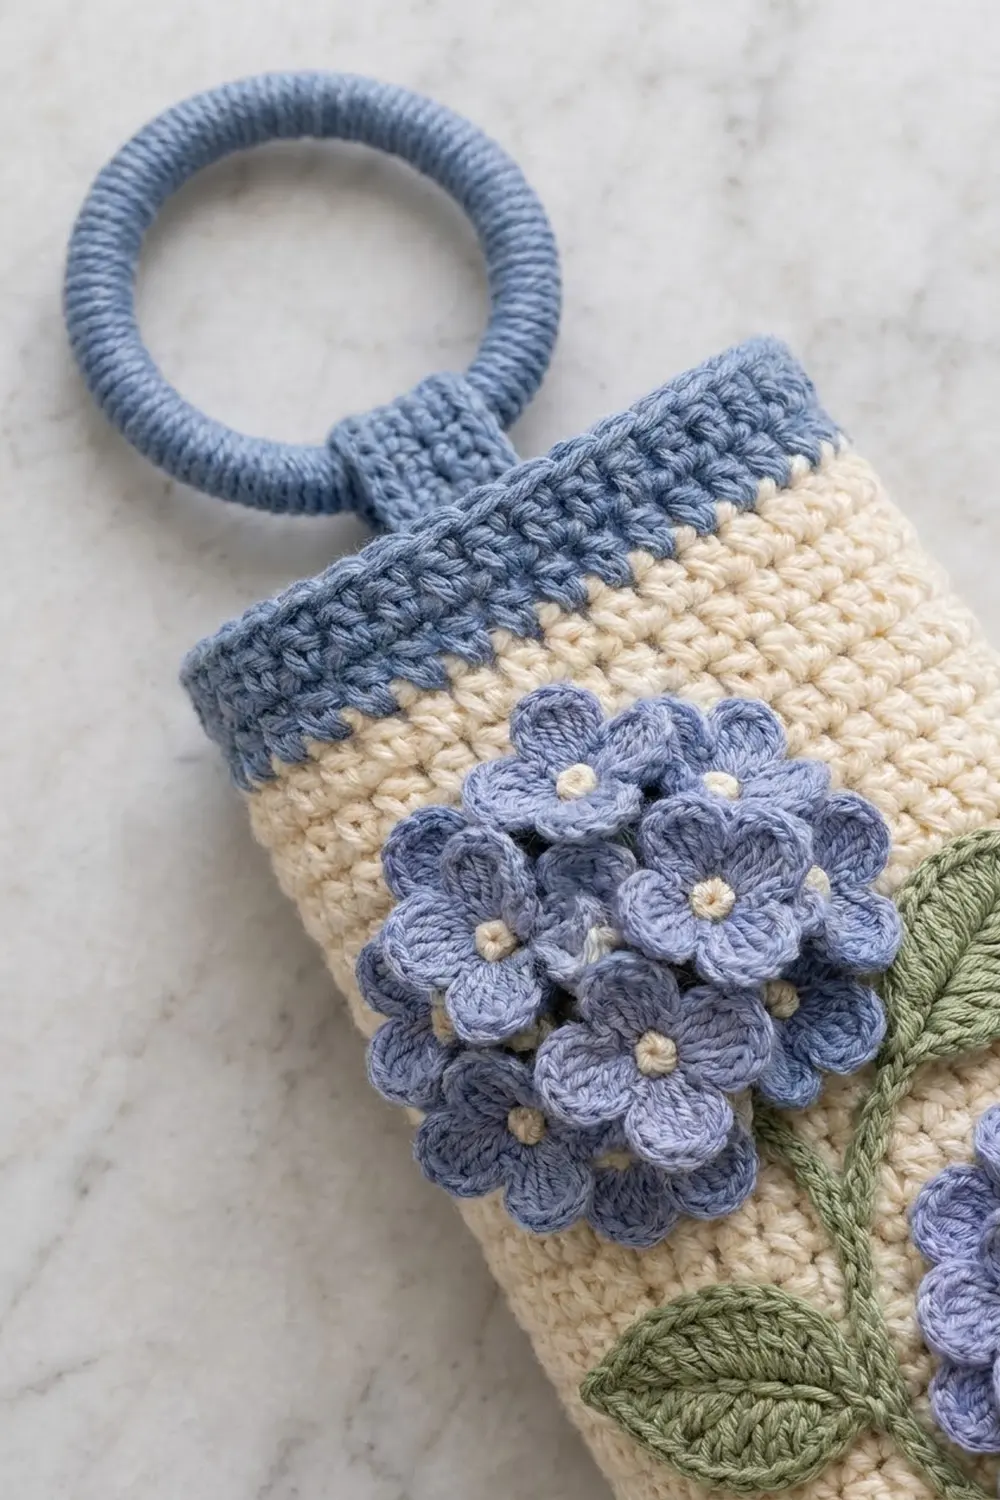
The front has two raised hydrangea heads, one denim blue and one lavender. Each is made from small four-petal florets with cream knot centers, stacked on a padded disc. Sage-green stems and leaves link the two blooms and curve down toward the slot.
The pattern uses US crochet terms. The finished holder is about 15.25 in (38.7 cm) tall and 5.75 in (14.6 cm) wide when flat, with a circumference of about 11.5 in (29.2 cm).
You work the oval base first, then build the tube straight up in joined rounds. The slot is made with a few turned rows, and a single chain closes the top of the opening. After the top rim and slot trim, you crochet the ring cover, the tab, and the flowers, then sew everything on.
Finished Size and Construction
- Finished size: 15.25 in (38.7 cm) tall x 5.75 in (14.6 cm) wide when flat, not counting the hanger
- Skill level: Easy-intermediate
- Terminology: US crochet terms
- Yarn weight: Worsted (#4) cotton or cotton blend
- Hook: 4.5 mm (US 7)
- Number of pieces: 1 tube body plus small sewn-on parts (1 ring cover, 1 tab, 2 discs, 26 florets, 5 leaves, 2 stems)
- Layout: Single standing tube; the appliqué sits on the front above the slot
- Body circumference: 40 sts, about 11.5 in (29.2 cm)
- Height before top rim: 14.5 in (36.8 cm)
- Top rim depth: 0.75 in (1.9 cm), 3 rounds of sc plus a slip-stitch round
Materials
Cotton is a good choice here. It holds its shape, doesn’t fuzz, and the flower petals keep a crisp outline. Any smooth worsted yarn with about 85 m per 50 g will work.
- Cream (body, floret centers): 100 g, about 170 m
- Denim blue (base, rim, slot trim, tab, ring cover, blue hydrangea): 45 g, about 77 m
- Lavender (second hydrangea): 15 g, about 26 m
- Sage green (stems, leaves): 15 g, about 26 m
Tools:
- 4.5 mm (US 7) crochet hook
- 3 in (7.6 cm) plastic or metal ring
- Tapestry needle
- 4 stitch markers (removable)
- Small amount of fiberfill (optional, to pad the discs)
- Ruler or tape measure, scissors, pins
These quantities include a margin of about 15 percent.
Abbreviations (US Terms)
- ch – chain
- sl st – slip stitch
- sc – single crochet
- hdc – half double crochet
- dc – double crochet
- st(s) – stitch(es)
- rnd(s) – round(s)
- RS / WS – right side / wrong side
- BLO – back loop only
Special technique – French knot: Bring the needle up at the floret center, wrap the yarn twice around the needle, and insert it back down right beside the exit point. Hold the wraps snug while you pull through.
Gauge and Checkpoints
Gauge: 14 sc and 16 rnds = 4 in (10.2 cm) in sc worked in the round.
Use the base as your gauge swatch. Measure at each checkpoint below and adjust before you go further.
- After base Rnd 3: The oval measures about 4.75 in x 1.75 in (12.1 x 4.4 cm).
- After Rnd 9: The blue wall is 1.5 in (3.8 cm) tall.
- After Rnd 20: The top of the slot sits 4.25 in (10.8 cm) above the base edge.
- After Rnd 61: The tube is 14.5 in (36.8 cm) tall.
If your base is too big, switch to a 4 mm hook and start again. If it’s too small, try a 5 mm hook. If only the height is off, add or remove plain cream rounds between Rnds 21 and 61. Do not change the 40-stitch count.
Base
With blue, ch 14.
Rnd 1: Sc in 2nd ch from hook, sc in next 11 ch, 3 sc in last ch. Working along the other side of the chain, sc in next 11 ch, 2 sc in last ch. Join with sl st to first sc. (28 sts)
Rnd 2: Ch 1, 2 sc in first st, sc in next 11 sts, 2 sc in each of next 3 sts, sc in next 11 sts, 2 sc in each of last 2 sts. Join. (34 sts)
Rnd 3: Ch 1, sc in first st, 2 sc in next st, sc in next 11 sts, [sc in next st, 2 sc in next st] 3 times, sc in next 11 sts, [sc in next st, 2 sc in next st] 2 times. Join. (40 sts)
Each round adds 6 sts, all at the two curved ends, so the long sides stay straight. That gives the base its oval shape.
Lower Body
Rnd 4: Ch 1, sc in BLO of each st around. Join. (40 sts)
The back-loop round makes a crisp fold and turns the work upward into a wall.
Rnds 5–9: Ch 1, sc in each st around. Join. (40 sts)
Fasten off blue.
Positioning the seam: Count 6 sts to the right of the join, going backward. Join cream in that 6th st. This puts the round seam at one side fold and centers the slot on the front long side.
Rnd 10: With cream, ch 1, sc in same st and in each st around. Join. (40 sts)
Rnds 11–15: Ch 1, sc in each st around. Join. (40 sts)
Slot Section
The slot is a 12-st gap, about 3.5 in x 1.25 in (8.9 x 3.2 cm), made with 5 turned rows.
Rnd 16 (Row 1, RS): Ch 1, sc in same st as join and in next 27 sts. Turn. (28 sts; the last 12 sts of Rnd 15 stay unworked)
Rnds 17–20 (Rows 2–5): Ch 1, sc in each of 28 sts. Turn. (28 sts)
Row 5 is a RS row. It ends at the slot edge.
Rnd 21 (closing): Ch 12. Bring the chain across the gap and sl st in the first sc of Row 5. Ch 1, sc in same st and in next 27 sts, then sc in each of 12 ch. Join. (40 sts)
Check the stitch count now: 28 sc + 12 sc over the chain = 40.
Upper Body
Rnds 22–61: Ch 1, sc in each st around. Join. (40 sts)
Measure: the tube should be 14.5 in (36.8 cm) tall from the base fold. Fasten off cream.
Border: Top Rim and Slot Trim
The border uses the same gauge as the body: 14 sc = 4 in (10.2 cm).
Top Rim
Join blue at the side seam.
Rnds 62–64: Ch 1, sc in each st around. Join. (40 sts each round)
Rnd 65: Sl st loosely in each st around. (40 sl sts)
Fasten off. The rim adds 0.75 in (1.9 cm), so the finished height is 15.25 in (38.7 cm).
Why the math works: The tube is a straight cylinder, so the rim stays at 40 sts with no increases or decreases. Worked 1 st into 1 st, it lies flat without flaring or pulling in.
Slot Trim
Join blue at the bottom right corner of the slot.
Trim Rnd 1: Ch 1. Work 12 sc in the 12 unworked sts along the bottom. On the left short side, work 6 sc over 5 row ends, putting 2 sc in the middle row end. Work 12 sc in the free loops of the 12 chains along the top. On the right short side, work 6 sc over 5 row ends, again putting 2 sc in the middle row end. Join. (34 sts worked 1 per st or row end + 2 extra = 36 sts)
Trim Rnd 2: Sl st in each st around. (36 sl sts)
Fasten off. The 2 extra sts sit at the short ends, where the edge curves. They round off the corners into a smooth oval and keep the trim from cupping.
Hanger
Ring Cover
With blue, join with a sl st around the 3 in (7.6 cm) ring. Work about 60 sc over the ring, packed tightly so no ring shows. Join and fasten off. Rotate the stitches so the ridge faces inward.
Tab
With blue, ch 7.
Row 1: Sc in 2nd ch from hook and in each ch across. Turn. (6 sts)
Rows 2–20: Ch 1, sc in each st across. Turn. (6 sts)
The tab measures 1.75 in x 5 in (4.4 x 12.7 cm). Fasten off and leave a long tail.
Loop the tab through the ring and fold it in half. Center both ends on the inside back wall, over sts 12–17 of the rim. They should overlap the rim by 0.5 in (1.3 cm). Sew firmly through both layers. About 2 in (5.1 cm) of tab shows above the rim.
Hydrangea Appliqué
Disc (make 2: 1 blue, 1 lavender)
Rnd 1: Make a magic ring, ch 1, 6 sc in ring. Join. (6 sts)
Rnd 2: Ch 1, 2 sc in each st. Join. (12 sts)
Rnd 3: Ch 1, [sc in next st, 2 sc in next st] 6 times. Join. (18 sts)
Rnd 4: Ch 1, [sc in next 2 sts, 2 sc in next st] 6 times. Join. (24 sts)
The disc should be 2 in (5.1 cm) across. Fasten off and leave a long tail.
Floret (make 13 blue, 13 lavender)
Make a magic ring. [Ch 2, 2 dc, ch 2, sl st] into the ring 4 times. (4 petals)
Pull the ring closed and fasten off. Each floret is about 1 in (2.5 cm) across. With cream, make a French knot in the center of each floret.
Assembling Each Head
Sew florets onto the matching disc in three layers:
- Bottom layer: 8 florets around the outer edge, each overlapping the disc rim by about 0.25 in (0.6 cm).
- Middle layer: 4 florets inside that ring, tilted slightly outward.
- Top layer: 1 floret in the center, raised on the others.
The finished head is a dome about 2.75 in (7.0 cm) across. If you want more height, tuck a pinch of fiberfill under the disc before sewing it to the body.
Leaves (make 5 in green)
Ch 9.
Rnd 1: Sl st in 2nd ch from hook, sc in next ch, hdc in next ch, dc in next 2 ch, hdc in next ch, sc in next ch, 3 sc in last ch. Working along the other side of the chain, sc in next ch, hdc in next ch, dc in next 2 ch, hdc in next ch, sc in next ch, sl st in next ch. Ch 2, sl st in the tip. (17 sts plus a pointed tip)
The leaf is 2 in (5.1 cm) long. If you like, add a vein by surface-slip-stitching down the center with the tail.
Stems (make 2 in green)
Upper stem: Ch 14, sl st in back bump of 2nd ch from hook and each ch across. (13 sl sts, about 3 in / 7.6 cm)
Lower stem: Ch 18, sl st in back bump of 2nd ch from hook and each ch across. (17 sl sts, about 4 in / 10.2 cm)
Placement
Lay the tube flat with the slot facing you. Pin the pieces in place before sewing.
- Blue head: Upper left, with its center 3 in (7.6 cm) below the rim.
- Lavender head: Lower right, with its center 6.5 in (16.5 cm) below the rim.
- Stems: Run each stem from below its head down toward the center, ending just above the slot trim.
- Leaves: Put 2 leaves on the upper stem and 3 on the lower stem, angled outward.
Slip one hand inside the tube while you sew, so you only go through the front layer. Whipstitch the edges of the discs and leaves, and backstitch the stems.
Final Blocking
- Weave in all ends inside the tube.
- Mist the body lightly, keeping the flowers fairly dry.
- Stuff the tube with a rolled towel so it stands round and 5.75 in (14.6 cm) wide when flat.
- Pat the slot trim into an even oval and press the leaves flat with your fingers.
- Let it dry completely, then remove the towel.
Final Quality-Control Checklist
- The base is a smooth oval with a crisp fold at Rnd 4.
- The body has 40 sts all the way up, with no drift in the seam line.
- The slot is centered on the front and its trim lies flat.
- The rim measures 0.75 in (1.9 cm) and doesn’t flare.
- The tab is centered on the back and sewn through both layers.
- No ring shows through the cover.
- All 26 florets have cream centers and sit securely.
- The total height is 15.25 in (38.7 cm).
Troubleshooting
- The base cups or ruffles. Check that the 6 increases fall only on the curved ends. Adjust your hook size if needed.
- The tube is getting narrower. You’re missing the last st before the join. Count to 40 every few rounds.
- The slot is lopsided. Re-check the seam position before Rnd 10.
- The slot trim gapes. Use only 1 extra sc on each short side, or work Trim Rnd 2 more firmly.
- The florets look flat. Pull the magic ring tighter and add a little fiberfill under the disc.
- The holder sags when full. Reinforce the tab seam with a second pass of stitching.
Care
Hand wash in cool water with mild soap, press out the water in a towel, and dry flat over a rolled towel. Don’t wring the appliqué.

Final Notes
Everything follows from the 40-stitch round. The base Rnd 3 oval of 4.75 in x 1.75 in (12.1 x 4.4 cm) sets an 11.5 in (29.2 cm) circumference. The slot rows top out at 4.25 in (10.8 cm), the body reaches 14.5 in (36.8 cm), and the rim brings it to 15.25 in (38.7 cm). Check each of these as you go, and the flowers will sit just where they should. Happy crocheting!